Thanks for the encouraging words, guys.
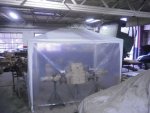
The next step was to get a sand-blasting chamber. I went to the nearest shop and bought a 2x3 metres chinese garden gazebo, then I bought a few meters of polyethylene and sticking tape for a few bucks. I assembled the gazebo by the side of the truck and then I hung the plastic sleeves from the frame, and voilá!... the sand-blasting chamber was complete and ready to be used, with enough place to work around the axles. I hoped that it would be enough to contain the sand and the dust from spreading all over the workshop.
The especial sand used for industrial sandblasting was too big for my father’s device, with a minimum request of half a ton. I ended up in the riverbed of the Aconcagua river with a shovel and spent a couple of hours sifting sand.
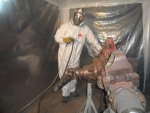
Dressed like the abductor of ET and sweating heavy I tested the sandblasting bloody thing. The compressor worked non-stop and the blasting was unequal but, no matter if it was a non-expert sandblasting (or worst), the most difficult corners were freed of rust, at least enough to trust that the primer and the new paint would adhere firmly.
In the meantime, I reasoned that resurrecting the Terrano would have consumed too much of my scarce time, so I started to look for a 4x4 to replace the venerable japanese. I told before that I love the japan-made 4x4 of the nineties, and I liked pretty much the design of the Montero, so I aimed to get one in good shape. Difficult task.
Carmen, Eduardo and his wife and I made a trip to inspect some prospects and, for a lot of unreasonable reasons, we went very far, almost 500 kilometres south to check a special one. Too expensive to make it worth, we came back with no car… but with a little hope.
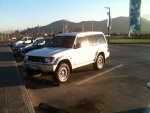
At some unexpected moment, more than one month later, the guy called to finally accept my offer and sold me the Montero. Eduardo and I made a flash-crazy trip and came back driving the 4x4. The vehicle was in very good condition for its age and mileage.
The weather was getting colder and colder every day. Rain was expected and it would be a problem with painting. Hmm… I decided to start cleaning and servicing the second axle and, with a little luck, I could paint both axles on the same session.
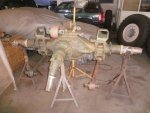
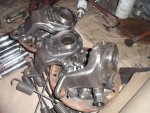
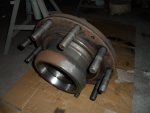
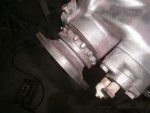
I washed the axle with gasoline to remove the grease and the dirt off the surface and the corners of the axle just to be able to approach it. I then removed the aft short shaft to change the retainers that leaked. The bearing was in good condition and the retainers had been ordered so it was a matter of cleaning and waiting.
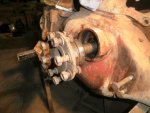
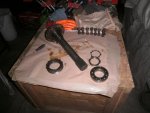
The front shaft presented no major problems except when trying to get the proper socket to remove the locknut. Though I just had to ask three workshops before one guy borrowed it to me.
The retainers that had been ordered arrived a few days later than expected, as usual, and guess what… one of them was wrongly labelled and did not fit in the front shaft. I ordered the right one and I reassembled the aft shaft with the correct retainer.
I had to dedicate many afternoons to the servicing of the Montero, changing oils, filters, tie rod ends, the tappets, fixing the heater and the starter and so on, so I did not have much time left for the Merkabah.
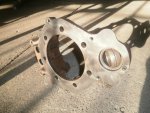
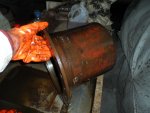
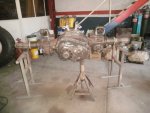
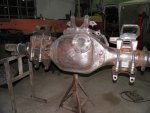
When I could I continued with the toilette of the second axle. I began to powerbrush it like crazy. Finally the holly retainer of the front cardan shaft arrived. I dressed up, put in the retainer and with the last gram of clean sand I blasted the corners and angles still left untouched.
Of course the sand was not enough and I had to recycle it, which took a lot of time. I also had to move the trestles, but firstly I had to get there with the portable winch among all the pieces and parts and stuff. Many, many hours spent.
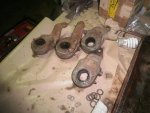
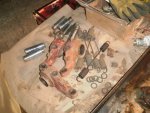
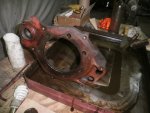
Then came the boring phase of powerbrushing the belly and the brackets of the axle; many hours of noisy and uncomfortable work with the electric tools but also with manual tools. I worked until very late every evening when I could.
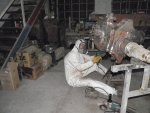
The result was pretty satisfying in the end, but…. Ah! the never wanted “but”, when I looked again at the other axle, the third axle, supposedly ready for painting, I found that in comparison with the recently cleaned axle it surely needed more attention and care, I mean, to leave them even. I know… but this disease has no cure.
The next step was to get a sand-blasting chamber. I went to the nearest shop and bought a 2x3 metres chinese garden gazebo, then I bought a few meters of polyethylene and sticking tape for a few bucks. I assembled the gazebo by the side of the truck and then I hung the plastic sleeves from the frame, and voilá!... the sand-blasting chamber was complete and ready to be used, with enough place to work around the axles. I hoped that it would be enough to contain the sand and the dust from spreading all over the workshop.

The especial sand used for industrial sandblasting was too big for my father’s device, with a minimum request of half a ton. I ended up in the riverbed of the Aconcagua river with a shovel and spent a couple of hours sifting sand.
Dressed like the abductor of ET and sweating heavy I tested the sandblasting bloody thing. The compressor worked non-stop and the blasting was unequal but, no matter if it was a non-expert sandblasting (or worst), the most difficult corners were freed of rust, at least enough to trust that the primer and the new paint would adhere firmly.


In the meantime, I reasoned that resurrecting the Terrano would have consumed too much of my scarce time, so I started to look for a 4x4 to replace the venerable japanese. I told before that I love the japan-made 4x4 of the nineties, and I liked pretty much the design of the Montero, so I aimed to get one in good shape. Difficult task.
Carmen, Eduardo and his wife and I made a trip to inspect some prospects and, for a lot of unreasonable reasons, we went very far, almost 500 kilometres south to check a special one. Too expensive to make it worth, we came back with no car… but with a little hope.
At some unexpected moment, more than one month later, the guy called to finally accept my offer and sold me the Montero. Eduardo and I made a flash-crazy trip and came back driving the 4x4. The vehicle was in very good condition for its age and mileage.

The weather was getting colder and colder every day. Rain was expected and it would be a problem with painting. Hmm… I decided to start cleaning and servicing the second axle and, with a little luck, I could paint both axles on the same session.
I washed the axle with gasoline to remove the grease and the dirt off the surface and the corners of the axle just to be able to approach it. I then removed the aft short shaft to change the retainers that leaked. The bearing was in good condition and the retainers had been ordered so it was a matter of cleaning and waiting.


The front shaft presented no major problems except when trying to get the proper socket to remove the locknut. Though I just had to ask three workshops before one guy borrowed it to me.
The retainers that had been ordered arrived a few days later than expected, as usual, and guess what… one of them was wrongly labelled and did not fit in the front shaft. I ordered the right one and I reassembled the aft shaft with the correct retainer.
I had to dedicate many afternoons to the servicing of the Montero, changing oils, filters, tie rod ends, the tappets, fixing the heater and the starter and so on, so I did not have much time left for the Merkabah.
When I could I continued with the toilette of the second axle. I began to powerbrush it like crazy. Finally the holly retainer of the front cardan shaft arrived. I dressed up, put in the retainer and with the last gram of clean sand I blasted the corners and angles still left untouched.
Of course the sand was not enough and I had to recycle it, which took a lot of time. I also had to move the trestles, but firstly I had to get there with the portable winch among all the pieces and parts and stuff. Many, many hours spent.
Then came the boring phase of powerbrushing the belly and the brackets of the axle; many hours of noisy and uncomfortable work with the electric tools but also with manual tools. I worked until very late every evening when I could.

The result was pretty satisfying in the end, but…. Ah! the never wanted “but”, when I looked again at the other axle, the third axle, supposedly ready for painting, I found that in comparison with the recently cleaned axle it surely needed more attention and care, I mean, to leave them even. I know… but this disease has no cure.


Last edited:

