MG Metalworks Van Build

mgmetalworks

Explorer
I picked up a bare frame this weekend for various uses. First, I need to get the Cummins/Allison/NV271 mounted in the van frame somehow and I figured it would be easier to do the design and fabrication of all of the mounts out in the wide open. Plus, it will reduce the downtime of my own van once I get to that point. I originally planned to cut this frame down to fit in my shop a little better but I think I'll leave it as is because it is in such great condition. I'm also planning on several development projects for our vans and this frame will be a good platform to work off of. This is an earlier frame than my van so I'll get to compare dimensions between old and new and make sure my designs fit a wide span of model years.
.
everything is stripped, time to clean it up
.
20140426_100731 (600x800).jpg
.
after an hour of pressure washing
.
20140426_104410 (600x800).jpg
.
20140426_104424 (600x800).jpg
.
 

mgmetalworks

Explorer
Progress on the Cummins swap comes in small chunks lately but at least I'm moving forward, right? Yesterday I took a few minutes to mess around with the fuel system. I'm going to be using an aftermarket lift pump from the tank to the engine which includes a filter and water separator. While everything is accessible, I'm doing all that I can to clean things up and simplify where possible. On a stock engine, there is a fuel filter housing on the left side of the block that houses the fuel filter, the WIF sensor (water in fuel) and a fuel heater. It isn't really necessary now with the aftermarket pump/filters and getting rid of it means opening up a lot of room on that side of the engine. Pretty easy to install the filter housing delete block with the engine sitting on a pallet in the shop....
.
filterhousing.jpg
.
This hunk of metal has to go...
.
filterhousing2.jpg
.
All cleaned up with the filter housing delete block installed...
.
filterhousingdelete.jpg
.
Just two simple connections at the engine for the fuel system. The lift pump is super simple too. The only challenging part of the this whole system will be getting the draw straw right in the tank. The parts sent with the lift pump are totally cheesy so I'll probably end up devising my own solution.
.
There is a provision for the WIF sensor in the new machined block but the fuel heater wiring will be re-purposed. How convenient that the wires are heavy gauge, direct link to the fuse panel with no splices in between and tied into the large ground bundle as well. Exactly what I needed for powering the Allison TCM and pretty close to the exact location I wanted to mount it. I love it when things work out like this!!
 

Kole

Adventurer
Again, I have no clue what you're on about. Everything you say makes sense to me in an over my head sort of way. But I can't stop checking in on this build. Very intriguing. Thanks for keeping us up to speed.
 

hammerhome

Observer
good to meet you

It was nice meeting you the other day, and checking out your build in progress as well as those awesome seats! Looking forward to the cummins progress, let me know if you need a hand, doctor let me out of the sling today so its back to work on the van.
 

mgmetalworks

Explorer
I have to add some sensors to the Cummins for the Ford electronics and today I finally got the parts to integrate them into the engine wiring. Now I admit, it did take some time to track down all of these individual components but the end result is just how I want it so the time spent doesn't really bother me. I can check it off the list and let my mind fixate on the next item on the list.
.
Some Ford sensors and some packages of goodies from Mouser Electronics.
.
DSC_0604.JPG
.
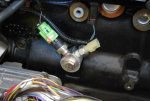
The water temp sensor goes into a convenient port on the head. I ran two wires up through part of the existing Cummins engine harness and made this short extension leg for the sensor.
.
DSC_0605.JPG
.
The other end of the wires terminate in a connector that mates up with the body harness (lower right of the pic).
.
DSC_0606.JPG
.
The oil pressure sensor will be integrated in a similar way. The end result is a factory appearance and very little chance of having problems with these wires in the future.
 

mgmetalworks

Explorer
How's the CAN decoding coming along? Hopefully you're still making headway on that front.

Apparently there will be someone offering a CAN hacking session at Blackhat in Vegas later this year. I doubt their class would offer you much, but I'm pretty interested in what they have to say about CAN network security (or lack thereof) and how it might be exploited. http://www.blackhat.com/us-14/train...ions-and-diagnostics-reverse-engineering.html

Decoding CAN messages is a slow process. I've been able to isolate several already but it takes a lot of time. It isn't particularly difficult to do...it is just tedious sorting through thousands of lines of data to find what you need. I've probably found about half of what I really need find...For the Ford van. I still have a bunch to figure out for the Allison and the Cummins as well.
.
I watched a similar lecture on the topic from last year (I think it was Blackhat or something similar). It was pretty informative though not in a how-to sort of way...more like an overview of CAN and what is possible. I love learning about the stuff. Thanks for the link!
 

mgmetalworks

Explorer
Finished up a custom adapter for the oil pressure sensors... The Cummins has a pretty convenient location for its own sensor so the idea was to just make an adapter that had a spot for the original and the sensor for the Ford dash. Probably didn't need all of the fancy rotary table machining but what the heck...I like making chips from time to time.
.
On the left is the original housing for the Cummins sensor. On the right my custom twin sensor part.
.
DSC_0619 (800x602).jpg
Here's how it sits on the block (driver's side, just next to the ECM. Without the fuel filter housing in the way, this is actually wide open accessible if it's ever necessary)
.
DSC_0622 (800x536).jpg
Though you can't see it, the inside of the adapter has been machined for clearance around the banjo bolt so the oil can get up to the sensors without obstruction.
.
On another note... I hooked up my CAN sniffer to the ECM and captured some data on all of the buses. The first thing of interest is that there are FOUR buses on this ECM. One is of course the link between the RAM truck and its modules and the others are more engine related. Of particular interest is that two buses broadcast A LOT of engine related data (temperatures, pressures, speeds, etc...) and could be used for all sorts of things. A lot of the message "IDs" follow known standards too so figuring out what they mean is just a matter of looking them up. The CAN-C/RAM specific bus will still need to be used for a couple of things, like the exhaust brake feature so I'll have to get my hands on a '13 RAM truck sometime to do a little detective work. :)
 

mgmetalworks

Explorer
Very nice work.

Thanks jbob! Much appreciated!
...
Awesome progress today. I've got the engine and fuse panel wiring all sorted out and documented. Every wire has a place in one big connector and the fuse panel has more than enough open positions for the relays and fuses.
.
DSC_0623 (536x800).jpg
.
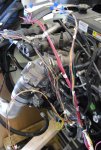
From right to left, the big black bundle is the ground cable, then there's a bundle of relay related wires, then all of the fused B+ wires, a larger bundle of sensor/actuator wiring and then the bundle for the APPS sensor (accelerator pedal position sensor). In all reality, the wiring is pretty simple now that all of the RAM truck BS is removed. I still have to find a harness for the Allison, tie in a few wires for that then re-wrap everything but I'd say that I'm way over the hump on this part of the swap. :sombrero:
 

Forum statistics

Threads
188,347
Messages
2,905,948
Members
229,959
Latest member
bdpkauai
Top