You are using an out of date browser. It may not display this or other websites correctly.
You should upgrade or use an alternative browser.
You should upgrade or use an alternative browser.
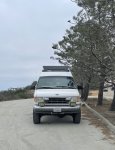
MOIRAI 1995 4x4 Fire Rescue BUILD Thread
- Thread starter Jdubucsd
- Start date
Jdubucsd
Addicted to Espresso
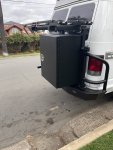
Was at Aluminess here in San Diego Monday. For rear bumper install. Deluxe box and two bike racks from 1up on top. Spare tire yet to be mounted.
up next is Ujoint 6”kit. Have to go weigh the rig front and rear bias. Going to take out the outdated and unsafe Advanced Four Wheel setup that was installed in 1995.
Chris at Ujoint has been very very helpful over the years. And finally determined my setup is unsafe. Im looking forward to the new ride quality. Keep ya all posted.
Attachments
Jdubucsd
Addicted to Espresso
Jdubucsd
Addicted to Espresso
Alcan springs arrived with u-bolts! Yay. Time to make the van safer!! Waiting for the remaining components to arrive.
Attachments
Jdubucsd
Addicted to Espresso
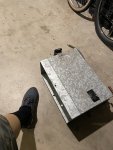
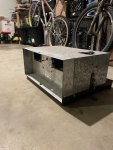
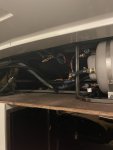
Rear AC and heat box removed. The rear operates off the engine. The coolant is plumbed into the Isotemp heat exchanger and the rear freon lines are off the valves under the drivers side frame rails. I had the shop turn the valves off and evacuate the rear AC lines. So extra storage space in a small space makes a BIG difference.
Attachments
-
 CE8F78CE-B7D1-4F0D-B765-1DB76563EDCA.jpeg1.8 MB · Views: 12
 -
 079C77EE-80FD-4F78-9747-7A5087B34BD1.jpeg1.4 MB · Views: 13
 -
 8687BAEF-ABD4-4D9A-B248-8379F3F6D14E.jpeg1.6 MB · Views: 13
 -
 85DA553D-4D53-435E-95D5-48EECCFE673C.jpeg1.7 MB · Views: 14
 -
 E14CA40D-6DB5-476E-87F2-1F31038C911D.jpeg1.6 MB · Views: 13
 -
 8BF0826A-6BF5-4A3B-AC82-2C26D0DD25EA.jpeg1.8 MB · Views: 12
Last edited:
Jdubucsd
Addicted to Espresso
Yea. I guess it can be easy depending on how the rear is hooked up to the front lines.Excellent! My rear ac/heat is coming out shortly.. I blocked it off just as a test and I haven't used it in over a year. I need the space more than I need the extra AC and heat capacity.
Jdubucsd
Addicted to Espresso
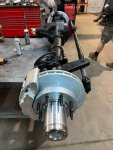
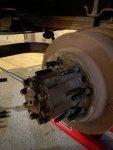
Looks like I have the full float Dana 60 out back. Chris at Ujoint asked me if I had semi or full. Now I know.
Attachments
Jdubucsd
Addicted to Espresso
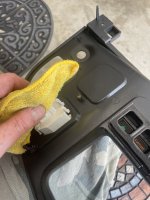
Took apart the dash somehow a pine needle from 1908 was in there haha. Been bothering me from day one. Gone and its clean.
Attachments
Jdubucsd
Addicted to Espresso
On the way to Diesel Tech in Hemet. The E4 OD overheated going up from San Diego. Notice the flat bed front wheels got about 1 foot off the ground.
Attachments
Jdubucsd
Addicted to Espresso
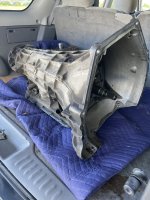
Well, here it is rebuilt and going back up to Diesel Tech. Upgraded internals, steel planetary not aluminum, billet torque converter, new electronics, Mag Hytech deep pan, Mishimoto trans cooler, Isspro EV 2 gauge.
Attachments
-
 3AF45672-139A-4199-BE94-30B43C6FCFCA.jpeg2 MB · Views: 8
 -
 A7073EEA-F59A-4657-9EA0-EE5C18001BD1.jpeg1.9 MB · Views: 8
 -
 9AD91D5A-4FBB-4850-AD18-B70950E28A7B.jpeg2 MB · Views: 8
 -
 A567EC34-E977-4E0E-9E33-DEF88BCC43C3.jpeg4.3 MB · Views: 8
 -
 908E2702-EF12-48DB-BAA0-5268C237ACD6.jpeg3.9 MB · Views: 7
 -
 69BB647A-2F26-4FA3-A60F-9C51808B2AB3.jpeg1.6 MB · Views: 6
 -
 020E89F4-FE7E-46B8-9581-CD0F74DBAE40.jpeg4.2 MB · Views: 6
Jdubucsd
Addicted to Espresso
Local junkyard had 2 Leader Ambulances. Pulled the scene flood lights and polished them up. Mine are not only yellow and cracked, but the seal on them is worn. These appeared to be in almost perfect condition. Just wet sanded and polished since I am ocd about the lights.
Attachments
-
 F99248D6-4F0C-4C2A-B3BE-87CBF59841E3.jpeg1.8 MB · Views: 12
 -
 874845D3-350A-4161-B200-6BD3FD23935B.jpeg1.9 MB · Views: 12
 -
 0929F245-5844-4744-BB7B-C4C4BBE54FC2.jpeg1.3 MB · Views: 12
 -
 34AF1D4C-E9F1-44A0-B6D3-05314C350AA4.jpeg3.3 MB · Views: 10
 -
 5E623DF2-A454-426B-9895-BA9A9F17DF1C.jpeg1.8 MB · Views: 10
 -
 014739D1-5C86-46BD-A09E-E0C0AE26CCEE.jpeg1.7 MB · Views: 10
 -
 8BE6D409-6C8A-4693-A83A-EE6D8347B3F9.jpeg1.6 MB · Views: 10
 -
 7906C479-07FB-4971-9947-B4CB53307FF0.jpeg1.5 MB · Views: 10
 -
 633372FE-44B0-4DBF-868B-0F728FC2802A.jpeg1.7 MB · Views: 12
Bikersmurf
Expedition Leader
Score.Local junkyard had 2 Leader Ambulances. Pulled the scene flood lights and polished them up. Mine are not only yellow and cracked, but the seal on them is worn. These appeared to be in almost perfect condition. Just wet sanded and polished since I am ocd about the lights.
Autosol works great for polishing headlights… and even gauge cluster plastic. I’m sure it would help keep them looking like new also.
Similar threads
- Replies
- 4
- Views
- 5K
- Replies
- 12
- Views
- 3K
- Replies
- 144
- Views
- 47K
- Replies
- 3
- Views
- 7K
- Replies
- 10
- Views
- 5K


