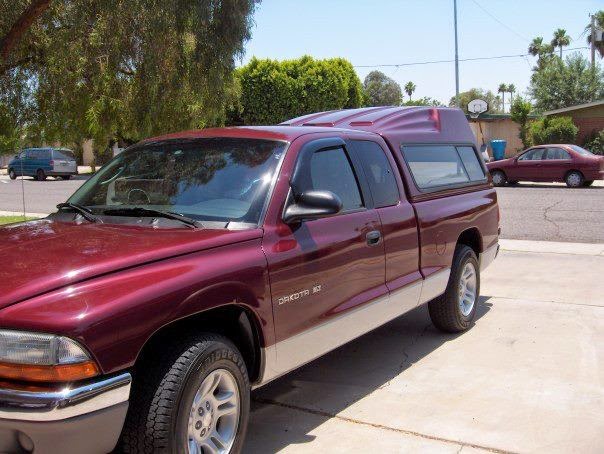
My Dodge Dakota, the "Comvee"

Nick02

Member
Basically the Unimog pivot mount allows the camper to follow one solidly mounted portion of the frame above the rear axle, so whatever that portion of the frame does the camper box will also do regardless of the front/rear of the frame twist.
I got the linear side mechanism mounted last night, still waiting on a few bearings but it works extremely well as-is.
The Coleman Colorado has a no hardtop, so the side canvas is stressed and structural so the door is in the front, the slide mechanism allows access to the door.
unnamed%2B%289%29.jpg

unnamed%2B%2811%294.jpg

6.jpg

4.jpg
 

R Thomas

Observer
Wow, what an awesome idea. I always look forward to seeing the notifications that you posted an update.

Sent from my SAMSUNG-SGH-I337 using Tapatalk
 

Nick02

Member
Got the complete slide mechanism done, you can walk around inside the camper without any additional support in the extended position.
unnamed%2B%283%29.jpg

So next I waterjet out the wood floors and installed the tail lamps
DVVLHSKJtCNIq1ddVFwr4n56cMyyoMDX2OIDzYO9FBk=w680-h510-no

Here a is a shot that showcases the basic structure, floor and side of the now extensively modified coleman colorado.
unnamed%2B%282%29.jpg

I used some cheap stick on flooring from homedepot to finish the floor, it came out nicely.
unnamed%2B%284%29.jpg

I then used the Cincinatti press brake to bend in the departure angle for the rear camper skins.
unnamed%2B%285%29.jpg

I also skinned the rear with aluminum inside the camper
unnamed%2B%286%29.jpg

after two 20hr work days I had the first pop up, stretching the canvas and getting things set.
unnamed%2B%287%29.jpg

she looked good!
unnamed%2B%288%29.jpg
 
Last edited:

Nick02

Member
Here is some more detail of the interior. The inside is basic for now, seats, table and kitchen will come later.
unnamed%2B%289%29.jpg

I was rushing to get it done because the Local-Motors booth at SEMA had a vehicle drop out at the last minute, since my vehicle was driveable and semi complete it was chosen to fill the spot. Some bodywork and we were off to Vegas! I was impressed with how it drove, the camper is pretty lightweight and it is much more stable then when I had the campershell mounted to the bed back in the day.
unnamed%2B%2810%29.jpg

Setup day, nice corner spot in the booth, I was extremely happy the camper could pop up inside the booth.
unnamed%2B%2811%29.jpg

The show started, and the Dakota was well loved by all the attendees I had a chance to talk to. Demonstrating the linear sliding mechanism for entry and setup was a hit. There was some trash talking by some other feature vehicle owners and some online communities but that is to be expected when you break the norms, drive a well used rig to a bling show and park in a $20,000 spot with it.
Here it is in the retracted position.
unnamed%2B%2813%29.jpg

Still much to be done, like the entry ramp, gas filler relocation, entry patio and leveling jacks but that is the fun stuff, all the heavy lifting is done now! yay!
 
Last edited:

ZJARCHER

Adventurer
The nay-sayers and trash talkers can suck it.
Your rig is well used, and well built (functionally), unlike the disco trucks on 22s, chromed and powdercoated undercarriages, covered in LED bars, and will never see dirt, that ARE the SEMA show now.

Keep it up man, love watching this build!
 

R Thomas

Observer
Great to know that you made it in the show. Great work, great build, always enjoy seeing your posts.

Sent from my SAMSUNG-SGH-I337 using Tapatalk
 

Wh1t3nukle

I gotz dis
The nay-sayers and trash talkers can suck it.
Your rig is well used, and well built (functionally), unlike the disco trucks on 22s, chromed and powdercoated undercarriages, covered in LED bars, and will never see dirt, that ARE the SEMA show now.

Keep it up man, love watching this build!

^this x1000!

Well done Nick. Actually displaying a functional piece should be the norm!!
 

guidolyons

Addicted to Gear Oil
I would have never guessed that this:

Hi my name's Nick
I knew nothing about automobiles..
begin%2Bstock1.jpg

Would end up at SEMA :sombrero:

I was rushing to get it done because the Local-Motors booth at SEMA had a vehicle drop out at the last minute, since my vehicle was driveable and semi complete it was chosen to fill the spot. Some bodywork and we were off to Vegas!
Setup day, nice corner spot in the booth, I was extremely happy the camper could pop up inside the booth.
unnamed%2B%2811%29.jpg

The show started, and the Dakota was well loved by all the attendees I had a chance to talk to. Demonstrating the linear sliding mechanism for entry and setup was a hit. There was some trash talking by some other feature vehicle owners and some online communities but that is to be expected when you break the norms, drive a well used rig to a bling show and park in a $20,000 spot with it.

Crazy cool idea to mount the pop-up on sliders. :beer:
 

kojackJKU

Autism Family Travellers!
Awesome rig. Screw the pansy's with the 200,000 bling rigs that never go off pavement with them. Posers. Your rig is purpose built and used.
 

Nick02

Member
The Dakota is getting some life upgrades, removed the coiltowers and cleaning the frame in preparation of an engine cage and 18" king coilovers.
IMG_20150603_212403.jpg


20150604_075547.jpg
 

Nick02

Member
So I have been making a little progress!
I bought some 1.75" .125" thick DOM and and started bending tube to fit the 18" coil-overs in.
The passenger side was easy, I like it, well triangulated and stuff.
I wanted to do the conventional engine cage that wraps toward the back firewall but the main harness / AC drier / trans and engine dipstick tubes are in the way and I do not want to relocate them. I also unbolted the master cyl / power brake booster all the way to test them so they can be removed with the engine cage in place in the future.
So I made this weird, unconventional, not symmetrical engine cage. The drivers side was hard! I have multiple support points coming off the frame to support vertical loading and had to work around the brake booster and steering gearbox, but I think it will support the coilover fine. I bent a tube to go around the brake booster, leaving a gap for frame/body flex, tube couplers on the crossover soon! I had to remove the ABS module, since that is where the new drivers side coil-over needs to go. The important thing is both pickup points are in the same location, the hood can close and I can go full bump hitting the frame before the coilover bottoms out this time!
engine%2Bcage.jpg

engine%2Bcage%2B4.jpg

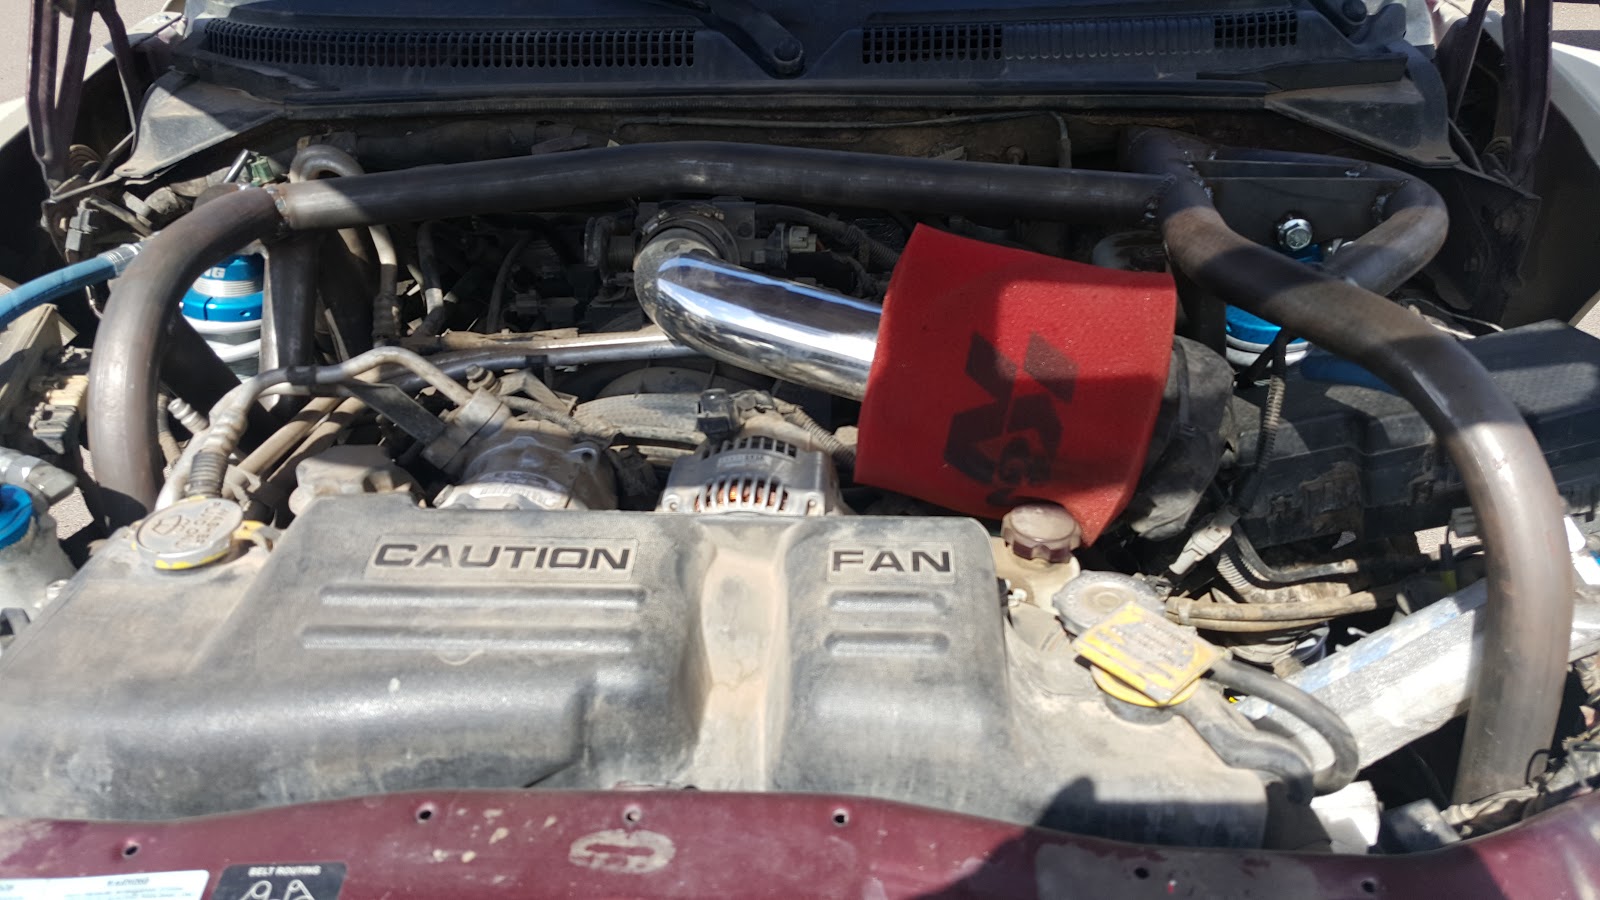
The big kick on the drivers side coil-over support is to support the fuse box and future air filter, the 4.7L is extremely temperamental with dust intake, my MAP sensor is blown, I have to find a solution that filters well.
engine%2Bcage%2B2.jpg


Here are all the frame side connection points, ignore the dangly mess from hell, ugly grind marks and plasma cutter boogers haha!
unnamed%2B%25287%2529.jpg

unnamed%2B%25285%2529.jpg


Time to select new coils! This time I am going to use the mathematics and junk because buying and swapping springs is expensive and waste of time.
First I need a total weight of the truck, each corner and it needs to be as exact as possible so I busted out some scales.
scale%2B2.jpg

She is a heavy pig at 5636 lbs! a 11% difference in weight distribution too, still front heavy! gotta add more weight to the back hahah!
scale%2B1.jpg


So using this mathematics, numbers and junk I can calculate my spring rate.
This is important to have the ride height I want and comfort level.
To make the truck sit were I want, I need 7" of up travel and 11" of down travel, this is a 40/60 split of travel and means that I need 60% of the shock shaft inside the body of the shock to make me happy. The ratio combined with the new shock placement determines my ride height and it will be the same as before.
For comfort I need a suspension frequency of .85-1.1 Hz, I like it soft. Most crawlers have a frequency of .85-1.1Hz and a car like a Nissan GTR has a frequency of ~1.8 Hz Since I got a big ******** camper on the back I want it soft but not super soft so I will choose 1.2 Hz.

BellVista has an excellent calculator for figuring this out, so I use it and have a modified version over the years for work N junk.
So get to the "real world" I can order 3.0x18"x 350 LB in springs for the main (lower spring) and 3.0x16 x 250 LB in springs for the helper (upper spring) this will have the suspension frequency I want and will have 57% of the shaft inside the shock.
KING does not make the coils to the specification I require so I found Filthy Motorsports, they are the only pace that seemed to have the coils I require so I ordered from them.
spring%2Brates%2Bfor%2Binternets.png
 

hansshanks

New member
Just finished reading your project thread. I recently purchased a 2004 Dakota 4door 4x4 with the 4.7 and manula trans. I have been trying to decide if I wanted to do a sas and start building it for wheeling or continue with my 94 grand Cherokee that I have been working on for the past 2 years. My grand built up fairly well but it has been becoming more of a rock buggy than the expo vehicle I originally purchased it for. SAS Dakota on 40s is nutz nice work.

Have you thought about where to put a spare tire, over the cab? or perhaps some kind of fold down or swing out attached to the back of the camper portion?
 

Nick02

Member
Just finished reading your project thread. I recently purchased a 2004 Dakota 4door 4x4 with the 4.7 and manula trans. I have been trying to decide if I wanted to do a sas and start building it for wheeling or continue with my 94 grand Cherokee that I have been working on for the past 2 years. My grand built up fairly well but it has been becoming more of a rock buggy than the expo vehicle I originally purchased it for. SAS Dakota on 40s is nutz nice work.

Have you thought about where to put a spare tire, over the cab? or perhaps some kind of fold down or swing out attached to the back of the camper portion?
No clue yet, I just run without one for now, but I want to do a swing down drivers side spare tire carrier in the near future.

I got the engine cage completed, it is asymmetrical, the drivers side captures the coilover in a hoop that allows the coilover to articulate to the drivers side as the panhard moves through it's radial arc.
Both coilovers sit within a couple inches of the hood, I originally wanted to pay a few fabshops to do the work but all of them said that packaging 18” coilovers would be impossible. So it was time to prove them wrong, sometimes you just gotta do it yourself haha!
The drivers side is a bit complicated, the tube bends up and around the vacc booster and gives it room for cab/frame flex. There are a few more tubes that vertically support that side for upward forces. I disconnected the master/booster to see how far it threw itself so I could package the tubes as close as possible to it and still allow for future removal.
20151005_125216.jpg

20151005_125219.jpg

The passengers side packages around the AC drier and exhaust manifold.
20151005_125209.jpg

Both coilovers sit at a 5 degree angle and the axle side has new coilover mounts that also help support the Dana 44 inner C.
20151005_125250.jpg

20151005_125241.jpg

20151005_125258.jpg


The coil spring calculator worked excellent, the ride is not to soft and not super firm. The 350/250 coilover rate was perfect.


Here is the axle fully out in the front, the drivers goes 10 degrees out and the passangers goes vertical, it is pretty crazy! look how much the thing shifts haha!
20150927_142825.jpg

The new range of suspension travel is crazy, the heim my old pitman arm bottoms out at full flex, so I have to come up with a new creative solution! I think I have a great idea.
20150927_152641.jpg

20150927_151321.jpg

20150927_152913.jpg


The brakelines are also sketch as all hell now, I am going to convert the Dakotas M10x1.0 bubble flare front dual lines to a single 3/8 -24 male and run it down to a 24” long 3/8” 24 female flex dual fitting near the differential, this is taken from a 1982 Dodge W250 rear. I then ordered rear brake lines from a 2004 chevy 1500 with the quadrasteer rear package. It has female 3/8-24 inputs, 10” length and uses a .38” or 10MM banjo fitting that should work with the Ford dual pistion D44/D60 stuff. All the brakes will run atop the axle out of harms way now since there is such a crazy amount of suspension travel.
I also have a new enclosed air cleaner for the front for snorkel time too! New front closeouts and supports will be made.

Anyways, after having it sit for half a year, it is fun to have it back!
20151006_120452.jpg
 
Last edited:

Forum statistics

Threads
187,988
Messages
2,900,667
Members
229,233
Latest member
cwhit5
Top