You are using an out of date browser. It may not display this or other websites correctly.
You should upgrade or use an alternative browser.
You should upgrade or use an alternative browser.
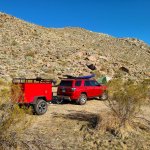
My M762 build (same structure as flatbed M416) - made a gear hauler (solar and fridge updates)
- Thread starter stbrendan
- Start date
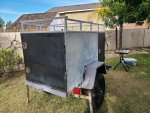
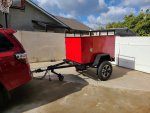
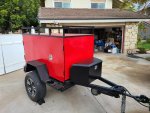
Also visible in that last picture - a bumper that I made with the intent of using it for a bike rack. The rear frame of the original trailer looked a bit flimsy to me, so I tried to stiffen and strengthen the area with welds, and by attaching the hitch portion of the new bumper through the frame member and welding it AND bolting it between a pair of 1/4" thick plates. This operation did NOT stiffen the rear end enough for it to be useful for a bike rack, when test driving it, the rear section was still too flexible, creating a lot of up and down sway which I found unacceptable. I'll have to figure out a different bike transport method.
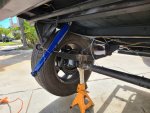
I bought 6 lug trailer brake hubs from Southwest Trailer Parts, a 7 way trailer harness and plug, and these spacers from Amazon -https://www.amazon.com/gp/product/B06WGR358C/ref=ppx_yo_dt_b_asin_title_o02_s00?ie=UTF8&psc=1
Install went smoothly - and here is a tip for someone else doing this - the spacers fit the acorn nuts/lug type (1/2") that come with the trailer hubs, and then fit the Toyota lugs (12mm) perfectly- just have to have the Toyota lugs.
Install went smoothly - and here is a tip for someone else doing this - the spacers fit the acorn nuts/lug type (1/2") that come with the trailer hubs, and then fit the Toyota lugs (12mm) perfectly- just have to have the Toyota lugs.

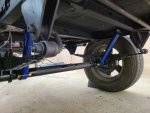
I might not have really needed shocks, but to control bounce for all my gear, I figure I may as well install them (and they were cheap). Monroe 32207 were spec'd as a close match for M416 trailers, are only $22 bucks each, and fit really nicely. I had to weld on lower shock mounts to my axle. Weld on shock mounts from these guys - fast and worked perfectly. https://www.wfoconcepts.com/pr/Universal-Shock-Mount-Lower-Parallel-to-Axle/3458/10475



And finally - the venerable (or not) Harbor Freight 2.75 cubic foot tongue box. I installed plywood inside the box to attach electrical switches/fuses/a battery and solar in the future. I'm also using a Tekonsha brake controller - everything tested perfectly, tows really smooth as long as bikes are not on the back. I'll show my bike solution once it is finalized.
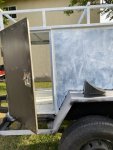
Also installed about 60 or more feet of weatherstripping inside the door frames, and put 1" angle aluminum above the doors as a gutter, and the doors are now rain tested and hose tested and my gear is still dry.
Also installed about 60 or more feet of weatherstripping inside the door frames, and put 1" angle aluminum above the doors as a gutter, and the doors are now rain tested and hose tested and my gear is still dry.

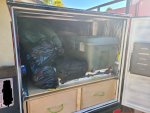
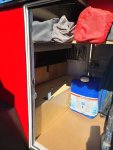
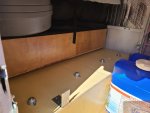
Here are some more detail pics - I built my cargo tray from plywood, and it rolls on ball bearing rollers that attach to the top of the drawer system.
I got most stuff from Amazon or local hardware stores like Harbor Freight and Home Depot, with some Grade 8 bolts for the tongue and frame from McMaster Carr.
I got most stuff from Amazon or local hardware stores like Harbor Freight and Home Depot, with some Grade 8 bolts for the tongue and frame from McMaster Carr.

Here is a close up showing how my door nestles into the 1" angle iron frame, as well as the weatherstripping I have used to seal it as best as able. It is a bit hard to see, but there is a 1" angle made of aluminum immediately above the door that acts as a gutter. Prior to the gutter install, there was slight water penetration. After the gutter - nada.
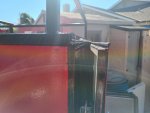

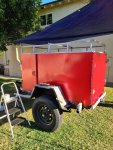
I bought an Orcish brand Hi Lift Jack Rack mount for $20 on Amazon. I had already bought the bolts and misc. stuff to do a DIY jack mount for the rack, but for $20 this thing works really nicely. Made from 1/8" steel, powdercoated, and seems very strong. I used the supplied ubolts to attach it to my rack in 3 places (2 on a horizontal brace, one on a vertical brace), and the whole trailer shakes without the jack budging at all when
I try and shake it. It also has holes for a shovel mount.
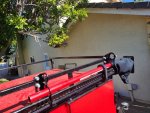
I try and shake it. It also has holes for a shovel mount.

dirtweazle
Member
Nice build. Good to see someone who admittedly did not not have the knowledge just jump in and build. Now just reap the rewards... And constantly repair stuff and upgrade and spend more money.... I have an M116A2 that is just the newer version. Check out my build for any ideas. M116A2 that can grill a cow...
Hit me up through here. I am in San Diego.
Hit me up through here. I am in San Diego.
Thanks Dirtweazle - I saw your build, looks sweet. I had looked for an M116A2 at the right price without luck, happy to have found the M762 which fits my side yard parking space perfectly.Nice build. Good to see someone who admittedly did not not have the knowledge just jump in and build. Now just reap the rewards... And constantly repair stuff and upgrade and spend more money.... I have an M116A2 that is just the newer version. Check out my build for any ideas. M116A2 that can grill a cow...
Hit me up through here. I am in San Diego.
I saw what seemed like a good deal on an Ekooler/fridge at Costco for $280, and figured if it doesn't work out, well, YAY Costco return policy. Of course, that means I had to jump start my electrical and solar design. Thanks again to YouTube and the Internet for all the solar diagrams. I got an Interstate group 27 Marine/RV deep cycle battery from Costco as well, and then everything else from Amazon. The battery seems to be rated at 95 Amp hours, and the fridge pulls 50W while running. Assuming a 50% duty cycle to cover hot days, that comes to about 2amps per hour of drain. Back of the napkin calculations lead me to believe that a 100W solar panel should do the trick, and field testing at Joshua Tree national park on a 90 degree weekend bore that out - the solar controller output indicated that the "lowest" the battery went was 70% when checking on it early morning before any sun hit the panel. Trailer was parked in the sun, went into the fridge at least 20 times per day for drinks or food, and at night before bed battery was 90% charged or better. I will also eventually add some lights for both inside and outside of the trailer, and plan on adding an external switch panel to the tongue box exterior.
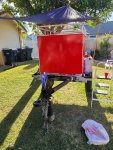
My intention with the solar panel is for it to be quickly removable and re-positionable via a 20 foot extension cable (park in the shade and put the panel in the sun when perfect).
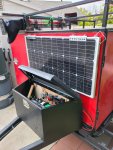
My intention with the solar panel is for it to be quickly removable and re-positionable via a 20 foot extension cable (park in the shade and put the panel in the sun when perfect).

Similar threads
- Replies
- 2
- Views
- 1K
- Replies
- 13
- Views
- 5K
- Replies
- 20
- Views
- 5K
- Replies
- 3
- Views
- 1K

