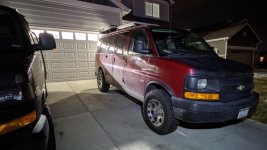
N.A.R.V. 2.0 - 2008 Chevy Express AWD Project (I'm back)

cmarcus

New member
With my build as is...You are correct. If traveling with 4 adults, the bench would have to stay at home and the 3rd and 4th passenger would need to ride in the dinette. If I were traveling with #3 and #4 being young kids, say under 10, you could travel with the bench. Just unlatch it, push it forward (and the front seats forward as far as they go). One can sleep on the floor, one on the bench.

In my last express, we've slept 3 adults in just that situation above (with the seat moved), and it worked fine.

IMO, for you, I would figure out what you need most, storage/gear or beds. If the latter, then I would build the bed higher and keep underneath empty. That way you could but gear OR sleep people on the floor. You "could" add seatbelts to custom seats (I did this in my Sprinter), but honestly, I trust the OEM DOT approved belts more than something I installed. If you are interested in that option, check out SeatbeltPlanet.com

Here are my suggestions for sleeping 4
  • Regular height bed platform and floor space like mine - and travel without the bench
  • Regular height Bed platform, one on bench, one on floor (assuming one is short enough to sleep on bench)
  • Regular height Bed platform, one on bench, one on the inflatable bed things (I know they are made for Sprinters...don't know about expresses)
  • High Bed Platform with gear garage underneath (I was going to do this with NARV 1, if I rebuilt it)
  • Regular Height Bed platform, one on floor (or bench), one in a hammock-cot above front seats. (Google CabBunk for ideas)
  • Rooftop Tent for #3 and #4
  • Regular height bed platform and floor space like mine - and bring a "gear tent" to put the bench in outside.
I'm sure others can come up with some ideas too. If it were me and I were building again for my two boys. I would go the floor/bench route until they got too big, then move to a RTT. That would allow the entire build to grow with them...even when they move out...you can sell the RTT. :)

Wow, thank you for your response!! I guess I didn't even think of some of those ideas. I looked up the Cabbunk system, which would work AWESOME if I installed both rotating seats. Much to think about here....
 

bigsam

New member
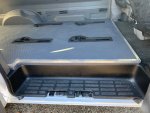
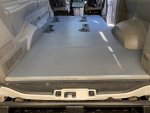
Thanks for the inspiration. Here is my attempt at a similar floor to yours. I appreciate how thoroughly you documented your build. I hope the images show up.4D1C0C2D-5939-4FF8-99D5-8BC932061218.jpeg16F1C086-C65D-444B-BEFE-14A81B0B5343.jpeg
 

LYlqoY2Fo

Builder
Rear Leaf Spring Replacement

I'm sure all of your Chevy/GMC'rs have seen the posts about using springs from a Suburban 2500 for lift. Some are for and some against.....so what the hell...I'll do it.

Actually the reality is, I NEEDED to do it. With the full build out and lugging a couple fattire E-bikes on the hitch, it was getting quite ass-heavy. It just didn't drive/feel like it should. Also, to level everything out would have required lowering the front, which is not the direction I wanted to go.

So, starting where I left off; SuspensionMaxx MaxxCam2 Key, Skyjacker BUK2061 blocks, Skyjacker H7003 front shocks, Skyjacker H7017 rear shocks. This was all well and good, until the weight was added.

Step 1 - Finding the Springs
The 6 leaf suburban springs are actually not that common. Ultimately I found mine on https://www.car-part.com/. I had to drive a couple hundred miles to get them, but for $150 for the pair it was well worth it.

2021-08-01 12.05.00.jpg

Step 2 - Preparing the Springs
My donor springs were off a 1994 Suburban, that had likely been sitting in the yard for quite a few years. So, they needed some reconditioning. First was removing the old bushings. If you have ever done this, you know how much of a pain in the ass this can be. I tried all the recommended ways, drilling, burning, pushing...in the end the best way was to drill out as much rubber from the bushing as you could, then hammer the sleave out. The outside casing then needs to be cut off with a hacksaw, then bent and mutilated until it comes out. See easy-peasy. Ugg!

Next was to pretty them up. I pressure washed them, hit them with a wire brush and put a few coats of black rustoleum on them.

For replacement parts,
- Leaf Spring Bolts (SHB-91645) $4.53 @ RockAuto
- Moog Leaf Spring Bushings (K200897) $8.72 @ Rock Auto

I ordered, what I thought were replacement shackle bushings but they were the wrong size. I ended up using my original shackles and its bushing, as they were still in good condition.

Getting the new bushing in the spring eyes. Well that is a challenge. My suggestion, is if you can find a shop with a hydralic press, just pay them to do it.

How I did it.... I lubed up the eye and bushing with lithum grease. Used guards from a rented Ball Joint press to push them most of the way in using my bench vice, until I could get the Ball Joint press on it to finish the job. All in all it worked pretty wall. I damn near destroyed my bench vice in the process, but it worked.

2021-08-01 16.34.25.jpg 2021-08-01 16.34.42.jpg 2021-08-22 11.56.20.jpg 2021-08-22 14.18.28.jpg 2021-08-22 15.01.18.jpg 2021-08-22 15.09.43.jpg

Step 4 - Removal and Installation
In theory, this should be easy; four ubolt nuts and two spring bolts per side. Yeah...negative ghostrider. The ubolts came off fine, as they've only been on for about a year or so. Spring bolts? Not so much. I ended up having to cut all but one with a reciprocating saw. The first bolt went through 6 Harbor Freight blades. I bit the bullet and spent the money on Diablo Carbide Tipped blades, which was like night and day. My advice, don't be cheap....just buy the ~$40 pack of 9" Diablo blades and save your sanity.

Once the old springs were out, installation of the new springs was really pretty smooth. They are direct bolt ons, with no issues. You WILL need at least two people to manuver the springs in to place. Those bastards are heavy. Anyway, torqued everything down to 80lbs, put the ubolts back on WITHOUT the 2" blocks, and we were done.

2021-08-28 12.25.00.jpg 2021-08-28 13.13.52.jpg 2021-08-28 13.13.58.jpg

Outcome
Um...wow. I should have done this on NARV 1.0. There is absolutely no comparison in ride quality. Effectively, I think I ended up with 3" of total lift. With the weight I have from the build, I suspect I'm causing about a 1/2" sag.

Prior to this, I took bumps really slow because the back end just didn't feel right. Now, it feels like an empty van. The ride is much smoother and overall the lift is more leveled out.

I really dropped the ball on measurements. I had meant to measure prior to the work...but I completely forgot until it was already up on stands and tires off....sorry.

Someone on Instagram (@theolelunchbox) had heard that the mounting bolts were different and that they could rub on the frame. The mounting bolts are exactly the same. As for the rubbing, that "could" be possible if you install the springs with the exposed threads on the rebound clips bolts pointed toward the frame. But if you install with the bold heads near the frame, there is plenty of clearance. See the pictures.

Advice
If you want to lift your AWD Chevy and you plan on doing anything other than keeping it empty inside....do the springs. It really is the best way. With block, you will get the "look", but your capacity and ride will suffer. It may take a little hunting, but you can find the springs in a junk yard. Car-part.com is your friend here....just make sure you don't buy it from a "U-Pull" place....no one needs that headache. I cannot imagine trying to get these off a junker in the yard. It was hard enough in my garage with unlimited power. Also...ensure you find the 6 leaf springs, NOT the 5 leaf.

If you are starting from scratch, do remember that you will need new shocks for this. The OEMs will not cut it. I had already replaced mine with the prior block lift.
 
Last edited:

rpfeifer303

New member
Rear Leaf Spring Replacement

I'm sure all of your Chevy/GMC'rs have seen the posts about using springs from a Suburban 2500 for lift. Some are for and some against.....so what the hell...I'll do it.

Actually the reality is, I NEEDED to do it. With the full build out and lugging a couple fattire E-bikes on the hitch, it was getting quite ass-heavy. It just didn't drive/feel like it should. Also, to level everything out would have required lowering the front, which is not the direction I wanted to go.

So, starting where I left off; SuspensionMaxx MaxxCam2 Key, Skyjacker BUK2061 blocks, Skyjacker H7003 front shocks, Skyjacker H7017 rear shocks. This was all well and good, until the weight was added.

Step 1 - Finding the Springs
The 6 leaf suburban springs are actually not that common. Utltimately I found mine on https://www.car-part.com/. I had to drive a couple hundred miles to get them, but for $150 for the pair it was well worth it.

View attachment 679863

Step 2 - Preparing the Springs
My donor springs were off a 1994 Suburban, that had likely been sitting in the yard for quite a few years. So, they needed some reconditioning. First was removing the old bushings. If you have ever done this, you know how much of a pain in the ass this can be. I tried all the recommended ways, drilling, burning, pushing...in the end the best way was to drill out as much rubber from the bushing as you could, then hammer the sleave out. The outside casing then needs to be cut off with a hacksaw, then bent and mutilated until it comes out. See easy-peasy. Ugg!

Next was to pretty them up. I pressure washed them, hit them with a wire brush and put a few coats of black rustoleum on them.

For replacement parts,
- Leaf Spring Bolts (SHB-91645) $4.53 @ RockAuto
- Moog Leaf Spring Bushings (K200897) $8.72 @ Rock Auto

I ordered, what I thought were replacement shackle bushings but they were the wrong size. I ended up using my original shackles and its bushing, as they were still in good condition.

Getting the new bushing in the spring eyes. Well that is a challenge. My suggestion, is if you can find a shop with a hydralic press, just pay them to do it.

How I did it.... I lubed up the eye and bushing with lithum grease. Used guards from a rented Ball Joint press to push them most of the way in using my bench vice, until I could get the Ball Joint press on it to finish the job. All in all it worked pretty wall. I damn near destroyed my bench vice in the process, but it worked.

View attachment 679864View attachment 679865View attachment 679866View attachment 679867View attachment 679868View attachment 679869

Step 4 - Removal and Installation
In theory, this should be easy; four ubolt nuts and two spring bolts per side. Yeah...negative ghostrider. The ubolts came off fine, as they've only been on for about a year or so. Spring bolts? Not so much. I ended up having to cut all but one with a reciprocating saw. The first bolt went through 6 Harbor Freight blades. I bit the bullet and spent the money on Diablo Carbide Tipped blades, which was like night and day. My advice, don't be cheap....just buy the ~$40 pack of 9" Diablo blades and save your sanity.

Once the old springs were out, installation of the new springs was really pretty smooth. They are direct bolt ons, with no issues. You WILL need at least two people to manuver the springs in to place. Those bastards are heavy. Anyway, torqued everything down to 80lbs, put the ubolts back on WITHOUT the 2" blocks, and we were done.

View attachment 679870View attachment 679873View attachment 679874

Outcome
Um...wow. I should have done this on NARV 1.0. There is absolutely no comparison in ride quality. Effectively, I think I ended up with 3" of total lift. With the weight I have from the build, I suspect I'm causing about a 1/2" sag.

Prior to this, I took bumps really slow because the back end just didn't feel right. Now, it feels like an empty van. The ride is much smoother and overall the lift is more leveled out.

I really dropped the ball on measurements. I had meant to measure prior to the work...but I completely forgot until it was already up on stands and tires off....sorry.

Someone on Instagram (@theolelunchbox) had heard that the mounting bolts were different and that they could rub on the frame. The mounting bolts are exactly the same. As for the rubbing, that "could" be possible if you install the springs with the exposed threads on the rebound clips bolts pointed toward the frame. But if you install with the bold heads near the frame, there is plenty of clearance. See the pictures.

Advice
If you want to lift your AWD Chevy and you plan on doing anything other than keeping it empty inside....do the springs. It really is the best way. With block, you will get the "look", but your capacity and ride will suffer. It may take a little hunting, but you can find the springs in a junk yard. Car-part.com is your friend here....just make sure you don't buy it from a "U-Pull" place....no one needs that headache. I cannot imagine trying to get these off a junker in the yard. It was hard enough in my garage with unlimited power. Also...ensure you find the 6 leaf springs, NOT the 5 leaf.

If you are starting from scratch, do remember that you will need new shocks for this. The OEMs will not cut it. I had already replaced mine with the prior block lift.
really appreciate your time to post and update the AWD crew! been looking at doing the same. do you have a pic with the springs and the new stance?

Did you ever consider Boulder Off Road? they do make a kit for 2-3inch lift with springs, been thinking of going this route.
 

Dstudda13

New member
Anyone looking for a aluminess ladder? Its made for the chevy center mount. I have one for sale and am willing to deal.
 

Attachments

  • E23041FE-30F1-4BD0-AB28-B3B2EA9CB964.png
    E23041FE-30F1-4BD0-AB28-B3B2EA9CB964.png
    2.9 MB · Views: 52
  • 5200A148-EFDE-42CD-B077-F4EDDC8BD3CC.png
    5200A148-EFDE-42CD-B077-F4EDDC8BD3CC.png
    2.4 MB · Views: 52

Surfdog

New member
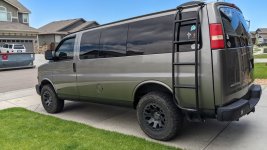
Next up Alumniness Ladder installation.

Overall a pretty easy installation. It requires that you drill two holes in the gutter, and three in the lower body, near the pinch welds. Addtionally, the (3) brackets from Aluminess are not drilled except for the two holes in the lower bracket.

It takes some playing around to get it just right. In fact, the first time I mounted it, the ladder actually was "twisted" slightly top to bottom. After a few days, I decided I couldn't stand seeing that imperfection in my mirror and I had to redrill the holes in the lower bracket to straighten things out. Now it is perfect.

Overall impression: Very sturdy, very light, and made very well. It would be nice if it followed the rear contour of the van more, but overall I'm satisfied for the price.

View attachment 588377View attachment 588379

View attachment 588380
it looks Great.... question - are you ok w/ the height ? can this go any higher ?
 

LYlqoY2Fo

Builder
it looks Great.... question - are you ok w/ the height ? can this go any higher ?

The height is fine to me. I don't have a roof rack yet, so I can't really judge how precarious is may feel getting up/down. I just use it now to get snowboards on/off the racks.

It cannot go any higher, its mount points are defined up/down. You can play a little front/back, but not much. If I had to do it again, I would likely get the mid-ladder, vs. the rear ladder. The gutter mount point is causing me some grief in planning a full rack, because it consumes so much gutter space, behind my fan.
 
Last edited:

maneumann0101

New member
One of the best, if not the best chevy express builds I have seen in my many hours of browsing! Super awesome stuff. What is your thought on the ride quality with the van lifted vs. stock? I'm leaning toward lifting mine as well. Also, any notable change in gas mileage? Did you bother with recalibrating speedo?
 

bdog1

Adventurer
Holy smokes, this is awesome. As someone eventually (next year) looking to buy/build out an AWD Express, this is giving me some awesome ideas.

One question - when sleeping 4 and the bench seat out, I assume the extra 2 passengers would be riding in the dinette area? I have 2 kids, and the idea (albeit a tall order) is I am trying to think of a way of having similar amenities as you have here, but also being able to sleep 4.

Carry on - killer work!!!
One of the best, if not the best chevy express builds I have seen in my many hours of browsing! Super awesome stuff. What is your thought on the ride quality with the van lifted vs. stock? I'm leaning toward lifting mine as well. Also, any notable change in gas mileage? Did you bother with recalibrating speedo?
Wow! That’s some cool quality build. On your sliding scale of NARV 1. To Sprinter to this I think my planned build is NARV 1/3.
Cheers.
 

LYlqoY2Fo

Builder
One of the best, if not the best chevy express builds I have seen in my many hours of browsing! Super awesome stuff. What is your thought on the ride quality with the van lifted vs. stock? I'm leaning toward lifting mine as well. Also, any notable change in gas mileage? Did you bother with recalibrating speedo?
Sorry for REALLY delayed response. Ride quality is better than factory, IMO. The springs made all the difference in the world. My son and nephew have the same vans, and mine is a cadillac compared to theirs.
 

LYlqoY2Fo

Builder
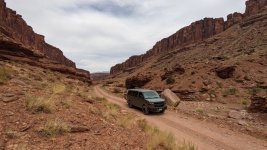
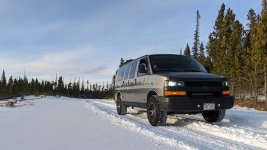
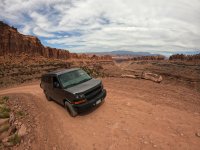
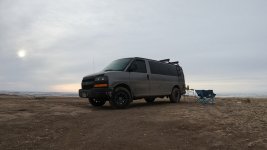
It has been a while since I posted, and thought I'd update what has changed/update since the springs.
  • Entire front end rebuilt - Upper/Lower Control Arms, Inner/Outer Tie rods, Bearings/Hubs, etc.
  • Rear Bearings changed
  • New brakes and calipers all the way around
  • New speed sensors all around.
  • Rocker panels bed-linered
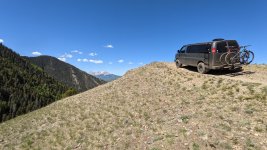
While it is my daily driver, it is by no means a pavement princess. It has been countless roadtrips, camping trips, so many snowboarding days. NARV 2.0 is just out living its best life. If you are in the Northern Colorado area, you've likely seen it.

2022-07-02 13.56.09.jpg2022-06-08 10.39.04.jpg2022-06-09 15.14.51.jpg2022-11-12 16.05.00.jpg
2022-11-13 08.10.08.jpgGOPR2997.jpgGOPR3402.jpg

And one last thing....NARV 1.0 is back in the family...this year my son bought it back from the person who bought it from me in 2019...and we rebuilt it from scratch. I'll post some updates to that thread at some point. You may see it around the Central Oregon area....still running strong as ever.
2022-12-11 22.42.27.jpg

Videos (You'll see it a lot in the videos on my channel)
 
Last edited:

Forum statistics

Threads
188,210
Messages
2,903,832
Members
229,665
Latest member
SANelson
Top