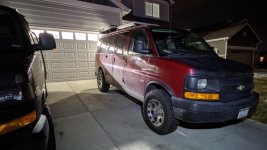
Rear Leaf Spring Replacement
I'm sure all of your Chevy/GMC'rs have seen the posts about using springs from a Suburban 2500 for lift. Some are for and some against.....so what the hell...I'll do it.
Actually the reality is, I NEEDED to do it. With the full build out and lugging a couple fattire E-bikes on the hitch, it was getting quite ass-heavy. It just didn't drive/feel like it should. Also, to level everything out would have required lowering the front, which is not the direction I wanted to go.
So, starting where I left off; SuspensionMaxx MaxxCam2 Key, Skyjacker BUK2061 blocks, Skyjacker H7003 front shocks, Skyjacker H7017 rear shocks. This was all well and good, until the weight was added.
Step 1 - Finding the Springs
The 6 leaf suburban springs are actually not that common. Utltimately I found mine on
https://www.car-part.com/. I had to drive a couple hundred miles to get them, but for $150 for the pair it was well worth it.
View attachment 679863
Step 2 - Preparing the Springs
My donor springs were off a 1994 Suburban, that had likely been sitting in the yard for quite a few years. So, they needed some reconditioning. First was removing the old bushings. If you have ever done this, you know how much of a pain in the ass this can be. I tried all the recommended ways, drilling, burning, pushing...in the end the best way was to drill out as much rubber from the bushing as you could, then hammer the sleave out. The outside casing then needs to be cut off with a hacksaw, then bent and mutilated until it comes out. See easy-peasy. Ugg!
Next was to pretty them up. I pressure washed them, hit them with a wire brush and put a few coats of black rustoleum on them.
For replacement parts,
- Leaf Spring Bolts (SHB-91645) $4.53 @ RockAuto
- Moog Leaf Spring Bushings (K200897) $8.72 @ Rock Auto
I ordered, what I thought were replacement shackle bushings but they were the wrong size. I ended up using my original shackles and its bushing, as they were still in good condition.
Getting the new bushing in the spring eyes. Well that is a challenge. My suggestion, is if you can find a shop with a hydralic press, just pay them to do it.
How I did it.... I lubed up the eye and bushing with lithum grease. Used guards from a rented Ball Joint press to push them most of the way in using my bench vice, until I could get the Ball Joint press on it to finish the job. All in all it worked pretty wall. I damn near destroyed my bench vice in the process, but it worked.
View attachment 679864View attachment 679865View attachment 679866View attachment 679867View attachment 679868View attachment 679869
Step 4 - Removal and Installation
In theory, this should be easy; four ubolt nuts and two spring bolts per side. Yeah...negative ghostrider. The ubolts came off fine, as they've only been on for about a year or so. Spring bolts? Not so much. I ended up having to cut all but one with a reciprocating saw. The first bolt went through 6 Harbor Freight blades. I bit the bullet and spent the money on Diablo Carbide Tipped blades, which was like night and day. My advice, don't be cheap....just buy the ~$40 pack of 9" Diablo blades and save your sanity.
Once the old springs were out, installation of the new springs was really pretty smooth. They are direct bolt ons, with no issues. You WILL need at least two people to manuver the springs in to place. Those bastards are heavy. Anyway, torqued everything down to 80lbs, put the ubolts back on WITHOUT the 2" blocks, and we were done.
View attachment 679870View attachment 679873View attachment 679874
Outcome
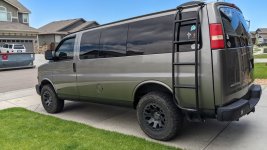
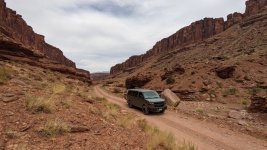
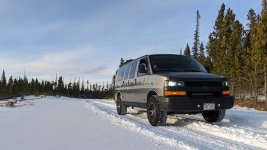
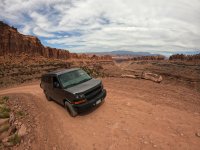
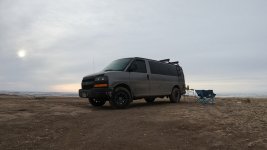
Um...wow. I should have done this on NARV 1.0. There is absolutely no comparison in ride quality. Effectively, I think I ended up with 3" of total lift. With the weight I have from the build, I suspect I'm causing about a 1/2" sag.
Prior to this, I took bumps really slow because the back end just didn't feel right. Now, it feels like an empty van. The ride is much smoother and overall the lift is more leveled out.
I really dropped the ball on measurements. I had meant to measure prior to the work...but I completely forgot until it was already up on stands and tires off....sorry.
Someone on Instagram (@theolelunchbox) had heard that the mounting bolts were different and that they could rub on the frame. The mounting bolts are exactly the same. As for the rubbing, that "could" be possible if you install the springs with the exposed threads on the rebound clips bolts pointed toward the frame. But if you install with the bold heads near the frame, there is plenty of clearance. See the pictures.
Advice
If you want to lift your AWD Chevy and you plan on doing anything other than keeping it empty inside....do the springs. It really is the best way. With block, you will get the "look", but your capacity and ride will suffer. It may take a little hunting, but you can find the springs in a junk yard. Car-part.com is your friend here....just make sure you don't buy it from a "U-Pull" place....no one needs that headache. I cannot imagine trying to get these off a junker in the yard. It was hard enough in my garage with unlimited power. Also...ensure you find the 6 leaf springs, NOT the 5 leaf.
If you are starting from scratch, do remember that you will need new shocks for this. The OEMs will not cut it. I had already replaced mine with the prior block lift.


