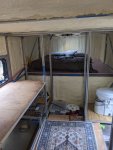
New Build Begins- 2021 CV 515

2 bikes 2 brown dogs

Active member
Now that we are dried in we are off the races on the interior and finally feel like we doing something other than walking in place.
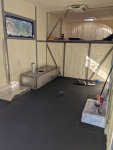
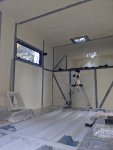
Closed cell spray foam happened Friday. Walls are 2.25"-3". The roof is crazy thick because of the deck corrugations. At the depressions we have 2.5" on the interior. That's in addition to the 2.5" of XPS above. At the raised portion of the corrugations we have 4.5" of spray inside and 1/2" of XPS above. At this point I wish I would have done a tiny through wall AC unit instead of the 14" tall roof top as even the smallest BTU product up there is going to be barely put through the paces.PXL_20221010_134423207.jpg
 

2 bikes 2 brown dogs

Active member
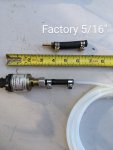
On a temperature control note I am 'relocating' the Tiberline/Planar hydronic heater as I'm realizing that it being directly under the calorifier will make much cleaner pipe runs. That reminded me of a head scratching install question related to the fuel line sizing that I skipped over on the first location. A picture of the hydronic fuel pump is below followed by my question:
fuel line (1).jpg
 

2 bikes 2 brown dogs

Active member
In the photo you see that the pump has a barbed fitting (both intake and output). The provided parts and instructions want you to mate a short section of ~3/16" hose to the pump and slip a ~1.5mm nylon line inside of that. The nylon hose is supposed to continue to your fuel source and then step back up to a larger diameter. Same thing happens between the pump and the furnace. In my case the factory auxiliary tank take off is a 5/16" barb. I'm trying to figure out if i can eliminate the nylon tube all together? I was going to eliminate the nylon and use a transition barb to step up to the factory fuel line diameter. Anyone know if this will cause problems? I could see how the small diameter nylon was an intentional means to restrict the fuel flow/rate. I could also see it being the most cost effective way to get from A to B and therefore a good 'recommendation' and not a system requirement.
Espar and Webasto furnaces use the same type of line reduction. My entire fuel run is less than 3' from tank nipple to the furnace intake and having 9 hose clamps in between just looks, well, about as silly as my roof caulk. Do I need the nylon?
 

shortbus4x4

Expedition Leader
Nice build. I daily drive a '21 CV515 service truck weighing in a 21k+ lbs, it rides very nice with the factory leaf springs. I do wish it had a better turn radius though. I've done the steering box and stops mod too under warranty and my 21 Dodge 5500 turns circles inside my service truck. If you ever make it out to eastern WA stop at the International dealer in Spokane and say hi.
 

2 bikes 2 brown dogs

Active member
It's been a busy two months since we really cut loose on the interior build out.
The summary is that we built a ring of 1.5" 8020 around the base of the three water tanks. The 8020 are tapped into the HSS and essential act as bumpers to keep the tanks from sliding. Tie down straps bolt into T-nuts.
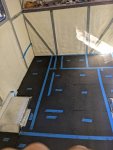
The corrugations in the floor deck have been filled with 2" XPS, just like the roof, and then we laid down 3/4" horse stall mats for the tanks to sit on. We dry fit the tanks on the mats first. Here you see the grey tank which sits under the shower pan and kitchen sink.
 

Attachments

  • greytank.jpg
    greytank.jpg
    2.6 MB · Views: 52

2 bikes 2 brown dogs

Active member
With all the tanks dry fit we were able to also set the lower 'bumper ring' and make any adjustments that would make the tapping locations work out best. I had given us 3" of wiggle room when I sized the tanks so that helped. With the locations tweaked we marked the mats with painters tape. Then there was a big chicken and egg, back and forth iteration of cutting mats, bolting 8020, setting tank, undo repeat, then start tapping. in the photo the gray tank lives in the upper left (driver's side). The potable is in the center. At one time we were going to have black water so there is a third tank in the top right (passenger's side) but not that we are composting it's a "spare". Having more head room above the toilet didnt seem as useful as a spare 40 gallon heated tank so I kept it in the build. Helps to be short I guess.:)
 

Attachments

  • Bumperring.jpg
    Bumperring.jpg
    3.1 MB · Views: 36

2 bikes 2 brown dogs

Active member
Here is how the tank sizes worked out. All are 14" tall.
Gray 72 gallon, potable 174 gallon, spare/old black 34 gallon.
Once the lower bumper ring and tanks were set we built an upper ring about 3/4" above the tank to support the walking floor. The shower and water closet have are 3/4" pressure treated flooring but the potable tank is 5'x4' and way too wide to span without adding intermediate supports ie more height. A few years ago we lost an 85 year old red oak and were able to work something out with a guy who had a portable saw mill. So......I actually have about a dozen rough hewn wood slabs that are about 2" thick, 18"-24" wide and 12" long. It will take some time to get the warp and twists of the planks to play nice with the 8020. We call the imperfections 'character'. I'm not a wood worker so it's going to be a bit before I get this figured out but once it's leveled up it will be epoxied with West systems 207/105 and varnished with Epifanes matt. My wife built up a bunch of sample boards with varying coats of epoxy and then multiple layers of varnish that were thinned differently. We ended up on two coats of epoxy with one coat of 50/50 varnish to mineral oil. At least that is the current plan. Here's what a side profile of the potable tank looks like when you are walking in the passenger's side door.
 

Attachments

  • tank side with floor.jpg
    tank side with floor.jpg
    1 MB · Views: 37

2 bikes 2 brown dogs

Active member
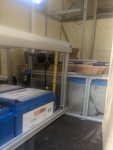
With the false floor ring in the cabinet bases, pantry and dinette benches could finally start. In the back of the truck one bench sit above an arb 73 liter DC fridge we will use as a freezer. The other side of the bench will be above the battery bank with the electrical bay being behind your back rest. here's the freezer bench
 

Attachments

  • freezer.jpg
    freezer.jpg
    3 MB · Views: 78

2 bikes 2 brown dogs

Active member
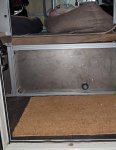
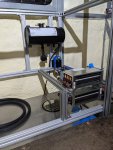
Here's what the original battery bench looked like. I have since built a platform ~6" above the mats and elevated the batteries. In setting the tanks the potable supply line pops out of the bottom and runs in one of the corrugations. If something goes wrong under that tank it is basically a full tear down to repair and I would have 4" of standing water around the tank if something went really REALLY wrong. So, in hindsight I wish I had the water pump pulling from a dip tube. If something goes wrong I'll plug the existing supply line and make that happen but the batteries are elevated and I installed a floor drain with an exit only check valve so I can work on that dip tube supply run....well, never hopefully.
 

Attachments

  • low battery.jpg
    low battery.jpg
    3.9 MB · Views: 38

2 bikes 2 brown dogs

Active member
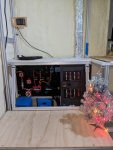
With benches built then the electrical board, inverter and other victron equipment could be mounted to the drivers side wall. The distribution panels sit a little in front of the switch board. You access this by swinging the back of the rear bench upwards.
Pro tip: a Charlie Brown xmas tree makes the nights a little more cheery and doubles as a good multimeter when you wire something hot and forgot to close the breaker. Nobody kills christmas in this truck....at least not when it's late and you wire your test plug right to the load side of the bus bar.
 

Attachments

  • electrical.jpg
    electrical.jpg
    2.8 MB · Views: 39

Forum statistics

Threads
188,178
Messages
2,903,430
Members
229,665
Latest member
SANelson

Members online

Top