New Build: T100 SAR and expedition rig

Arclight

SAR guy
CYi5,

I don't have a fridge, but I do have HAM radios and a bunch of LED lighting that gets used when I camp. I went with the 30W mostly because the "unbreakable" only comes in that size. I also wanted to keep the battery topped up when I park it between trips. There should be enough room for a second panel if I do get a fridge, however. At this point, I've got a few more mods I rather spend $500+ on.

I just got my LED flood lights, so I should have a post on that shortly.

Arclight


I'm diggin' your solar setup. We have pretty similar methods for preventing battery drainage in the field. Do you think 30 watts is enough to keep your battery topped off? I'm not sure if you were planning to add a fridge or not, but I read on here around 60w is the magic number for fridge duty. I suppose they could always be doubled up in the future, just curious on your take on the setup.
 

PaintRock

Adventurer
Nice setup! So, I guess the T-100s don't have the slots in the bed to mount 2x4s, 2x6s, 2x8s, etc. vertically like the Gen1 Tundras? I always thought if I were to put a camper shell on my Gen1 Tundra I would make a false floor out of some carpeted plywood cut to fit on top of some, probably 2x6s, set into the factory slots and use the space under the false floor for a pretty good amount of storage. I guess to do this, you wouldn't technically NEED the slots, but they would make things easier. The obvious downside is you lose some headroom.
 

Arclight

SAR guy
I'm pretty sure the T100 has the slots in the bed, but it's covered with the factory bed liner right now.


Arclight

Nice setup! So, I guess the T-100s don't have the slots in the bed to mount 2x4s, 2x6s, 2x8s, etc. vertically like the Gen1 Tundras? I always thought if I were to put a camper shell on my Gen1 Tundra I would make a false floor out of some carpeted plywood cut to fit on top of some, probably 2x6s, set into the factory slots and use the space under the false floor for a pretty good amount of storage. I guess to do this, you wouldn't technically NEED the slots, but they would make things easier. The obvious downside is you lose some headroom.
 

Arclight

SAR guy
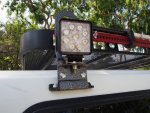
In the mean time, I finally got my side-facing off-road lights installed. I took the advice of the forum and got some of these:

24W LED Tuff Lights (4" square)

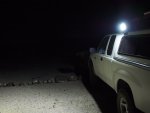
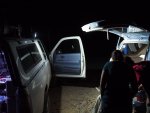
They draw about 2A each and put out a pretty wide flood-light type pattern. I've also got a third one with a 20' cable and a magnet, which I can use as a trouble light or general area lighting when unpacking gear/etc.

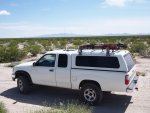
I attached them to the gutter-mount brackets I used for the roof rack. Since the van-style mounts I bought tuck in about 1.5", this came out really nice. All I had to do was extend the mounting bolt a bit and put a nylon nut on it.

P5090136.jpg

I drilled through the non-honeycomb portion of the shell with a step drill (had to hit it from both sides due to the thickness of the fiberglass) and installed cord grips from McMaster-Carr.

P5090137.JPG

Here's how they look on the truck:
P4300178.JPG
P4300161_1.JPG
P4300177.JPG

Since the amperage is low,I just ran #16 wire and used some 5A-rated micro switches instead of relays. Works great!

One tip: try to mount these so that they can face slightly forward. I ended up adjusting them this way, and now I can get a good view of rocks, trails, etc from my side windows. They are also fantastic when you're parked and organizing gear/etc.


Arclight
 

Arclight

SAR guy
New Alternator

On my last trip out the Mojave to chase a weather balloon, I was having trouble with the voltage dropping below 12.3V and the engine stalling when I stopped. I cleaned the IAC and checked for vacuum leaks with propane. I found a small crack in the throttle body hose which I patched with RTV, and also replaced the TBI gasket. After an ECU reset, the idle seems much more stable.

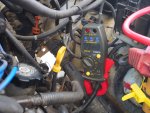
Next on the list is a check of the charging system. I bought an AC/DC ammeter and did a quick check. At idle, my truck draws right around 10A with just the engine running. This is within spec, according to the Toyota manual. With the high-beams and AC on however, it passes 45A (still OK). With the inverter, lighting and HAM radio, it's over 70A at high idle and the voltage drops at low idle. (Not OK, as the stock alternator is only rated to 70A). So it was time to upgrade the alternator.

P5170188.JPG

Since there's no stock high-amp alternator option for this truck, I decided to take the forum advice and either get the Mean Green or DC Power unit.

I opted for the Mean Green, mostly because they assured me it's a 100% drop-in and they had a 140A in stock. I really don't need 200A, and safely wiring that up would mean building a new wiring harness.

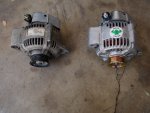
Here is the new alternator next to the old:

P5170189.jpg

Replacing the alternator on a 5VZFE requires:

10mm wrench/socket
12mm wrench/socket
14mm wrench/socket
Belt tension gauge (optional)

The whole process took about 15 minutes, and it really was a drop-in. Be sure to disconnect the battery, as you're almost certain to cause a short when you disconnect the alternator lead.

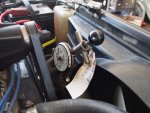
If you have the TRD supercharger, you really need to tension the belt with a gauge. It's a good idea on other vehicles too. This is a $25 eBay find:

P5170195.JPG

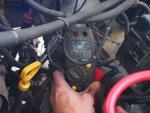
And one more test...75A at idle is now no problem!

P5170191.JPG

I highly recommend getting a DC clamp-on ammeter if you're interested in knowing what your charging system is really doing. You can basically do the volts and amps test under load that the auto parts store does, but without having to remove anything.

Note that the AC clamp-on meters work differently. They use a pickup coil, while the ones with DC also have a magnetic Hall-effect sensor inside. Be sure to check.

This ELENCO from Amazon was cheap and works pretty well.

Arclight
 
Last edited:

Booosted Supra

Observer
Cant say I really see too many T100's and I know alot of Toyota drivers. This is a really cool truck, its different. Pretty cool you supercharged it too. I dont think these had a TRD option? Correct me if I am wrong. Do you have more info on your solar set up... I really like that
 

Arclight

SAR guy
The TRD Supercharger is available for the 97-98. Some of the earlier models had some sort of engine control issue that prevent you (at least officially) installing it. I don't believe there was anything like a "TRD Package" available - just the base (DX) and deluxe (SR5) packages. The superchargers were all owner or dealer-installed.

The solar system uses a 30W Powerup panel that is bonded to a stainless steel backing for impact resistance. It's + and - wires are attached to the input of the Morningstar 4.5A charge controller. The output of that goes to a 5A "always on" fuse in the accessory fuse box. It will put out 2-3A in full sun, and the charge controller has 3 stages, keeping it from overcharging if there are no loads. I put an Anderson Power Pole connector on it, so that I can disconnect the solar panel and hook up a small power supply if I'm garaging it and want to keep the batteries topped off.

I brought the cable in through the firewall using a large-diameter "cord grip" and sealed it with rubber inner tube wrapped around it and cinched down. This way, I can remove it and add more wires later if I get more lights, antennas, etc.

This is the

Cant say I really see too many T100's and I know alot of Toyota drivers. This is a really cool truck, its different. Pretty cool you supercharged it too. I dont think these had a TRD option? Correct me if I am wrong. Do you have more info on your solar set up... I really like that
 

OndrejT100

New member
The T100 does have slots in the bed for 2x boards.

Cool alternator upgrade, good to know for the future if I ever need to go that route. $400 seems a bit steep, but sounds like a solid product.

The DC clamp on amp meter. Just have some questions about it and if I really need one.

Assuming this is different than a volt meter? Pretty sure I can't measure AMPS on a volt meter.

What kind of test can you perform? or what things can you test?

Can the one you have also measure volts?

And make sure to get one that is for a DC system.
 

stioc

Expedition Leader
Nice upgrade on the alternator...those inverters can be taxing.

The DC clamp on amp meter. Just have some questions about it and if I really need one.

Assuming this is different than a volt meter? Pretty sure I can't measure AMPS on a volt meter.

What kind of test can you perform? or what things can you test?

Can the one you have also measure volts?

And make sure to get one that is for a DC system.

It's like any other Digital Multi Meter (DMM) but with a clamp which allows you to measure AMPS using inductance. Otherwise you'd have to attach the DMM in series to measure amps...which is cumbersome and sometimes not possible so having a clamp-on DMM is great. About $60 on Amazon/RadioShack etc.
 

brushogger

Explorer
Very clean build Arclight. You do very nice work. I may borrow (e.g. steal) some of your ideas. I'm interested in the lighting control board if you decide to build more. Keep us posted.
 

Arclight

SAR guy
I actually built 5 of these, so I've got 'em. PM if interested.


Arclight

Very clean build Arclight. You do very nice work. I may borrow (e.g. steal) some of your ideas. I'm interested in the lighting control board if you decide to build more. Keep us posted.
 

Arclight

SAR guy
I got a bit more work done this week. This time, I added a CB radio. I went for the Cobra WX-75ST, a 3' Firestick antenna and a custom mount.

Here are some details.

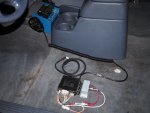
I mounted the radio to my center console, on the other side from my Yaesu 8900 mic. The remote unit went under the seat, and I used self-drilling sheet metal screws to ground it to the body. The power wires went to the 6-circuit Blue Sea fuse box, and I put it on the same circuit as the USB chargers. This was a lot easier with the seat removed. The coax cable is white RG58/U with soldered-on UHF connectors.

P5260188.JPG

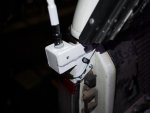
Here's the antenna mount (left rear corner). I used more self-drilling sheet metal screws and star washers to ensure good bonding between the body and mount. The mount itself is a TIG-welded box with a stiffener on the mounting surface.

P5260191.JPG

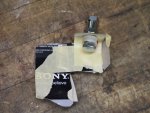
The shape got mocked up in cardboard before I started cutting stuff out.

P5200184.JPG

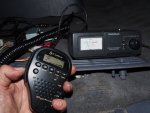
I broke out my old Radio Shack SWR meter and tuned the Firestick to get 1.5 or less on all channels. Note that the adjustment tip on the Firestick is very sensitive - just a turn or two can have a large effect on SWR. Tip: before you power up the radio, take a multimeter and make sure there is no short between the coax shield and tip. Also check that the shield has continuity with the body of the truck at both sides.

P5260192.JPG


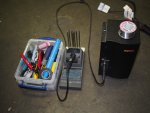
This is my electronics tool setup. Some things that work really well:

  • Metcal MX-500 soldering iron. This iron can do everything from tiny SMT parts to #10 wire with a simple tip change. It heats up almost instantly. You can find Metcals used on eBay for a good price. This is the Lexus of soldering irons.
  • Heavy-duty (10" long) crimpers for spade/ring terminals
  • Sharp wire cutters (never used on steel)
  • Non-adjustable wire strippers for 10-22ga and 22-32ga wire. This really helps prevent cutting of the conductors.

P5260193.JPG
 

Arclight

SAR guy
Today I finished changing out the last of the original hoses. The oil cooler lines are a real PITA to get to, so I'm guessing the ones on the truck were original. I picked up a new set of these and also the throttle body coolant hoses from Toyotapartsman and got those in. I lost some coolant when I did the timing belt and water pump, so I took the opportunity to flush and refill the system with distilled water and Toyota Red coolant.

Tip: a long set of needlenose pliers really helps for removing and reinstalling the hose clips.

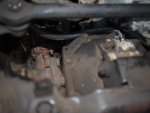
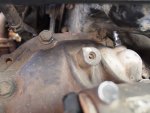
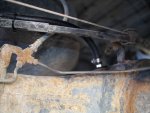
Following forum advice, I also did a front and rear diff breather relocation. I used the Toyota diff nipple barb, part #90404-51319. The rear was easy - I ran the new line up to the fuel filler neck and zip tied it in place.

The front was a little tricky, since the 5VZFE on the T100 only clears the front diff by about 3/4". I ended up cutting the barb into 3 pieces and then TIG welding it back together to shorten it. Here are some pics:


Front:
dnTUpzr.jpg
FwbhLkB.jpg

Rear:
jmIM2Md.jpg
 

Forum statistics

Threads
186,582
Messages
2,887,697
Members
226,608
Latest member
DQblues
Top