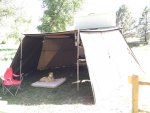
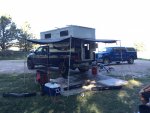
New FWC Grandby Shell

TacoFWC

Observer
Thats a fine looking camper, congrats. Just curious, how stable is that rear carrier? I have something similar and it rocks left and right pretty good. I am thinking of adding a piece of 1" square tubing, something with a pretty thick wall, to the rack that will slide into another little reciever on the truck. Its either that or convert my rack to a double reciver setup or swing out. Its a lot to think about I guess
 

schunkb

Observer
I welded a couple beads down the sides of the hitch tube and ground them down to get a tighter fit into the receiver. It still rocked slightly, but once I put in a stabilizing hitch pin, it snugged it up. For the $25, it was a pretty successful fix. If you don't need the extra receiver for payload, I'd look at the stabilizer first and see if that solves your issue.
 

schunkb

Observer
Pictures aren't great, but I got the blue sea fuse panel installed, as well as three 12v outlets, the solar charge controller, and the remote meter. Feels good to have the wiring completed. Next job cabinets...

Here are the two outlets just below the counter, and an outlet toward the cab for the ARB fridge
20140109_143348_Grace Way.jpg20140109_143428_Grace Way.jpg

Here is the remote meter for the charge controller.
20140109_143440_Grace Way.jpg
 

schunkb

Observer
I installed the 140w solar panel yesterday. I wanted to install without putting any holes in the roof. I only got the 5 foot yakima tracks from the factory. In hindsight, I wish I would have ponied up for the 10' tracks to give me more flexible mounting options when I utilize the roof racks for a rocketbox as well. Anyway, I installed the 78" crossbars, and used the "yakima universal snaparounds" to mount the panel to the crossbars. It turned out to be a very clean install. I used yakima hardware for the install, but may replace the twist-on nuts for lockable nuts down the line.
20140116_154054_Yarrow_St.jpeg


Anyway, I'm pretty happy with the install and still have plenty of room for the cargo box. The panel does cover the fantastic fan vent cover, but I can still open it enough to function--This is where the 10' tracks would have been handy.

20140116_154324_Yarrow_St.jpeg
 

Scoutman

Explorer
Very nice camper and truck. Subscribed to see how this turns out. I love the simplicity of the shell with adding just what you need. Much lighter, easier to fix and you can build it as stout our as light as you need. That also means less exterior penetrations for potential leaks. Keep posting picts...

For keeping that hitch rack (or any hitch accessory) rock solid, the simplest thing I found to do is to drill and tap a 1/2"-13 hole in the side (and/or top/bottom) of your 2" receiver. Insert the rack and pin and then tighten down on a 'jack bolt' inserted in that threaded hole. It's stupid simple and very effective costing almost nothing.
 

Frosty_1

Adventurer
I mounted my solar panel with 3M VHB tape. Super solid and you'd be able to put it down lower, for a lower profile while freeing up rack space. AM Solar in Eugene OR sells nice mounting kits that come with the VHB tape...
 

schunkb

Observer
I don't have any pictures of the foxwing yet, I'm still brainstorming how I want to mount it. The a/c was a $700 option.
 

MNtraveler

Observer
For the swaying on the receiver mount, and utter simplicity itself, I have a pack of composite shims. Drive a piece of shim in between the ball mount and the receiver and no rattles or sway. Buy a pack every year right before I go camping. Works well and is cheap!
 

schunkb

Observer
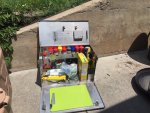
So, I know it has been a while, but here are a few more of the modest mods I've made to the rig. First off a picture of one of my outdoor kitchen cases. Always fun repurposing items. :)

IMG_0184.JPG

I put in two ikea drawers that matched the baltic birch pretty well. Next to it is the camp chef collapsing table/kitchen. I love this little bit of kit. Holds the stove, dutch oven, and all the miscellaneous kitchen/tableware.
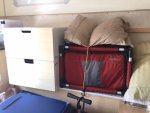
IMG_0185.JPG

Not the best picture, but I put a submersible 12v pump into a scepter water can to give us running water. It's actually incredibly convenient, and still fits my modular theme.
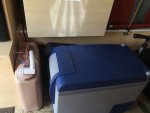
IMG_0187.JPG

I built a storage bench along the back window using baltic birch ply. It turned out pretty well.
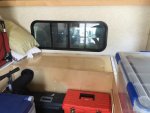
IMG_0188.JPG

I made sure I could fit the scepter cans in the bench as you can see on the right.
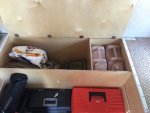
IMG_0189.JPG

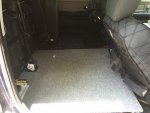
We have the crew cab dodge, and to make the trips a bit more comfortable for the dogs, I took out the 60 split rear bench and built them a platform. Since we have a bench seat up front, with the single seat in the back, I can still legally carry 4 people, so it worked out pretty well. The girls love having some space to stretch out on their dog bed.
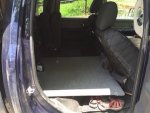
IMG_0190.JPG
IMG_0191.JPG

I finally got around to mounting up my foxwing awning. I'll post a couple pics of it deployed this weekend. It's nice to have some shelter, and the install turned out pretty good.
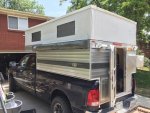
IMG_0193.JPG

Now to come up with more stuff that I "have" to do to the rig. :) Hope everyone is enjoying their trails!
 

schunkb

Observer
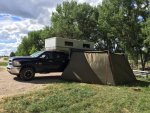
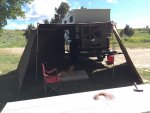
Here are a few pics of the foxwing deployed with the tapered sides attached. It makes for a nice little shelter out of the wind and sun.


image.jpg

image.jpg

image.jpg

And then without the sides on.
image.jpg
 

WASURF63

Adventurer
Looking good!
Do you ever carry anything on the roof / crossbars besides the solar panel?
If so, how are you liking the weight of lifting all that with the Grandby sized roof to boot? :)
I carry a couple surfboards up top along with a 100w solar panel and got tired of heaving everything skyward when I got to camp.
Ended up installing (4) exterior lift struts and it made a huge difference in the ease of lifting the loaded roof.

Walt
 

Forum statistics

Threads
186,628
Messages
2,888,254
Members
226,767
Latest member
Alexk
Top