New Guy, '97 12 valve, Many, Many Adventures To Go!

GJStringert

Observer
Thanks! And More Updates!

Well thanks a lot for the kind words everybody! I'll try to answer a few questions here:

@ttravis5446, this bed is a CM "SS" model. They are sold totally plain, no boxes or anything, and can be installed as cheap as $1700 (that's the number I remember when I was calling around last summer). Besides strapping EVERYTHING down, ALL THE TIME, having a flatbed has been such a blessing! The thing's 7 feet wide and indestructible! Also look into Bradford Built beds, I've always liked the look of those.

@Malibusurfer, the entire thing is 1.5x1.5 12ga wall (roughly 1/8th inch wall). The base that rides on the bedrails and the rear standoff are 2.5x2.5 12 ga (just because that matched the width of the bedsides and gave it a nice profile).

@purdytj, thanks! and 12 valves are not awesome. 12 valves are EXTREMELY awesome.

OK, I got to hit the camper for about 10 hours today (I don't have classes on Thursday).

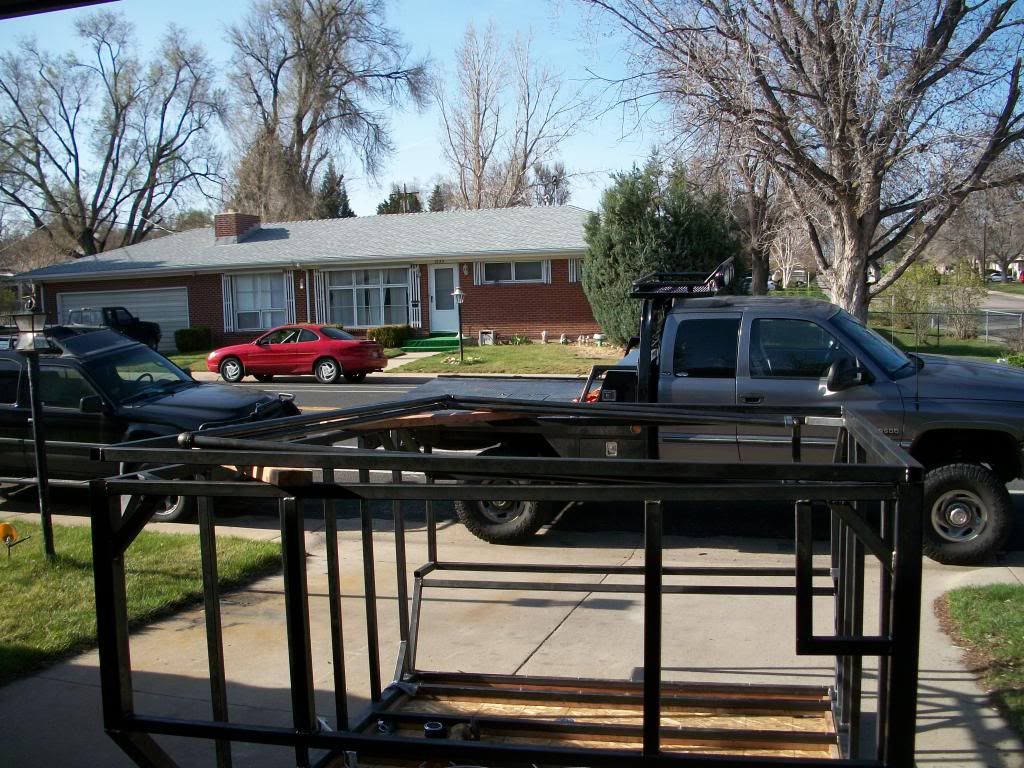
First order of business, get a "subfloor" in. On my flatbed, the bedsides are raised from the bed about 1". This meant that, the way the camper was sitting, all it's weight was riding out on the sides, and not on the "belly" of the bed. So to remedy this, and give myself a bit of "lateral stability", I turned the frame on its side and built the floor down about an inch with some OSB and a TON of sheet metal screws. Eventually I will tar the bottom of this to get it nice and weatherproof, and this is nice because now I have a "skeletal" chassis into which to build my electrical and plumbing. Then, insulation, then another thin sheet of OSB for the "top floor". Hopefully you can see in this picture how the wood dips down into the belly of the bed, below the camper frame:


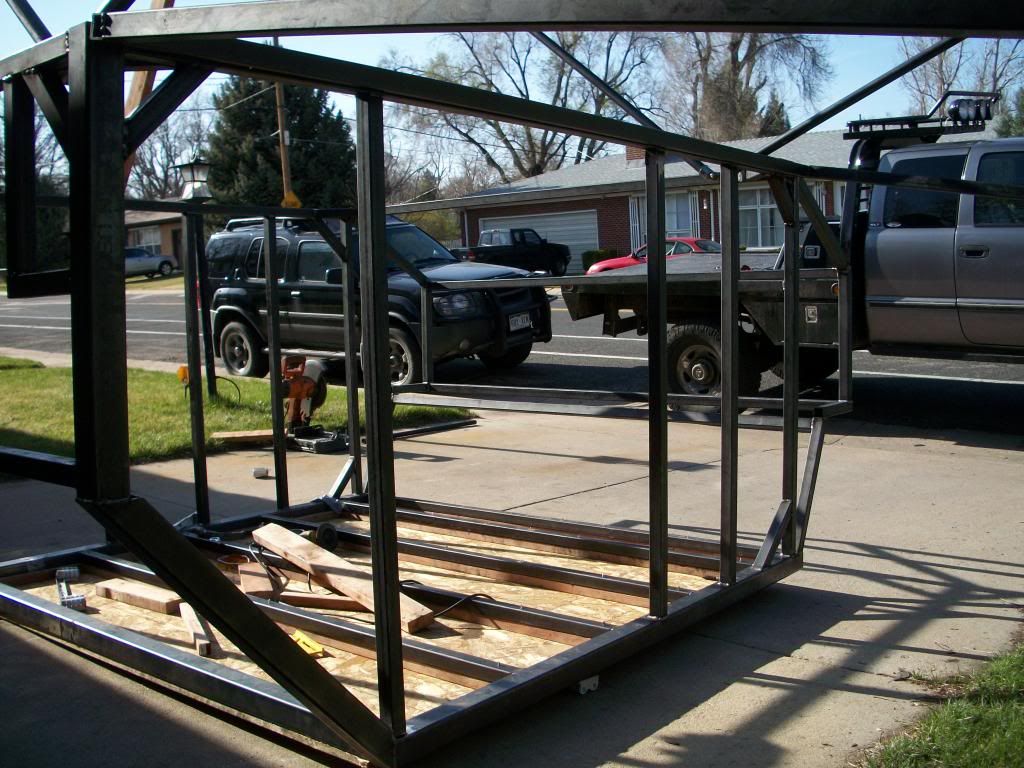
Also in that picture, you can see where the door will be (still waiting to get that, should probably just get on ebay...), on the rear right corner. Originally I was going to have a rear door, but that turned into trying to "reinvent the wheel", and got a little too complex. I like this approach better because now it's curbside, and won't be a hassle to get into if I'm towing and have the camper on.

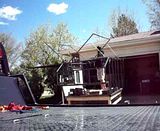
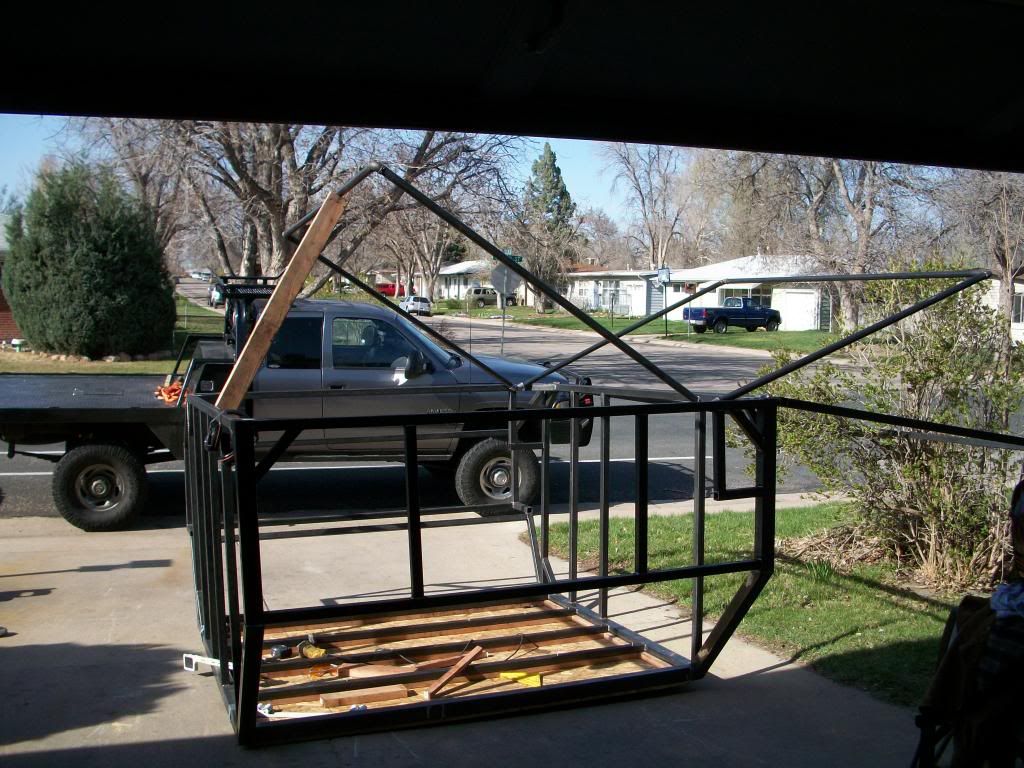
Next up, roof! So, this is hard to understand at the moment, but just think of a flippac, that opens sideways. On the top there is another 1.5x1.5" square that rests perfectly on top of the frame. Nesting inside it is another framework, made of some sch 40 and elbows, that opens and creates a tent frame. This way, my roof now turns into a 7x8 sleeping platform, and when the frame is up (at the height of my scientific 2x4), I'll have around 6'10" of headroom. The only thing I couldn't do today was cut and clamp the cables that will hold the whole ****eree together, just got too tired!


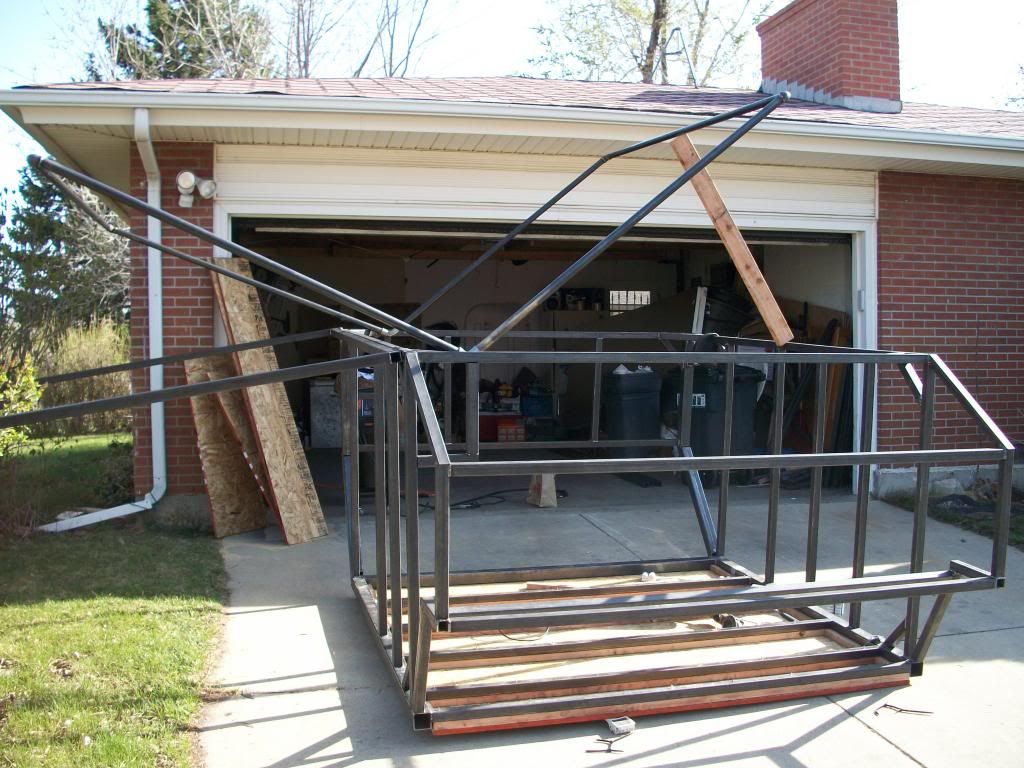
It opens off the passenger side, above the door, so it doubles as a shelter for outdoors as well!


And here's a rough idea of how it all nests back together:


Obviously there's still a ton of work left, but I think this helps give a better idea of the end goal!

Thanks for checking in!
 

Saiyan66

Adventurer
Definitely love what you have done with the truck so far. I am really interested to see how your camper turns out. Looks like it will be well thought out. I like the "Flip Pac" style top idea. You might have already checked into it, but maybe someone like CVT could make you a top for it?
 

chilliwak

Expedition Leader
I like the look of your camper GJS. Like mentioned before the flip pack is a great idea and will give you lots of room. The only thing I am concerned with is the use of osb particle board for your flooring. My experience as a carpenter is that it turns to mush when exposed to the elements. Lets hope your tar treatment will keep it protected. Keep us updated with lots of pics. I am anxious to see how it turns out. Cheers Chilli...:)
 

colodak

Adventurer
Nice looking truck, a couple of thoughts for you. 1. Yes, paying a shop to do your heater core next time is definitely a smarter way to go, at least with the Ram you don't have to roll the dash out like the smaller Dakota, when the heater core goes out on my Dakota I let someone else do it, I just remove a few outer pieces of the dash for them. 2. Your fuse block, check Summit racing, I have this unit http://www.summitracing.com/parts/prf-70203/overview/ installed inside one of my rear taillights to supply power to items in the bed of my truck. It's weatherproof, with a HD cover on it. They have larger models that this.
 

redthies

Renaissance Redneck
I agree with Chilli about osb, but I have seen it used on the floor of rvs many times before. It would NOT be my first choice. A marine grade of plywood would be a much better option. Take a scrap of osb and put it in a bucket of water for a week. This will be a good simulation of what will happen over time. No matter how much tar or other waterproof agent you apply to the osb, it will eventually soak up a ton of water and disintegrate.
 

GJStringert

Observer
Cables are in!

Hello all, and thanks for your interest! I need to make this post super fast because my girlfriend just got dinner ready haha! We hit the camper for a few hours tonight, mainly finishing up some welds, but mostly getting the hinges and tent frame good to go, along with their support cables. here's a few pics of the progress:


There is a turnbuckle in the main horizontal cable to "fine tune" the rigging:


And I still need to weld in some stops to catch the frame coming down, but everything still nests and matches up nicely!


...sort of reminds me of building a really big 4 ling suspension haha!

Well I gotta go for tonight, but thanks for looking and I'll check back later this week!
 

GJStringert

Observer
Happy Thursday!

Howdy ExPo! You know what today is: camper day!

First order of business, finish framing the rear standoff:


Then, frame and "floor" the "clamshell canopy". The frame is the same 1.5x1.5" tubing, but the "joists" that span across to hold the plywood are 1x1, while the plywood is .5" thick. This way everything rests nice and flush.


Now, redthies and chilli, probably a good call on the OSB vs plywood. I was renovating an old camper trailer one time and they do use OSB in the floor of those, so at first, I thought "no harm would be done". Then, however, I kind of started to remember how cheaply RVs and campers are made anyway, so I heeded your advice: out with OSB, in with ply! (Flipping this beast on its side was NOT fun, luckily I had a Drew!)


The good news is that OSB wasn't a total loss. It's already cut to the spec of my floor, so once electrical and plumbing is checked off the list I can insulate and lay that down, and I'm set!

Speaking of electrical, this is in the mail as of tonight:


I'm probably going to have to devise a way to put one of those panels on the portion of the roof that flips open (they're 59x26" each), while the other stays on that slanted front portion behind the roof rack. I think what I may do is fab a little slide system that allows the panel to slide forward once the clamshell is opened, then flipped 180* so it is facing upwards again. Anyway it's a 280 W kit designed for use in small cabins, and BIG RV's, so it should be perfect for my baby earthromer type machine!

A bit further on the electrical: so, as we ARE a community of curious explorers, I HATE the idea of finding a place to plug in a camper, at ALL TIMES. It ruins the idea of off roading! Further, I really don't like generators, they're noisy and cumbersome, and that just means I have to carry gasoline in addition to diesel when I go on my outings. As such, I have done my very best to set this camper up so that it is very dry-camp friendly (i.e., no water and electrical hookups). The end result is going to, roughly, be the 280W panel and charge system above a "hookup" isolated via Blue Sea goodies to charge batteries off my alternator while driving, 4-200 AH marine batteries, and probably three inverters (maybe 2).

Now, hear me out, I haven't gone insane yet! Inverters are, by nature, quite inefficient. My original plan was to just dump an enormous amount of money on a 5KW inverter, but I got to thinking, and realized I'd never need that much, all at once. So here's what's going to happen: the A/C will get it's own, dedicated 1KW inverter. It's really not ideal, but that A/C unit was one I already had, and I wanted a wall-style unit, not a roof one, because the roof flips! Obviously field tests will tell but all the research I've done says this should be a decent setup.

The "kitchen" will get its own 1.5KW inverter for small appliances and the ALL IMPORTANT coffee machine! (my father and I LOVE coffee, and one thing we can't stand about hunting and hiking is making that nasty instant coffee. this rig may just get it's own Keurig machine!).

Finally, wall outlets will get their own 1 KW inverter (probably a 500 W with a 1K peak), for charging GPS and cameras, etc.

This way, when things are not in use, I can just shut them down and conserve every Watt possible!

Otherwise, just about everything I can do with materials gathered locally is complete. The next step is mounting these:


They should be here by next Friday, and couldn't have come sooner. We have DESPERATELY needed to get jacks under this thing, Drew and I are guessing this chassis is close to 700lbs by now...

Further, a 42x42" teardrop door and two 24x30" tinted windows are in the mail as well. Yay Ebay!

Well as always thanks for looking, and take care all!

Graham
 

redthies

Renaissance Redneck
Glad to hear you went plywood. This has the makings of an awesome camper and I'd hate to see it rot out early. I'm sure you'll still waterproof the hell out of the ply, right?
 

MT6bt

Rock hound
I have been watching this thread with gitty anticipation as to see the final result! Well done, sir!

Also, as a fellow coffee enthusiast (fanatic?) i'll suggest to you to ditch the keurig/auto drip and get yourself a French press or a percolator! I'd lean more towards the French press for it's quickness and ease; all you have to do is pour hot water in and wait a few minutes. The percolator makes better coffee but the French press comes in a close second.
Just my .02 :coffeedrink:
 

SDDiver5

Expedition Leader
Dude nice work!! I love your fab skills. Where in Co are you? I have family in FoCo and I visit all the time. I'd love to see some sweet CO trails, and, of course, your sweet rig.
 

GJStringert

Observer
Thanks all!

redthies, worry not, the ply will DEFINITELY be getting a good weather proofing treatment!

MT6bt, haha I actually do keep a percolator in my backpacking gear, because it certainly does make coffee-making more simple. However, I admit, I'm a bit lazy, and pressing a button and getting coffee is darn convenient sometimes!

SDDiver5, thanks for the compliments! I'm living in Greeley fulltime right now (I'm fulltime at the University of Northern Colorado), but only for a while longer. I'll be picking up my summer lab job in Pueblo shortly after the semester's out. Being in Greeley, believe me when I say I frequent FoCo and Estes Park pretty often!

Door arrived tonight, and I'm picking up some siding next week, when I get some time. Stay tuned!
 

Luckychase5

Adventurer
Awesome Build!

Just wanted to say hi to a fellow Cummins guy, and you have an amazingly unique and cool build going on here. I love all the custom fabrication you've been doing, and I can't wait to see you finished product. Keep up the good work!
 

GJStringert

Observer
A Might of Progress...

Hey folks! Just a quick update here, and hopefully a few questions answered.

First off, and I apologize, this was so far back I can't address it to who asked it, but the tent top portion of this camper will likely be made out of canvas, from the Denver Tent Company. I did a lot of research and flippacs and other things like the Earthroamer jeep conversion use much lighter tent material (similar to a backpack tent), which is fine, except it requires a rain fly. Now, honestly, canvas is NOT perfectly water proof either (and I toyed with the idea of doing vinyl, like the true popup truck campers use), but for the use this camper will see, where occasional rain is possible, I'm thinking it will do just fine. Heck, my dad's Alaskan canvas wall tent we take on our antelope hunts has outlasted MANY a torrential downpour and I honestly don't think he's water-proofed it!

Luckychase5, thanks for coming over for a look! I always appreciate thoughts from a five-nine-guy!

Ok so the jacks arrived today. They're not mounted yet (can't be until the frame is painted and skin is on), but I figure I could at least get them in "mock-up phase", and to do that the camper had to be up off the ground, high enough so that the jacks could retract and still allow me to push the camper in and out of my garage. We had to get dangerous with the math on this one...

So we slammed together a little table out of some 4x4s and 2x4 scrap, and a buttery-smooth set of braking castors.


Now I can finally move this thing around easily, and once jacks are on, throw it on the truck for some fitting. Also the teardrop door arrived. It's also in "mock up" right now, just needed to get the framing complete so I can hit this thing with some paint sometime [hopefully] soon. It probably won't stay white, I don't like white...

The jacks are some nice Atwood electric jacks with a remote kit added on. These will be hella handy for one-man loading (likely just myself after work on a Fridays or something like that!).


That's all on the camper for now, but in other news (if you recall from page 1 or 2 of this thread), I used to have a switch panel I made from some acrylic for my lights and compressor. Well I had a few hours last Friday night so I made a new one with provisions for my airbag fill switches (I'm oh-so-slowly getting those ready for install), and added 2 more switches for future use. This one is made from some scrap 12 ga I had, and instead of black I hit it with a little Chrysler gunmetal to bring some of my exterior in. Turned our ok for just some dremel work!


So my schedule's a bit off this week, but if I can pull the strings right Thursday should be camper day like usual. Hopefully I'll be back then!

Take care,

Graham
 

GJStringert

Observer
Jacks are mounted, canopy has been reworked, windows and solar are here!

Hey ExPo!

Let's get to it. So, this was my old "hinge" setup for the canopy:


It worked, but those cast aluminum pocket hinges and single-sheer bolts were a little questionable. "Sketchy", as the college kids say...

Here's the new setup:


REALLY big bolt (3/4"), REALLY big "hinges" (top links for tractor supplies), and one VERY hot, thorough weld to hold it to the frame. Now, I am NEVER a fan of single sheer, let me make that known, but this framework will only be carrying the weight of some canvas, and holding a bit of the load of the newly engineered powered-closing feature, so I'm pretty comfortable with this setup.

Ok next up, powered opening/closing. When we framed and floored the canopy it got heavy VERY fast (honestly I was surprised, I didn't think it would make such a dramatic difference). So now the setup will have "hydraulic" struts to force it open, and a winch to pull it back closed. Refer to the very scientific doodle below:


So dashed line is winch cable, solid lines are support cables. It's not to scale, and the geometry is a bit off, but the idea is 4, 185lbs struts (think hood prop struts for your car) that will keep the canopy in constant "tension", and all opening/closing is controlled by the winch. This will minimize setup time; once the rig is in camp, all we've got to do is power the winch out, and let the hydraulics do the rest. The struts were ordered monday, so they may be a little while longer getting here. Otherwise, while Drew was here today, we got the winch, or "Powered Closing Feature" installed!


and hopefully the video plays as well:


(If it does play problem free, pardon my camera, it's not great for shooting video...)

I also finished up mounting the jacks (these are going to have to come back off, along with the door, to paint the frame)


I had to cheat the passenger rear one off at a little angle to let the door open wide, but it'll still work just fine:


And finally, right as I was putting stuff away for the night, the UPS dude showed up with a few boxes:


That's right! Solar and windows are here! Just a little framing for these, some paint, and this thing's ready for skin!

Thanks for looking, and take care!

Graham
 

ripperj

Explorer
Dude, are there more than 24hrs in a day where you live? :) you work quickly!
Nice design, although I do have to admit I was waiting for you to get whacked in the head with the floor in the video :)
Can't wait to see the final outcome .
Keith
 

Forum statistics

Threads
186,667
Messages
2,888,619
Members
226,767
Latest member
Alexk
Top