New Guy, '97 12 valve, Many, Many Adventures To Go!

poriggity

Explorer
I was looking at that same tank from hf, but with only one port, can you elaborate on how you plumbed it for an inlet and outlet?
 

XRrider

Observer
Great looking truck, useful without overkill or 'hey, look at me' modifications. Colorado looks better every time I see photos from folks out that way.
 

GJStringert

Observer
Thanks all, really appreciate the input! I got a big box of stuff from DIY 4x4 and Ballistic Fabrication on Friday!


(U-bolts thrown in to complete the look...)

Everything is "sitting in paint" in my garage, hit it all with some Sherwin Williams Heavy Duty black enamel, for hella-rock-chip-proofness


SERIOUSLY high quality stuff from the looks of it, this is the first I've dealt with both companies, and they both appear to make some top of the line products, I'm very pleased. I'm pretty sure the box my shackle flip came in weighed a metric ton... Anyway I should be putting it all on next Saturday, little update to follow... I'm really looking forward to getting that done, that way i can get rid of my dumbo 4.5" block and overloads, and just run a 2" block and 3 leaves. Gotta love trying to turn a 3/4 ton into a Tacoma-esque trail machine!

I also pulled some pictures from my phone from the roof rack build:

Bottom frame started as a stick of 1x2 tube. If you look closely, you'll see we actually cut wedges out of the straight stick and bent it with a rosebud to get the 45* corners. This made cleaning the welds a little easier


Then we traced that shape onto some expanded metal (I believe it was #6), and tacked that all over, flush with the bottom, to complete the "basket". Also in this picture, you can see the little corners we used for the schedule 40 top hoop.


We did that using 5 90* corners: we cut one in half on a bandsaw to get 2-45* elbows to make the hoop rake up over the lights. It fools most people into thinking we used a pipe bender!

Attached that, and put the whole thing up top for a test fit (take note of the very scientific 2x4 spacer on the roof. Every shop needs a few of those!)


Pulled it back down, ground every weld on the 1x2 and sch. 40 with a sandpaper flapper to disappear them, and made some huge 1/4" mounts and gussets. Now I owe Charlie for this one too, this was EXTREMELY clever. Earlier on when I had my lights mounted to the piece of L-angle, they were supported by just 2 holes through the rack. We drilled those out to 3/4", and built the supports off of that. No welding to the headache rack (which meant no ruining the nice powdercoat paint), and it's still completely removable. SO SWEET!


I admit it's probably a bit over-built, but I weigh 180-ish lbs and I can sit on the hoop out over the lights, and NOTHING, not the headache rack, or the roof rack, so much as creek. Thanks again Charlie! (my girlfriend's father, he's silently following the build along...)

So next weekend comes the shackle flip, then I have to retrofit my airbags to that (thinking I might also fab up a few "airbag cradles", similar to the Daystar ones, to compliment my new and improved rear suspension), and hopefully soon after that comes dynamat. I love the mild performance gains from removing that kinked down horseshoe bend of exhaust pipe from over the axle, but now that it's close to the cab it is WAY too loud. Car Toys quoted me $1000 to do the whole thing, so I suddenly became very motivated to do it myself. Update to follow pending... That's getting pricey...

Well once again thanks for checking in!

Take care,
Graham
 

GJStringert

Observer
I was looking at that same tank from hf, but with only one port, can you elaborate on how you plumbed it for an inlet and outlet?

You caught me! At the moment, it's all tee-d into that one input. Basically, it's not a true system, yet. The tank shares volume with the lines shares volume with the small in-compressor reservoir, which, when this pressure reaches 140, kicks the compressor off. I put this up knowing I'd have to pull it down to plumb an output to supply my airbags (I have the Firestone bags with in-cab controls, so I'll be pulling a 1/4" hose off the tank all the way to the cab control). When I to that I think I'm just going to drill a hole through the tank somewhere up high and weld a nut on as a "fill bung" for the input from the compressor, so the big brass valve/manifold there will be my main output. Good eye!

I'll take some pics when I get the airbags plumbed.
 

poriggity

Explorer
I have a similar tank that had a tee fitting on it. I put a couple of 3/8 hose barbs on it so it will essentially be the same setup that you are running. Should work fine as the pressure switch I am buying is designed to shut the compressor off at 120 psi, and the tank is rated for 125. Now I just need to figure out where and how to mount the tank. Loving the build!
 
Last edited:

GJStringert

Observer
A Shackle Flip, Dynamat, and a Camper!

Hello all! I've decided I need to try and get better at logging on more often then every three months... Busy busy!

I'm still slammed with school and stuff, and getting ready for my lab job this summer, but I've done some work on "Mater" since I last checked in!

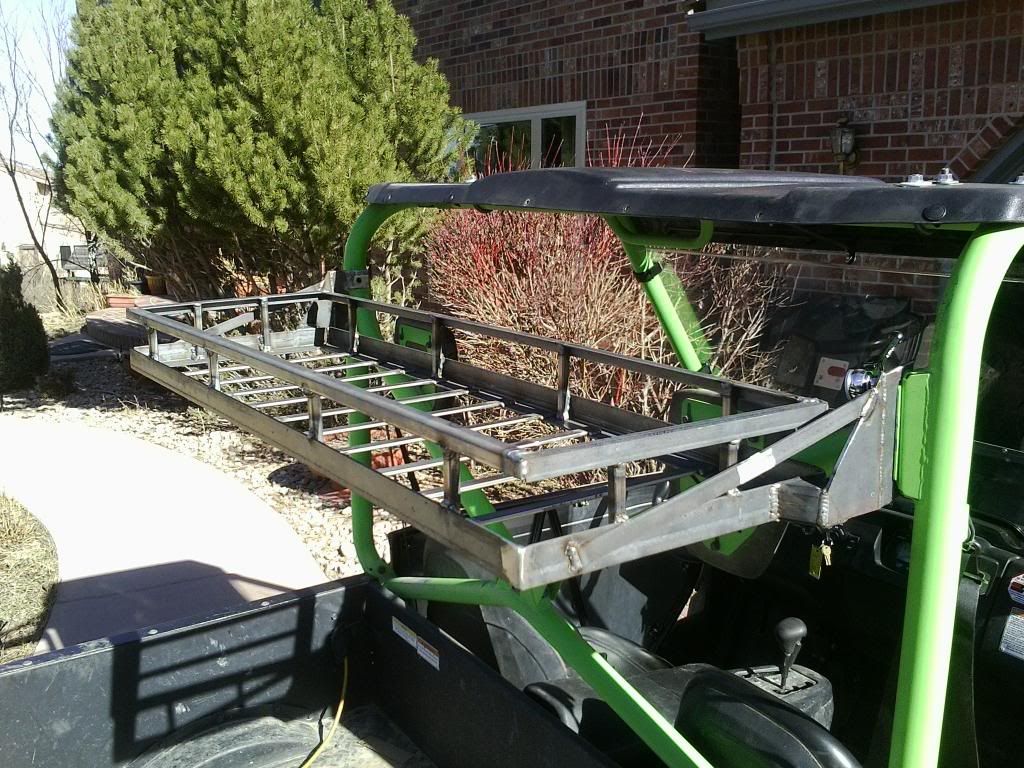
First, I figured you all could appreciate this: my dad had me build him a little rack for his Kawasaki Tyrex over my spring break when I was home. It's "expo" esque, and totally trick. It indexes off the existing rollcage mounts so there is no drilling and welding to the frame! Not bad!


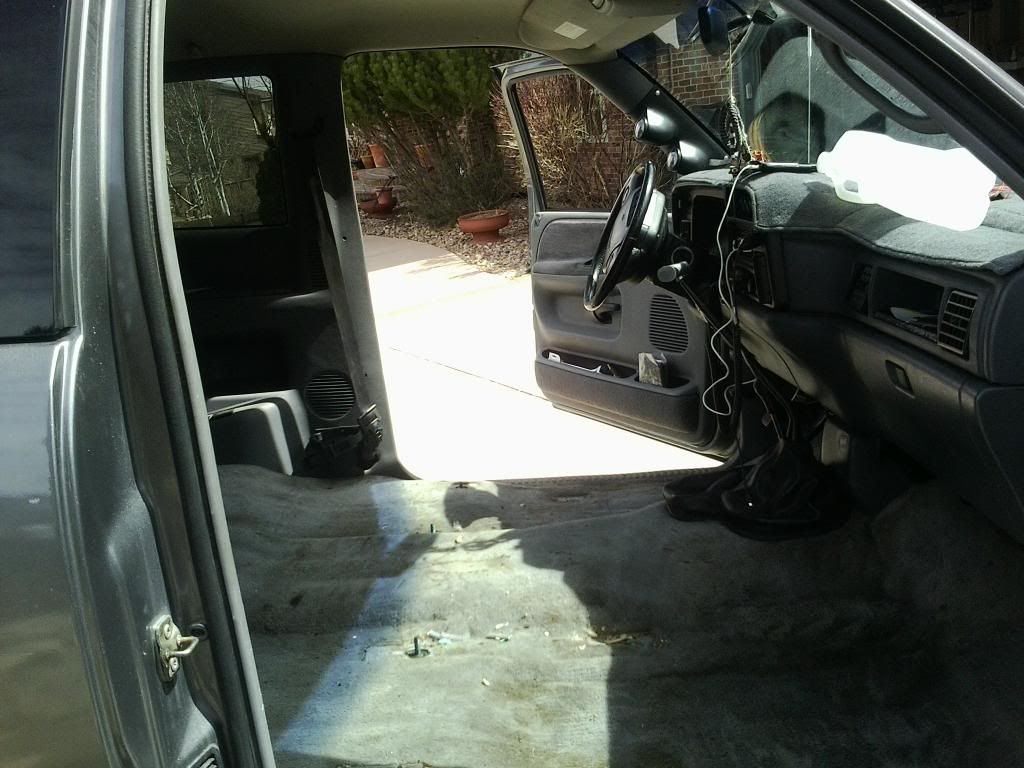
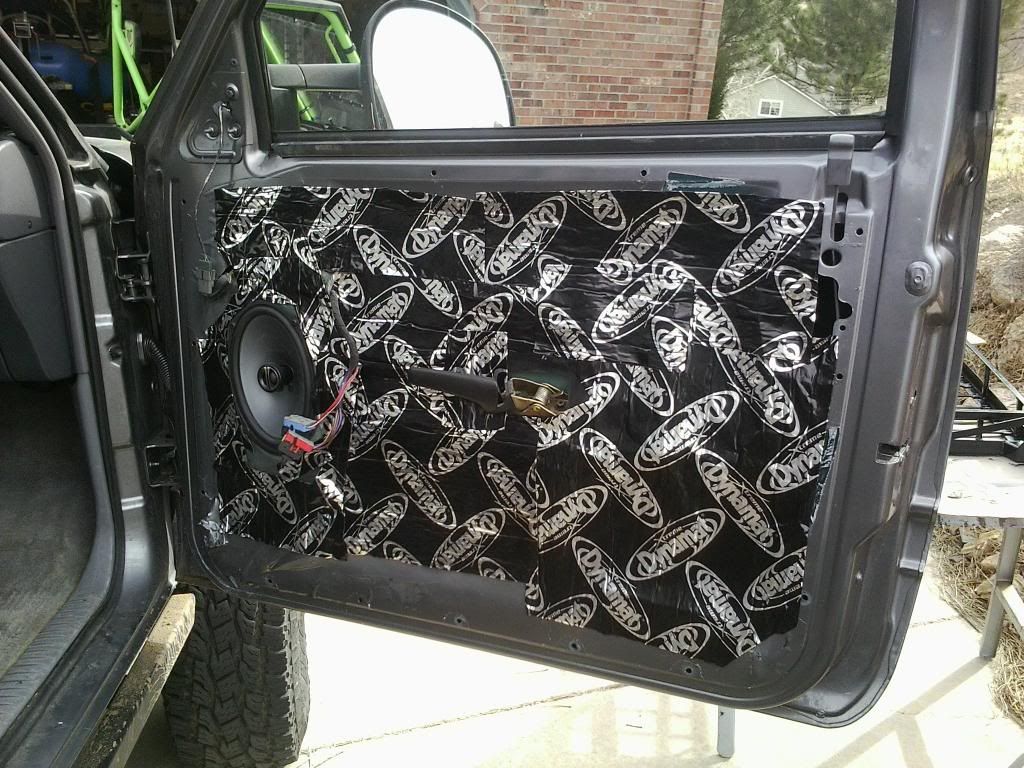
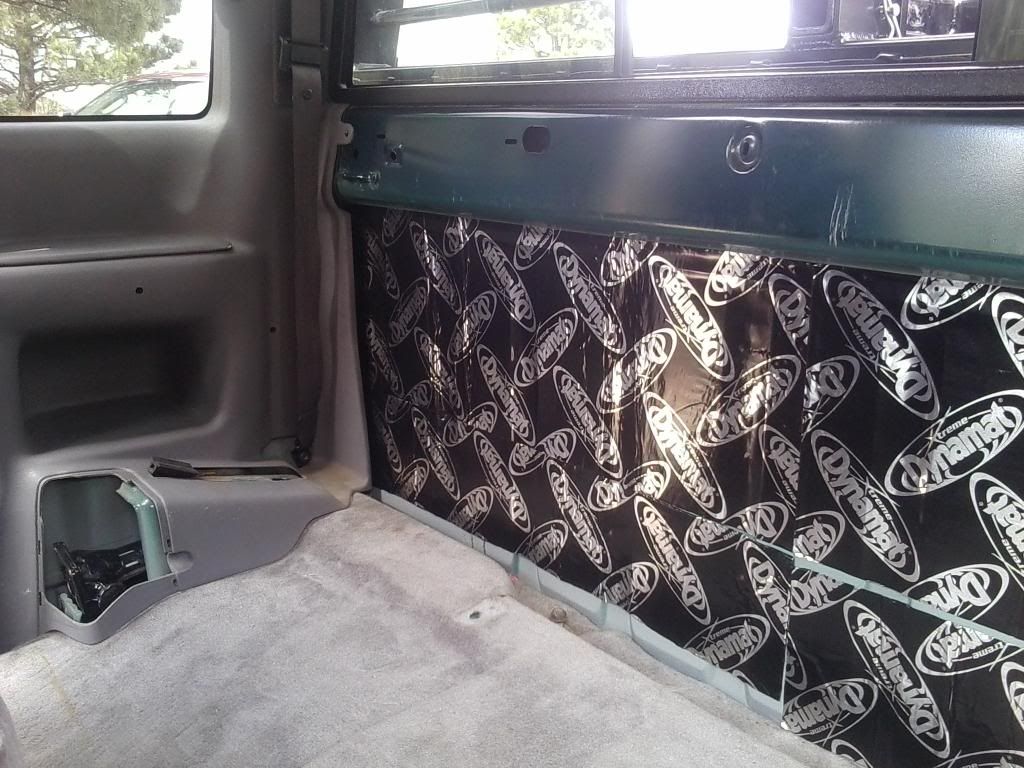
Then, with my brother's help, I pulled the entire interior on the truck and put down about 40 sq ft of dynamat. Expensive stuff, but is seems to have been worth it!


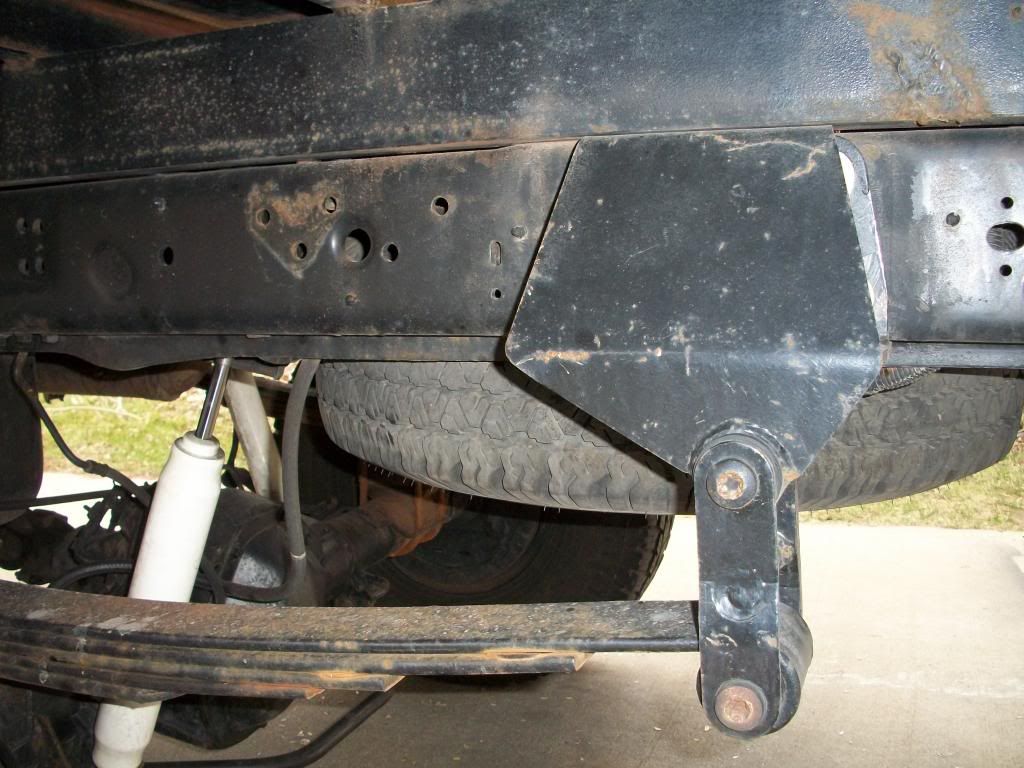
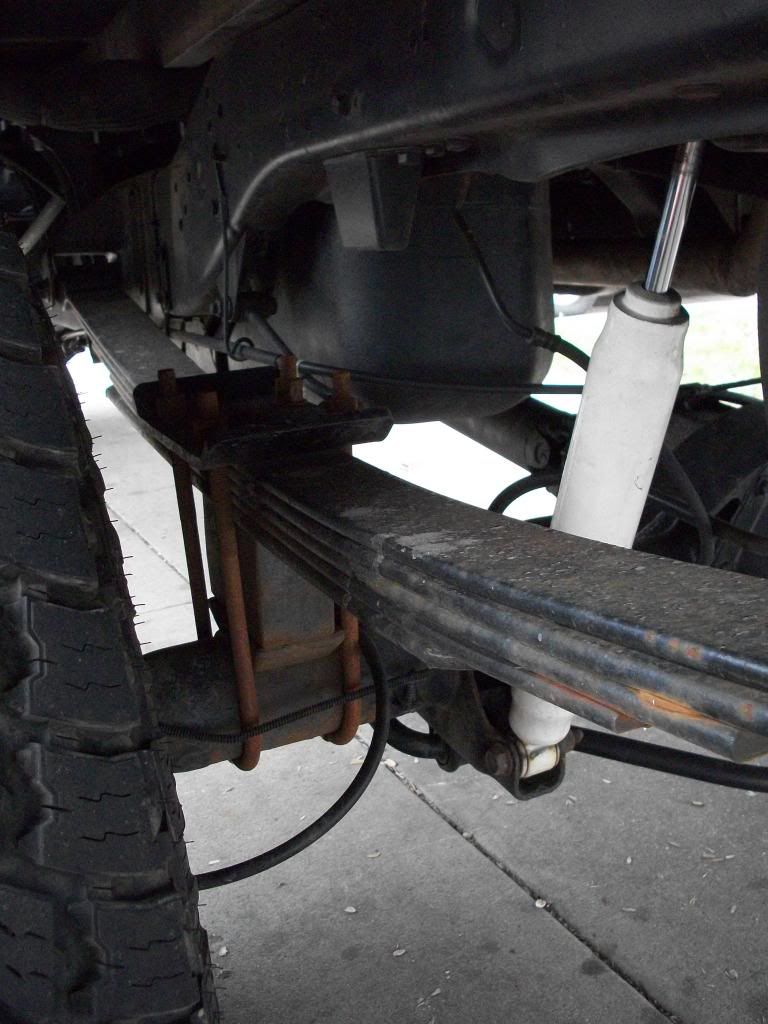
I also got the shackle flip and U-bolt flip installed a while ago! (complete with a fresh layer of rust!)


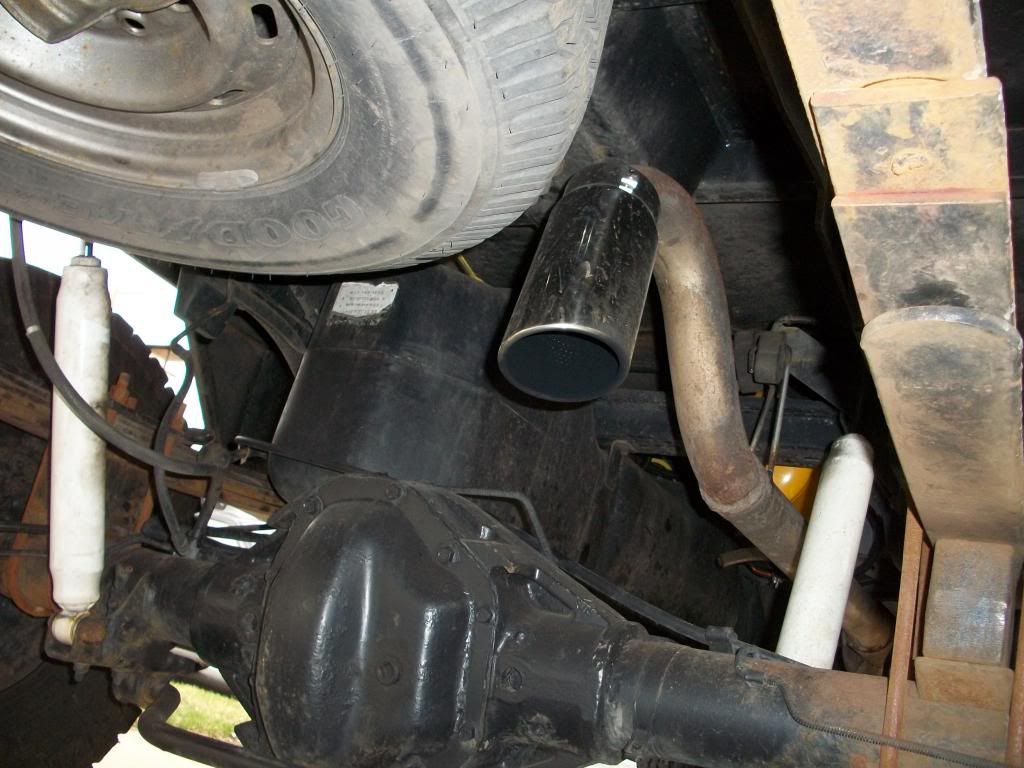
I also re-did my exhaust for the 3rd time haha! I had a trip for school to the sand dunes down in Alamosa, and from where I live currently, that's a 5 hour drive, and not one I was wanting to complete with no muffler or cat... so I welded the factory junk back in and did it "turn down" style to maintain my high clearance. I kinda like it! The generic "rice rocket" polished tip actually looks ok up there haha!


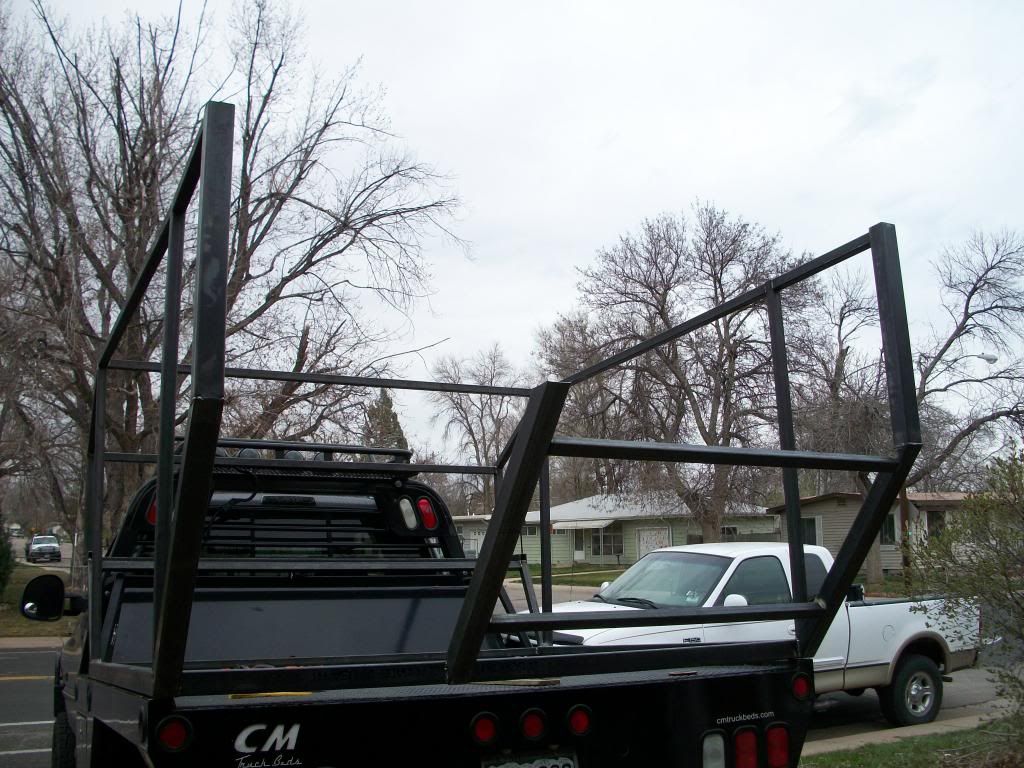
And finally, something TRULY expedition inspired. I've been planning something on the order of a camper for a while. Ever since my girlfriend and I camped in Moab last summer, in the middle of July, in a tent, I vowed to never be left to the heat, EVER again. I know it sounds ridiculous, but I know if I have the room on a flatbed, there HAS to be a way to make something off-road savvy that's comfy as heck too (and has A/C). So, here's the general plan I doodled up one day after school:


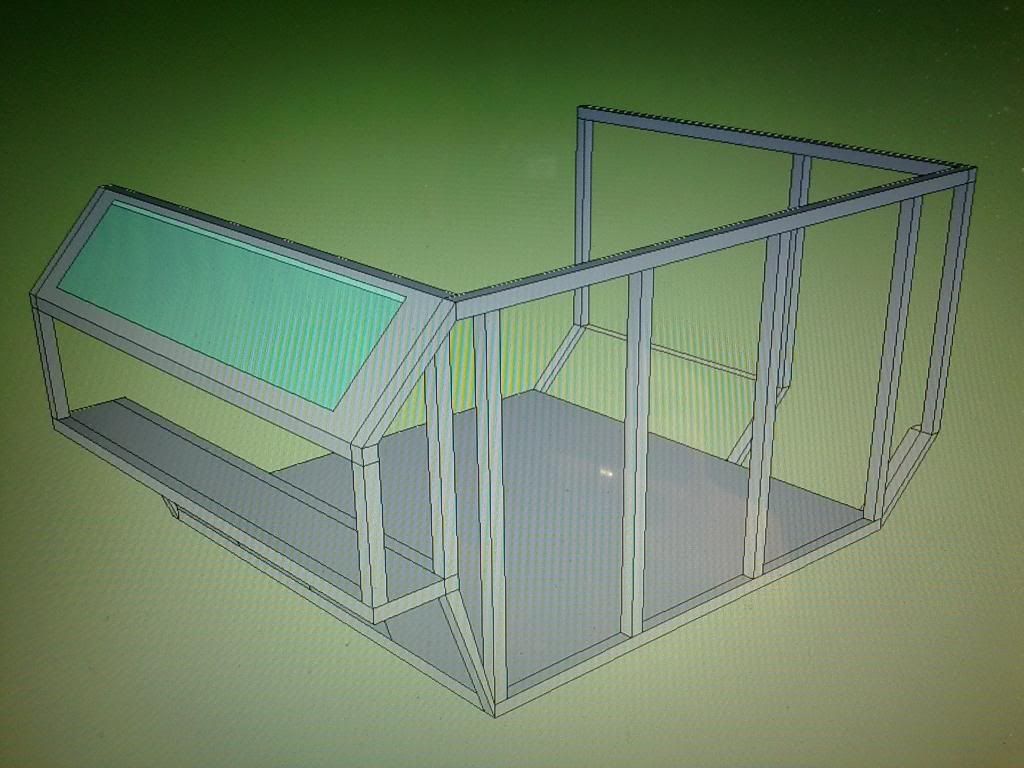
I'm not very artistic with CAD programs, but that's a general idea. I don't want to divulge any on the roof yet, that's a surprise for the end! So I got the general framing going last night, and did as much as I could today with my friend's help, but I ran out of C25 and steel, and tomorrow's my girlfriend's birthday, so I'll have to push this aside for just a bit, for now. Here's the progress we DID make:


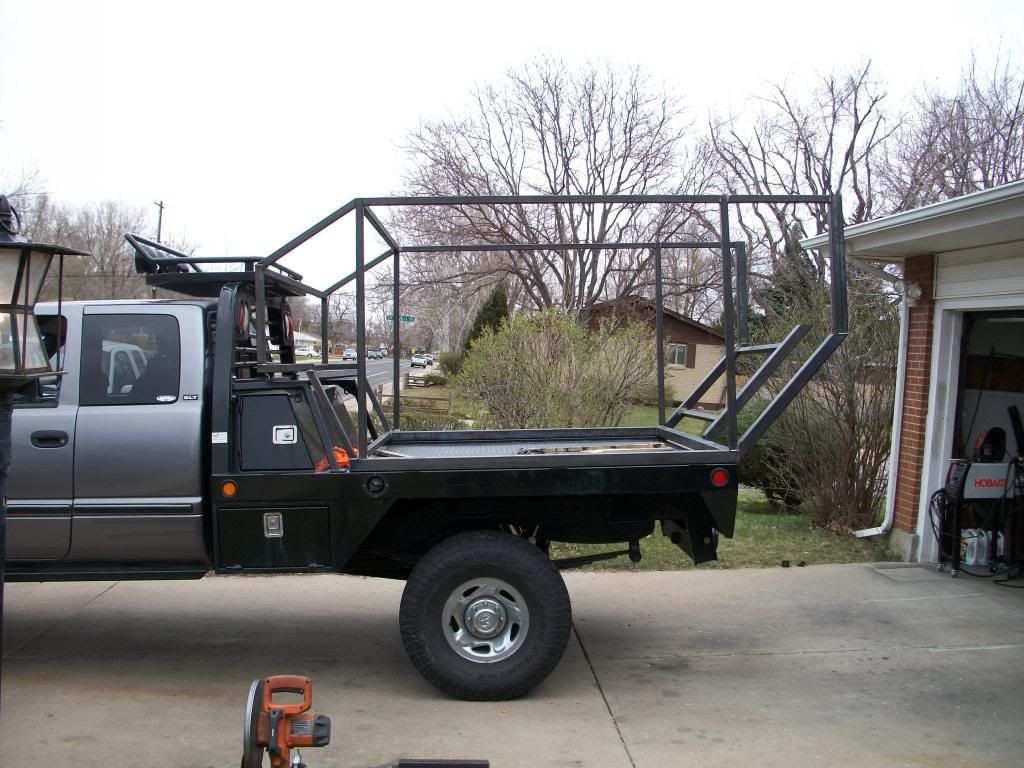
Think of a Unimog, here. I wanted the back end to have a "standoff", to make up for the room I'm loosing with my toolbox up front.


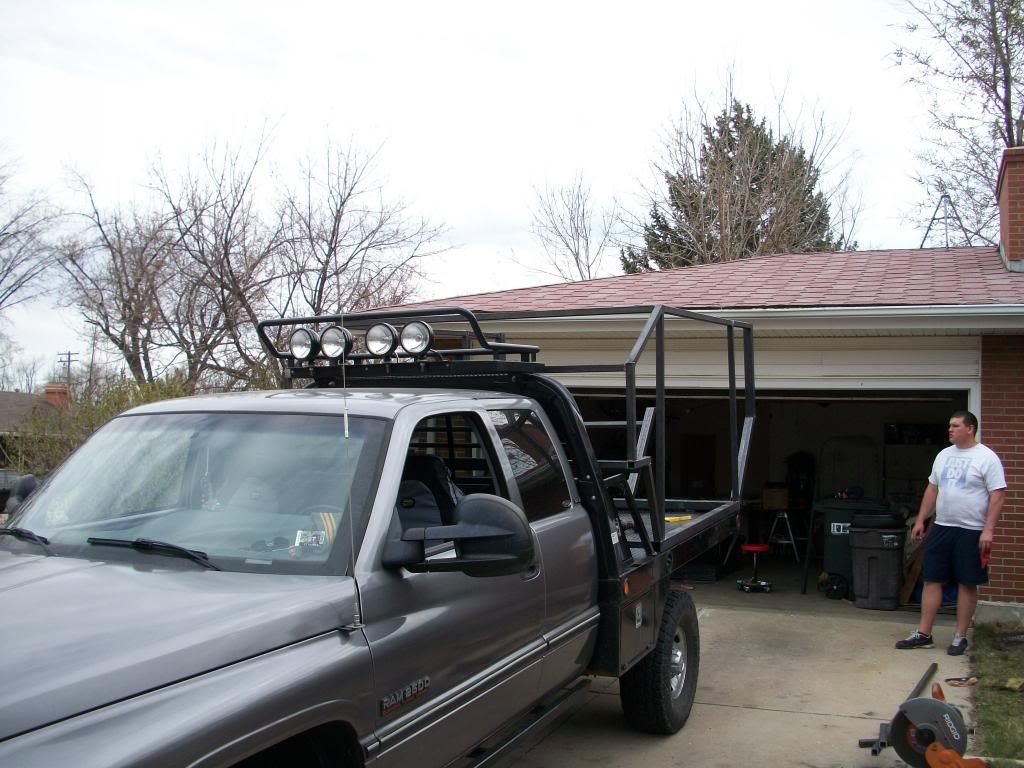
In that picture you can see my buddy Drew. He's 6'5" tall and weighs 345 lbs. He's handy for projects like this!


This frame currently weighs in at about 200 lbs. I've got more to add to it, but I'm not that concerned with weight. As it stands I have around 1500 lbs of payload at my disposal, leaving room for luggage and water, my girlfriend, dog, whatever. That's all pretty conservative.... hopefully...

So for the time being that's all I have done! I hope you enjoy, I always look forward to hearing what you have to say!

Take care all, and I'll leave you with a disgustingly low quality picture of the big bad cummins scoring a 600 on the RTI at the 4x4 shop!


ftballman125

New member
Camper looks sweet! I'm a bit concerned about your shackle angle though... 90* doesn't exactly provide the best comfort relative to a less steep angle...
 

GJStringert

Observer
Thanks! Yeah, I wondered about the shackle angle too when I first installed it, but I've had zero problems with it. It is noticeably more comfortable in the back end, now that they're out of that "tension" orientation. Also helps to have no overload springs! I still need to get the airbags in...
 

GJStringert

Observer
Framing is almost done!

Ok I got to hit the camper for a few hours tonight, here's the progress:

Finished framing driver's wall and the floor:


Gusseted [almost] every corner thusly:


And wrestled the behemoth onto the truck for a poser shot:


In the meantime I've been scouring craigslist for an old camper to snatch up for cheap and use as a parts donor (mainly looking for windows and a good propane system, and furnace. maybe if I'm lucky I'll rob some siding off it as well, but because of the "custom shape" of this camper build, it may be difficult).

Next chance I get, the floor is going down!

Thanks for stopping by!

Graham
 

purdytj

seeker
12-valves are awesome

Thanks for the great documentation. I like your fabrication skills and creativity.
Subscribed!
 

Forum statistics

Threads
186,667
Messages
2,888,619
Members
226,767
Latest member
Alexk
Top