You are using an out of date browser. It may not display this or other websites correctly.
You should upgrade or use an alternative browser.
You should upgrade or use an alternative browser.
Northern Explorer's 2015 TRD Off Road Tacoma
- Thread starter Northern Explorer
- Start date
bigskypylot
Explorer
I'll know in a day or two if it's totaled. The adjuster said something about damage to the firewall that cannot be fixed. So at this time I will be surprised if it's salvageable. The truck concerns me less than the camper. The camper roof has a hole in it and the underlining roof framing is bent a little. FWC needs to have the camper in their shop in California to do the repair.
Oh man. I just heard about the weather from some friends that were at UPO '16. I am glad that you guys are okay and the truck can be replaced. The FWC can as well but man, talk about a headache. Insurance will cover that and the transport to FWC, I hope. You may know some folks I know in the Marquette area and under the bridge?
Konkordmusk
New member
Why must they always go so young 
Northern Explorer
Explorer
Thank you Progressive Insurance. Not quite as happy with the camper fix estimate they gave me but it will all work out.
[URL=http://s983.photobucket.com/user/NorthernExplorer2/media/FullSizeRender%202.jpg.html]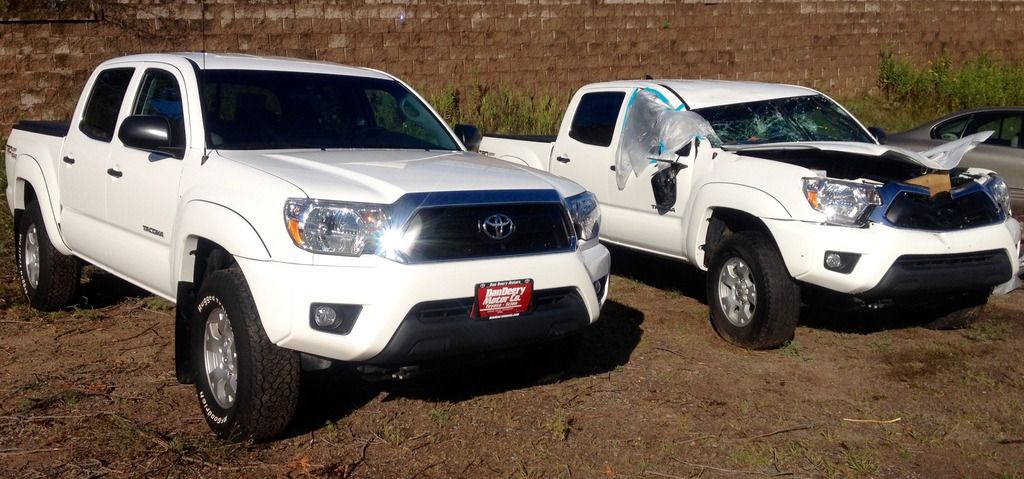 [/URL]
[URL=http://s983.photobucket.com/user/NorthernExplorer2/media/FullSizeRender%202.jpg.html]
 [/URL]
Northern Explorer
Explorer
Back Seat Shelving Unit
As with my Chevy Colorado I decided to remove the back seats and install a homemade shelving unit.
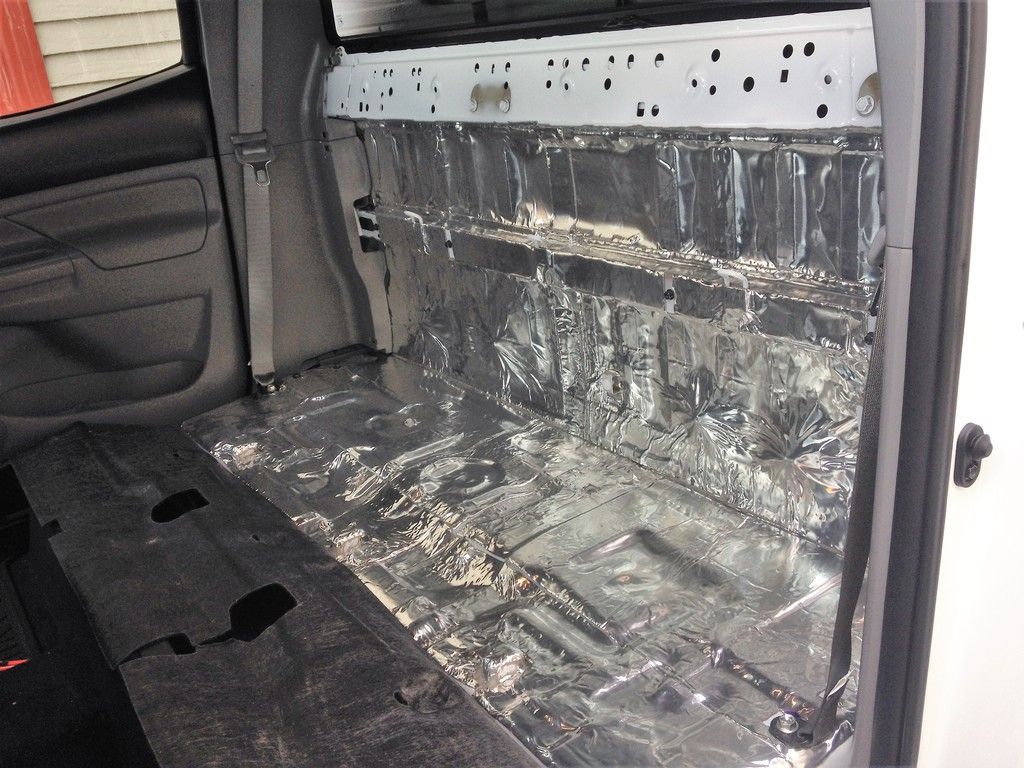
After removing the seats and the plastic, back wall storage compartment, I covered all exposed metal with RAAMat. I purchased 10 sheets and had one sheet plus some scrap left over. This stuff has the consistency of taffy covered in thick tinfoil. It was much more forgiving to work with than I was expecting. The fact that it was in the 40 degree range when I was doing the install probably helped.
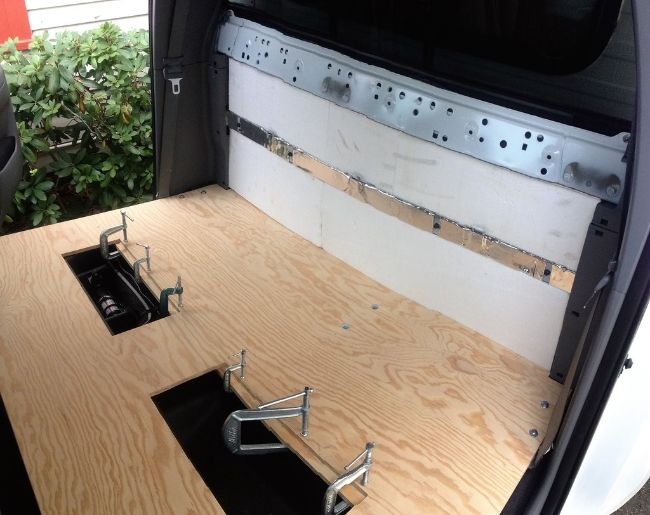
I used .5 inch marine grade plywood for the top and bottom shelf and .25 inch for the back wall. I cut holes in the bottom shelf in order to access the storage compartments underneath. I also added some .5 inch foam insulation to the back wall in order to fill the gap and add a little extra sound deadening.
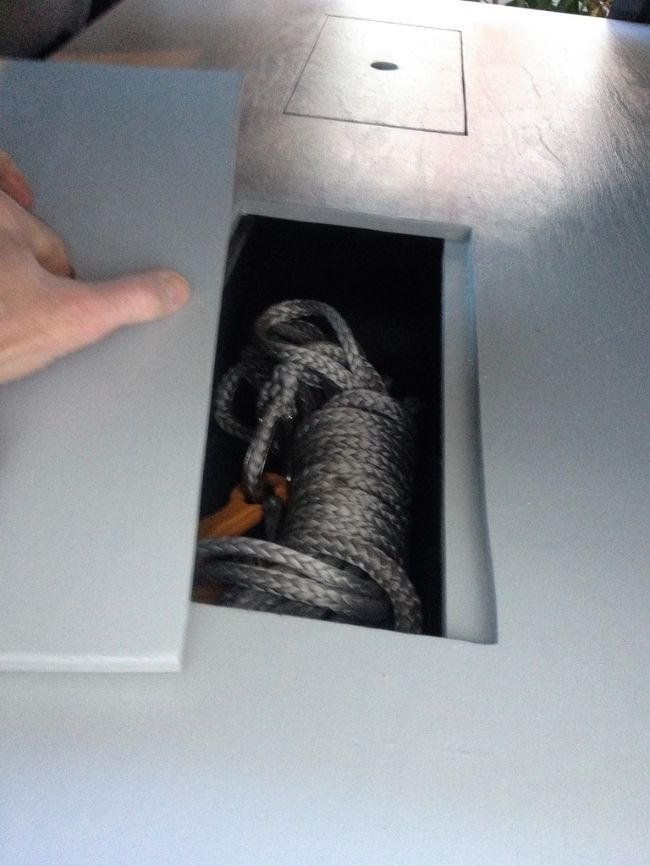
I painted the bottom shelf with light grey floor and porch paint and made some doors to cover the storage compartment.
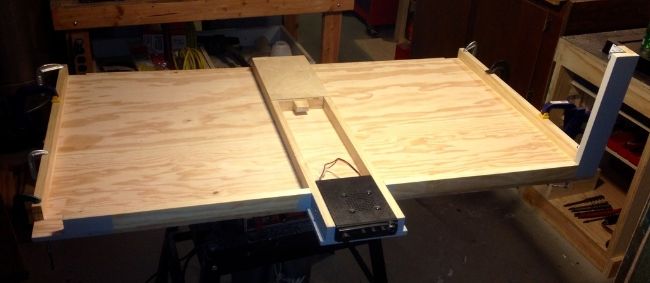
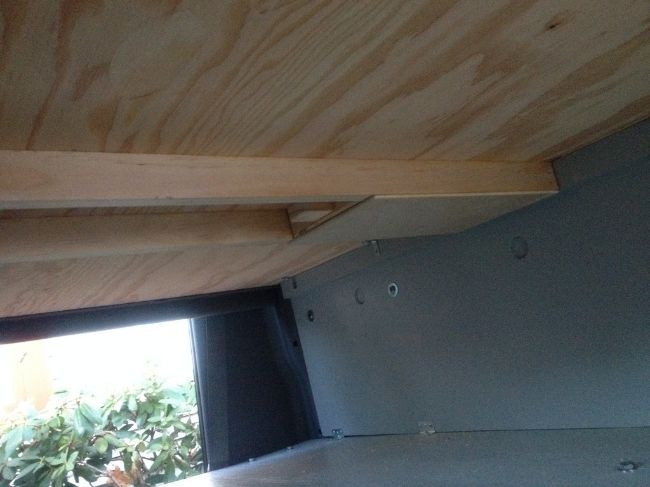
I reinforced the top shelf with some .75 x 1.5 inch (actual measurements) pine. I didn't want to put any unnecessary holes in my dashboard so I made a place to fit my cb. More on this in a future post.
underside of top shelf
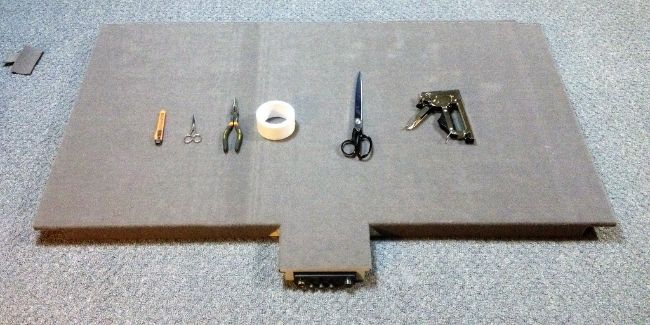
I then covered the top shelf with automotive carpet from O'Reilly's Auto Parts. (I would not recommend this carpet)
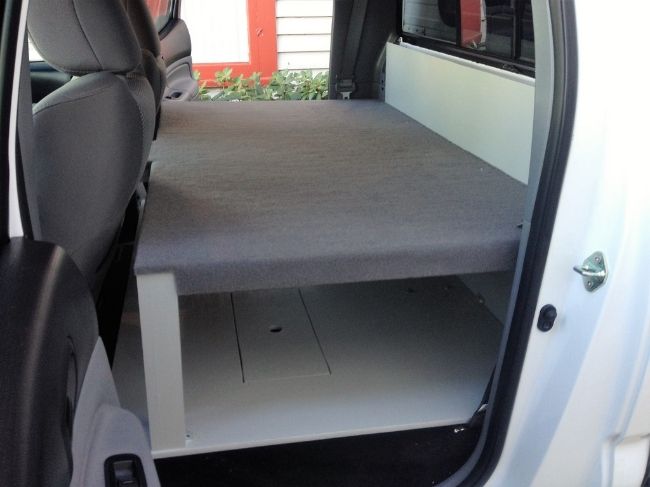
All in place.
.
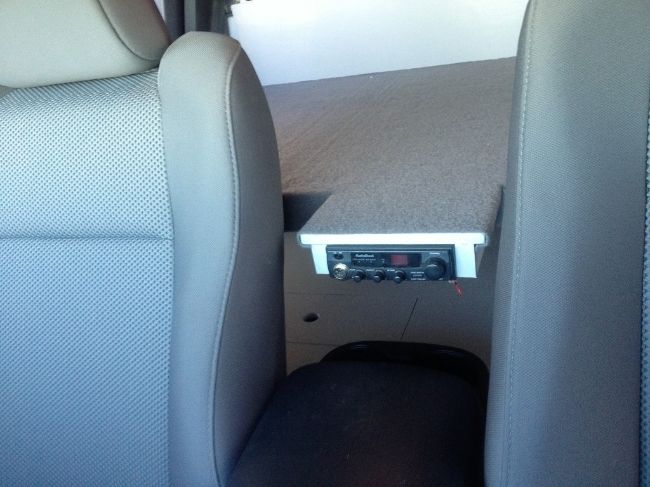
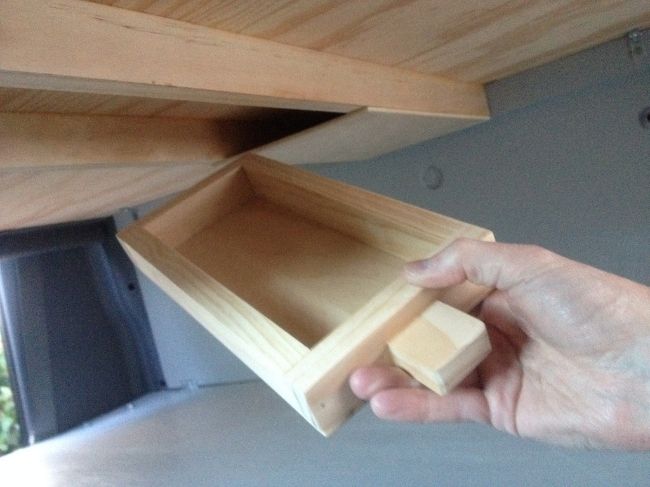
I even built in a super secret hideaway drawer. (don't tell anybody)
.
I just need to add some dividers to the bottom shelf to prevent things from sliding around.
As with my Chevy Colorado I decided to remove the back seats and install a homemade shelving unit.
After removing the seats and the plastic, back wall storage compartment, I covered all exposed metal with RAAMat. I purchased 10 sheets and had one sheet plus some scrap left over. This stuff has the consistency of taffy covered in thick tinfoil. It was much more forgiving to work with than I was expecting. The fact that it was in the 40 degree range when I was doing the install probably helped.

I used .5 inch marine grade plywood for the top and bottom shelf and .25 inch for the back wall. I cut holes in the bottom shelf in order to access the storage compartments underneath. I also added some .5 inch foam insulation to the back wall in order to fill the gap and add a little extra sound deadening.

I painted the bottom shelf with light grey floor and porch paint and made some doors to cover the storage compartment.

I reinforced the top shelf with some .75 x 1.5 inch (actual measurements) pine. I didn't want to put any unnecessary holes in my dashboard so I made a place to fit my cb. More on this in a future post.
underside of top shelf

I then covered the top shelf with automotive carpet from O'Reilly's Auto Parts. (I would not recommend this carpet)

All in place.

.

I even built in a super secret hideaway drawer. (don't tell anybody)

.

I just need to add some dividers to the bottom shelf to prevent things from sliding around.
Northern Explorer
Explorer
I'll have to keep the speaker carpet in mind for next time.
Northern Explorer
Explorer
sweet build. what you plan on running for rear springs or helpers for the camper if any?
I have installed Firestone Ride-Rite airbags in combination with Daystar airbag cradles. I have an issue I need to address with the airbags setup. I am also installing an Archive Garage shackle reverse kit along with longer shocks and brake lines. I won't have time to have it installed until next spring so there will be no write-up until then. I literally have a table full of parts that need to go on my truck.
Northern Explorer
Explorer
De-Chrome Grill
This is one of the few modifications I will be doing purely for aesthetic reasons.
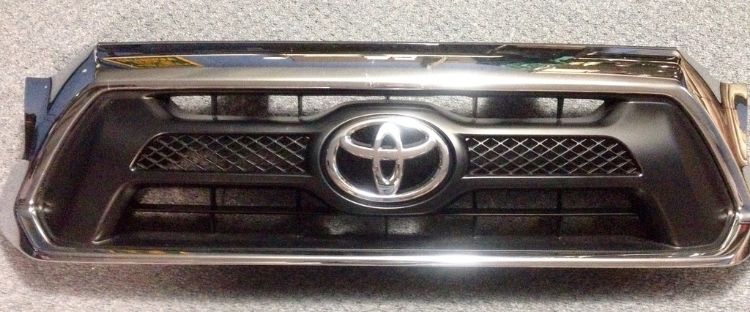
I first separated the chrome grill surround from the center section of the grill. I then attempted several different techniques to chemically remove the chrome. After inhaling my lifetime limit of fumes I decided that chemical removal was not a good idea and I just went to work on sanding the chrome with 120 grit sandpaper.
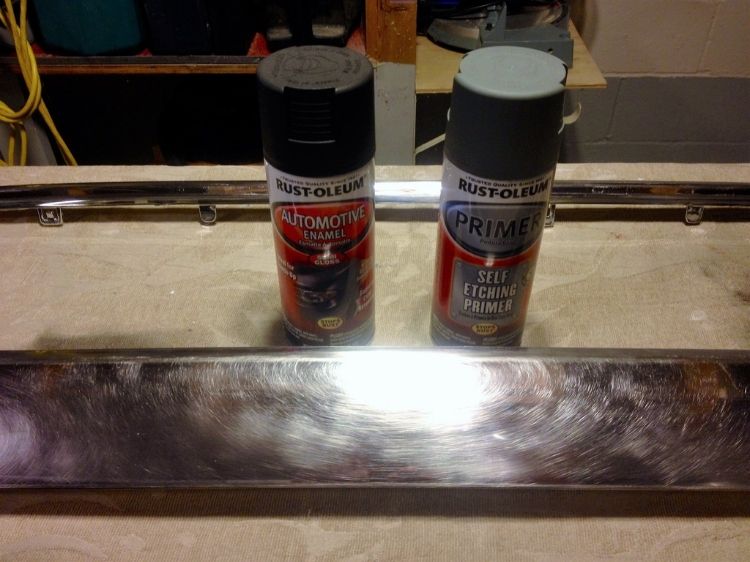
The rest of the process went like this.
Self Etching Primer 1st coat
Self Etching Primer 2nd coat
let cure for 24 hours
sand with 800 grit sandpaper
Self Etching Primer 3rd coat
Automotive Enamel semi gloss 1st coat
Automotive Enamel semi gloss 2nd coat
Let cure for 24 hours
sand with 1500 grit sandpaper
Automotive Enamel semi gloss 3rd coat
Turned out good.
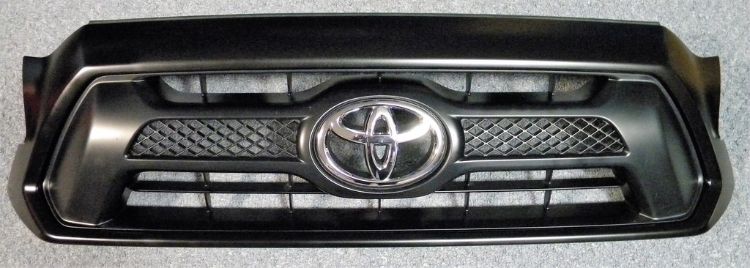
This is one of the few modifications I will be doing purely for aesthetic reasons.

I first separated the chrome grill surround from the center section of the grill. I then attempted several different techniques to chemically remove the chrome. After inhaling my lifetime limit of fumes I decided that chemical removal was not a good idea and I just went to work on sanding the chrome with 120 grit sandpaper.

The rest of the process went like this.
Self Etching Primer 1st coat
Self Etching Primer 2nd coat
let cure for 24 hours
sand with 800 grit sandpaper
Self Etching Primer 3rd coat
Automotive Enamel semi gloss 1st coat
Automotive Enamel semi gloss 2nd coat
Let cure for 24 hours
sand with 1500 grit sandpaper
Automotive Enamel semi gloss 3rd coat
Turned out good.

Last edited:
Northern Explorer
Explorer
Truck with FWC Finch
Just realized I didn't have a picture on here with the camper mounted to the truck.
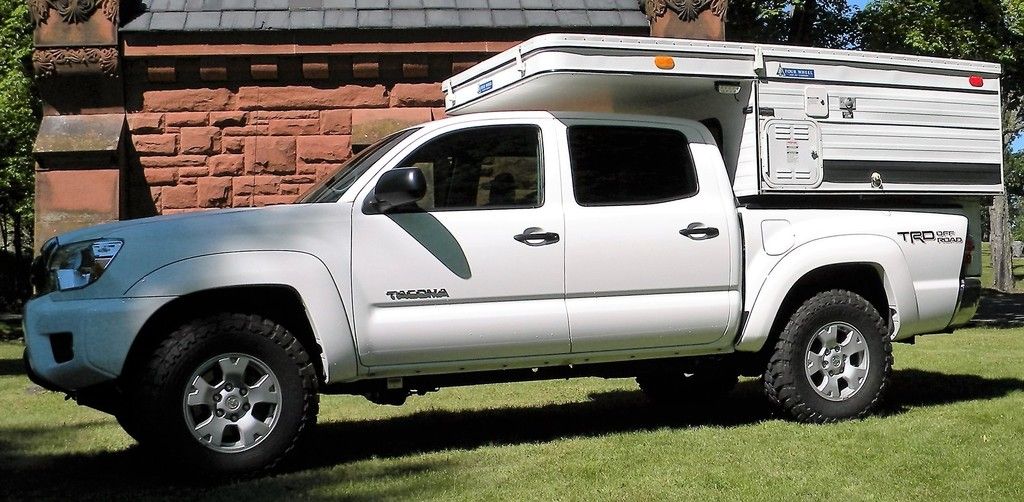
Just realized I didn't have a picture on here with the camper mounted to the truck.

Rattler
Thornton Melon's Kid
Just realized I didn't have a picture on here with the camper mounted to the truck.

ooks great (as expected). What is the sandstone building behind it?
Similar threads
- Replies
- 6
- Views
- 2K
- Replies
- 0
- Views
- 669
- Replies
- 0
- Views
- 284
- Replies
- 5
- Views
- 2K
