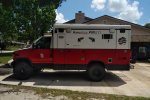
Not So Subtle E350 Shuttle - 100% Satisfaction Guaranteed

sakurama

Adventurer
This thread went quiet exactly when I started considering the coil setup for larger breaks.... any updates?
I don't know where you are located, but if you are planning on being at the "Cars and Coffee" meetup this Sunday, I'm planning on being there with my MG 4X4 Coil Conversion. I haven't had the issues that Gregor is dealing with and have been pretty happy with the conversion so far. Hopefully Gregor's conversion gets straightened out soon!

Well thankfully I've finally found the solution to the issue and I can't believe I didn't try this earlier on but it turns out that what the van was missing all along was...

Fender Flares!

Okay, so it turns out that isn't the issue but as suggested I've spoken to several experts and had several shops look at and drive the van. There's zero wrong with it. Everything is in spec, all the parts are new and it turns out my van isn't worn out, tired or at the end of it's life. The feed back I've gotten is that it handles and rides better than most conversions but that they don't know why I have the issue. So at this point there's really only one person who's continuing to do development and testing on coil conversions and that's Chris of U-Joint. I reached out to Chris and he echoed the sentiments of all the shops and mechanics I've spoken to which is that a damper isn't my solution. He's been extensively testing his updated coil kit putting on hundreds of miles and has had no issue with wobble despite running absolutely no damper. So I will be converting my van to Chris' updated coil set up but he's still a few weeks out from getting parts.

Perhaps my van is simply pushing the limits of the coil set up. It's a heavier van (8800lbs) running larger tires than any coil kit out there so it's likely that I'd find the weakness first or at the same time as a few others judging from the messages I'm getting. I'm also actually driving my van as you or me or anyone who converts a van to four wheel drive would hope to. When I raced I did development work so finding limits is something I tend to do and no matter how good a design is there's no replacement for real world testing. I'm as real as it gets.

So I've been quiet because I don't have the solution yet but I am working very hard to get there. But this post is about other important functional advances on the van.

Fender Flares!

i-sPTsCKg-X2.jpg


Oh, no. I wasn't joking. I'm done with those ************ stock tires. It had been mentioned that my 35's were too heavy and that was part of the issue but that was pure speculation like all of the things that I replaced. Out of curiosity I actually weighed the stock Superduty wheel/tire combo and they were 87lbs each. My 35x12.5 BFG's were 91lbs. so heavier? Yes, significantly? No. In fact I've put the 35's back on and lowered the pressure a bit more to 45 and the van is riding better than ever. And it looks better than ever.

Bushwacker flares are pretty much the only option for the E series vans. The fronts fit up pretty well and the rears (seen above) had a few gaps. Just like fitting trim in a house you simply run a pencil along the body and gently remove material with a Dremmel until it fits.

i-GBBxDtc-X2.jpg


The front uses the existing inner fender screws and you simply peel the backing away from the rubber trim and stick it on the outer part of the flare.

i-M8Js29F-X2.jpg


Press it into place...

i-SW9M5SJ-X2.jpg


And the rear gets screwed in in four places and you'll need a very small drill or a right angle attachment or to remove the wheels.

i-N5ZnvdP-X2.jpg


The flares fit perfectly. I didn't bother to paint them because they're already the right color and my van will continue to be used off road where it will collect more scratches. They offer full coverage of the 35's which is nice because in the mud my tires would cover the whole van in spray.

i-R2QWRz8-X2.jpg


i-m3gkCk4-X2.jpg


So the flares really tie the tires back in and give the van a very balanced stance and look - which is very important to my wife right now.

You see my wife works in social media and marketing and somehow she pitched the idea of our restored trailer to a national magazine who thought the idea of our trailer and 4x4 van was a cool idea for their camping issue. For the cover. If you've ever wondered how to get your wife on board with van improvements get a magazine feature.

I never thought I'd see her reading Overland Journal but she is. She's told me I have a month to get bumpers, a winch, roof rack, lights, tire carrier and anything else that we need to make the van look good. Oh, and to also have the trailer finished. The roof rack I'm going to try to do on my own since there's no real option for the style of roof we have. Bumpers will most likely be MOVE as they've mentioned they're interested in sponsoring me and I like the idea of being able to customize them to the fit the van. Chris should have the parts in a couple of weeks I'll be done with most of my shoots so I'll be taking the end of June and most of July to work on the van.

My van and this thread are far from over.

Gregor
 

86scotty

Cynic
My 95 Quigley (coil) setup was 10,500 loaded and was an RB. It was also a gas motor, 460. Never an issue with death wobble. My 98 V10 that I converted with MG's kit had it until I put a damper on and never again while I owned it, and most of the parts on it were old except the parts from MG. Still weird. I'm in no way as savvy on the technical stuff as some who have contributed. Just weird.
 

FDM2012

Adventurer
I went to a junkyard and cut my off of a conversion van. Less than $100 for all 4.

IMG_20180427_1417368.jpg

{Fender Flares! Bushwacker flares are pretty much the only option for the E series vans.}
 
Last edited:

thescottgivens

New member
I’m curious if you ever came up with a good way to sound insulate the doghouse and front firewall area? I just took my 7.3 on about a 1000 mile road trip and it needs some serious sound dampening....
 

sakurama

Adventurer
I’m curious if you ever came up with a good way to sound insulate the doghouse and front firewall area? I just took my 7.3 on about a 1000 mile road trip and it needs some serious sound dampening....

The doghouse in my van is fairly insulated already - at least compared to the rest of the cabin. My next goal for the interior is to Rattletrap the cabin up front and the side doors. Those are pretty sparse right now so I'm going to grab as much low hanging fruit as I can now. If there's time and I find a set of Sienna seats I'll tackle that in the next month or so but the priority for the moment is bumpers. Watch this space for more on that.

Gregor
 

VANMAN

Observer
I Know this probably will not help .....but I have owned my van (1990) for over 20 years....my buddy owned it before me....originally a quigley....not really anymore.....was Dana 44HD quigley 4 link....now Dana 60 better 4 link big Heim joints on it ...crossover steering...kingpin 1989 axle ...was on 33's now on 35's. (4:10's)..actually same tire combo as you....best tire decision I ever made was changing to the 35's especially offroad...air em down...much better ride...I normally run the at 65 psi on pavement...whats best?... do brake tests...skid pad...cone drill (like Chris UJOR does in one of his videos)...that's how I think you will find out what psi runs best with your tire combo and weight...within reason

I have never had Death wobble in it....and I actually have tried to induce it....

Do you or Chris UJOR ( GREAT GUY)....think maybe the height of the coils and the radius arms may be the culprit? It seems like your rig sits much higher than some of the other rigs MG has made (this is just from pics I have seen) I have always felt it is better to open up wheel wells for bigger tires than get the vehicle it self too high...just start seeing handling and other problems etc.

PS...you think that death wobble is scary? Hope you never have a rear tire go instantly flat pulling that big trailer down the coast highway...that cured me of ever wanting to tow anything heavy with a van....dually is much safer...I have been thru numerous driving courses on and off road....and I had my hands full keeping it on the road..and I love my van
 

Justgosurfin

Active member
I’m curious if you ever came up with a good way to sound insulate the doghouse and front firewall area? I just took my 7.3 on about a 1000 mile road trip and it needs some serious sound dampening....

I’m trying to gather more information on this too. In diesel center console boat I insulated the console with a product from “soundown” and it worked tremendously well. The main thing is a 1/4” mass loaded vinyl layer. dynamat type products are great to quiet down vibrating panels and road noise but to quiet the low freq diesel noise you need a thick layer of MLV or lead mat.... my PO installed some so it’s not high on my list but when I do more I’ll let you know what I go with.
 

ujoint

Supporting Sponsor
Do you or Chris UJOR ( GREAT GUY)....think maybe the height of the coils and the radius arms may be the culprit? It seems like your rig sits much higher than some of the other rigs MG has made (this is just from pics I have seen) I have always felt it is better to open up wheel wells for bigger tires than get the vehicle it self too high...just start seeing handling and other problems etc.

I have a theory on why these particular rigs get DW or how they can with everything tight and/or brand new. Never ending conversation and I'd rather not debate it but I believe the angle of the drag link/trac bar and the unwillingness of the radius arms to twist and move in the same arc as the trac bar under compression have a lot to do with it.

I've got a knuckle being machined right now for Gregor's van.
 

VANMAN

Observer
Chris-I totally agree with your statement about not debating it...Thanks for info...when I changed my axle and 4 link...we put the big heim joints on it (4 at the rear attachment points just so it would twist better)...original Quigley 4 link had both ends fixed which seemed perhaps not the best way

PS I have another post...got the manual tranny in - fairly easy..sorry for hijack
 

sakurama

Adventurer
So last week I was working with one of my main clients Rev'It! Sport on a shoot that took us all over Oregon. Two years ago on the same shoot I met a videographer that was working with us who had a 4x4 van and I was so smitten with it. Fast forward to last week and I have the van. Goal attained! Mostly.

While the van was used for it's main job of carrying equipment it also will be making some cameo appearances in photos and the videos we shot but I can't post that until things are officially released. I can however post a shot I took for myself as we were leaving Cape Kiwanda.

i-8drfhqv-X2.jpg


So often I'm in cool places working and barely have time to shoot anything for myself but this light was too good to miss.

The other thing I learned on the shoot was that it is essential that I get a solid platform on the roof. I'm trying to work out a good design for a roof rack that won't look cheesy or poorly thought out and will still give me a decent level place to shoot from.

More to come soon.

Gregor
 

sakurama

Adventurer
It's surprising when a medium sized, yet fairly heavy box shows up at your house from MOVE. It's too small to actually hold a bumper...

i-gMkpRHB-X2.jpg


My boy has been waiting for two years to get a winch. This was a big day for him even though this isn't the winch because it means the winch is coming. When it didn't magically unfold and install itself on the van he was a bit disappointed and went off to build Legos which give faster satisfaction.

i-8pp6xjt-X2.jpg


i-qrjdL9j-X2.jpg


Nonetheless all the parts are there - all 12 of them. It really couldn't be simpler but I'll figure out a way to make it complicated I'm sure. For starters I don't have a MIG and if perusing a hundred MOVE build videos tells me anything I'll be the first person to TIG one of these together.

So with the bumper parts unpacked I made a run to the welding store for some 1/8" tungsten, filler and a gas lens the right size.

i-bBmR2Sg-X2.jpg


I have no idea how much rod this will take. I estimated about 10-15' of weld and guessed I'd need twice that in rod which is about one pound. Then I bought more just in case and some 3/32 as well.

i-LhthQvD-X2.jpg


And as I loaded the rod into the storage tube I looked at my argon... On a Friday...

But guess what? This isn't my first rodeo! I know that big projects magically drain argon tanks right in the middle of the weekend. I've been there, done that and I have a second tank of Argon. Take that Murphy!

i-WLXsWNw-X2.jpg


So I start to prepping the standoffs. I'm not sure how much I'm going to need to back bevel so I take it most of the way while leaving a flat.

i-74xFTtq-X2.jpg


Oh, and because I have one friend has pestered me for years... I am trying to work on a small video for this. Yes, Locul, this one is for you! In fact, once I'm done I'll do a whole separate writeup for the bumpers since there's probably more than a few people who are considering this route.

One of the things that I really love about the whole MOVE thing is that there really aren't instructions. They have one "official" video and a bunch of user ones but they seem to operate off the basis that if you're considering welding up a bumper you're probably a bit past needing instructions. That's refreshing.

i-gVDb4t2-X2.jpg


So they're very clear that your truck is supposed to be your jig. That's the one rule. So what did I do? Yeah, I decided to measure that ******** up and do the math way. Or at least the tape measure way.

i-fTKNnC3-X2.jpg


The center section is the base - get that right and everything else falls into place. I measured up and down, left and right and three times. Mostly because I don't have a MIG or three hands. I'm experimenting with the settings. My Dynasty 200 only goes to 200 amps which is pretty much exactly the amount you need. The center section is 1/4" thick and the sides are 3/16" but if you're not getting a winch the whole bumper is 3/16"

i-TsZfHTb-X2.jpg


Here you see some pulsing tests and the large beads are me just working the peddle. Judging by my HAZ I'm probably putting in too much heat which is something I'm always struggling with. In fact I welded both sides of the standoff to the flat plate that bolts to the frame and warped it slightly. Nothing I couldn't fix in the press but it's something to work on.

i-4m378W9-X2.jpg


This is why you don't do it the way I'm doing it. You should be bolting the plates to the frame and then tacking on the front plate. I also didn't just tack and fit like I was supposed to. I tacked, and tacked, and tacked and started having so much fun I just kept going. More weld on the other side of that plate might suck it back a bit but it will still tighten down.

i-jpLvDzz-X2.jpg


Since it's apparent that to build this you need friends I made some calls and then decided to prep the edges so when said friends showed up I'd be ready to go.

i-SpnfRv9-X2.jpg


It's times like this that I'd like to have a driveway with one small, level spot.

i-5Npjxsz-X2.jpg


So only the center section is together and it still needs some more weld but it certainly looks better than before.

More tomorrow.

Gregor
 
Last edited:

sakurama

Adventurer
Putting this bumper together might be possible by one person but it would be pretty hard and require some serious rigging. I guess if you're a skilled Mig welder you're used to holding something up and just pulling the trigger but Tig requires two hands. So I roasted a 1/2lb of coffee to lore over my buddy Taylor who lives just up the road from me and also has a big E350 coil van. We eyed up the side wings and Taylor held them while I tacked them into place.

Quick side note: One of the reasons I wanted a white van was that every junk yard in the country has one kicking around. I just ordered a replacement left fender to replace the dinged one and it set me back $50. So that will get replaced next week sometime.

i-Bb6SvQv-X2.jpg


i-P5jr6sL-X2.jpg


MOVE makes a "Precision" bumper for the E350 but it's not for a winch. The Precision bumper angles up tighter on the sides to show off more tire which I think makes the stance very aggressive but what you see there is the standard bumper. But not for long.

i-HgC8DT5-X2.jpg


Stock the bumper wings came precariously close to the tire - less than two inches. With anything less than 33's it would be fine and it might have cleared my 35's but I wasn't taking the chance. I used some painters tape to mark out a line that would show a bit more tire from the front (like the Precision bumper) and also give more room on the return and angle into the flare.

i-dDVChP8-X2.jpg


I measured three inches from the inner corner and used the plasma cutter and a straight edge to lop off the excess.

i-SFtv2BG-X2.jpg


A happy accident was that the cast off chevron fit perfectly on the back edge to neaten up the bumpers return.

i-GSjhvRf-X2.jpg


One thing I discovered when welding outside is that a gust of wind can come up and blow your argon away - which really screws up the look of your welds! But all the outside welds will be ground down anyway...

i-cLN2dzJ-X2.jpg

i-kMsNKDS-X2.jpg


My goal in grinding the welds is to give them the same radius as the bends or folds of the bumper. I like that MOVE doesn't crease the bumpers hard. And compared with some of the folded designs it's a softer look which I think fits the van.

i-rkVzjzP-X2.jpg


Another mistake I made was not finish welding the mounting brackets to the center section before I welded in the sides...

i-dBXJ98C-X2.jpg


i-RZ8TfRD-X2.jpg

So in addition to welding the back side of all the welds (because I like belt and suspenders) I had to squeeze in and make my final pass on the brackets.

Next up was the tow recovery points.

These giant loops are a very thick 5/8" so I back beveled them a solid 1/4" and ran a single bead all around...

i-B2xbfGz-X2.jpg


My welds get better as I go as I'm constantly experimenting with pulsing and rod size. While I started with 1/8" filler I found it took too much heat out of the weld and I wasn't able to get good penetration so I switched to 3/32" filler.

i-MbSdjNx-X2.jpg


For my second pass I went back to 1/8" filler but I decided to weave the puddle instead of making two passes. I've never done that before so by the second tow loop I was getting the hang of it. I love the look of the weave as well. These welds I won't grind out.

i-X2dT2jk-X2.jpg


I also broke down and bought the electric ratchet that I've been eyeing for a few years. I just needed the right project and this was certainly it. The whole van in general seems to really beg for one of these and so far, I really like it!

So here's what the stock bumper looked like before I cut it down...

i-P5jr6sL-X2.jpg


...and here's how it looks now that I cut a few inches off the sides to angle it up and show off the wheels a bit more:

i-9G4JdnB-X2.jpg

i-7Z7fF76-X2.jpg


I think that slight modification makes a big difference and it's pretty great to be able to just fit the bumper up and mark the lines you want. Buying a bumper you're stuck with whatever you get. While I could probably fab up my own bumpers I don't have a press wide enough so I'd have to cut and weld the entire thing and it would be really time consuming. This was the right balance of prefab and fab.

On the winch front I was going to go with the Warn VR-12S but it was backordered and 4WheelParts.com ended up giving me a decent price on the Zeon which was the winch I really wanted anyway. It is being dropped shipped from the factory here in Portland so once I get that I'll take the bumper off again and weld the bracket that is the shelf for the winch. I'll leave it bare for a week or so until both bumpers are done and I don't want to make any changes.

One last thing is weight. People tend to guess at these things but I bought some serious shop scales so I wouldn't have to do that. My old bumper, which was cut down a bit and lacking in the front air damn, was 48lbs. This bumper seems really heavy, looks really heavy and after lifting it up and down for two days felt really heavy. But it's not really heavy - it's 98lbs. Only 50lbs more than the trimmed stock bumper. Of course the winch will add to that.

So, next up is the rear bumper. If you have any questions about this let me know!

Gregor
 

sakurama

Adventurer
The bumper looks great! I'm enjoying following your build.

Thanks. Now for the rear bumper.

i-HfjF7VH-X2.jpg


Again, it comes in a heavy box - well packed.

i-Q4STsdF-X2.jpg


Only 8 pieces this time - or 10 if you could the recovery mounts but they're too large to fit anywhere on the bumper and I'm thinking maybe they were sent as a mistake. I may decide to cut them down and mount them anyway.

i-JFLgXkJ-X2.jpg


These bumpers are very well designed and made - it's simple but the tolerances are very good and fit up is excellent.

i-tpXZHgt-X2.jpg


Most all of the fits are open corners that allow you to get full penetration welds. This would be easy if you were mig welding which most people would do but only slightly less work to tig weld.

i-Gqw4Ctr-X2.jpg

i-NWS9hRN-X2.jpg

I do a couple of very light tacks to hold the different parts in place and then weld short stitches together to keep them there when I weld the passes.

i-RRXVBDJ-X2.jpg


On the inside corners I did a weave over my initial weld to get the bead to more flush so I wouldn't have to grind any inside corners.


i-4LsPhTZ-X2.jpg

i-PxBDdGn-X2.jpg

i-xNKnnzB-X2.jpg


I grind the weld off both faces first to ensure it's flat and grind the middle at 45 and feather it into a radius so keep the edges soft.

i-Dnxv2Vp-X2.jpg


It's a pet peeve of mine that trailer plugs are these cheap lightweight brackets tacked under a bumper...

i-5CjTmH7-X2.jpg

i-Lc54fCj-X2.jpg

i-HNwtnJP-X2.jpg


And now the trailer receptacle is in the lower bumper. Out of the way and solidly mounted.

i-Jk2tLjc-X2.jpg


And that is pretty much it for the rear bumper. It took one afternoon and was really pretty simple. I spec'd the cutouts for the additional backup lights because I wanted to use them for mounting a bike holder. I haven't built that just yet as I also want to add some extra running and brake lights as the plan is to build a rear tire holder and they all seem to obscure the taillights.

So I ordered the swing out mount from 4x4Labs

i-rzhj2b9.jpg


but I'm not sure how I'm going to make that work just yet. It's made for their own bumper which is straight and this bumper has a large (and very helpful) step in the middle. So some fabrication will be necessary.

I'll do some more photos when I get it closer to finished but this rear bumper needs another round of work before it's done.

Gregor
 

Forum statistics

Threads
188,184
Messages
2,903,530
Members
229,665
Latest member
SANelson
Top