NPS Camper Build

SkiFreak

Crazy Person
I'm a bit confused... (does not take much to do that these days).
You say that you have a pivot at the rear so it can tilt, but how can it do this with two fixed spring mounts on each side. I am guessing by tilt you mean like a tipper; maybe I am missing something.
Time goes quickly, doesn't it?
 

LeishaShannon

Adventurer
We pulled the finger out and made some progress on the truck.

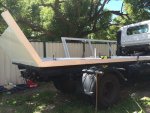
The frame is 75x75x3mm aluminium with a floor and roof section. This helped keep things square and aligned as the build progressed.
frame.jpg

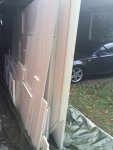
We used the veranda to square up the first wall
wall.jpg

Second wall went on quite easily
walls.jpg

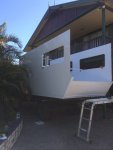
After waiting a few days we moved the truck
freestanding.jpg

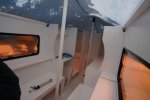
Two of us knocked over all of the interior carcass in 4 days. Yay for CNC cutting accuracy :)
inside.jpg

Without the use of a crane / trestles the roof was.. challenging. People power prevailed and we lifted the camper roof first onto the carport , then into place on the walls.
roof.jpg

With 9mm of sika 252 between the subframe and the floor and 3mm on all other joints we used almost 50 sausages, all manually pumped as I couldn't find a hire place with pneumatic guns.
The interior consumed over 300 meters of 3M VHB tape.
 

Jfet

Adventurer
OMG you did NOT pump 50 tubes of Sika by hand?!?!!!!!

I pumped 1/5 of one tube of Sika 252 by hand then ran to the computer and got next day delivery of a pneumatic gun.

Nice job on the build!
 

LeishaShannon

Adventurer
To be fair we did have 4 people pumping on the day we did the floor :)
Let us assure anyone who's wondering.. the sika guns are 10x better than the cheaper selleys/bunnings guns even if they look exactly the same (we learnt this the hard way)
 

LeishaShannon

Adventurer
Sika252 for the floor, walls, roof, etc. These composite panels are 34mm thick and have a rebate routed out on the edges (red/yellow). Aluminium 50x50x1.6 square hollow section (orange) was used along all interior edges to provide additional strength for the joint and as a place for cables/pipes to be run. The 75x75x3 angle (grey) protects the outside edges and provides additional sealing.
edge2.jpg

VHB was used for the internal furniture/cupboards mainly because its less messy (and we were sick of squeezing!)
 

mog

Kodiak Buckaroo
Very nice build and informative. I'm planning on just using VHB tape on my build in the future. Is there a benefit of the Sika252 such as sealing or strength over the VHB tape? The tape sure is much easier to work with.
Why did you rabate the edges (red/yellow panels)? Was it for strength (more surface area for Sika252), to seal the end of the yellow panel, both, or other?
Thanks,
 

LeishaShannon

Adventurer
The Sika 252 has a ~2x tensile strength advantage over VHB but this did not play a huge part in the various failure modes we tested as the panels delaminated well before the joints gave way:

Without the SHS on the inside :


Rebating the edges provides extra strength by increasing the glue surface area while also helping with sealing. In theory it should minimise thermal bridging too although I'm not sure how much of a difference it makes.
 
Last edited:

4x4coaster

Adventurer
Do you have a detail drawing on the floor to wall intersection?
Fantastic practical demonstration of the joint strength! well done.
 

Forum statistics

Threads
187,952
Messages
2,900,280
Members
229,233
Latest member
cwhit5
Top