DWELLER BIKE RACK - Post 2 of 2
Design Overview
Here is a summary of the approach I took:
- Utilize my existing 1Up rack. It is a little heavy, but it is near bulletproof. 1Up is one of the stoutest bike racks you can get in the U.S.. 1Up makes a ”Heavy Duty” hitch rack and “Super Duty” hitch rack. Both racks have 2-piece wheel trays (for ease of shipment?) with the difference being that the Super Duty has an additional reinforcement plate. My specific rack is built with the 1-piece roof-rack wheel trays. The 1Up engineer I worked with characterized my rack as “Heavy Super Duty”
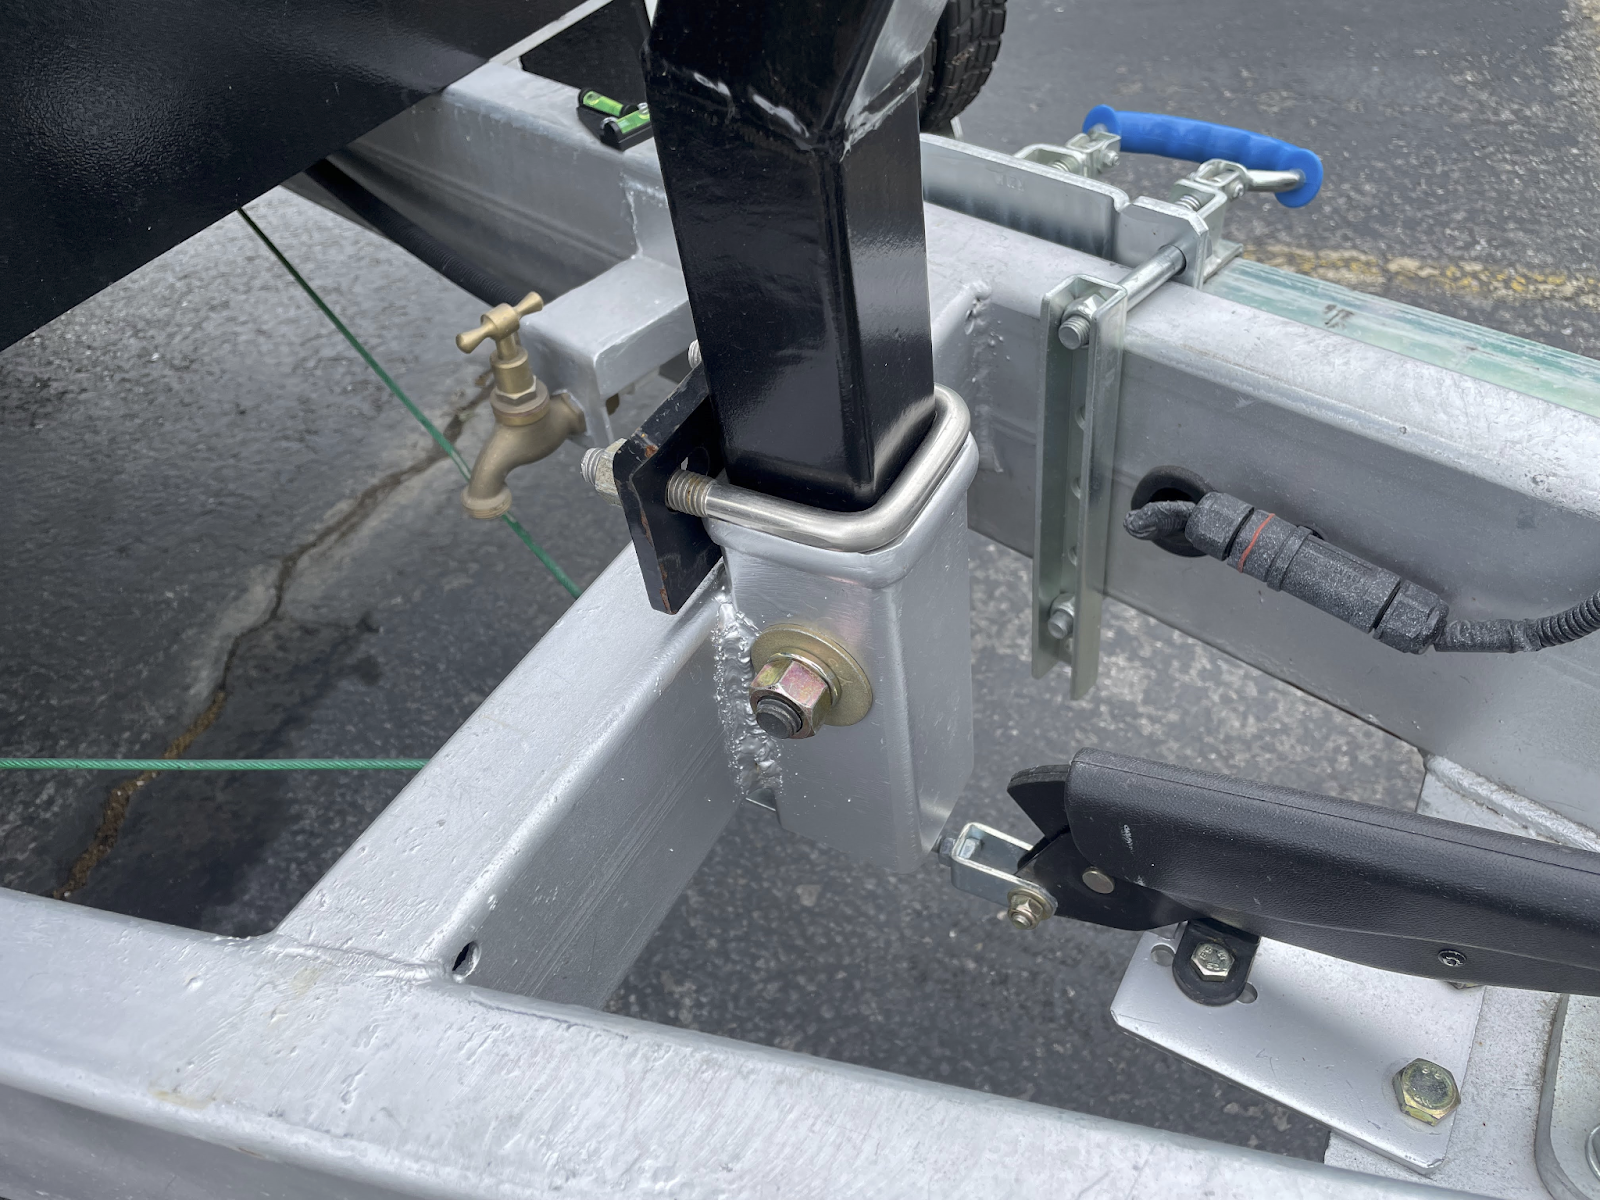
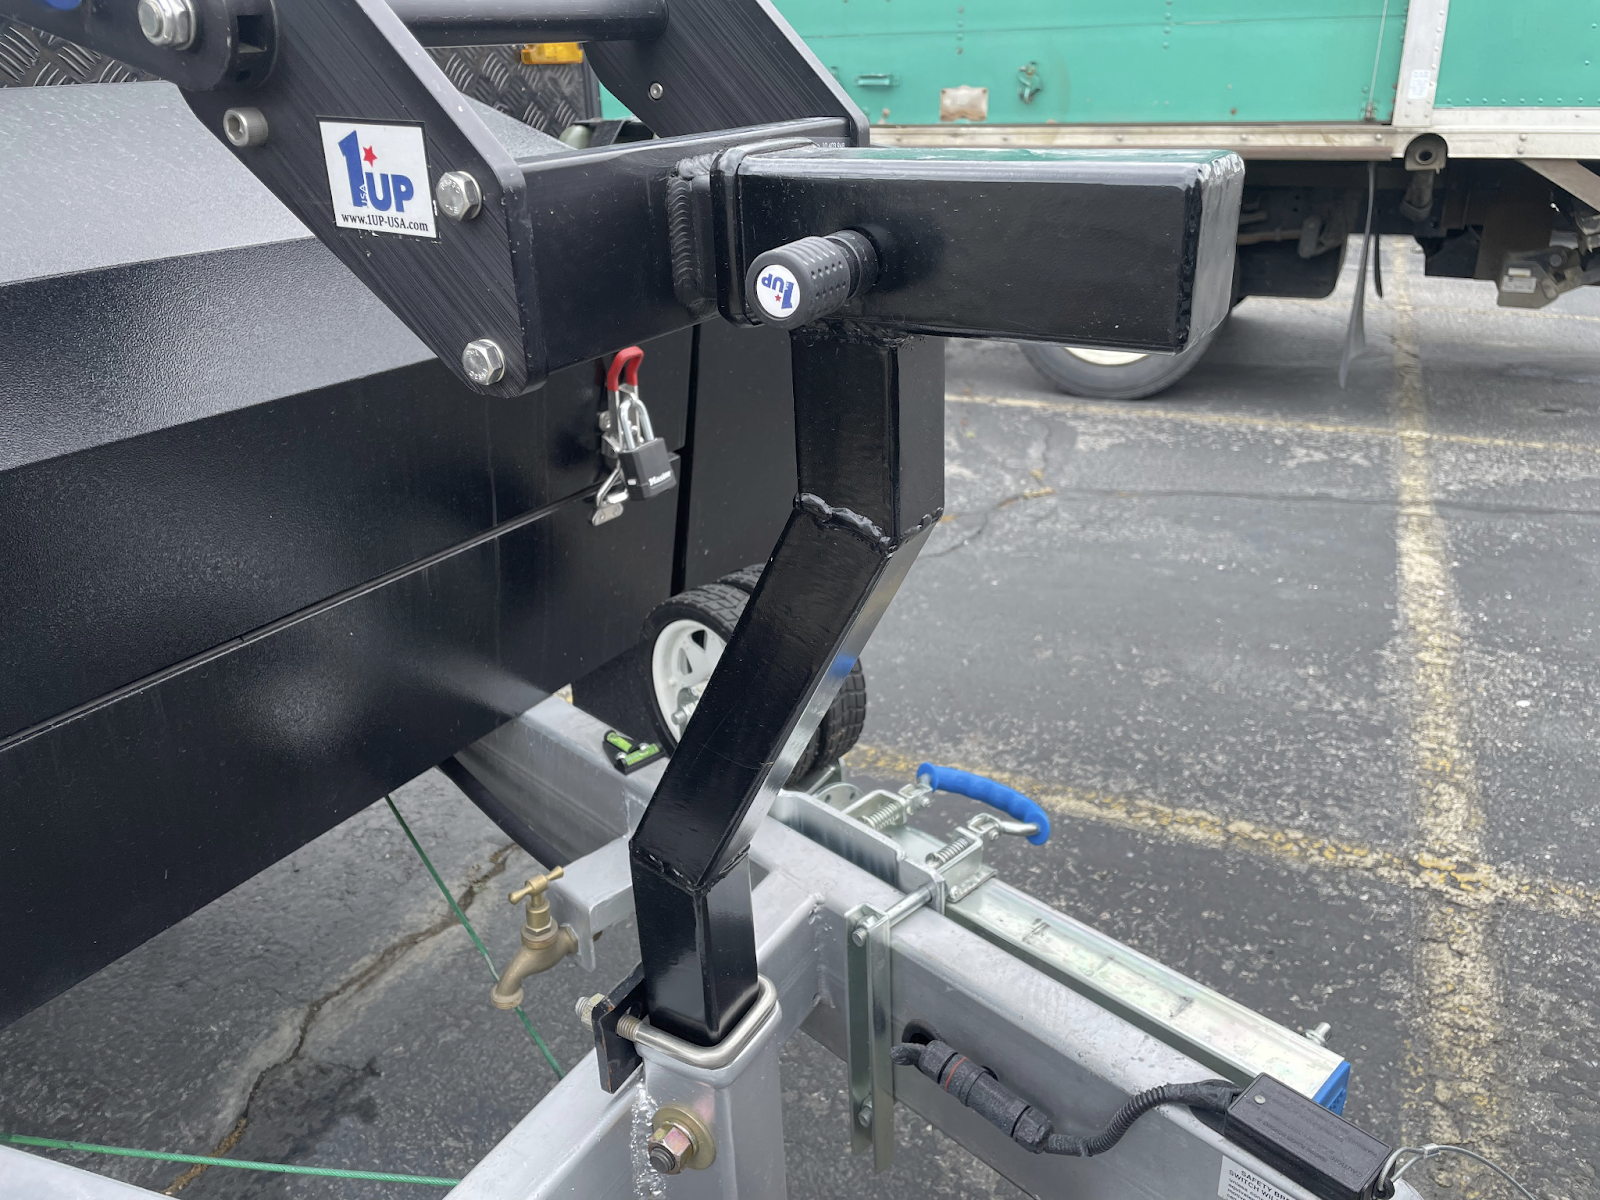
- Weld a 2-inch receiver onto the cross member. The VIN sticker for the Dweller is located on the backside of the drawbar cross member. I chose to mount the receiver vertically on the front side of the cross member. The vertical orientation gave me a lot more surface to weld to the cross member. I was very careful to protect the VIN sticker while welding.
- Build a tower to connect the two items (analogous to the iSi Strong Arm tower). The bottom end of the tower mounts into the receiver I welded onto the cross member. The upper part of the tower has a 2-inch receiver for the 1Up rack. The tower is constructed of 2”x2” square tube 7-gauge (4.5mm). I used a heavy duty hitch stabilizer where the tower connects into the vertical hitch receiver.
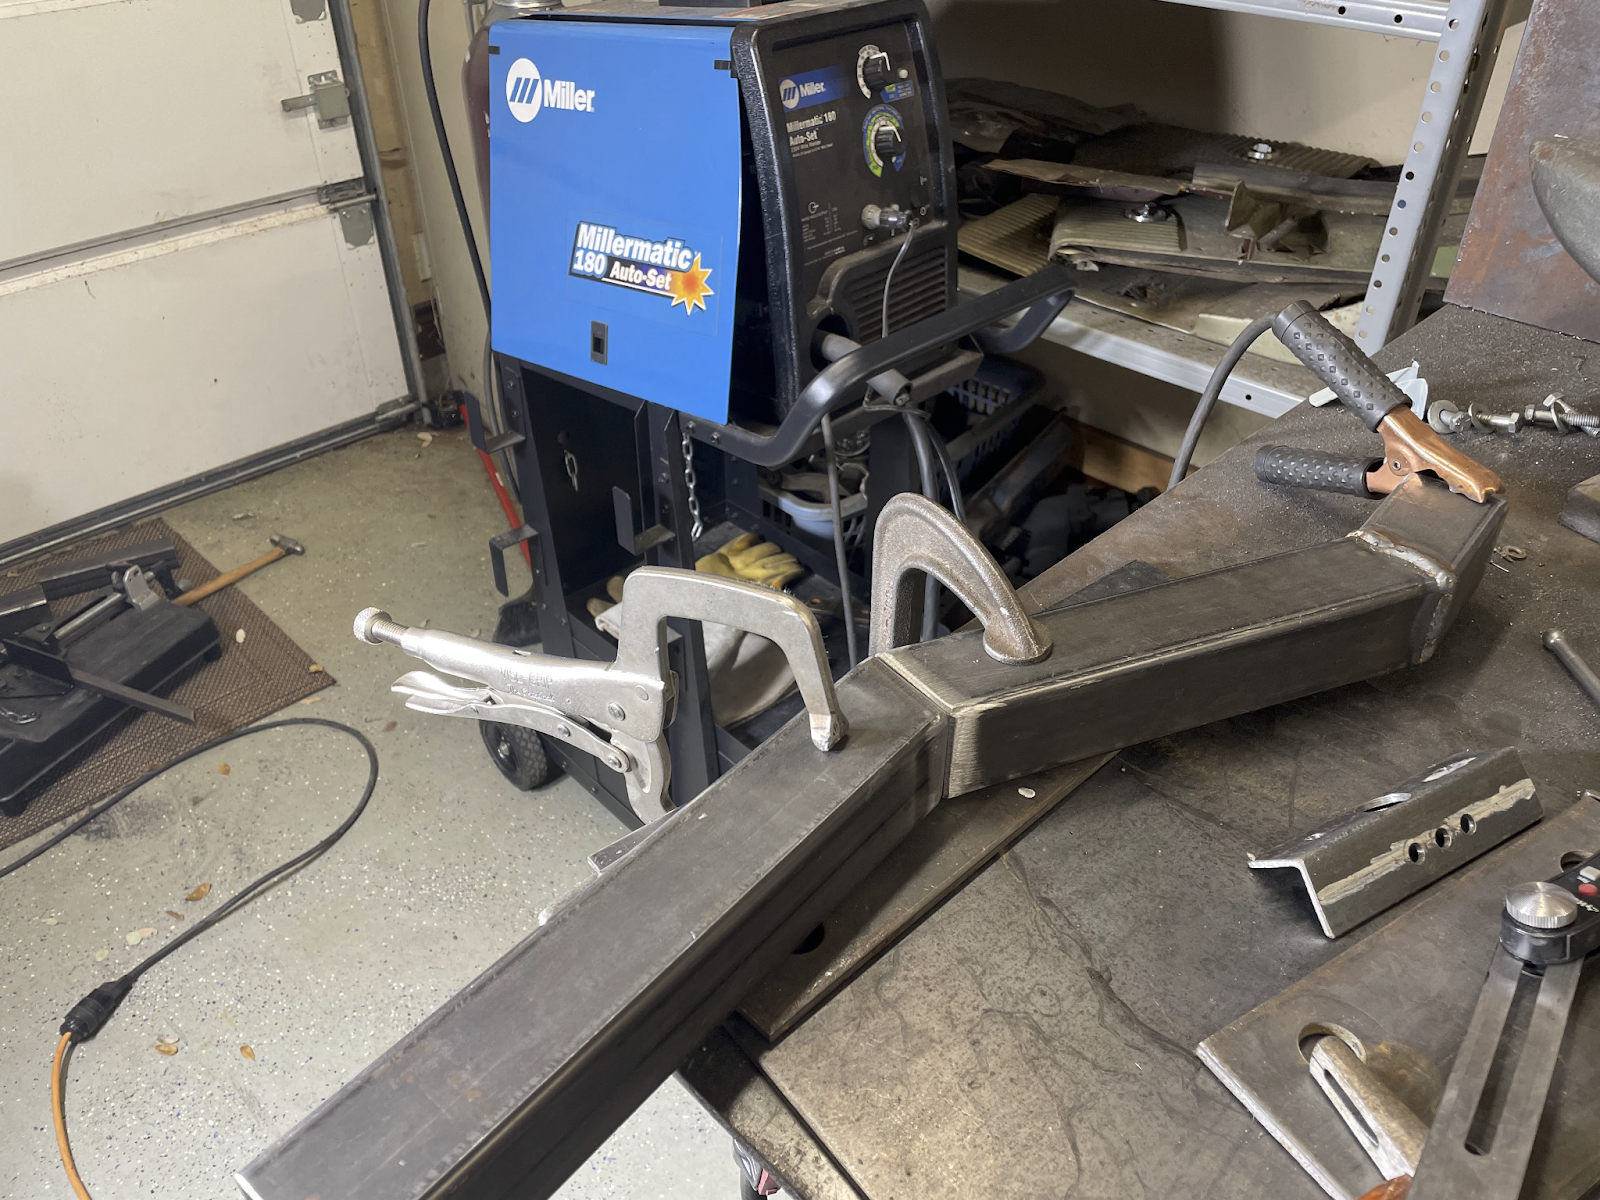
Here are photos of the work-in-progress and the finished product.
Fabbing the tower
Test fitting before welding onto the cross member
Testing gearbox clearance
Initial sea-trials and checking turning clearances
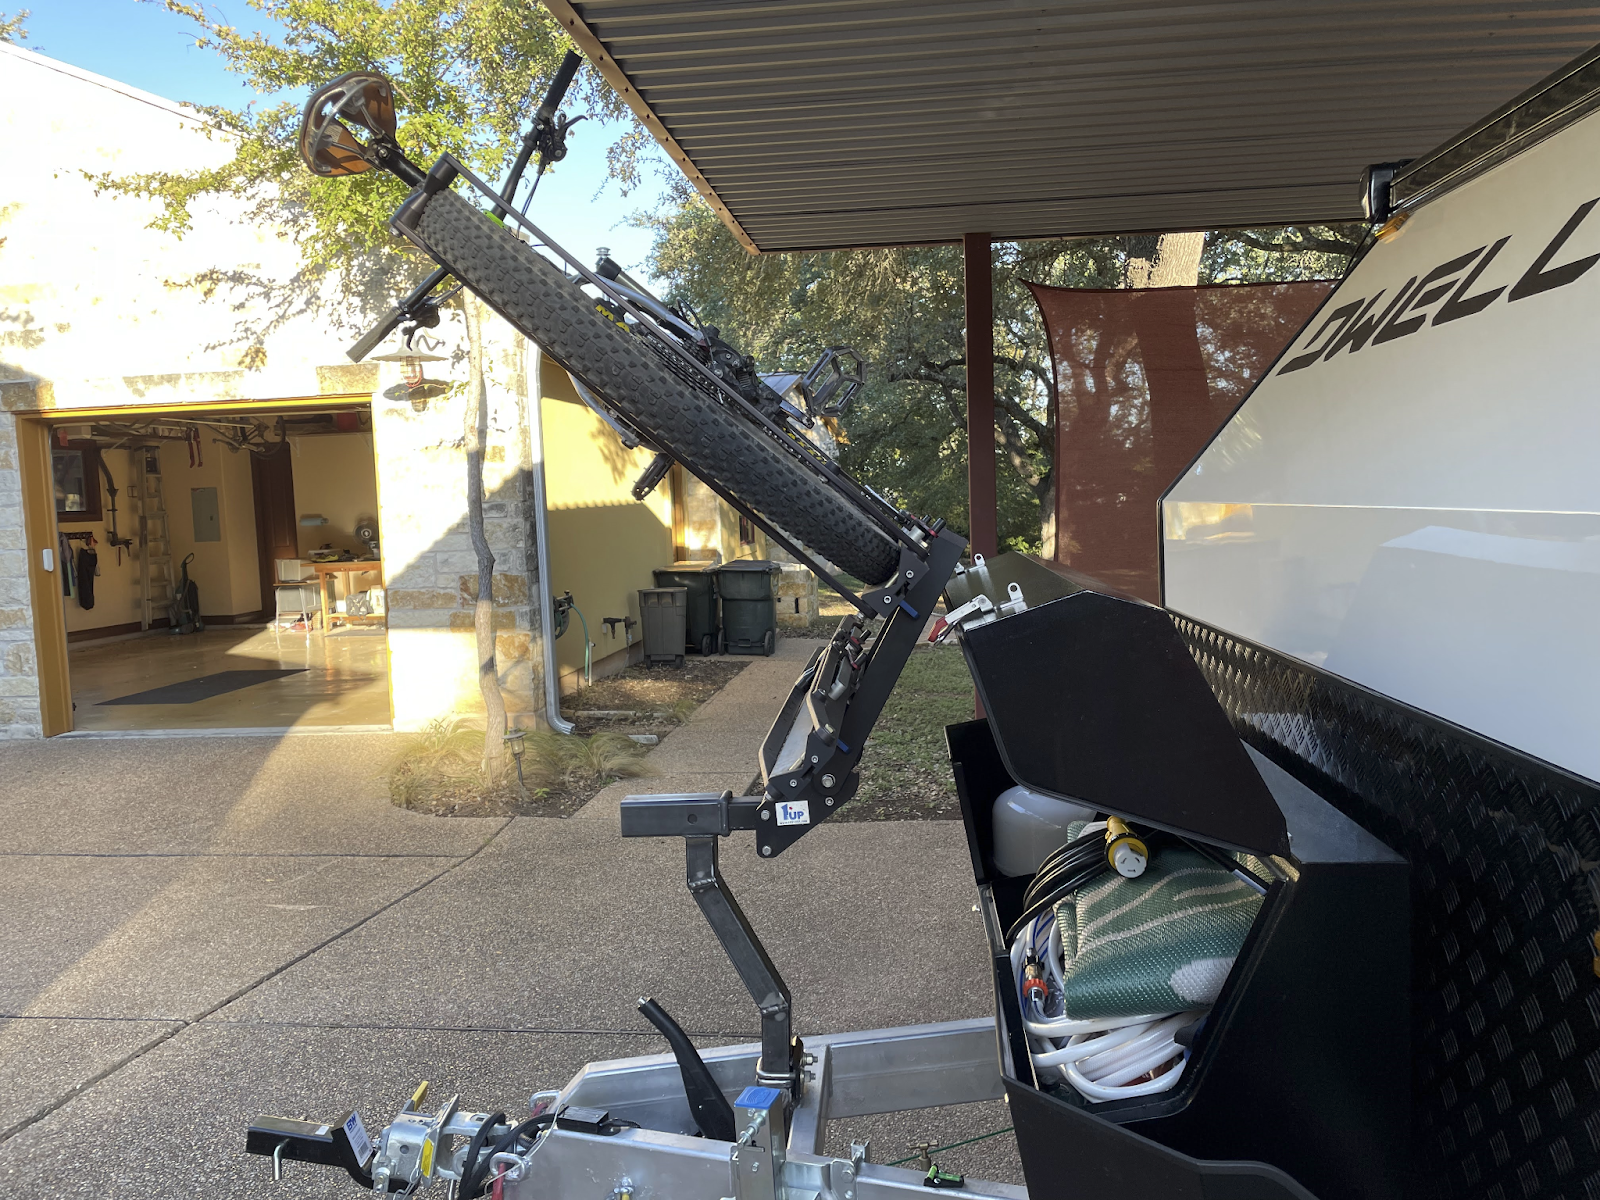
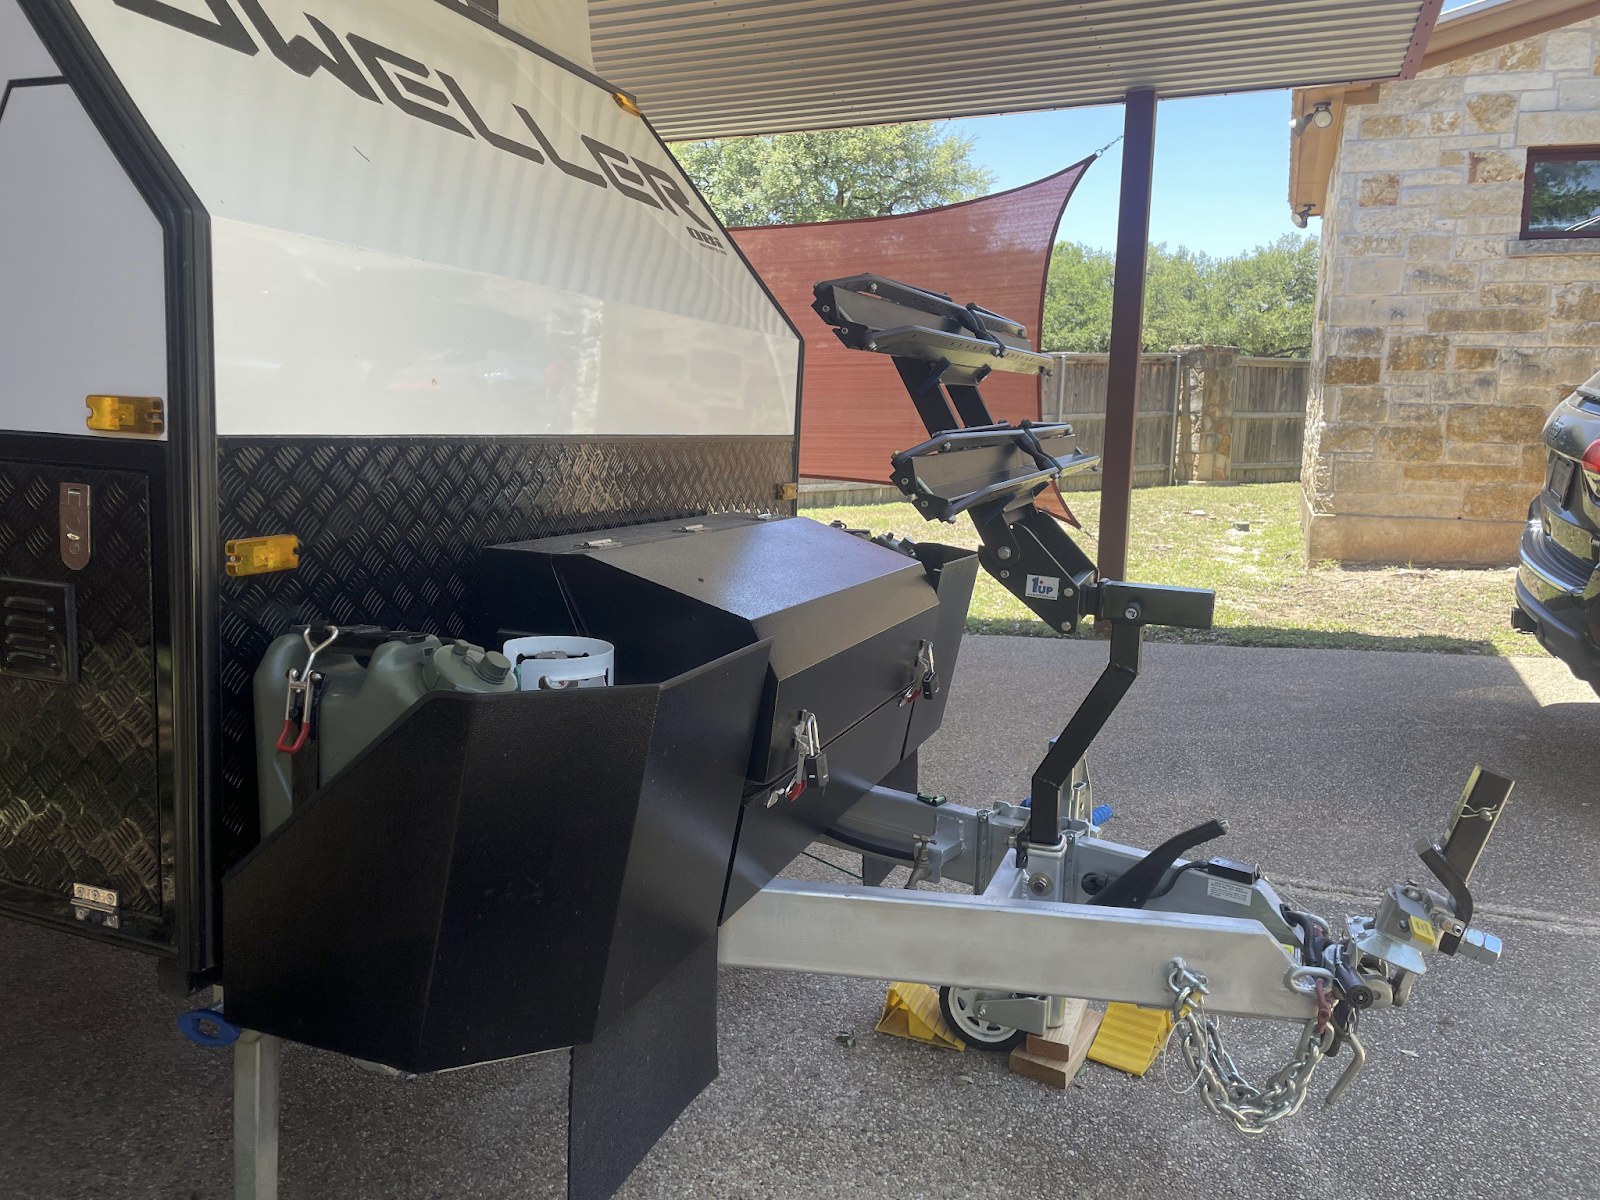
Finished product
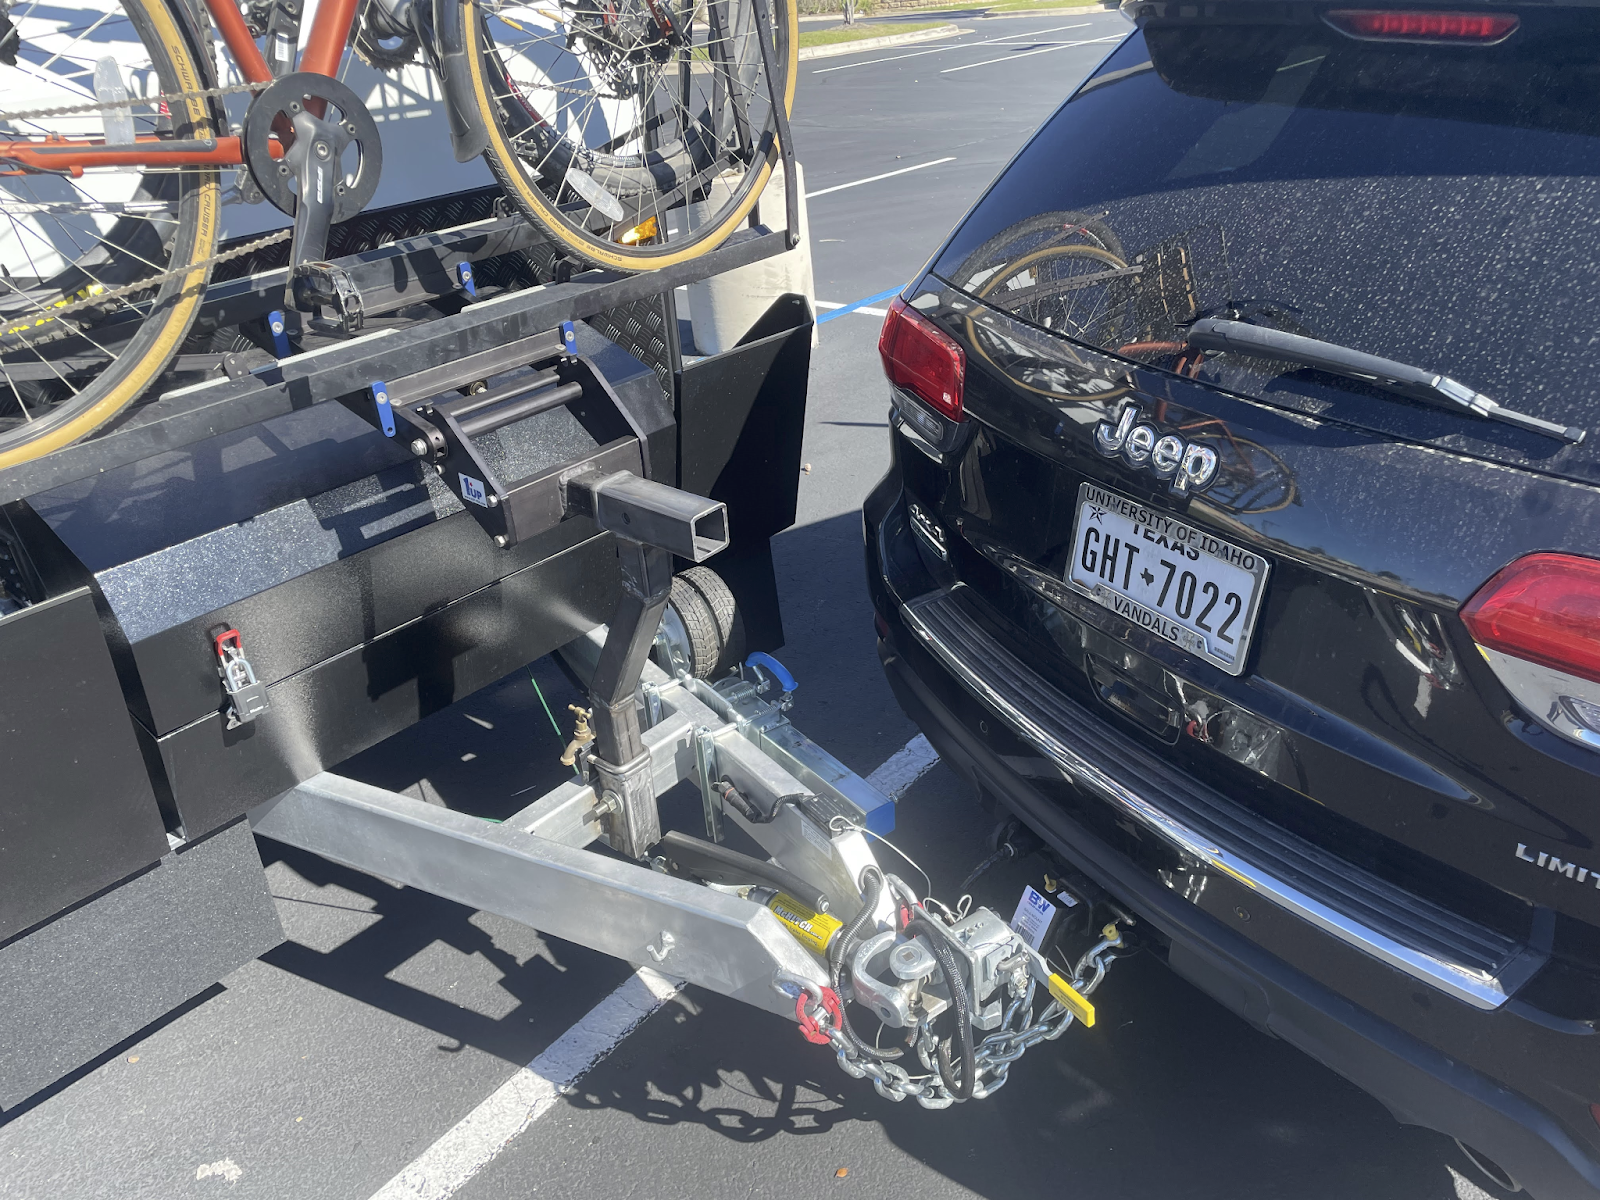
On the road
Impact on Tongue Weight
I did a “worst case” measure on the Cat Scale with two bikes, all of my camping gear and
two full water tanks. In that scenario, the tongue weight measured 680 lbs which is getting up there. When boondocking, I will tend to keep most of my potable water in the 20 gallon rear tank which is just behind the trailer wheels. I will put the minimal amount of water in the 30 gallon forward tank. I need to spend more time at the Cat Scale doing a full analysis using a typical camping load.
Ruggedness.
TBD. I have spent limited time off pavement so far. Everything is “very sturdy” and it seems like it will hold up. I am taking the SpaceX “test it until it breaks” approach. I will post updates if I break anything and/or have to make any modifications.
Useability
- Getting bikes on and off the rack is “easy”.
- Accessing the gearbox is “okay”. It is “easy” to tip the rack forward with the bikes in place. In that position, I can open the gearbox lid all of the way. It is just a bit more effort to get things into and out of the gearbox, but it works.
- Transferring the bike rack from the Dweller to my tow vehicle is also “okay”. If I were younger and stronger, it would likely be easy. It looks to be easier and faster than transferring the iSi rack as shown in their YouTube video.
Total Cost
- Two 2-Inch x 9-Inch Weld-On Raw Steel Trailer Hitch Receiver Tubes - $17 apiece
- 3-feet of 2”x2” square tube 7-gauge - $10 at local steel yard
- Anti-Rattle Stabilizer for 2 Inch Hitch - $17
- Hardware, 5/8-inch Grade 8 flange head bolt, nut and washers - maybe $5
- Bike Rack, I obviously designed around the rack I had. 1Up currently sells 2-inch hitch, 2-bike racks for between $635 and $715 depending on color and Heavy Duty or Super Duty.
Notes
- Rustoleum aluminum colored spray paint is a perfect match to the trailer frame. This is what I used to paint the receiver I welded to the cross member.
- I did need to relocate the parking brake forward about 1-inch in order to clear the receiver. This was a matter of drilling two holes in the handle mounting plate.
Summary
I met all of my design criteria and I am extremely pleased with the finished product. Driving across the country with one bike was no issue (refer to my shock absorber post above). By the end of July, I hope to have a very good idea as to how well this is going to hold up on rough roads. I am cautiously optimistic.
Let me know if you have any questions.
")