OBI Dweller Review and Discussion

gendlert

Well-known member
Holy awesome. Really?!? For $150 and a couple hours this trailer will tow like we want it to on the pavement? What do we have to do to get install instructions? Thanks for taking the time and leap to getting this done. If anyone else makes this upgrade, post if you have similar results. This would be a game-changer. I'll give it a go when I have a couple down weekends.

Sent from my Pixel 5 using Tapatalk
 

glennsmith15

New member
So… I swapped out the shock absorbers on my Dweller.

Buckle up. This is a lengthy post.

The Executive Summary is this: Changing the shock absorbers is by and far the best change/upgrade I have done to my Dweller so far.

I purchased my Dweller last fall in Idaho. In October I pulled it to Central Texas. The trip was an 1850 mile “white knuckle” experience. My tow rig is an EcoDiesel Grand Cherokee rated to tow 7200 lbs with up to 720 lb tongue weight. A WDH is recommended for trailer weights in excess of 5000 lbs. I was lightly loaded with just myself in the Jeep and no water in the tanks. I do not have a lot of margin on the weights, but the trailer is certainly within the specifications of the tow vehicle. For the record, I have towed a lot of trailers over the years for a lot of miles.

Traditional trailer sway was not an issue for me pulling the Dweller. The issue I experienced on the highway towing the Dweller was a side-to-side rocking of the trailer. It would get in a harmonic motion and not want to stop. There were several things that would set off the rocking at any speed over 60 mph - potholes, cross winds, large trucks (either passing me or coming the other direction). Sometimes it would start to rock back and forth just while navigating a turn on the highway. The only way to stop the motion was to gently slow down.

Once I was in Texas, I took a number of camping trips. I tried a number of different ballast configurations with the front and rear fresh water tanks. None of them made any significant difference to the towing behavior. The Dweller continued to rock and roll down the highway.

I did a cursory investigation of shock absorbers over the winter. My initial conclusion was that I would need to get a custom-built, custom-valved set of shocks from Fox or a similar source. I explored adding a sway control system and/or WDH. All of the people I spoke with, whom I trust, indicated that they did not think a sway controller or a WDH would change the road manners of this trailer. I was dreading the trip back to Idaho.

I would like to give a special mention to John Roemer at Caravan Specialties. John is the U.S. distributor for McHitch. About a month ago, I left John a message which he quickly returned and we had a lengthy conversation. John is very familiar with OBI and is very complimentary of their overall build quality. Anyway, John also discouraged a WDH and strongly suggested I explore shock absorber options. From our conversation, it sounds like John has extensive experience with Black Series. His comment was something to the effect that the Black Series trailers are commonly supplied with poor performing shocks and that they respond well to shock upgrades. He suggested I look at Rancho 9000s or something similar.

I began my shock absorber exploration journey in earnest. I first established my wish list for replacement shock absorbers:
  • No un-doable change to the upper or lower mounts. I wanted to be able to go back to the stock shock absorbers if things didn't work out. I wanted the replacement shock to bolt up to the existing shock mounts
  • As close to the same compressed and extended lengths as possible.
  • Readily available. I did not want to wait weeks or months for shocks and I want to be able to readily find replacements when needed.
  • Reasonable cost. I would be willing to spend “considerable” money if I knew the solution worked, but I wanted to stay at a reasonable price point during the R&D phase.
  • Appropriate construction and valving. I wanted to find a heavy duty shock that is designed for a heavy duty application would seem to cross over to the Dweller application
  • High quality. I have a strong preference to buy from an established shock manufacturer and not purchase an re-labeled shock from an unknown manufacturer.

Here are my measurements of the stock shock absorbers on the Dweller:
  • Compressed Length = ~12.25 inches
  • Extended Length = ~19.625 inches
  • Upper Mounting =
    • Loop Bushing & Sleeve Mount
    • 5/8" (16mm) Sleeve ID X 1-1/2" Sleeve OAL
  • Lower Mounting =
    • Loop Bushing & Sleeve Mount
    • 5/8" (16mm) Sleeve ID X 1-1/2" Sleeve OAL

I jacked up the Dweller and looked at the suspension travel. Hanging from the limit strap, the shock is extended a bit over 18 inches. The shock requires virtually all of the compression available meaning that the replacement shock should ideally have the same or a shorter compressed length (I will discuss this more on another day).

I started to research available options. The pickings are slim. I explored Rancho. I explored Eibach. I explored Bilstein. I explored Koni. No luck. Everything I looked at either would require I change and/or relocate the shock mounts or they were sized for an application I did not think was appropriate. Shocks for a CJ Jeep could be made to fit, but even an adjustable Rancho 9000 designed for a CJ did seem like the path I wanted to take.

Almost ready to give up, I was perusing the shockwarehouse.com site and decided to explore commercial vehicle shocks. I noticed that Monroe Magnum 60 series shocks were available for everything from delivery vans to class 8 trucks and trailers
“Gas-charged for medium and heavy trucks and tractors, Monroe Magnum 60 Series Heavy Truck Shocks replace worn-out units to reduce excessive vibration for longer tire life, less downtime and a lower cost per mile. There is a Gas-Magnum shock absorber specifically designed for every hard working truck from class 3 to class 8; check against your original OE part number to choose the right shock.”

I started exploring the Monroe Heavy Duty shock catalog and found two Monroe Magnum 60 shock options which looked like they would meet my requirements list - part number 66440 and part number 66449 :

Monroe 66440 and 66449 Specifications
  • Compressed Length = 12.38 inches
  • Extended Length = 19.73 inches
  • Upper Mounting =
    • Loop Bushing & Sleeve Mount
    • 5/8" (16mm) Sleeve ID X 1-9/16" Sleeve OAL
  • Lower Mounting =
    • Loop Bushing & Sleeve Mount
    • 5/8" (16mm) Sleeve ID X 1-9/16" Sleeve OAL
  • Applications for the Monroe 66440 =
    • Rear shock for 2014-2022 Ram Promaster 2500 and 3500 vans.
  • Applications for the Monroe 66449 =
    • Rear shock for 2014-2022 Ram Promaster 1500.

Compared to the stock Dweller shock, these Monroe shocks are less than 0.2 inches longer on the compressed length. The width of the sleeve is 0.0625” wider. I knew I could make these work.

I chose the shock p/n 66440 for the Promaster 2500/3500. They happened to be in stock at the local NAPA store for $65. The price at Rock Auto seems to vary by day. I have since seen them at Rock Auto recently for under $40.

Here are the 66440 next to the stock Dweller shocks. The body and reservoir are much larger as are the bushing and sleeve. I believe I read in the literature that the 66440 has a 35mm piston bore.

View attachment 726340 View attachment 726342

I do not have a means of quantifying the difference in performance of the shocks. I can say that the 66440 is “noticeably stiffer” when compressing by hand. I would estimate that they are on the order of 40% stiffer. I also notice that when doing multiple compressions by hand, I can feel the multistage valving and the subsequent compressions seem to be much stiffer than the first compression. I have no good way of even estimating the difference when extending.

Installation is basically plug-and-play and takes about 20-30 minutes a side. It may require that the mounting ears be spread a bit since the sleeve on the 66440 shock is 0.0625” wider than the stock shock (1.5625” vs. 1.50”). I did not need to do anything. I was able to mount them into place with a few gentle taps with a rubber mallet. Here they are installed.

View attachment 726341

Impressions. The difference in towing the Dweller on paved surfaces with the new shocks is basically the same as the difference between night and day. The difference is immediately different in a very good way. The Dweller behaves as if it is glued to the road.

Since installing these shocks, I have driven back to Idaho. We traveled from Austin to Boise via Ruidoso, Pie Town, Flagstaff, Fredonia, Duck Valley, Cedar City, Ely, and Twin Falls. My point is that we covered every type of paved surface from Interstate freeways to winding secondary roads with very large pot holes and frost heaves. We had severe crosswinds much of the trip. We did three days of 650-ish miles/day with no issues at all. I hate driving interstate, but I had no issues and was not uncomfortable at 70-72 mph for miles on end.

The caveat of this post is that I have not put any substantial miles on unpaved roads. I was planning to wait until I had that experience under my belt before making this post. However, I don’t anticipate any issues and I think the benefits I’ve experienced with this shock absorber upgrade make it worth sharing with others before I complete that part of the investigation.

There it is. This is a relatively low cost change which I consider a major upgrade in performance that can be easily reversed if desired. Prior to this upgrade, I was dreading the cross country trip. I was considering trading in the Jeep GC for a beefier tow rig. Right now, I am now ready to try going almost anywhere with the current set up.
Thanks so much for the info. I was having the exact same issues with a 2019 F150 Raptor and my only complaint with the unit. Got the shocks and installing this weekend
 

WillySwan

Well-known member
Thanks so much for the info. I was having the exact same issues with a 2019 F150 Raptor and my only complaint with the unit. Got the shocks and installing this weekend

I'm hoping it works out as good for you as it has for me. Please post your post-installation impressions. For me, the difference was obvious immediately.
 

WillySwan

Well-known member
DWELLER BIKE RACK - Post 1 of 2

Another lengthy post. I had to break it into 2 posts because of the length. If you don’t care about hauling around bicycles, you may want to skip this one.

One of the quandaries I faced when I first got my Dweller was how to transport my bicycles. Bicycles are an important part of our outdoor experience. We enjoy riding bikes when out camping. I also like the security of having a bike with me in case I get stuck or break down and need to go for help. Since I have an SUV, carrying a couple of bikes in the tow vehicle is not a viable option.

To figure this out, the first thing I did was put together a list of what I wanted in a bike transport system.

Requirements
  1. Bikes on the trailer drawbar, not hanging off the back of the trailer. I rode in the back of the schoolbus as a kid; I would never subject my bikes to that sort of abuse.
  2. Retain access to the front gear box without removing the bikes.
  3. No impact on turning radius while towing or backing up. I don’t want to worry about the bikes hitting the tow vehicle when maneuvering the trailer
  4. No additional height. I want my bikes to be no higher than the top of the trailer when going down the road.
  5. Ability to easily swap the bike rack from Dweller to tow vehicle. I want to be able to put the bikes on the back of my tow vehicle for day trips once I’m at camp.
  6. Removable. If I am taking an extended trip without the bikes, I would appreciate being able to completely remove the rack so that it is not in the way.
  7. Rugged. I want to be able to confidently carry my bikes anywhere I decide to pull my Dweller

The next thing I did was investigate the make vs. buy decision. I looked at what was commercially available.

N. America sourced Bike Carrier Options
There are a number of commercially available drawbar mount bike racks from companies such as Swagman, Stomberg-Carlson and Lippert. While they may be fine products, all of them had a number or compromises when measured against my requirements list. I looked them over and fairly quickly eliminated all of them from consideration.

Australian Sourced Bike Carrier Options
I assumed that Aussie’s may also like to bike when they caravan. I was right. Looking over the options, two manufacturers floated to the top - iSi Carriers and GripSport. Both iSi and GripSport offer caravan mounts that can be converted to an Aussie-spec hitch receiver (50mm x 50mm?).. They both have some good solutions which appear to meet most if not all of my requirements.

GripSport appears to only be interested in the Australian and New Zealand markets.

iSi is direct-to-consumer and will ship anywhere but they do not have any N. America based support that I could locate. I have seen posts in other Expedition Portal forums from several iSi owners and for the most part they seem satisfied. I looked seriously at importing an iSi system, but I decided against it for a couple of reasons.
  • Cost. I priced out the iSi hitch-mounted bike rack at about $1050 AUD without freight. In addition, I would have needed the iSi Strong Arm tower and the iSi H-mount adjustable drawbar mount. All of this would need to be flown or floated from Australia. I have no idea what freight would cost, but I am guessing that by the time I had everything in hand, it would have close to $2,000 US invested.
  • Risk . No assurances it would fit. I likely could have addressed this by directly reaching out to iSi.

After looking over the commercial options, I decided to design my own solution.

Prior to purchasing the Dweller, we camped out of a M416 that I built up over the last 25+ years. When I built the cover in 2017, I installed a couple of 1Up racks on the roof. At camp, I could transfer these rails to a 1Up hitch assembly to carry the bikes on the tow vehicle for day trips. It was a pain in the rear to carry all the pieces and have to go through the assembly and disassembly process.

Tt2liJ47OOx4_LX9GIT-Nsg0WCgz8vAXssonggqs8YnxcWR8oKMOmEn30Iu6inE1ETbxHAPcpYyacai6h8sURTGxFwKZgKI9_2jW_aaElVrY8C8wIzeyTApR7zFvddPwPeWquvmlycjns2n9sA


In 2018, I replaced the drawbar on the M416 with an extended design. At the same time, I designed a hitch receiver on the drawbar for mounting my fully assembled 1Up bike rack. This has worked out great. I have towed this setup across thousands of miles of highways and hundreds of miles of unpaved roads with no issues.


p_71CFGHQbS8r4ZqLIWIi9WkAqkohDHhlzLO6RYVI1O5gdHCI2bDsXNUpixzHTf6Id3uRiZDDpuXPJC6PsLlZ-BBD9Def2VFLTFZkYU3yZhjwwv4IQ6ffB1OYLzFN2wqE4mjarSb6kbRY1L85g


I decided to take this same approach with the Dweller.

Bolt-on vs. Weld-On
A good bolt-on solution was my preference. The iSi “H-mount” is a flexible design. I really like the GripSport “Option 2” bolt-on cross member shown in their fitting guide. However, the drawbar area on the Dweller is crowded. With the tongue-jack, the parking brake, the water faucet, and the runaway brake module, there is very little space to add an additional cross member. If I were to add a bolt-on cross member for a bike rack, it would need to be behind the existing cross member and I would need to remove/relocate the water faucet. The water faucet has a mount that is welded to the drawbar which would need to be removed.

I went with a weld-on solution and decided to work off the existing cross member. The cross member location is good for my requirements and it is 4mm thick rectangular tubing which should easily handle the load of a bike rack with 2 bikes. Am I risking the warranty on my frame? Probably, but I am pretty confident that I will not have any structural issues with the frame as a result of this project. If I were to bend/break the cross member, I guess I will have to fix it myself.

CONTINUED in Post 2 of 2
 
Last edited:

WillySwan

Well-known member
DWELLER BIKE RACK - Post 2 of 2

Design Overview

Here is a summary of the approach I took:
  • Utilize my existing 1Up rack. It is a little heavy, but it is near bulletproof. 1Up is one of the stoutest bike racks you can get in the U.S.. 1Up makes a ”Heavy Duty” hitch rack and “Super Duty” hitch rack. Both racks have 2-piece wheel trays (for ease of shipment?) with the difference being that the Super Duty has an additional reinforcement plate. My specific rack is built with the 1-piece roof-rack wheel trays. The 1Up engineer I worked with characterized my rack as “Heavy Super Duty”
  • Weld a 2-inch receiver onto the cross member. The VIN sticker for the Dweller is located on the backside of the drawbar cross member. I chose to mount the receiver vertically on the front side of the cross member. The vertical orientation gave me a lot more surface to weld to the cross member. I was very careful to protect the VIN sticker while welding.
  • Build a tower to connect the two items (analogous to the iSi Strong Arm tower). The bottom end of the tower mounts into the receiver I welded onto the cross member. The upper part of the tower has a 2-inch receiver for the 1Up rack. The tower is constructed of 2”x2” square tube 7-gauge (4.5mm). I used a heavy duty hitch stabilizer where the tower connects into the vertical hitch receiver.

Here are photos of the work-in-progress and the finished product.

Fabbing the tower

2S3vvR6T_yzxpvyj0gIzfBEh84BSYQyCW6XW1x4Cu4q8YQfFFCvL6_JLA7_87RvBzWXtoJN0sLZbdeEtLAX1-myBr-hgMTqa3vjCyl46CLVq1qQD2JvJV0ol71IKOQHD99cYEjO0uJ5q6wjVrw


Test fitting before welding onto the cross member

EHrAO_6SInzA8jl6imhOMQ_6LPWXT-DK1sYlAZltwpUOTXFib-jkMXR5ggGwNpKfWgbbItir01o98io_vOoM1lwJ_6f3cyF2ZDWS5rZidNI4vTs2fY0xsca9BPYcrM3X5ItwIv2anTdB0MpaEQ


Testing gearbox clearance

NXKyXxSoRcRBrnHT_qtctLUpqpVX4sZfM9dOpobr9VJAbbmHvZ1SDDXm8UYnb1OyGwdCbaYSU38vU2dXX7iDePUE3vLSjv6dyMyS8tZX7ZGewau7sUtYa0glNFtEHwIA4SHYz9jRCroQYF71RA


Initial sea-trials and checking turning clearances

q9ctrUl-VGnOfR0G13JVRxMLFgZI8lTlLqZvITpYmvqdrnqNQ4xwIZuXHN5UBbkHB9K-9mgy2dRqhLWfVSIi0bbIOdJq5haSraz_3wbzHwyyKLCEwMnctHPlfTe44dMo3eQseZA_0E8WYQmRug


Finished product

yKE7mHkubidFqzJAdcI3OVHll4DyiCDt-gCIubF2fMdRXNylLyVDWzZyB_L4MyGLofodJ1bXhxxUm0tTcy6ppbGMWvoXzvKElaIKK9HIhZfeG_bYfPj2gTI9DlRyLTJQSFwaMpdXbSQYsepxSg


nUGWHM5tdXgi-CrJxrU7JA3givK0DDbhLQ7_AfFDnbOBOQg5YhI9DrNyI4YaLrxMmAPkahDyHyT_DdZEn6Nw2quu1F0McJe9qS9-YgsYcc-kjdXm9r8_ZIuNLW2kyPc0rSuu5SryXWEzPEoWNg


1svFMTDzLLE9eUDQVX62tCRldCdOgASQbWXyUx5-79I6s9bEyP9LwfHPjNsTQEzMX966pIBuym7jSIZ3JV9TrfeaDeOPO95nriYQfpwFQ9lCAXOEGFxBeOQg71cH8e0B-M1wyf-Mi7hy0zLwvg


E6Y8CbunO7hg2uPj6sdVVtyqdjS4jiJ5IhWrLBZwJNaRoRUo1g214U2EUdjWSfvygzEqPT6Vvq4KueKClue-gLUlRXjC6NlYT4_25Z_G1KT4aDTNc0lmbj6g1ZZFFgQ6KooSRK-LT-DldExD5w


On the road

xqhyU0Zl11KuKIk8Oke-nZEwhXnVwozUyRWfwHzMwMWNJ_JQKXwY4-5YO2mPsK_P4ZZCMiSDkHbIzSPeWESE3KU_zOs-rU7V5ES2EIESqx00YTq2wbaxC9Ky1cEr9VICCGuPs9P8Bh7tDfl-OQ


Impact on Tongue Weight

I did a “worst case” measure on the Cat Scale with two bikes, all of my camping gear and two full water tanks. In that scenario, the tongue weight measured 680 lbs which is getting up there. When boondocking, I will tend to keep most of my potable water in the 20 gallon rear tank which is just behind the trailer wheels. I will put the minimal amount of water in the 30 gallon forward tank. I need to spend more time at the Cat Scale doing a full analysis using a typical camping load.

Ruggedness.

TBD. I have spent limited time off pavement so far. Everything is “very sturdy” and it seems like it will hold up. I am taking the SpaceX “test it until it breaks” approach. I will post updates if I break anything and/or have to make any modifications.

Useability
  • Getting bikes on and off the rack is “easy”.
  • Accessing the gearbox is “okay”. It is “easy” to tip the rack forward with the bikes in place. In that position, I can open the gearbox lid all of the way. It is just a bit more effort to get things into and out of the gearbox, but it works.
  • Transferring the bike rack from the Dweller to my tow vehicle is also “okay”. If I were younger and stronger, it would likely be easy. It looks to be easier and faster than transferring the iSi rack as shown in their YouTube video.

Total Cost
  • Two 2-Inch x 9-Inch Weld-On Raw Steel Trailer Hitch Receiver Tubes - $17 apiece
  • 3-feet of 2”x2” square tube 7-gauge - $10 at local steel yard
  • Anti-Rattle Stabilizer for 2 Inch Hitch - $17
  • Hardware, 5/8-inch Grade 8 flange head bolt, nut and washers - maybe $5
  • Bike Rack, I obviously designed around the rack I had. 1Up currently sells 2-inch hitch, 2-bike racks for between $635 and $715 depending on color and Heavy Duty or Super Duty.
Notes
  • Rustoleum aluminum colored spray paint is a perfect match to the trailer frame. This is what I used to paint the receiver I welded to the cross member.
  • I did need to relocate the parking brake forward about 1-inch in order to clear the receiver. This was a matter of drilling two holes in the handle mounting plate.

Summary

I met all of my design criteria and I am extremely pleased with the finished product. Driving across the country with one bike was no issue (refer to my shock absorber post above). By the end of July, I hope to have a very good idea as to how well this is going to hold up on rough roads. I am cautiously optimistic.

Let me know if you have any questions.
 
Last edited:

Obsessed2findARuggedHybid

Well-known member
So far it looks like these Dweller s are a decent build for the cost. I noticed that one of our local dealers has 20-40 units on thier lot. The dealer network seems to be both off road and massive RV dealer chains. In other words they have built a sheet ton of these rigs. I am guessing in the thousands. Possibly more then MDC, Opus and Black Series. So I am curious could all these US Dwellers actually go through AZ to be American ized or are they just shipped in straight to dealers from China? I only bring this up for QC issues on such a mass produced rig. So far so good right?
 

Raspy

Active member
So far it looks like these Dweller s are a decent build for the cost. I noticed that one of our local dealers has 20-40 units on thier lot. The dealer network seems to be both off road and massive RV dealer chains. In other words they have built a sheet ton of these rigs. I am guessing in the thousands. Possibly more then MDC, Opus and Black Series. So I am curious could all these US Dwellers actually go through AZ to be American ized or are they just shipped in straight to dealers from China? I only bring this up for QC issues on such a mass produced rig. So far so good right?

I have a friend with a Dweller, and I've met one of the owners of OBI. After looking the Dweller over very carefully, I came away convinced of the high quality of the build. The owner is well trailed in manufacturing and intends to do it right. All of this is in extreme contrast to Black Series, for instance. BS has has had numerous quality control problems and refuses to try to do better.

I had a Black Series HQ19 for a couple of years. During that time a dealer I know, and I, tried to help BS do better and I spent a lot of time fixing mine. In the end, we both gave up and moved on. Many BS dealers have dropped them and the new dealers don't know anything about them. Compare for yourself and you'll see what I mean. It's too bad, but in my opinion, the management at BS is the problem. The trailers are almost great, but mistake after mistake, and a bad attitude, really takes away from the user experience.
 

Obsessed2findARuggedHybid

Well-known member
Good to know and it sounds like you have very close ties to OBI and know more then I do as I have only seen one twice and it was a fairly quick walk through. There are a few things I would worry about in the Dweller. The cabinetry seem to be questionable, the wiring and electrical did appear a tad messy, vynal looked to be sub par, the truma and pretty much everything else is under the bed which could create a lot of heat. Bathroom is decent but the insert seemed cheaper. The stick on solar panels looked suspect but i could not see the brand. Wondering the quality of the suspension system as it looks Chinese. Those are my only concerns. I like the galv chassis, Mc hitch, truma and frig. Like I said there lots of these units out there so I guess thats a good thing for availability but also means there could be mass production issues. I hope not!

Curious to what brand awining the Dweller 15 comes with. Website states 12' electric. Wondering if that style awining is heavy-duty enough. It sure could make a good spiniquer if down wind ?
 

gendlert

Well-known member
Curious to what brand awining the Dweller 15 comes with. Website states 12' electric. Wondering if that style awining is heavy-duty enough. It sure could make a good spiniquer if down wind ?

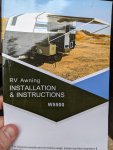
Doesn't appear to be any name brand or anything. Note the warning in the manual; not a heavy duty awning by any means.
PXL_20220627_161835158.jpgPXL_20220627_161940689.MP.jpg

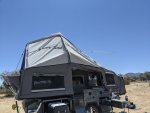
That being said, I've had awnings that were super heavy duty, but they're only as good as your tie-down job. Here's a pic of what the Graveler XT was supposed to look like set up, and what it looks like when a gust of wind comes before you get a chance to tie it down. That's another OBi product, and they got me replacement poles because I bent a few of them in that incident. I never made that mistake again.

PXL_20210716_212533734 (2).jpgPXL_20210417_193138521 (2).jpg

So no, it's not a heavy duty awning, but I've had it in 25 mph winds (which it didn't like and I rolled it in) and some rain (which it didn't mind much as long as I gave it some tilt to run the water off). Basically if you use your common sense and roll it up before it gets to crappy out, it should last a while.
 

gendlert

Well-known member
DWELLER BIKE RACK - Post 2 of 2

Impact on Tongue Weight

I did a “worst case” measure on the Cat Scale with two bikes, all of my camping gear and two full water tanks. In that scenario, the tongue weight measured 680 lbs which is getting up there. When boondocking, I will tend to keep most of my potable water in the 20 gallon rear tank which is just behind the trailer wheels. I will put the minimal amount of water in the 30 gallon forward tank. I need to spend more time at the Cat Scale doing a full analysis using a typical camping load.

Let me know if you have any questions.

Interesting, I'm trying to think about this from a pure physics standpoint: wouldn't the worst case on tongue weight be with only the front tank full? Because the rear tank is behind the axle, doesn't that actually decrease tongue weight when filled? There's gotta be some effect on overall weight impacting downward force on the trailer tongue, but I wonder if that's greater than the lever action from being behind the axle. I'm gonna need you to do a bunch more trips to the Cat Scales so we can resolve this. :)
 

eatSleepWoof

Do it for the 'gram
Interesting, I'm trying to think about this from a pure physics standpoint: wouldn't the worst case on tongue weight be with only the front tank full? Because the rear tank is behind the axle, doesn't that actually decrease tongue weight when filled?

Correct. Load behind the axle decreases tongue weight. Load forward of the axle increases tongue weight. This goes for any trailer.
 

gendlert

Well-known member
Correct. Load behind the axle decreases tongue weight. Load forward of the axle increases tongue weight. This goes for any trailer.

OK, but let's nerd out for a minute, because we're trying to get to the "worst case":

We can agree that weight in front of the axle will increase tongue weight (TW). And that weight behind the axle (in a rigid fulcrum situation, like a teeter-totter on a playground) would decrease TW. But say, for argument's sake, that you add 1000 lbs centered directly over the axle. With a rigid fulcrum, the TW wouldn't change, but with suspension (like most trailers have, and Willy's Dweller in particular), the entire chassis will "squat," and the TW will increase somewhat (I think; this is my hypothesis, anyway). So if that's true, you COULD be adding TW just by adding overall weight, regardless of its relative location to the axle. Adding water to the rear tank which is behind, but very close to, the axle: is the "squat" impact greater than the "lever/fulcrum" impact? That's what we're talking about here, right? Is adding 250 lbs of water in front of the axle or adding 500 lbs of water straddling the axle going to add more TW?

There have got to be some physics majors following this. :geek:
 

eatSleepWoof

Do it for the 'gram
OK, but let's nerd out for a minute, because we're trying to get to the "worst case":

We can agree that weight in front of the axle will increase tongue weight (TW). And that weight behind the axle (in a rigid fulcrum situation, like a teeter-totter on a playground) would decrease TW. But say, for argument's sake, that you add 1000 lbs centered directly over the axle. With a rigid fulcrum, the TW wouldn't change, but with suspension (like most trailers have, and Willy's Dweller in particular), the entire chassis will "squat," and the TW will increase somewhat (I think; this is my hypothesis, anyway). So if that's true, you COULD be adding TW just by adding overall weight, regardless of its relative location to the axle. Adding water to the rear tank which is behind, but very close to, the axle: is the "squat" impact greater than the "lever/fulcrum" impact? That's what we're talking about here, right? Is adding 250 lbs of water in front of the axle or adding 500 lbs of water straddling the axle going to add more TW?

There have got to be some physics majors following this. :geek:

Yes, anything that changes the height of the trailer relative to the tow vehicle will affect tongue weight, but the height change would have to be very significant to make a noticeable difference in tongue weight.

I had a bit of experience with this with my last travel trailer...

When I bought it, the trailer was incredibly low to the ground and was much lower than my tow vehicle, so the trailer's tongue pointed up towards the coupler. In this configuration I could stand on one leg (and I did, as the other one was significantly hurt) and lift the trailer's tongue into the air. The trailer was around 2500lbs. The poor weight distribution resulted in incredible trailer sway, and I almost lost it at about 110kph just 10 minutes out of the dealership.

The trailer desperately needed more tongue weight.

I had the trailer lifted about 5", I then extended the tailer's tongue by two feet (effectively putting the axle further back relative to the overall trailer length), and built a storage platform on the tongue that I would then load with about 200-300lbs of propane/water/etc. These modifications made a colossal difference in trailer stability. I hauled it at 120-130kph all day long with zero problems, and had it up to 150kph.
 

Forum statistics

Threads
188,259
Messages
2,904,632
Members
229,805
Latest member
Chonker LMTV
Top