You are using an out of date browser. It may not display this or other websites correctly.
You should upgrade or use an alternative browser.
You should upgrade or use an alternative browser.
OBS FORD 350 PSD FWC FB Hawk build
- Thread starter offroadrolls
- Start date
IdaSHO
IDACAMPER
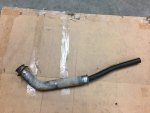
One thing about the stock filler necks that I'd never seen before is that the fuel actually runs all the way to the tank in a tube that is inside the larger hose connected to the filler neck and the venting runs around the outside of the smaller hose.
Thats the "liner" that I spoke of.
And after some research and testing, I ripped them out.
The result is faster fueling and less spillage, at least with the shallow slope provided by flatbed rail-height fillers.
Something else Ive been meaning to do, just havnt found the time for it yet, is to tie the two filler necks together with a vent tube, to purge the displaced air out of the tank faster, when being fed fuel. The thought is that liner removed, fillers connected via vent tube, and with both fuel caps removed, the Ill be able to fuel faster.
offroadrolls
Observer
Something else Ive been meaning to do, just havnt found the time for it yet, is to tie the two filler necks together with a vent tube, to purge the displaced air out of the tank faster, when being fed fuel. The thought is that liner removed, fillers connected via vent tube, and with both fuel caps removed, the Ill be able to fuel faster.[/QUOTE]
Ya that makes sense like you can't put the fuel in any faster than the air it's displacing can escape. I got my figures crossed that mine works OK. I double checked today and have between a 2 and 4 in drop to both tanks.
Ya that makes sense like you can't put the fuel in any faster than the air it's displacing can escape. I got my figures crossed that mine works OK. I double checked today and have between a 2 and 4 in drop to both tanks.

SSSSTFIRE
Adventurer
Later after lunch the Fedex truck pulled up with the new wheels my wife picked out. They're Desert Sand Armory from Black Rhino. Here's a picture of one during test fitting. BTW, I got these at Wheel warehouse in CA. and I gotta say great service!!
View attachment 398598
Those wheels are sic!! What's the back spacing and offset? I know your front is leafsprung, I figure you don't expect any fitment issues with the 35's. Were you ever considering 37's?
Sent from my iPhone using Tapatalk
offroadrolls
Observer
Thanks Guys. I knew 35's would fit from reading threads on forums and the Autonomous F350 thread by Pappawheely is running 37's on pretty much the same truck. The story on the wheels is I must have looked at 3000 different wheels and nothing really appealed to me. Then I saw these and really liked them. They also come in a Gun Black that I preferred but those were 45 days out. So we got these and figured if they don't look right we'll Plastidip them another color that does.
They come in 2 offsets, 6mm and -18mm and 3 diameters, 17, 18, and 20 all 3 are 9.5" wide. I did the math and figured the -18mm would work out. I test fit them before mounting the tires and the rears look like I'll have about and inch between the sidewall and the airbag. The fronts should be OK too as they clear all the vitals. I'll be building a new front bumper at some point so I can gain clearance there if its needed. As far a 37's go I have mixed feeling about big tires and going to 35's on a truck like this was a big step for me. In a previous life I was a mechanic so I tend to see things from a what's going to happen point of view. I'm gonna lose some power and fuel economy and I've already started the hunt for a Dana 60 front axle to replace the 50 that these tires are sure to kill. I'll post some pictures as soon as I get em' on the truck.
They come in 2 offsets, 6mm and -18mm and 3 diameters, 17, 18, and 20 all 3 are 9.5" wide. I did the math and figured the -18mm would work out. I test fit them before mounting the tires and the rears look like I'll have about and inch between the sidewall and the airbag. The fronts should be OK too as they clear all the vitals. I'll be building a new front bumper at some point so I can gain clearance there if its needed. As far a 37's go I have mixed feeling about big tires and going to 35's on a truck like this was a big step for me. In a previous life I was a mechanic so I tend to see things from a what's going to happen point of view. I'm gonna lose some power and fuel economy and I've already started the hunt for a Dana 60 front axle to replace the 50 that these tires are sure to kill. I'll post some pictures as soon as I get em' on the truck.
offroadrolls
Observer
wheel on!!
Here's a picture outside the shop just after bolting on the new wheels. And the flatbed is about 95% done.
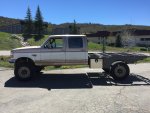
Here's the "before shot"
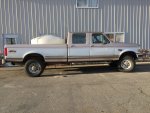
Here it is backed in under the camper so we could decide on a color for the flatbed side skirts etc. The big space between the cab and camper is where the backpack box I'm building will go. It'll have a basic out door kitchen that slides out on the awning side.
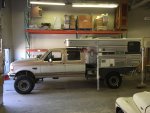
Here's a picture outside the shop just after bolting on the new wheels. And the flatbed is about 95% done.

Here's the "before shot"

Here it is backed in under the camper so we could decide on a color for the flatbed side skirts etc. The big space between the cab and camper is where the backpack box I'm building will go. It'll have a basic out door kitchen that slides out on the awning side.

offroadrolls
Observer
One of the 2 colors is called Gun Black and the pictures look like what I'd call gun metal.
All the fasteners on the face are real steel. I did not try to remove them with a wrench but it did cross my mind to give it a try but, I don't mess anything up.
Originally I wanted the Gun Black color but got these because of the lack of availability of the others. I'm good with these though, we have a plan.
Glad to see they have them in several more offsets, I think they will sell the hell out of these.
offroadrolls
Observer
No, you'd need to cut a hole in them or not mount them
offroadrolls
Observer
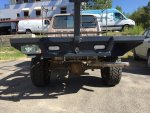
Got the flatbed done and took it to the powder coater up in Craig CO. Installed the filler necks and all the rear lights etc. Put 19 gallons in the new rear tank and crossed my figures that it would read 1/2 tank. Of course it did not so I had to pull the sender and bend the arm until it did.


Also started on the pack pack box that'll go between the cab and the camper. It's going to be sort of purpose built to hold the grill, and the outdoor chairs. Above the grill will be a hammock style cargo net. Then below the grill will be a 4 foot pull out counter type deal for setting the grill on. On the other side below the chairs it'll be a pull out drawer of sorts just for storing whatever. Tomorrow I have a full day to work on the box.........hope I can finish it.
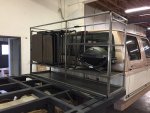
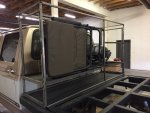


Also started on the pack pack box that'll go between the cab and the camper. It's going to be sort of purpose built to hold the grill, and the outdoor chairs. Above the grill will be a hammock style cargo net. Then below the grill will be a 4 foot pull out counter type deal for setting the grill on. On the other side below the chairs it'll be a pull out drawer of sorts just for storing whatever. Tomorrow I have a full day to work on the box.........hope I can finish it.


offroadrolls
Observer
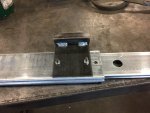
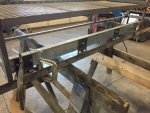
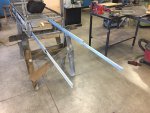
Didn't get as far as I expected but did make some progress. I started with mounting the drawer and counter slides into the box frame. Here's the doodads I made to mount to the slides and then weld into the frame of the box.
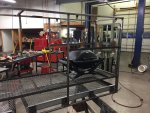
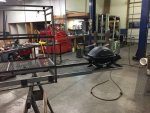
Then I made some frames out of angle and welded in expanded metal.
Next I skinned the front and back with .080" aluminum diamond plate. For this I glued it to the frame with windshield urethane and then riveted it with aluminum rivets.
I'm doing it this way because tig welding is beyond my skill set.
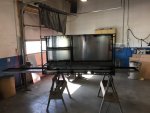
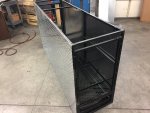
Next, I'll skin the ends, mount the doors, lights and switches and then put the top on.


Then I made some frames out of angle and welded in expanded metal.


Next I skinned the front and back with .080" aluminum diamond plate. For this I glued it to the frame with windshield urethane and then riveted it with aluminum rivets.
I'm doing it this way because tig welding is beyond my skill set.


Next, I'll skin the ends, mount the doors, lights and switches and then put the top on.
Similar threads
- Replies
- 0
- Views
- 432
- Replies
- 2
- Views
- 610
- Replies
- 1
- Views
- 556
