Thanks Brad! I was actually kind of waiting for some commentary on the rear shackle placement. It was hard to find much useful information about how they should be located. I've been half-expecting to have to move them. What's the best method, though? Do I load up the trailer with all the components on it, then locate the mounting bracket so that the shackle is vertical? Or should it be done with the weight off the trailer? Does it matter?
You are using an out of date browser. It may not display this or other websites correctly.
You should upgrade or use an alternative browser.
You should upgrade or use an alternative browser.
Off-road teardrop scratch-build
- Thread starter rob cote
- Start date
indiedog
Adventurer
It affects the rate of travel and how much travel you get from your spring, you want the spring to be "working" and not too much play in the shackle which would allow a lot of movement without the spring taking much of the load. So, as the suspension determines if you arrive with eggs or scrambled eggs, I reckon it's worth doing. Attached pic shows the installed but unladen setup from Alko and it's the same regardless of the amount of leaves on the spring.


Louisd75
Adventurer
Thanks Brad! I was actually kind of waiting for some commentary on the rear shackle placement. It was hard to find much useful information about how they should be located. I've been half-expecting to have to move them. What's the best method, though? Do I load up the trailer with all the components on it, then locate the mounting bracket so that the shackle is vertical? Or should it be done with the weight off the trailer? Does it matter?
etrailer has a pretty good description, though you may have to do some legwork to figure out which mounting kit they reference is closest to what you have:
https://www.etrailer.com/question-54112.html
If you're using Dexter parts, you can use page 4 of their catalog PDF (pg 22 of the catalog)
http://www.dexteraxle.com/docs/defa...mentation/catalogs/2300-4000_lbs.pdf?sfvrsn=4
indiedog
Adventurer
etrailer has a pretty good description, though you may have to do some legwork to figure out which mounting kit they reference is closest to what you have:
https://www.etrailer.com/question-54112.html
If you're using Dexter parts, you can use page 4 of their catalog PDF (pg 22 of the catalog)
http://www.dexteraxle.com/docs/defa...mentation/catalogs/2300-4000_lbs.pdf?sfvrsn=4
I'm surprised the links show the shackle angling in at the top as per current installation. The shackle is meant to handle the fact the spring gets longer as it deflects, so you'd think forward to backward movement at the rear eye is what's required and this seems better served with the centre of deflection having the shackle vertical. This way the shackle has maximum capability to move forward/backward to manage spring deflection. If the shackle is installed as per the etrailer diagrams then it's capacity to move backwards to handle spring deflection is limited by the fact it has to move up as well as back. Obviously the more horizontal the shackle gets its capacity to handle the lengthening of the spring approaches zero. It would also exert a rearwards force on the shackle/bushings/mount which would be significantly more than the compressive force pushing upwards as the wheel travels up.
Maybe they are using the extra bit of vertical travel permitted by the shackle to get more vertical travel when you hit a bump?? Just make sure the spring when fully flattened out does not make the shackle go all the way to the horizontal.
Maybe you guys just do it differently to us.
workingonit71
Aspirantes ad Adventure
concerning leaf spring shackle mounting
 Here's a drawing of how the angle of the spring shackle affects ride quality. I made my spring assemblies as one piece to retrofit on my trailer frame, after the original axle and springs started to fail (too much trailer weight). I looked at several other trailers and compared their known "factory" weight/spring rate/shackle angle ratios and tried to interpolate my projected final trailer weight using the average ratio. I also (here's where I went wrong) used too heavy a spring rating for mine, thinking that less flex would be better for overall ride control. My trailer is 1650-1750 lbs loaded, so I figured I would gain extra durability using 3000 lb (on a Dexter 3500 lb axle) springs. I soon found out, that they didn't compress enough to absorb shocks, even on the highway. The axle only drops 1.25 inches at full droop. So, as a partial remedy (short of replacing my brand-new springs with softer ones, though I will before venturing off-road), I used some progressive rate bumpstops, cut down to fit, and modified to be less-stiff, to absorb some of the harshness and bounce I had over bumps. They performed as I hoped, and will work until I get a 4WD. If the proper spring rate is chosen for your trailer, then the shackle angle can control the ride quality somewhat, even if you choose to use any additional ride control accessory or not. Choose wisely!
 Here's a drawing of how the angle of the spring shackle affects ride quality. I made my spring assemblies as one piece to retrofit on my trailer frame, after the original axle and springs started to fail (too much trailer weight). I looked at several other trailers and compared their known "factory" weight/spring rate/shackle angle ratios and tried to interpolate my projected final trailer weight using the average ratio. I also (here's where I went wrong) used too heavy a spring rating for mine, thinking that less flex would be better for overall ride control. My trailer is 1650-1750 lbs loaded, so I figured I would gain extra durability using 3000 lb (on a Dexter 3500 lb axle) springs. I soon found out, that they didn't compress enough to absorb shocks, even on the highway. The axle only drops 1.25 inches at full droop. So, as a partial remedy (short of replacing my brand-new springs with softer ones, though I will before venturing off-road), I used some progressive rate bumpstops, cut down to fit, and modified to be less-stiff, to absorb some of the harshness and bounce I had over bumps. They performed as I hoped, and will work until I get a 4WD. If the proper spring rate is chosen for your trailer, then the shackle angle can control the ride quality somewhat, even if you choose to use any additional ride control accessory or not. Choose wisely!
So the rear of the trailer has a couple stabilizer jacks. They have to be tall, due to the height of the trailer. This makes them long, when collapsed. Since it's such a small trailer, this was a little tricky to deal with. I wanted to tuck them up "into" the frame as much as possible, to minimize the possibility of getting them hung up on stuff and/or ripped off. So I mocked up a few different options.
This option has the jacks flush with the top of the frame. Keep in mind that as the legs swing down, the feet get closer and closer to the nut end of the jacks.
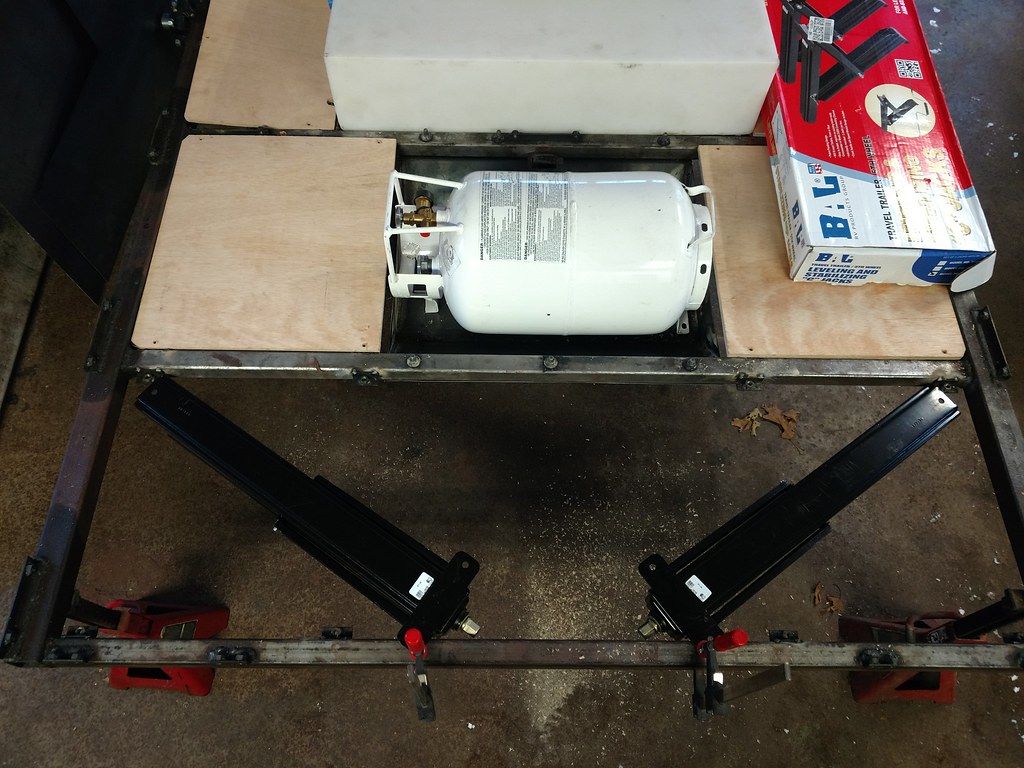
I didn't like this because both the feet would be near the middle of the trailer, near each other, when deployed. It didn't seem like it would be very stable, thus defeating its very purpose.
This option was just dumb:
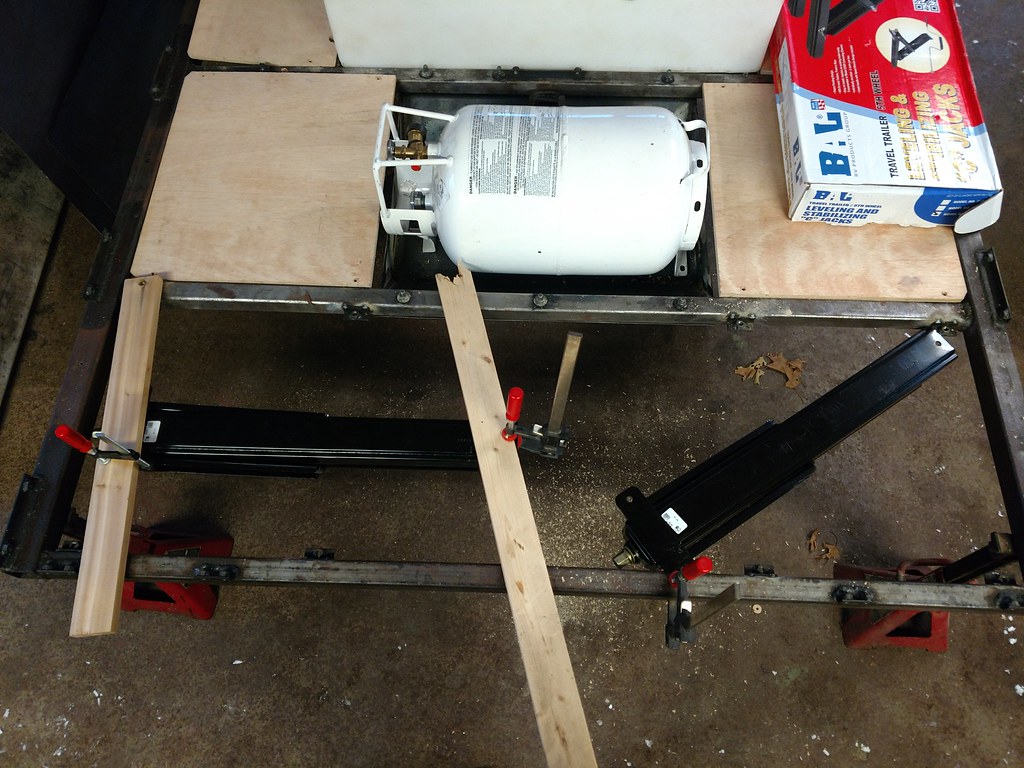
I looked at mounting them in this orientation and flush with the top of the frame:
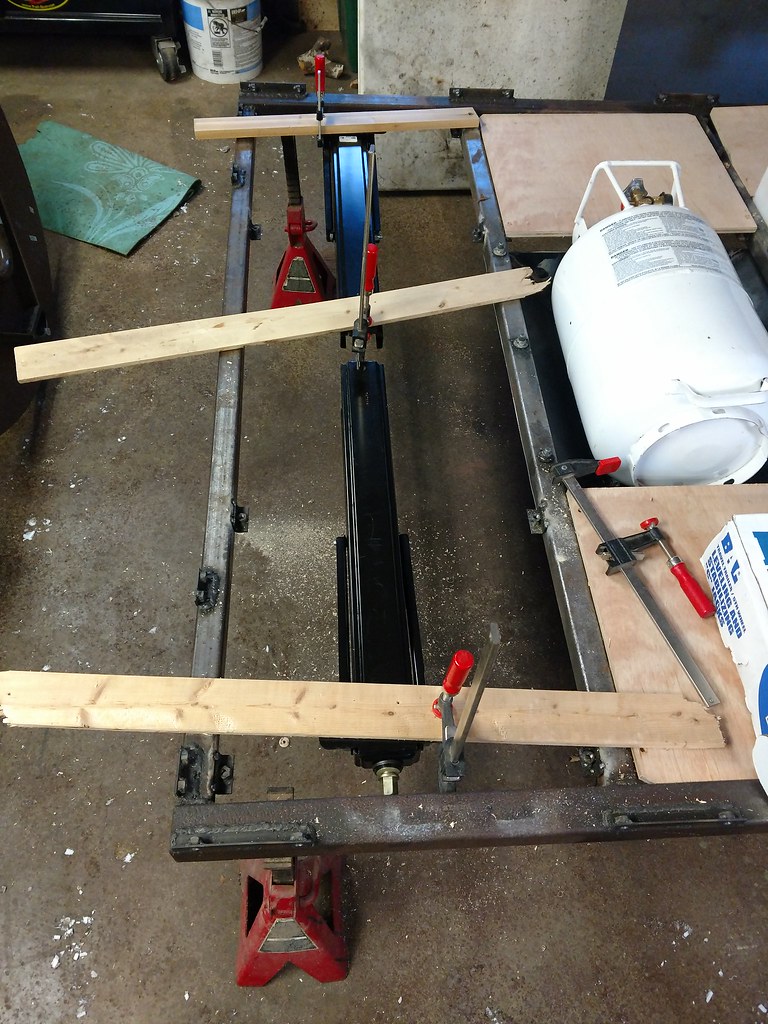
This would have meant drilling and sleeving the frame to allow access to the jacking nuts. Which was an option, however it was rather close to the bottom of the frame tube, which I didn't like.
In the end, I decided to lower them about a half inch or so, which put the drive nuts fully below the frame tube, and required no drilling into the frame. I think the sacrifice of clearance was worth not having to modify the frame in this manner. We got some U-channel and cut it to length to fit between the crossmembers. Using the jacks to locate the sections of channel, I welded them in place.
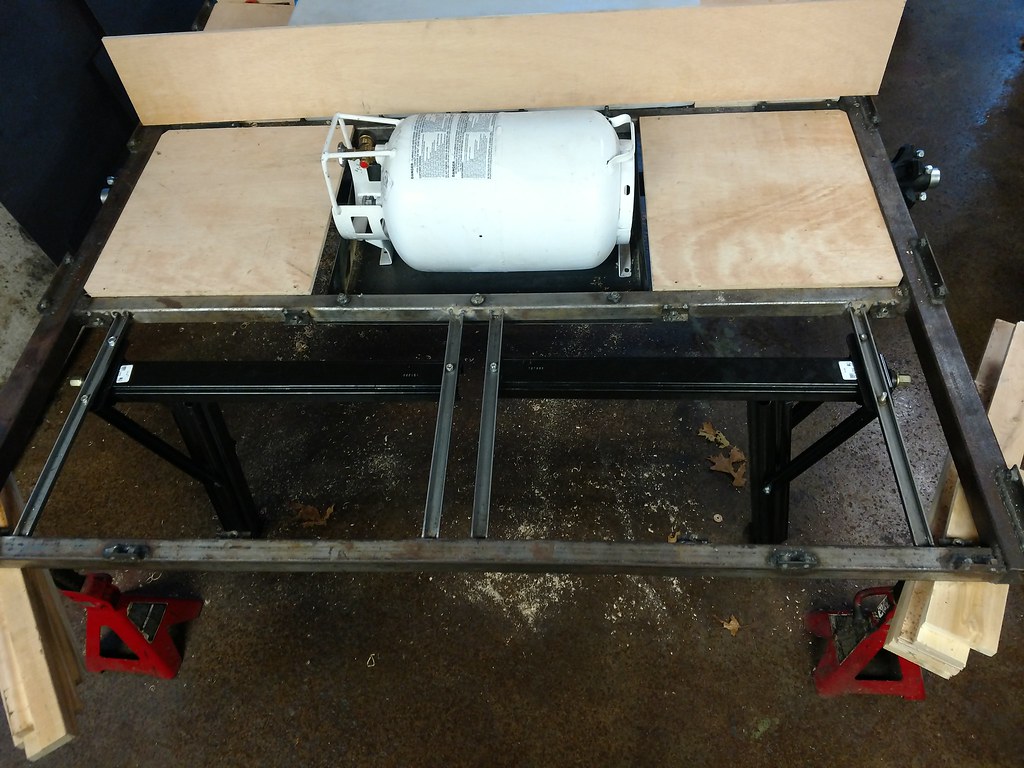
Drilling the mounting holes was a simple matter. I still need to get matching hardware for it; for now it's just assembled with stuff from my miscellaneous bucket that was approximately similarly-sized.
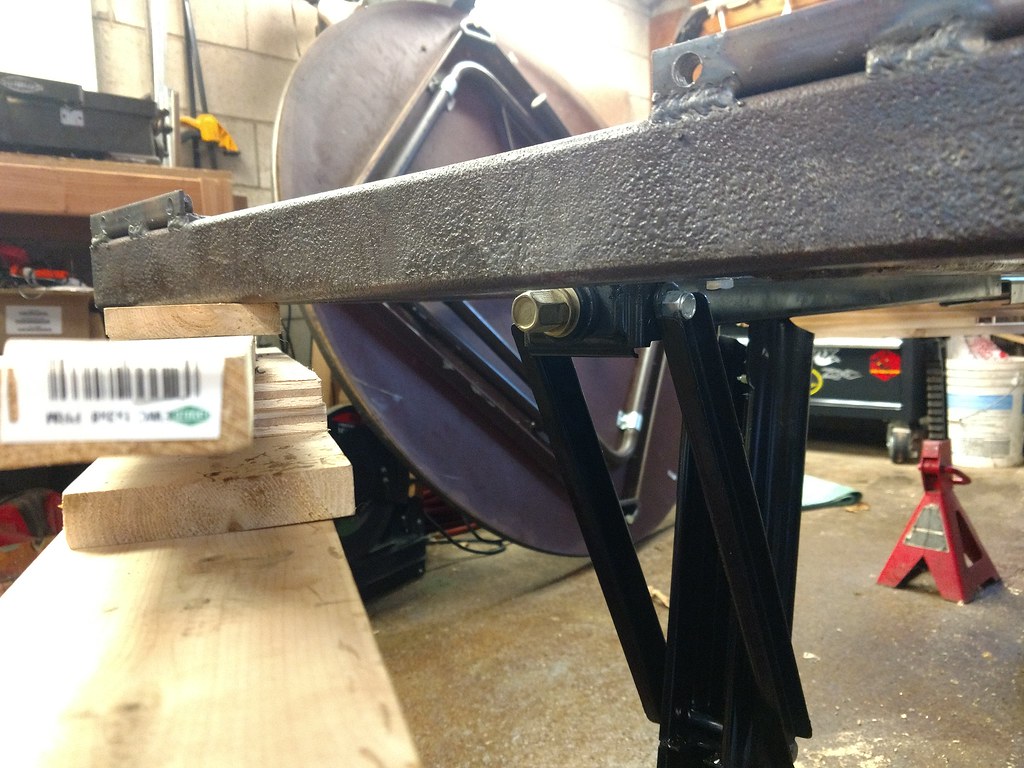
I don't have a good picture of the jacks collapsed right now. They hang down very little from the frame, though.
This option has the jacks flush with the top of the frame. Keep in mind that as the legs swing down, the feet get closer and closer to the nut end of the jacks.

I didn't like this because both the feet would be near the middle of the trailer, near each other, when deployed. It didn't seem like it would be very stable, thus defeating its very purpose.
This option was just dumb:

I looked at mounting them in this orientation and flush with the top of the frame:

This would have meant drilling and sleeving the frame to allow access to the jacking nuts. Which was an option, however it was rather close to the bottom of the frame tube, which I didn't like.
In the end, I decided to lower them about a half inch or so, which put the drive nuts fully below the frame tube, and required no drilling into the frame. I think the sacrifice of clearance was worth not having to modify the frame in this manner. We got some U-channel and cut it to length to fit between the crossmembers. Using the jacks to locate the sections of channel, I welded them in place.

Drilling the mounting holes was a simple matter. I still need to get matching hardware for it; for now it's just assembled with stuff from my miscellaneous bucket that was approximately similarly-sized.

I don't have a good picture of the jacks collapsed right now. They hang down very little from the frame, though.
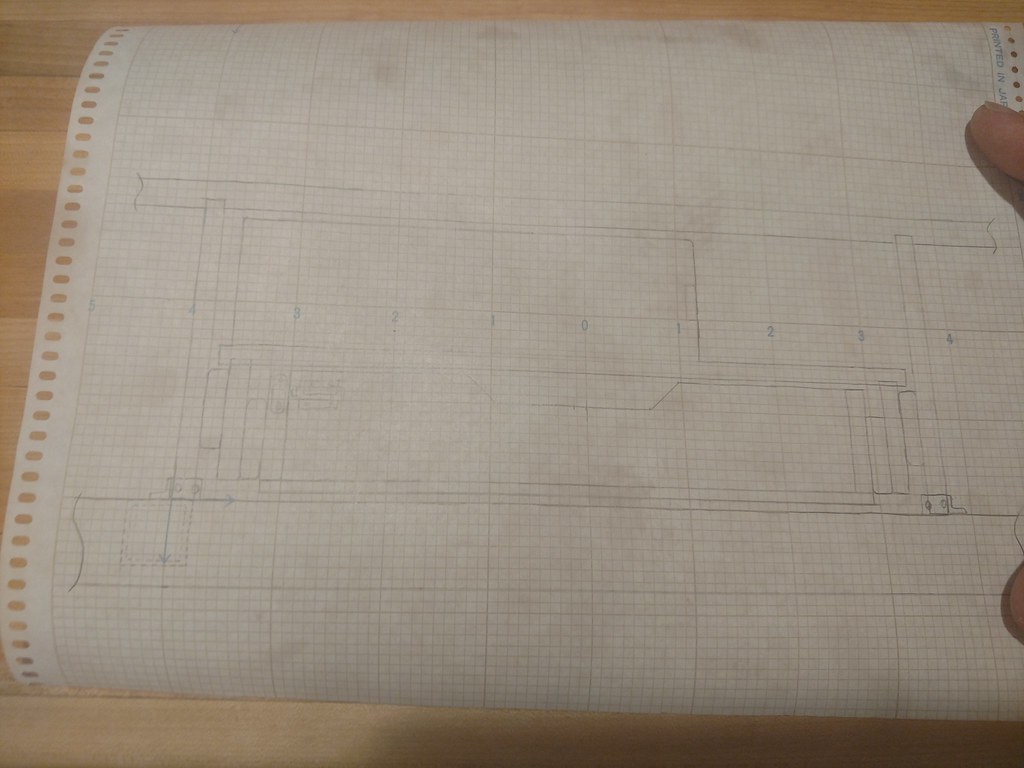
Of course, we need a cooking surface! We already have a propane grill so we incorporated that and designed around it. The grill has to slide out of the trailer side wall so we can use it without burning the whole place down, so it's on a sort of upside-down drawer. We wanted to take full advantage of the drawer space, so we put a right-side-up drawer inside it. This will allow us to store utensils and whatnot conveniently. That's the hope anyways. It's a little tough to see, but this is what we're working toward:
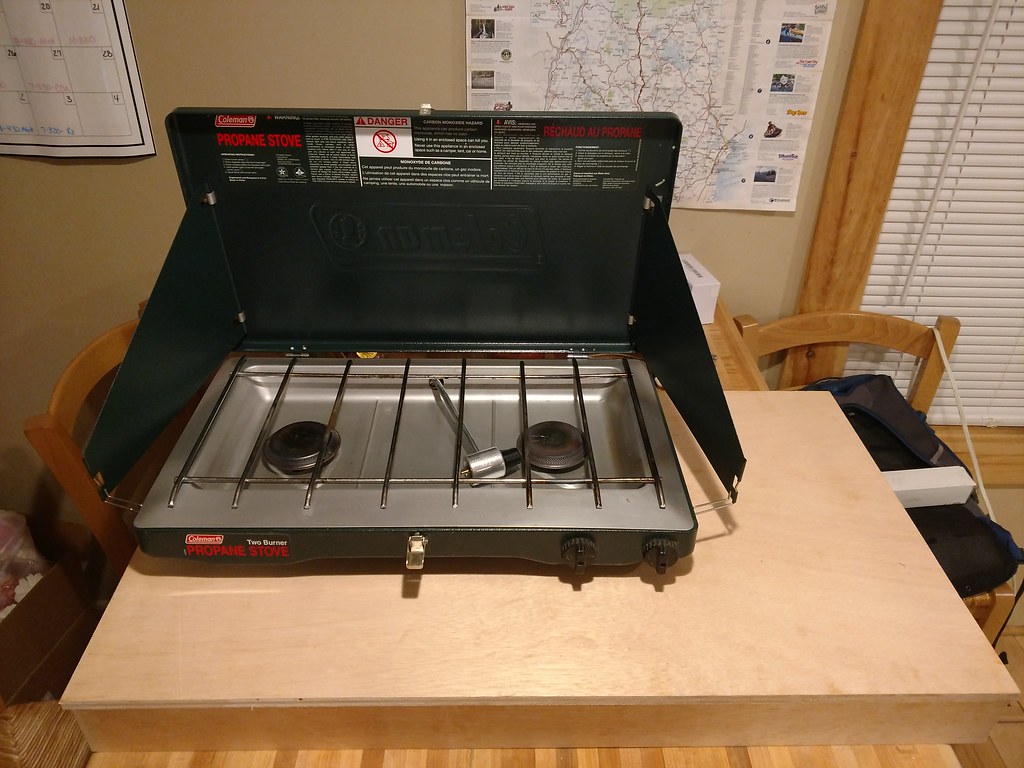
So first I made up a 4-sided box, which will support the stove and house the utensil drawer.
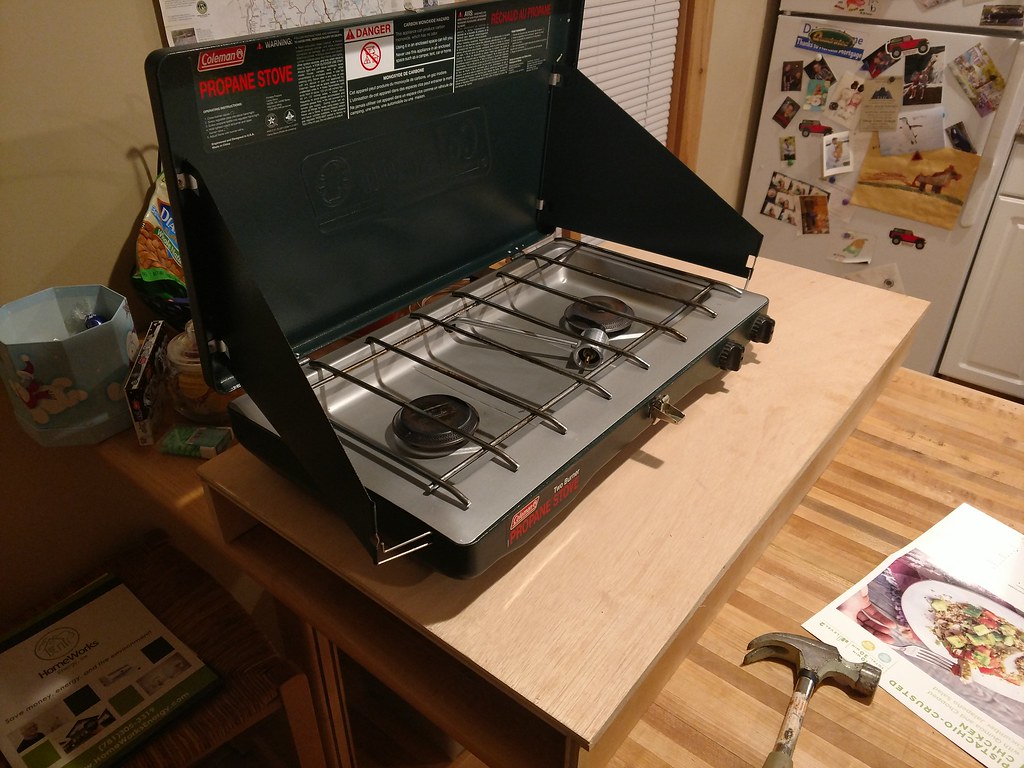
And we made it larger than it has to be, with the intent to have a little work area next to the stove.
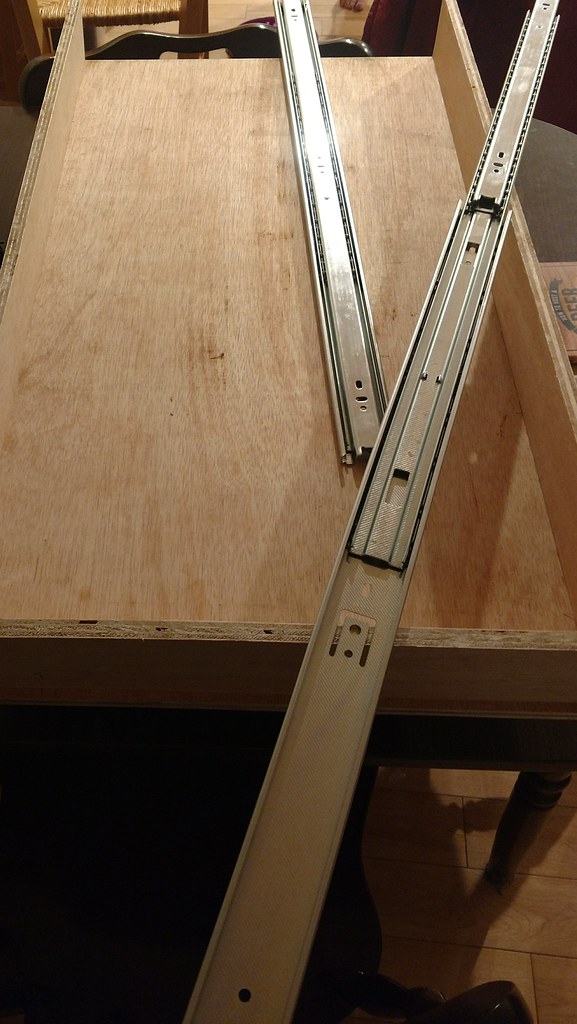
Then, we got some long, heavy-duty drawer slides to mount the whole rig to the trailer.
We assembled the drawer to the trailer for a test run to make sure everything was right. Closed/stowed:
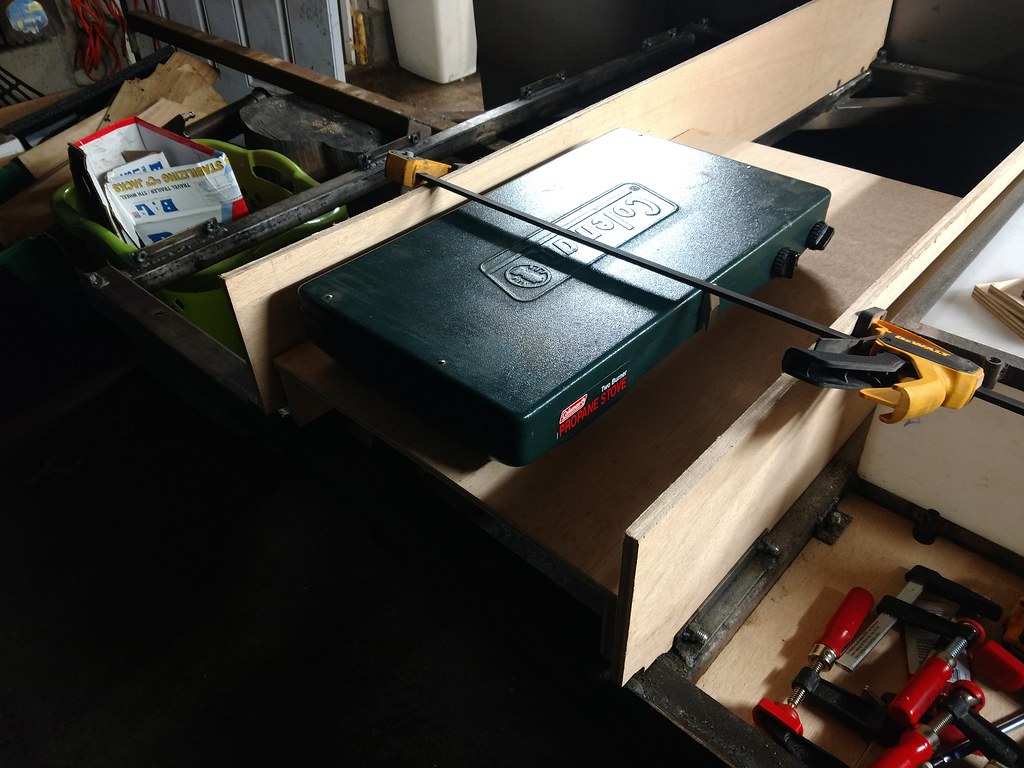
Open/deployed:
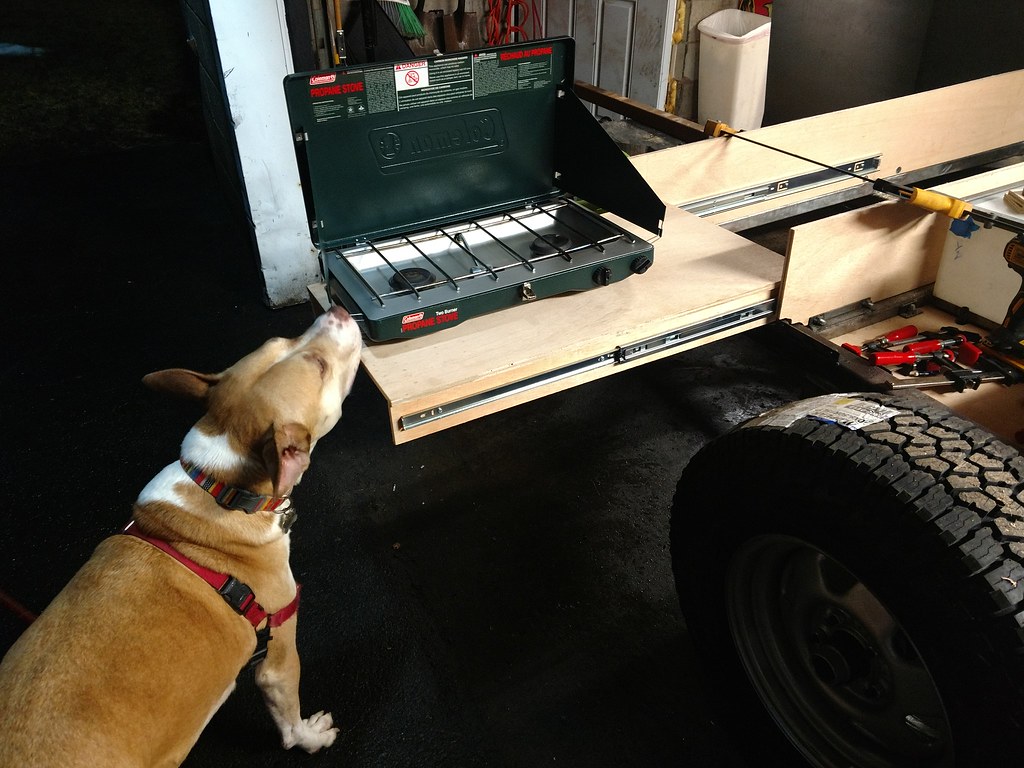
Dog said it's acceptable, so we continued knowing we were on the right track. I made up a drawer for utensils but I ended up scrapping it. I'll show you anyways. On the outside it looked fine.
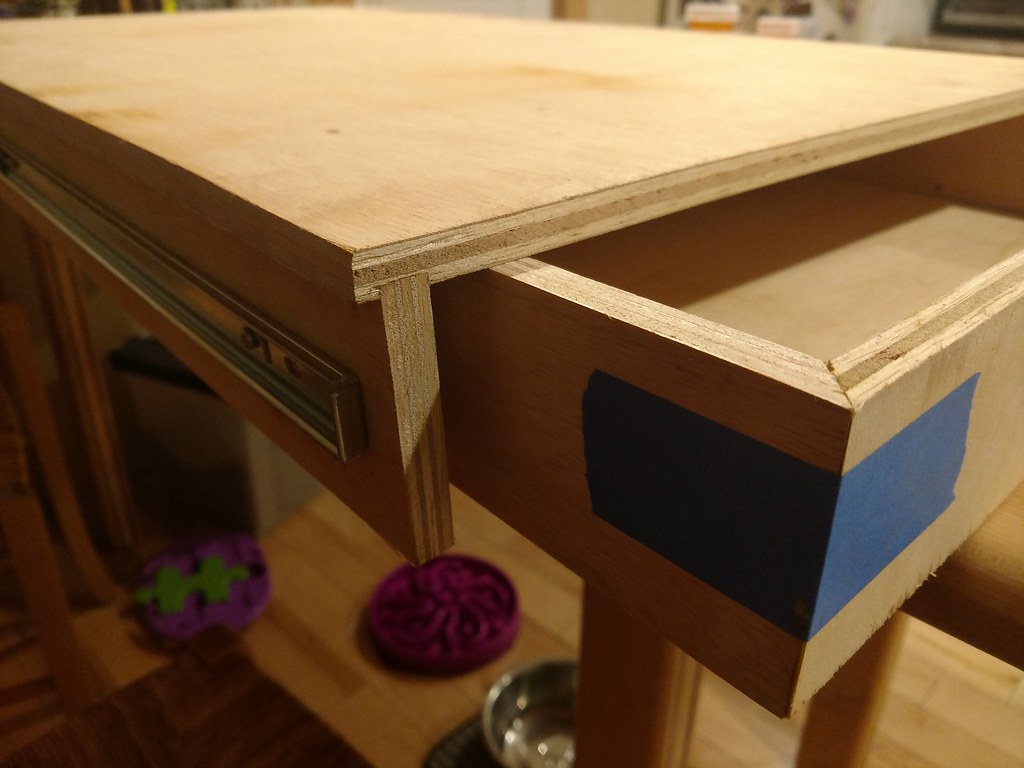
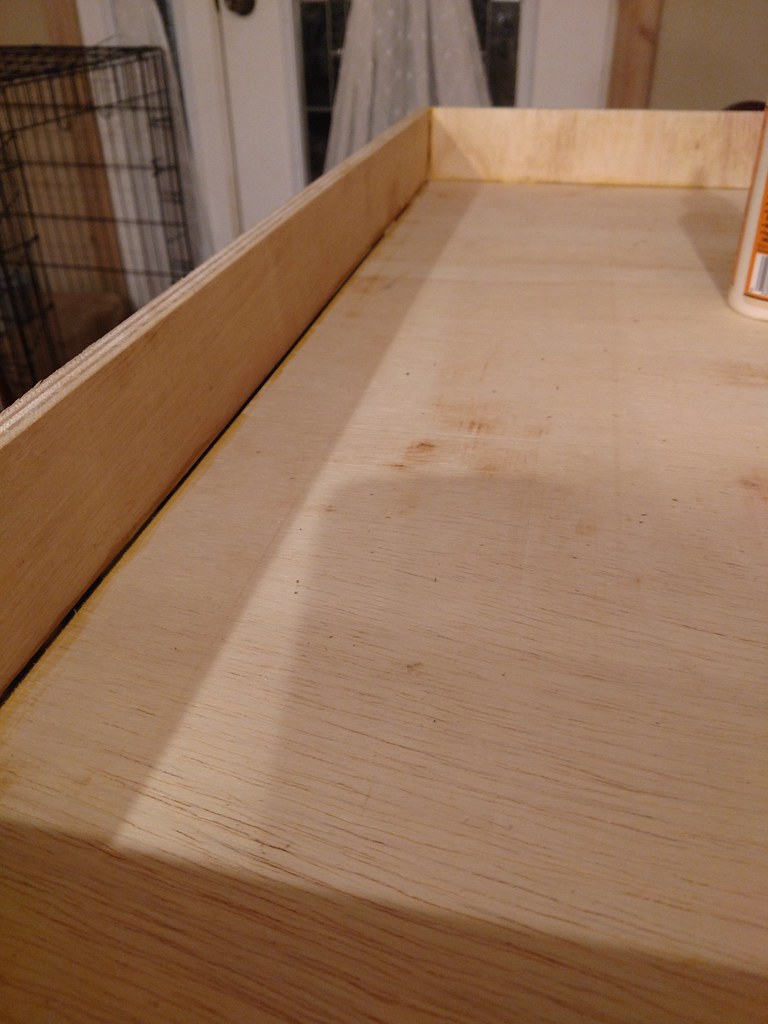
But the real issue was the inside. I screwed up the glue up and ended up with this big stupid gap:
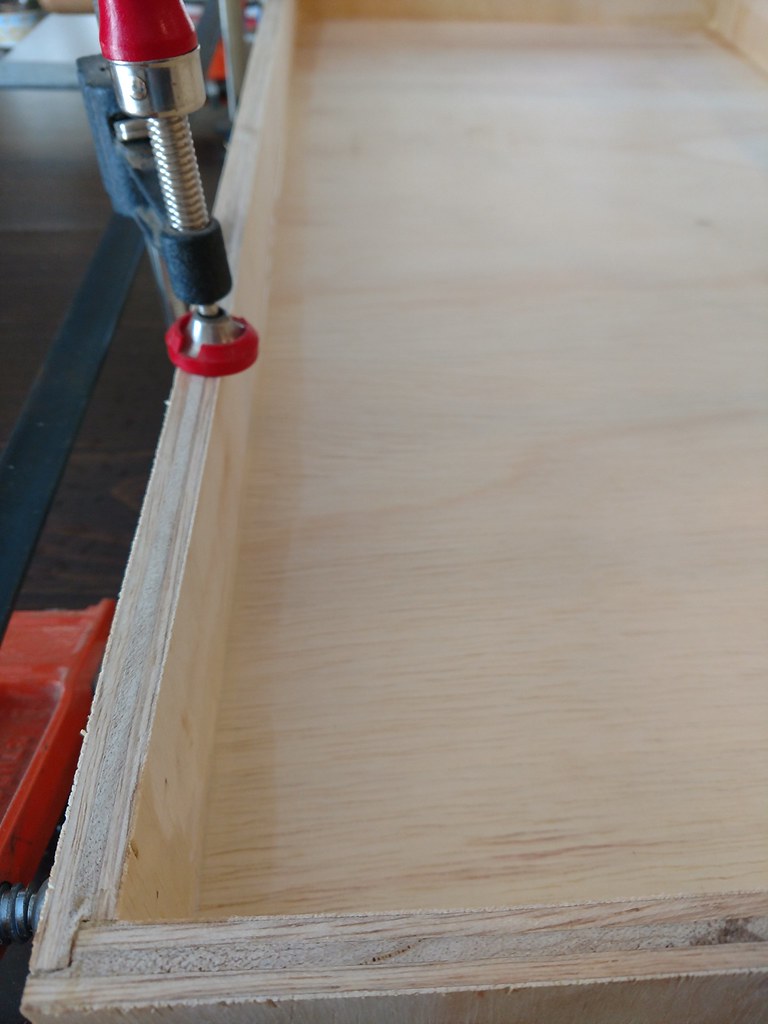
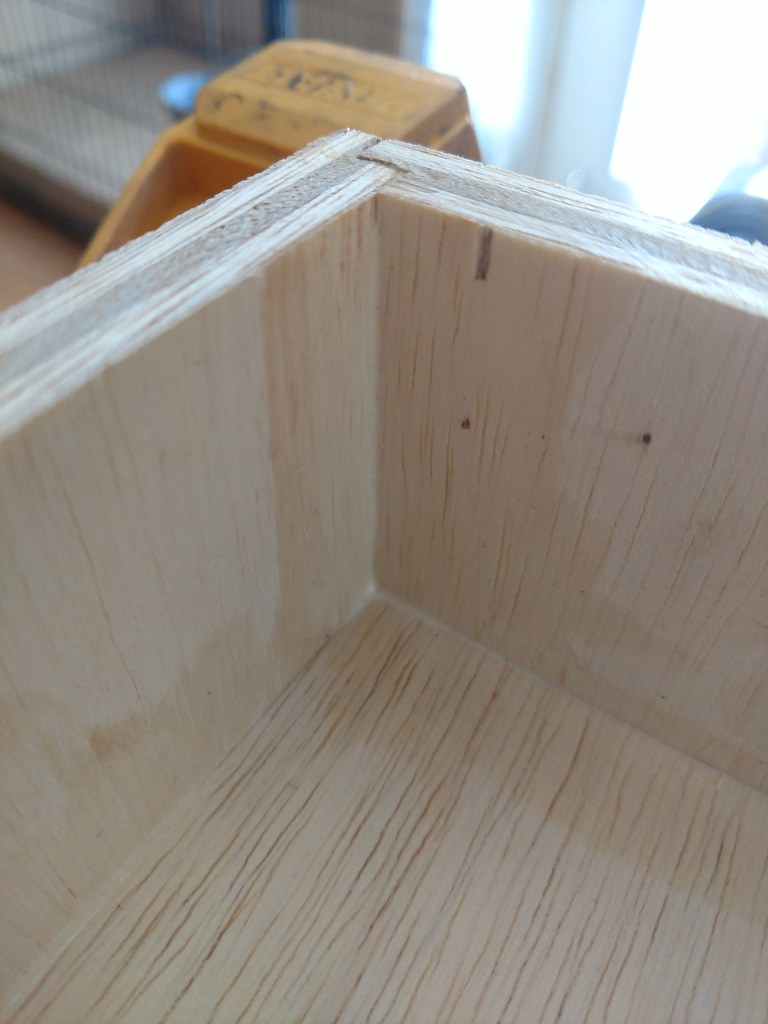
So instead of all mitered joints, I did this sort of half-lap thing. It should be plenty strong, and the fit is much better.
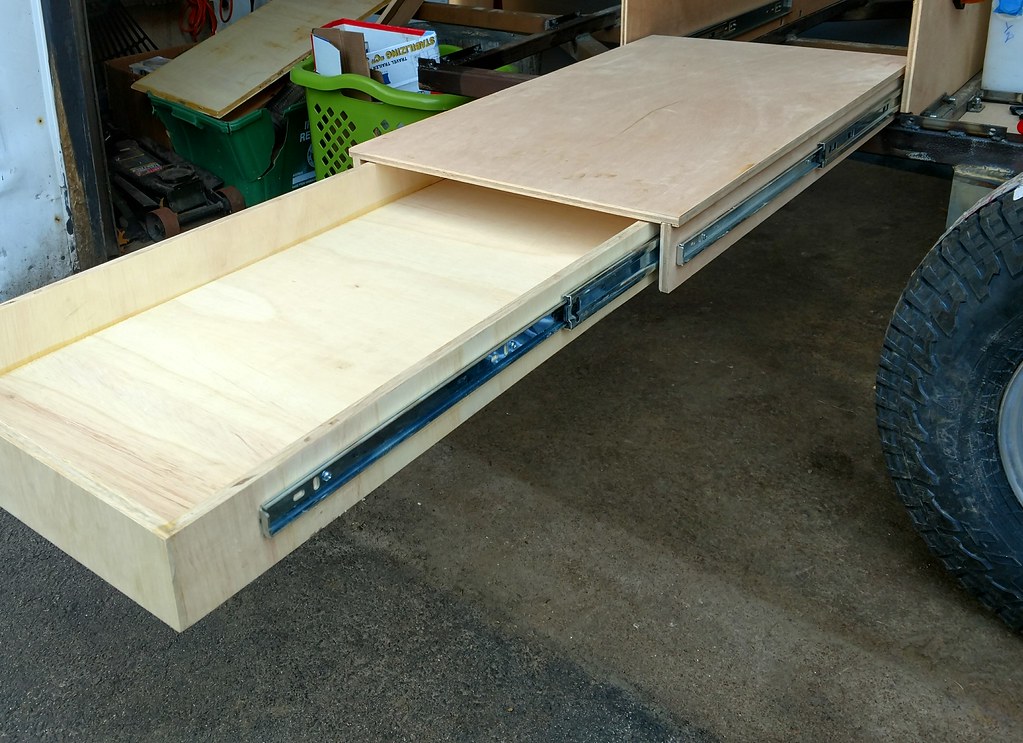
So the inner drawer also got a set of drawer slides. These are lighter-duty and shorter in length to keep cost down. I don't think they should need to hold 400lbs. that the outer set are rated for.

So first I made up a 4-sided box, which will support the stove and house the utensil drawer.

And we made it larger than it has to be, with the intent to have a little work area next to the stove.

Then, we got some long, heavy-duty drawer slides to mount the whole rig to the trailer.

We assembled the drawer to the trailer for a test run to make sure everything was right. Closed/stowed:

Open/deployed:

Dog said it's acceptable, so we continued knowing we were on the right track. I made up a drawer for utensils but I ended up scrapping it. I'll show you anyways. On the outside it looked fine.

But the real issue was the inside. I screwed up the glue up and ended up with this big stupid gap:

So instead of all mitered joints, I did this sort of half-lap thing. It should be plenty strong, and the fit is much better.


So the inner drawer also got a set of drawer slides. These are lighter-duty and shorter in length to keep cost down. I don't think they should need to hold 400lbs. that the outer set are rated for.

workingonit71
Aspirantes ad Adventure
a lot of weight might need a bit of support; ask me why!
Never rely on extended slides to support a load. Something or someone will eventually overload it, and your "engineering masterpiece" (my words concerning my so-called slide-out, just prior to it's collapse!) will need fixing. Here's the way I had done it previously,(not as sturdy as I needed...the mount failed), and the way I repaired it a better way.Of course, we need a cooking surface! We already have a propane grill so we incorporated that and designed around it. The grill has to slide out of the trailer side wall so we can use it without burning the whole place down, so it's on a sort of upside-down drawer. We wanted to take full advantage of the drawer space, so we put a right-side-up drawer inside it. This will allow us to store utensils and whatnot conveniently. That's the hope anyways....
So first I made up a 4-sided box, which will support the stove and house the utensil drawer....
Then, we got some long, heavy-duty drawer slides to mount the whole rig to the trailer.

...
So the inner drawer also got a set of drawer slides. These are lighter-duty and shorter in length to keep cost down. I don't think they should need to hold 400lbs. that the outer set are rated for.

Not that your slide system is weak, but, accidents do happen! I would guess that you've already come up with a support for your sliding drawer, probably less redneck-engineered than mine. I originally wanted a slide under the left side , for my cooler (not shown), but, I aready had two sides to fiddle with. I don'have the carpentry skills to make doors to cover the machinery/hardware I used, so everything is in plain sight.workingonit71 said:(from another forum): I built a swivel/slide-out platform for my Honda/Craftsman 2500 watt generator (about 65 lbs). The genny is mounted on a "lazy susan" riding on three 35 lb drawer slides; it pulls out of the trailer, swivels to point the exhaust away from the galley/storage area, and sits on a metal brace for added stability. No photos of it in operation, though tested in the garage (haven't used it in the wild yet). I pulled the genny out at home, to test-run before my latest camping trip. I then tripped over a nearby ladder, and inadvertently contacted and bent the slides. Later, when I was at camp, I was demonstrating the operation to a fellow camper, and pulled it completely off its' tracks. I put in back in place, but it would never work the same again (actually bounced off the tracks again, on the drive home)...so, I rebuilt it today. I pulled the genny out at home, to test-run before my latest camping trip. I then tripped over a nearby ladder, and inadvertently contacted and bent the slides. Later, when I was at camp, I was demonstrating the operation to a fellow camper, and pulled it completely off its' tracks. I put in back in place, but it would never work the same again (actually bounced off the tracks again, on the drive home)...so, I rebuilt it today. I used Blum Tandem Plus undermount drawer slides (rated at 100lbs), from Rockler, to replace the 3x35lbs slides that broke (cheap HD slides). I thought that the new Blums wouldn't be sturdy enough, compared to the higher rated trio, but actually the set (2 pieces) are much stronger than I had expected, and roll smoother, also. I built a new plywood baseplate, mounted the existing pair of wooden plates (the turntable mechanism, still intact) to it, and attached the upgraded assembly to the new slides (which I previously, and painstakingly, fitted/mounted to the floor of my "galley"). Not easy, as the whole thing was about 85 lbs, and at arm's length. Here's pics of the new set-up, which works ever-so-better than the first one. I'll also re-engineer my stabilizer brace, to better withstand incidental contact (as when tripping over a ladder!).
Looking good! What I'd like to know is where you got that propane tank?
Thanks, glad you like it!
The propane tank we got here.
Sorry for the hiccup in progress here folks, I know it's been a little bit. Life kinda got in the way a bit. Plus the cold weather is a hindrance. I rebuilt the transfer case in my TJ and did some other associated work, trying to sort out kinks in that rig so it's ready for summer wheeling and a road trip  . And on the home front, finally got around to installing the new water heater. But I haven't been totally idle on the trailer, either. I've been chipping (literally) away at the drawer for the sink. It's similar to the one for the grill, just completely different. We decided to try making it out of hardwood for a little challenge, and, hopefully, a prettier finished product. Lemme know how I did.
As you saw in some of the drawings I put up earlier, the sink moved all around all over the place. The faucet was a real pain in the butt to work around. We finally settled on installing it in the forward-most bay so it's not actually under the bed. Most of it is lower than the bed, but I don't think it will fit entirely beneath that plane. Doesn't matter, it's in front of the bed anyways. This allows us to have a shorter overall trailer, without having a uselessly-short faucet. You'll see.
So anyways. First things first- sharpen the chisels. And the kitchen knives, too. I mean...the sharpening stone is already out. Do your pocket knife too because you're procrastinating. And then layout the tails. I always mark what part goes away so I can make sure I cut the right side of the line. I screwed it up before and it's super frustrating.
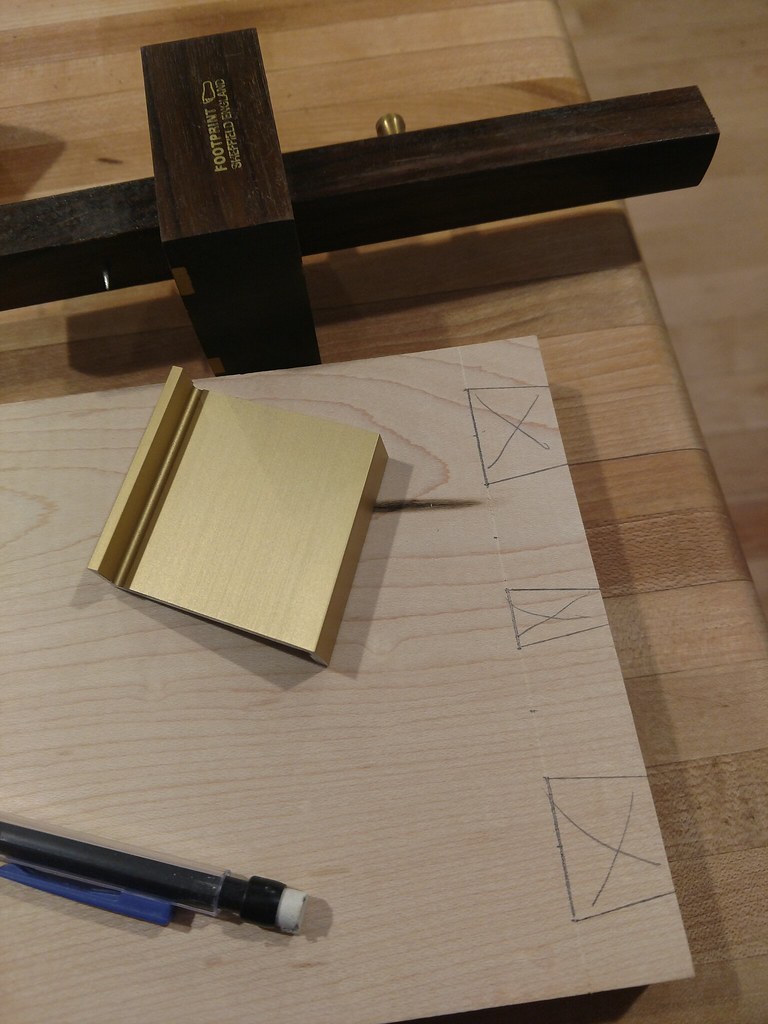
Cut them out:
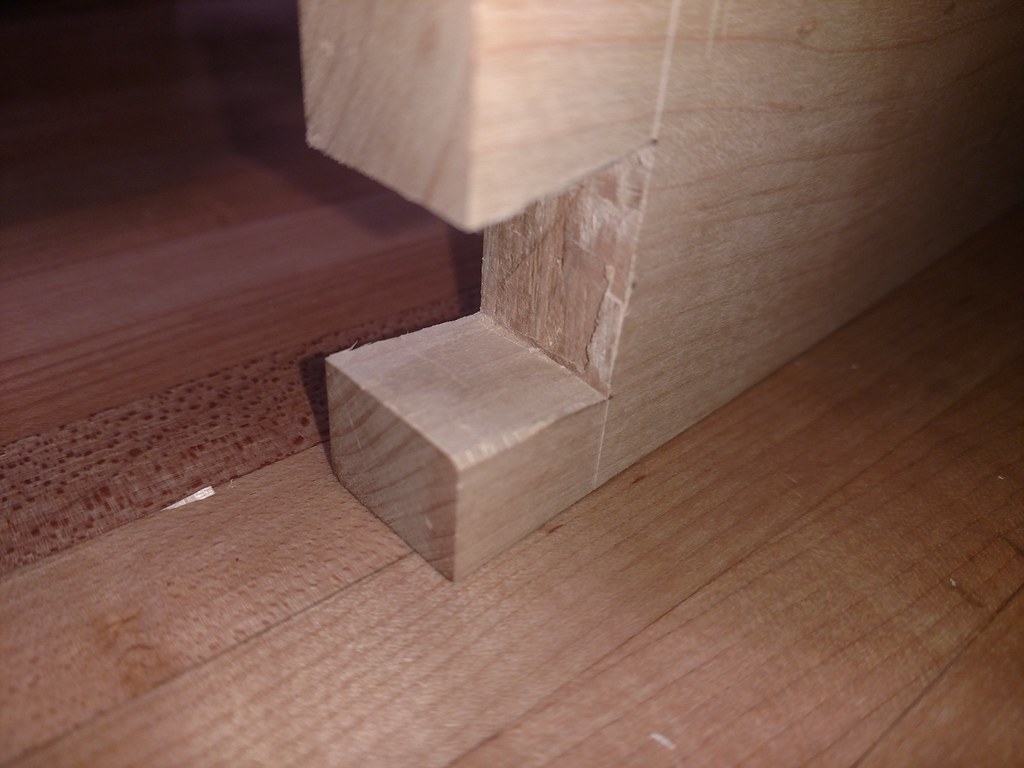
Note I'm doing this on the kitchen counter, where it's warm and comfortable and clean. I made a disaster of our kitchen. Ooops!
So then use the tails to mark the pins, basically the same thing, only different. Cut those bad larries out, and you got yourself a dovetail joint! Go ahead and do it 3 more times.
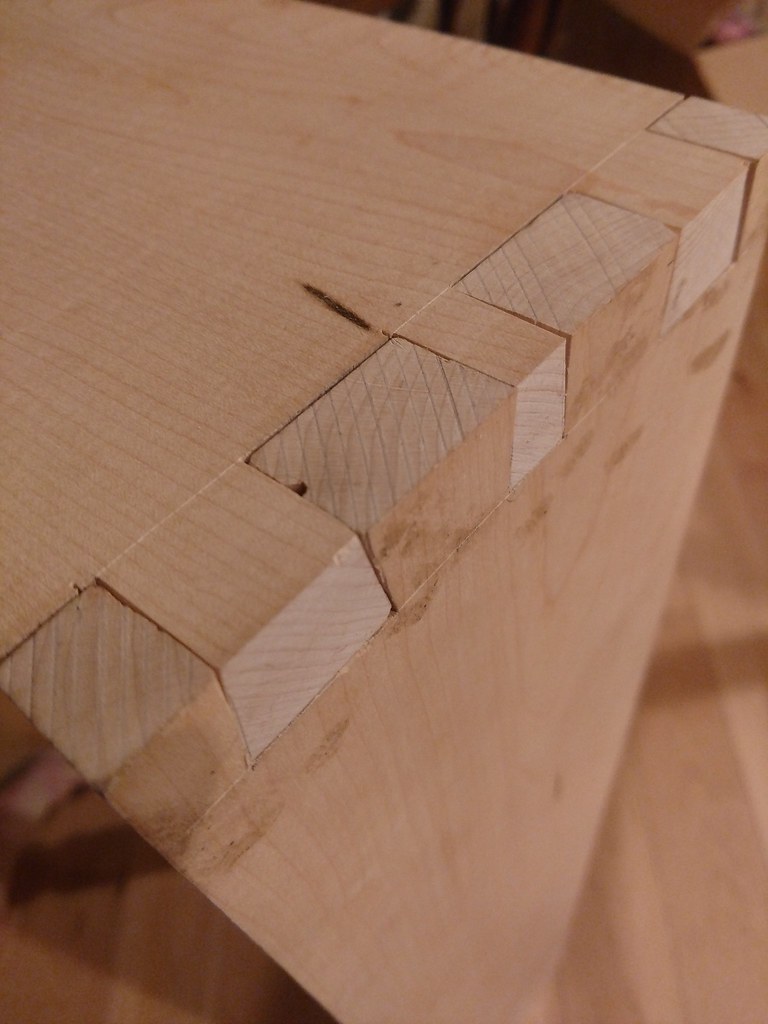
This is like the 50th time I mocked it up. It's important to make sure you're staying on the right track, and it also helps to motivate.
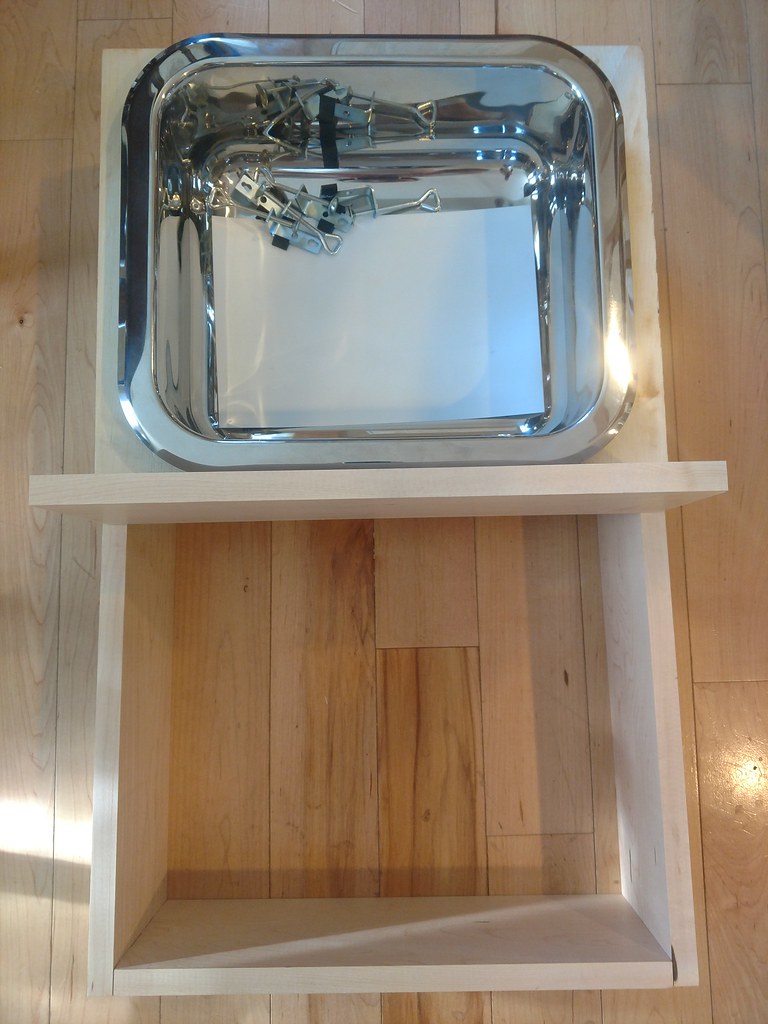
So the middle board you see there doesn't fit in because it doesn't have its mortises cut yet. I remedied that:
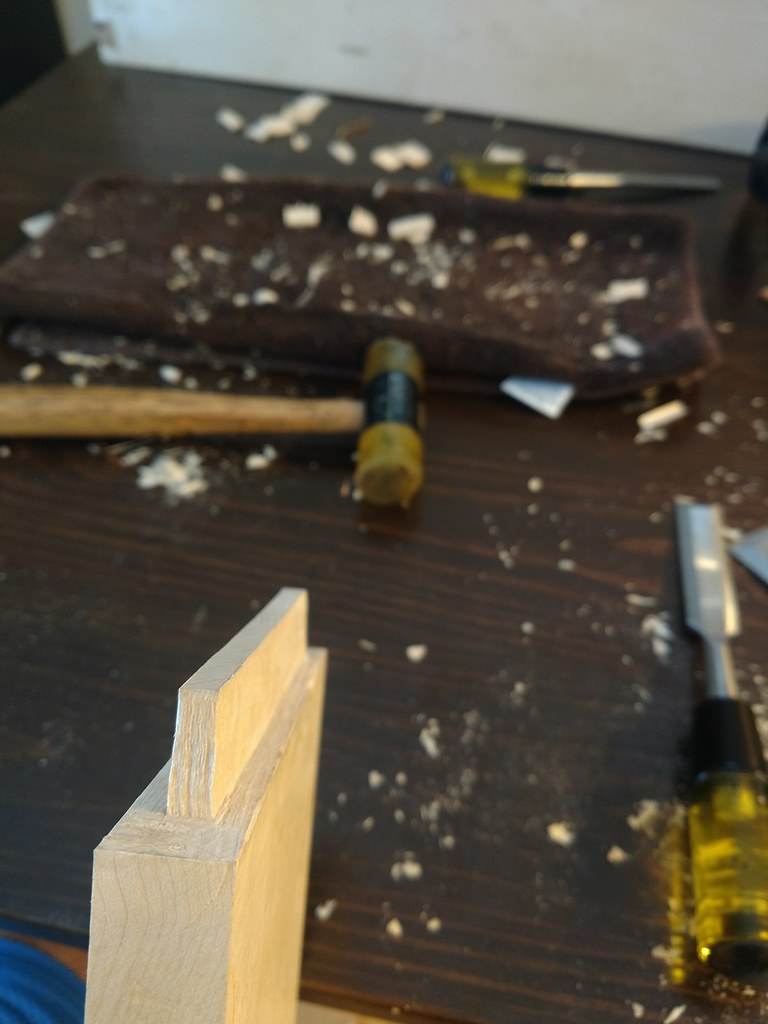
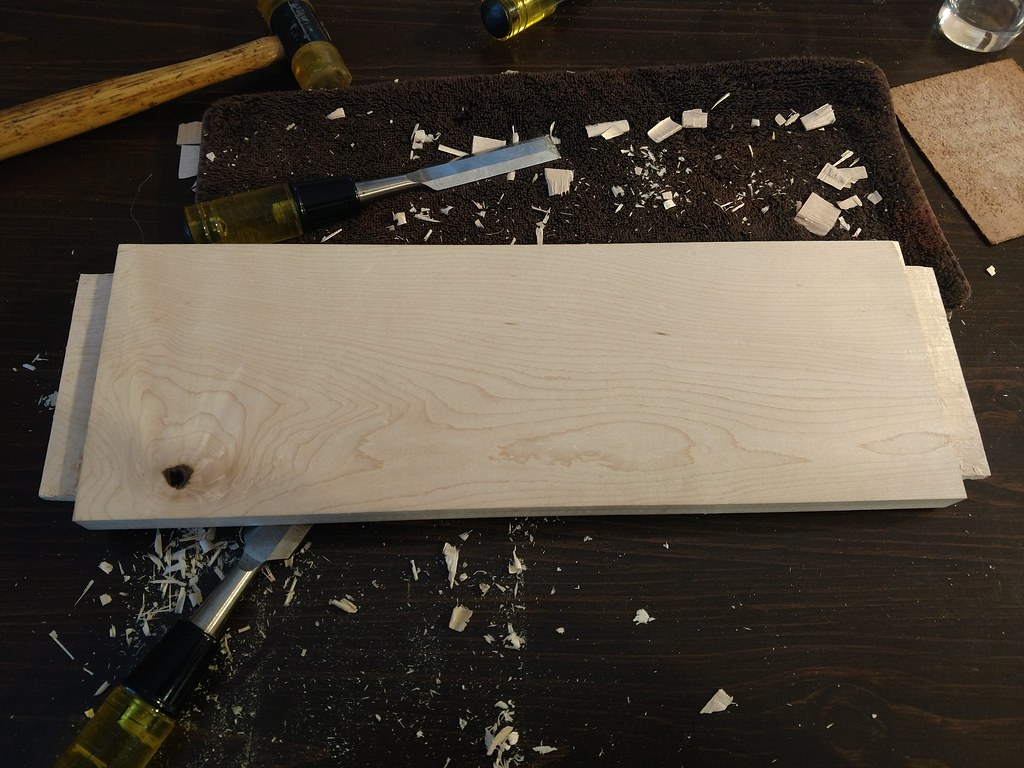
That was the easy part of the mortises. Next up was the hardest part of the entire drawer. Full disclosure: part of the delay here was the time leading up to cutting these slots out (as well as actually DOING it). It took me a bit to sit down and actually start them. If I were to do it over, I'd have a smaller chisel, or make a wider joint, or do it by machine, outsource it. Literally anything different. :laugh: That's maybe a bit dramatic. I did get them done, didn't I? Super detailed segment here, as this was my first time trying out a mortise joint, and a friend had asked "How?". Skip the next few if you don't really care. So, I first laid them out:
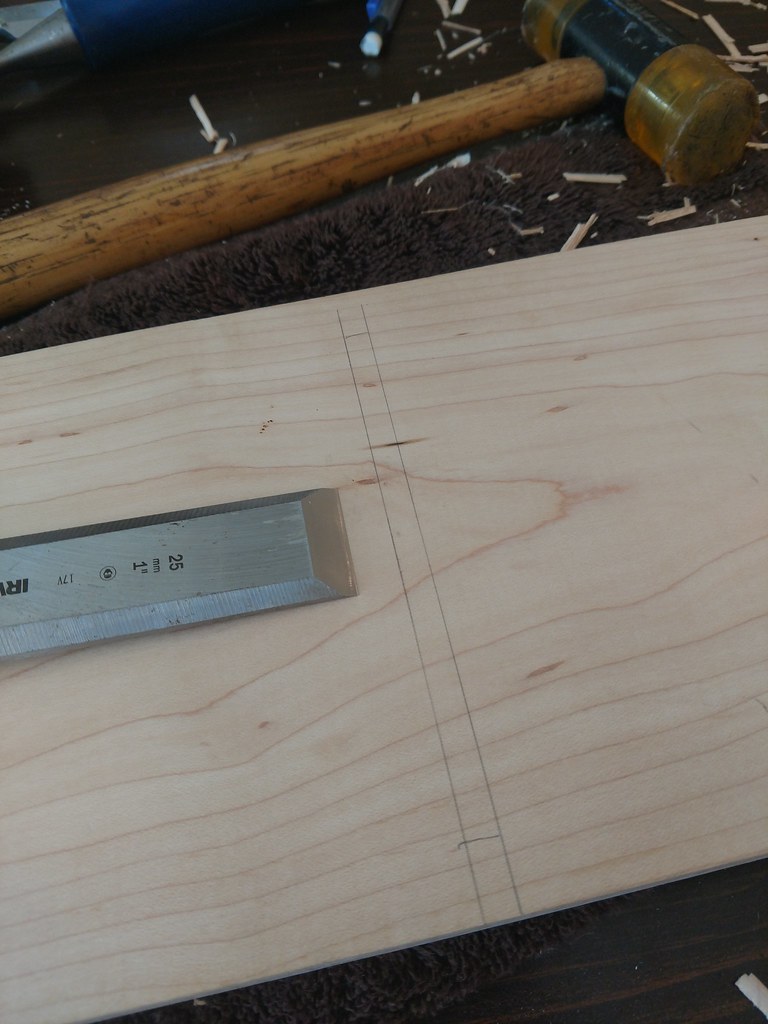
Then chop down the lines:
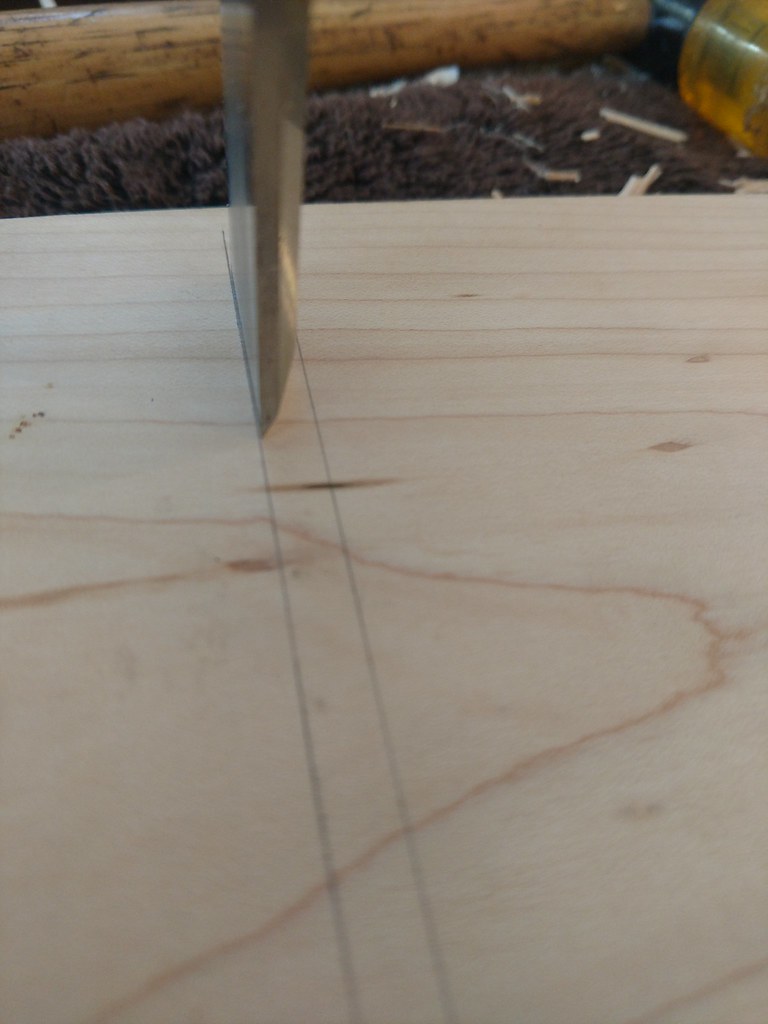
Chip to the line:
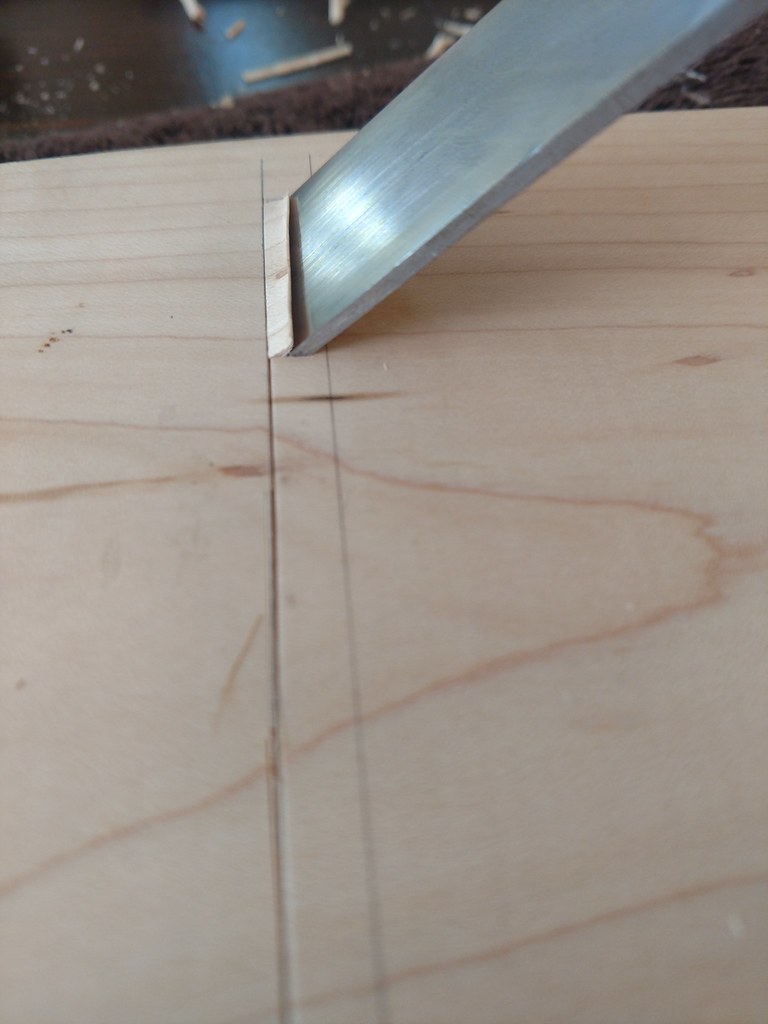
Then do the other side:
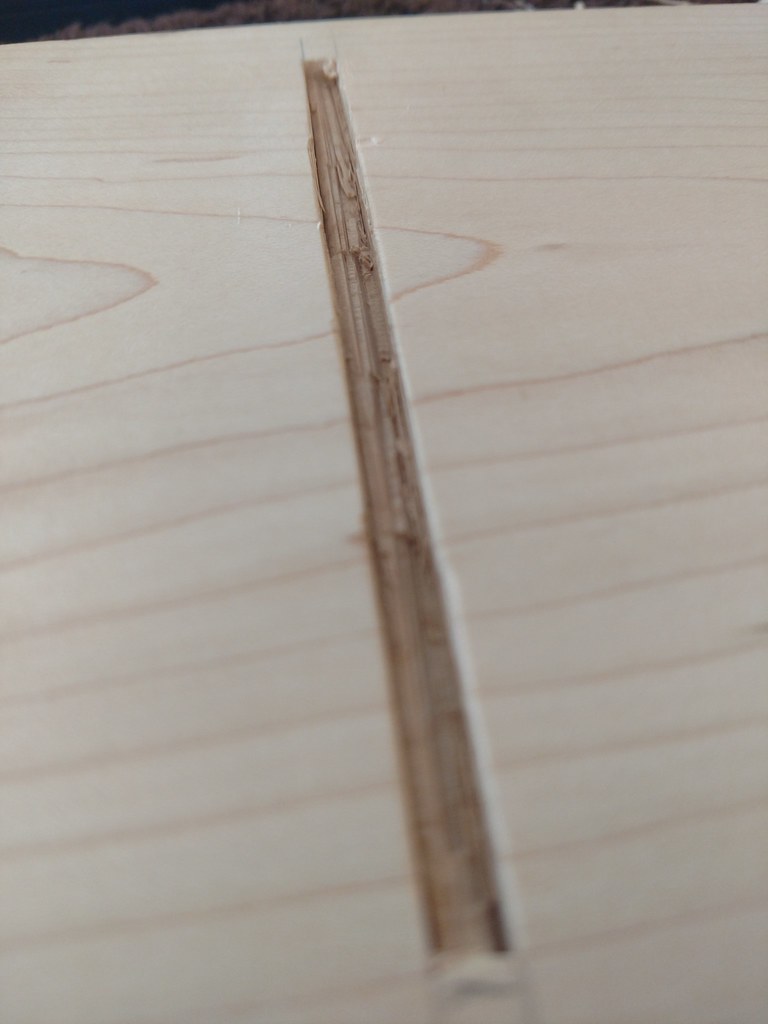
Repeat. Repeat. Repeat. Flip it over, go from the other side, so you don't get tearout, and meet somewhere in the middle. Then it's lots of test fit, adjust, test, trim, test:
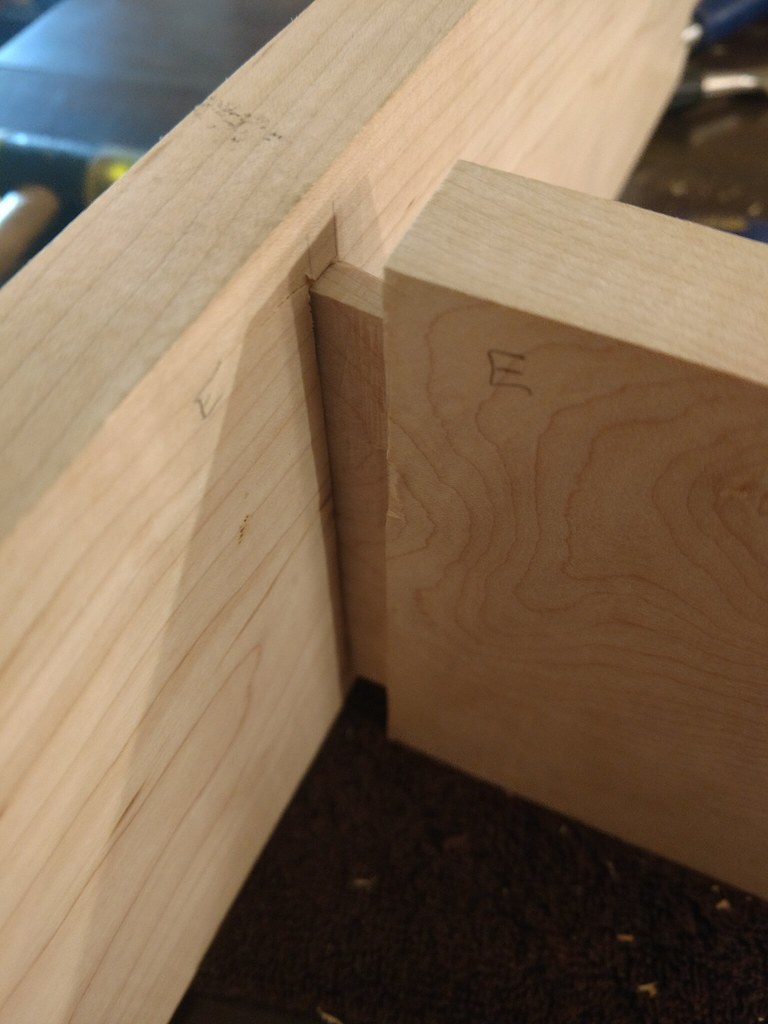
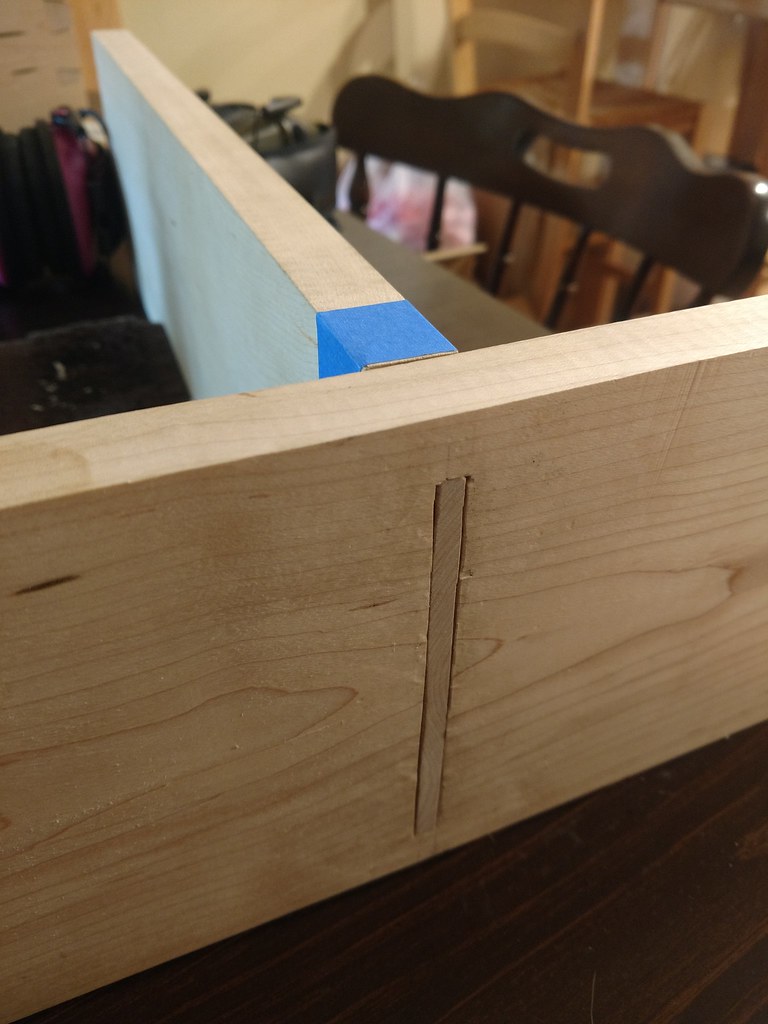
Then I put all the pieces together (mockup #928) :
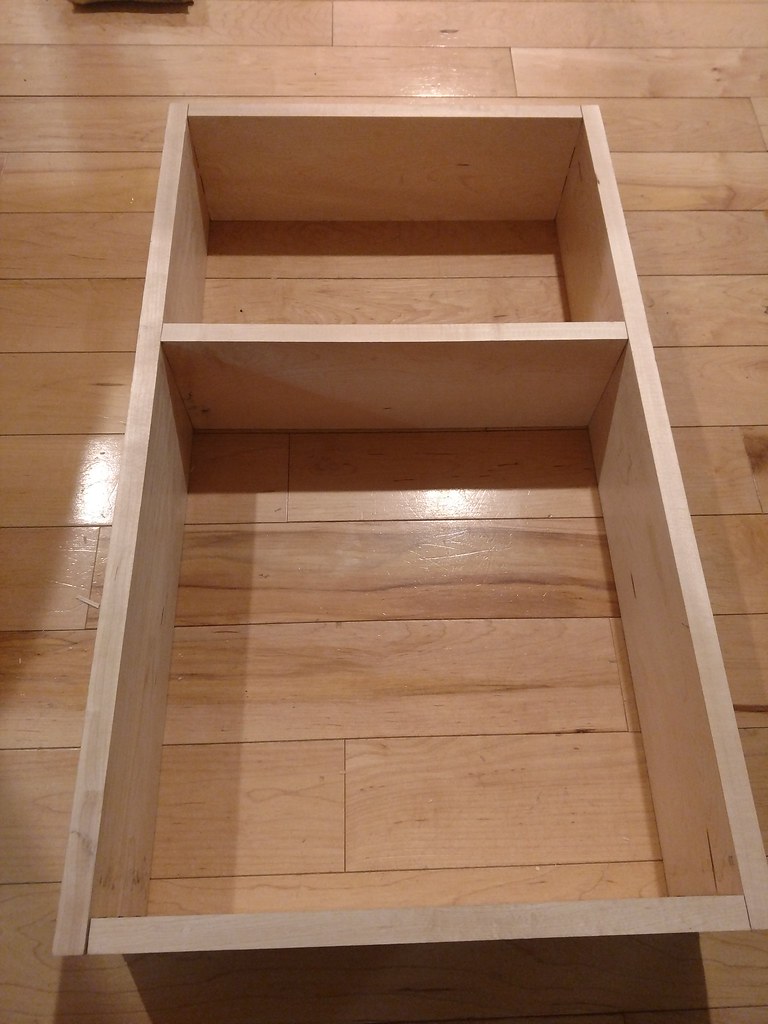
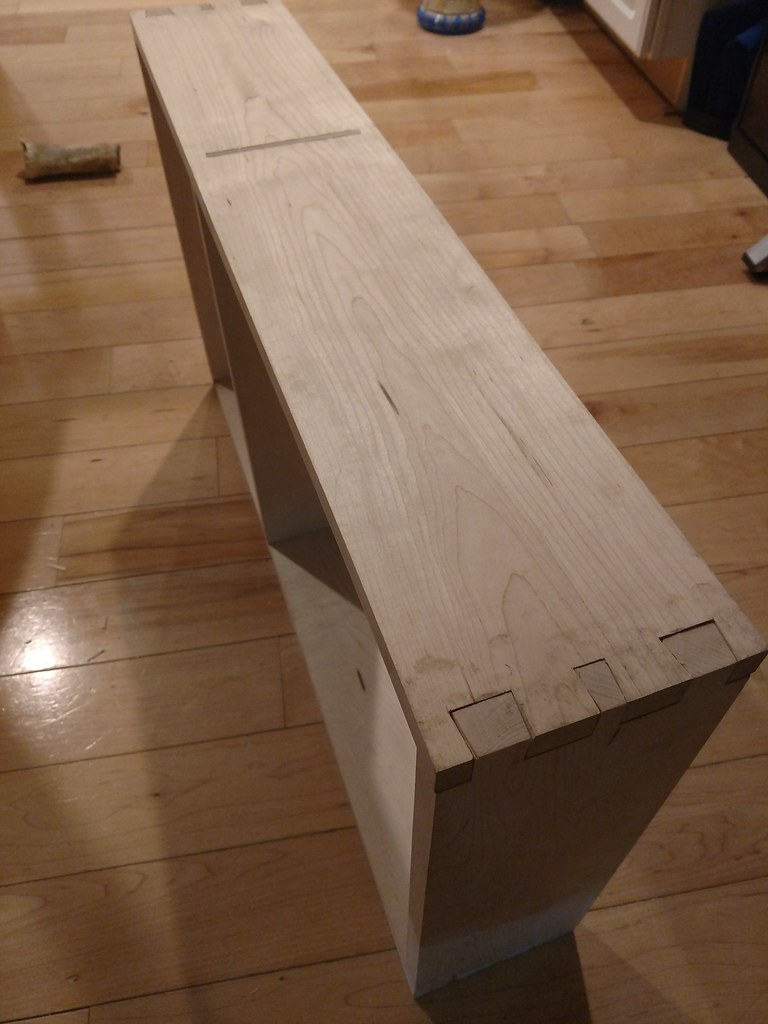
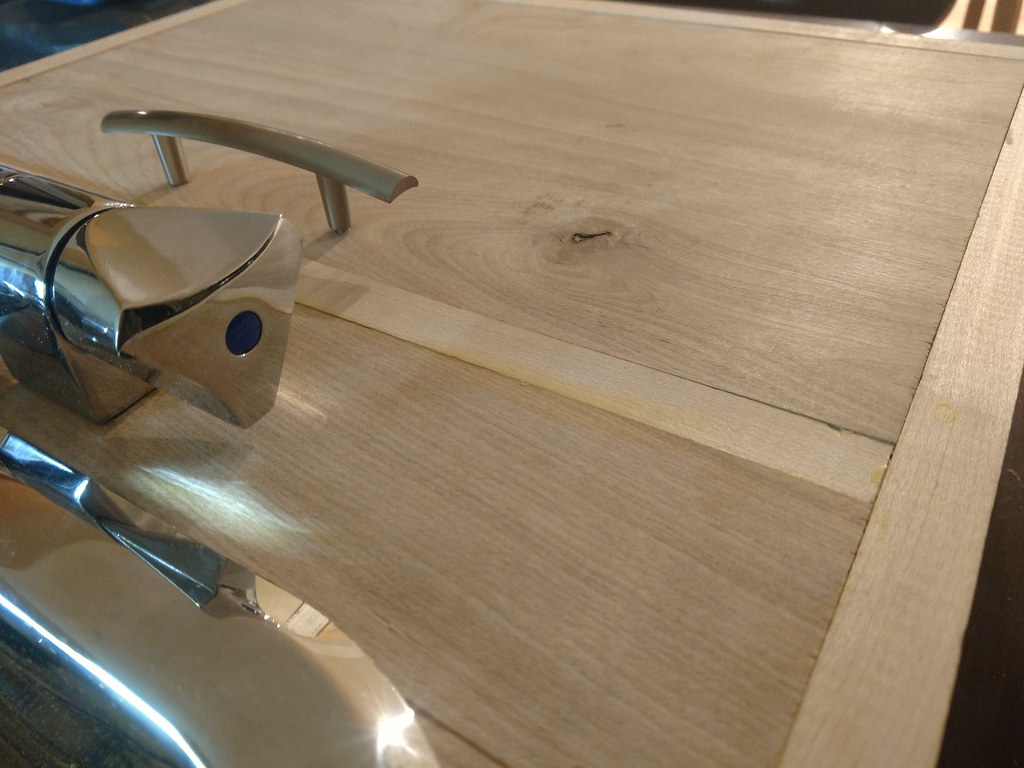
Then the rest was easy, by comparison. The top face is faced plywood. We talked about hardwood for this, but it just didn't seem necessary/reasonable/economical/etc. Plus, using plywood, I was able to get the grain to match up across the two compartments:
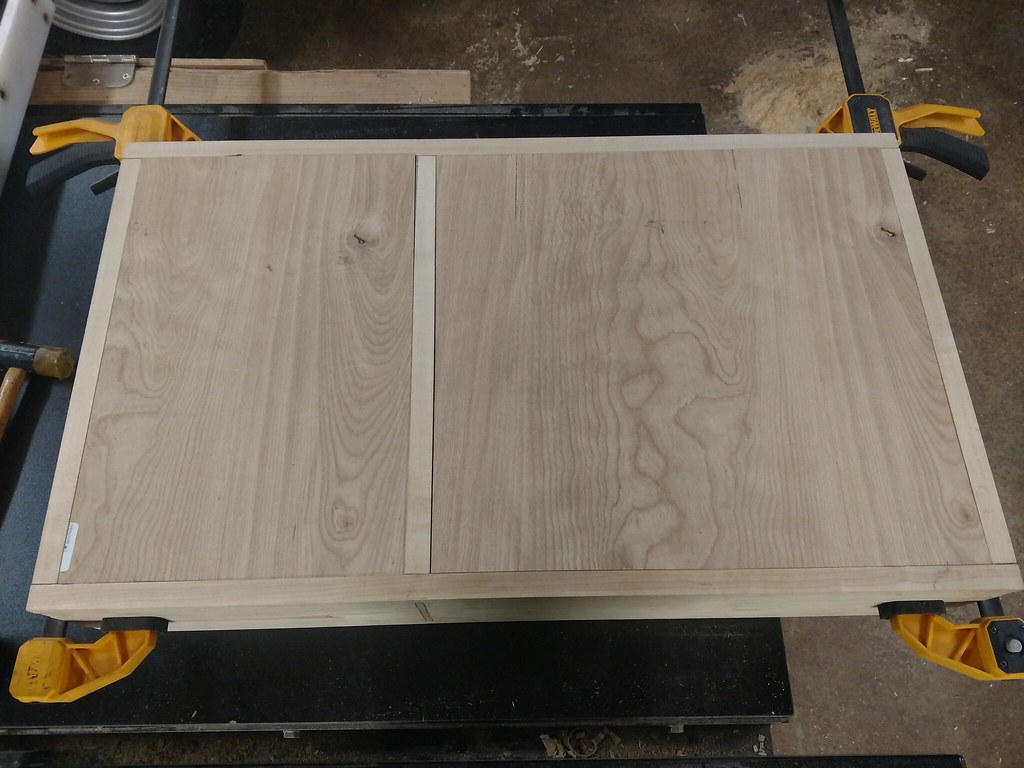
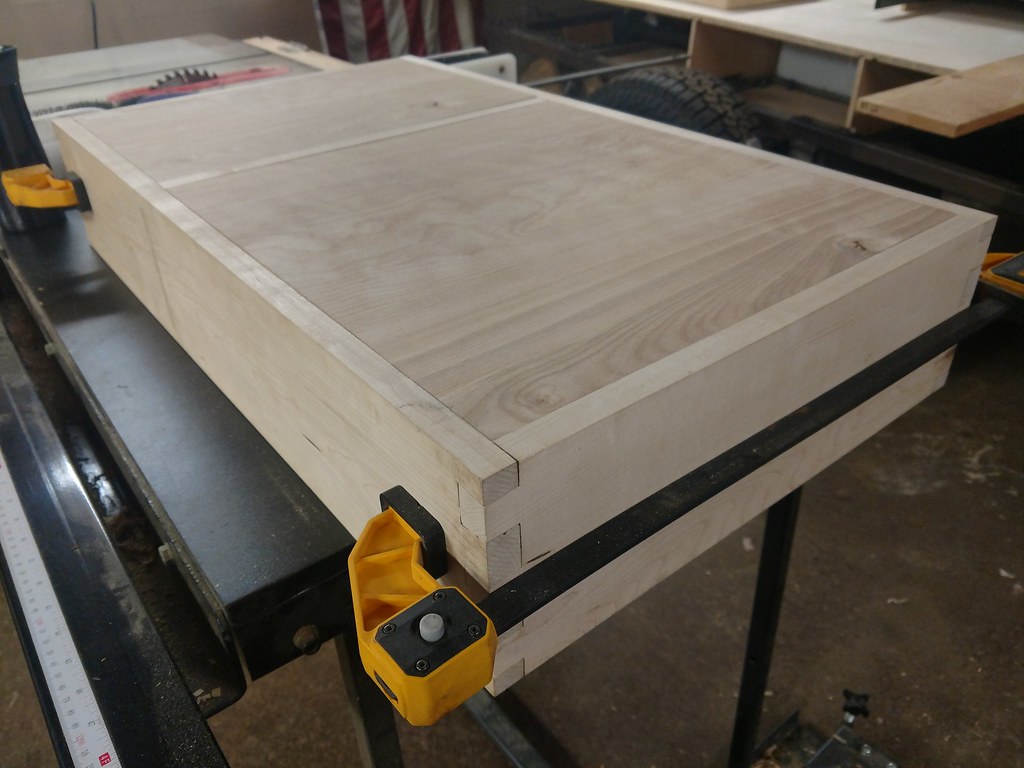
The smaller compartment is storage, so it has a hinged lid. The hinges require a 35mm forstner, which wasn't in its home in the shop. It was too cold to go hunting for it, so I just used a gouge.
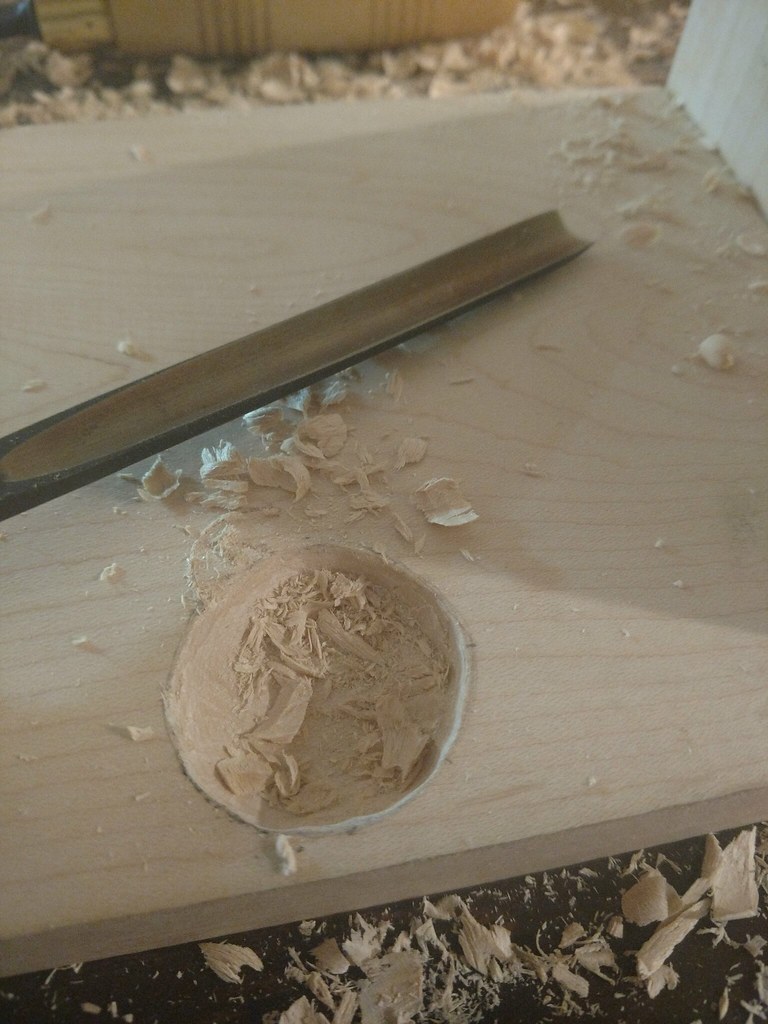
The pocket looks rather oblong in this picture, I'm not sure why:
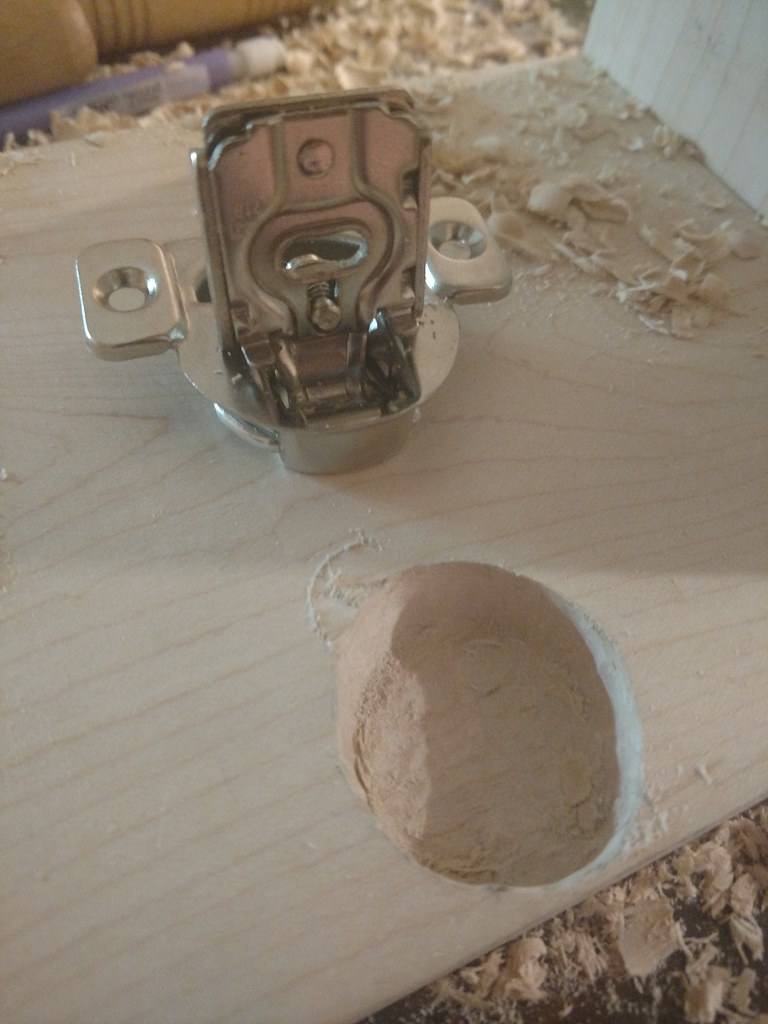
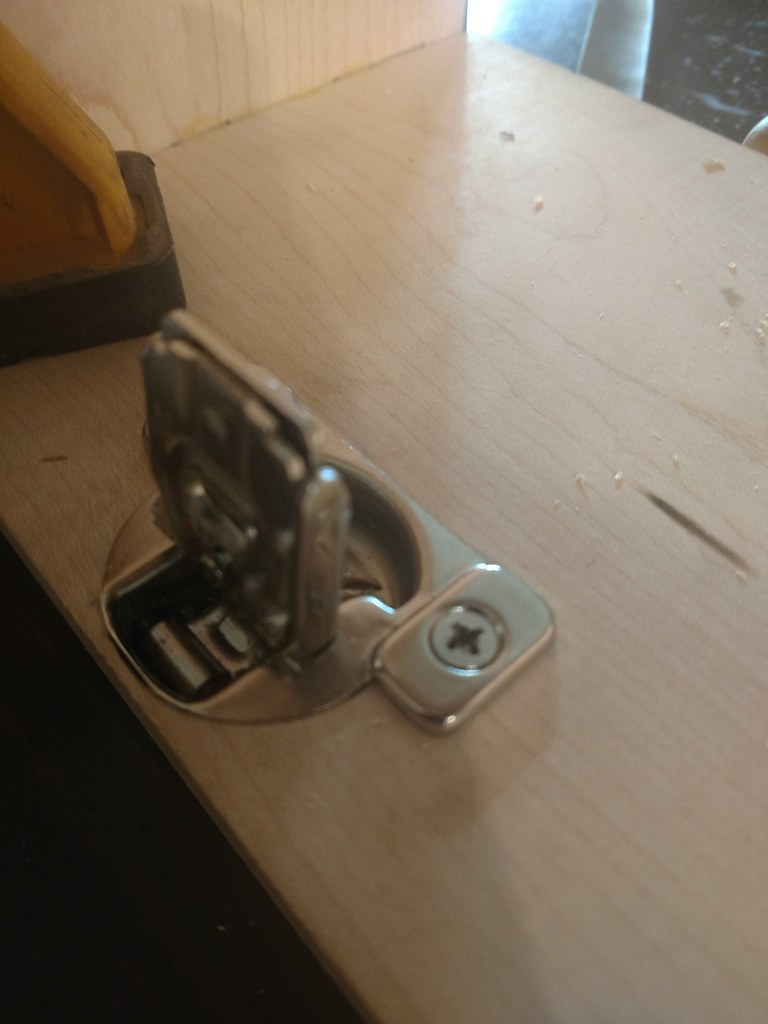
With both hinges installed, we have a functional cover:
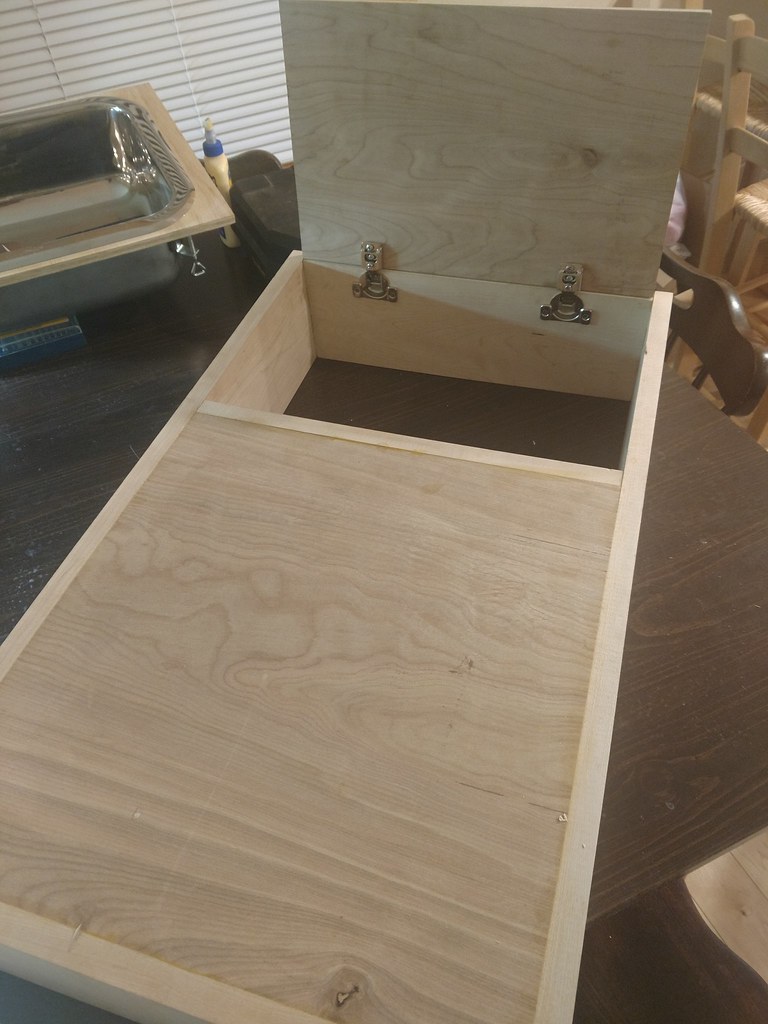
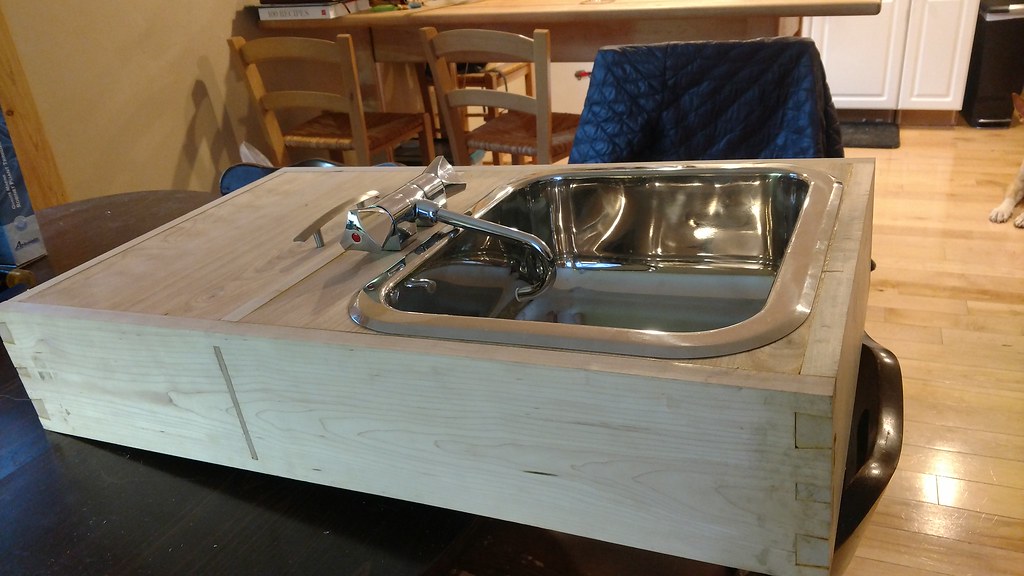
From there it was just a simple matter of cutting out the window for the sink, blowing some 1" holes for the faucet, and a couple #10 holes for the handle and installing all that stuff:
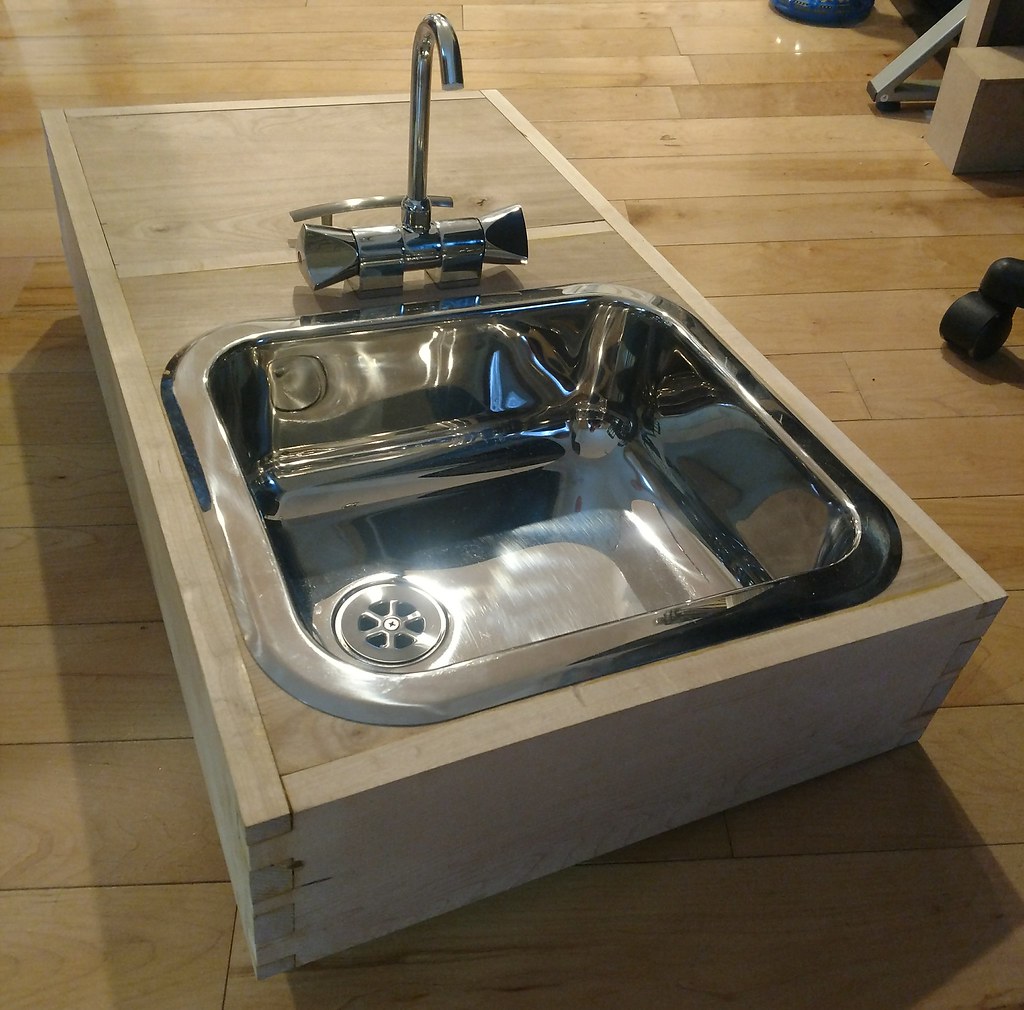
Oh and the faucet folds down into the sink, so it should store really well. We got it here if any of you need one. The drain is also really low profile, again from Ambassador Marine. You can find them here if you're trying to do something similar to this.
And with a floor in the storage compartment, I checked the available space inside.
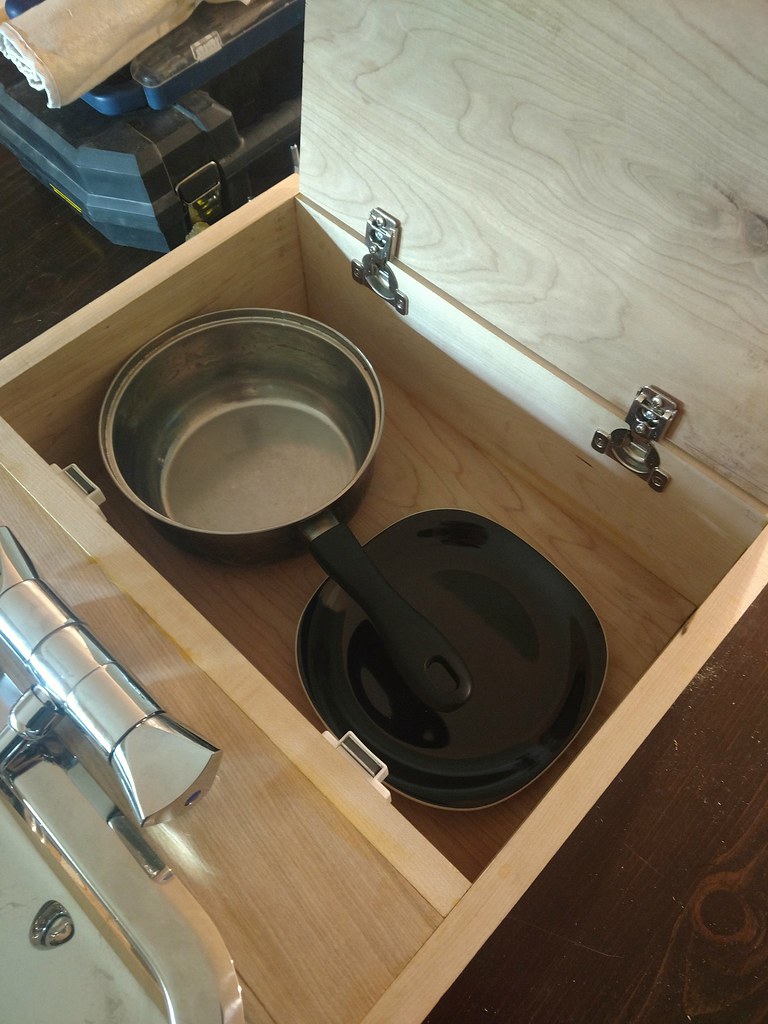
For reference, that's a medium sauce pan and a small dinner plate. Probably our two most-used items besides cups. They fit with plenty of room. We haven't really figured out what exactly will be stored here yet, but once we do, we'll have to figure out a way to secure it all so it's not a jumbled mess when we open the lid. At this point, I'm waiting on the front wall of the trailer to go up before I can install the drawer, but that will be a really straightforward matter. We already have the slides, which are the same as the ones used for the grill drawer. Other than that, it obviously needs sanding and finishing, but I need to wait for warmer weather for all that anyways.
We're supposed to get like 2 feet of snow right now, so hopefully that will hold you guys over for a bit while I hibernate.
As you saw in some of the drawings I put up earlier, the sink moved all around all over the place. The faucet was a real pain in the butt to work around. We finally settled on installing it in the forward-most bay so it's not actually under the bed. Most of it is lower than the bed, but I don't think it will fit entirely beneath that plane. Doesn't matter, it's in front of the bed anyways. This allows us to have a shorter overall trailer, without having a uselessly-short faucet. You'll see.
So anyways. First things first- sharpen the chisels. And the kitchen knives, too. I mean...the sharpening stone is already out. Do your pocket knife too because you're procrastinating. And then layout the tails. I always mark what part goes away so I can make sure I cut the right side of the line. I screwed it up before and it's super frustrating.

Cut them out:

Note I'm doing this on the kitchen counter, where it's warm and comfortable and clean. I made a disaster of our kitchen. Ooops!
So then use the tails to mark the pins, basically the same thing, only different. Cut those bad larries out, and you got yourself a dovetail joint! Go ahead and do it 3 more times.

This is like the 50th time I mocked it up. It's important to make sure you're staying on the right track, and it also helps to motivate.

So the middle board you see there doesn't fit in because it doesn't have its mortises cut yet. I remedied that:


That was the easy part of the mortises. Next up was the hardest part of the entire drawer. Full disclosure: part of the delay here was the time leading up to cutting these slots out (as well as actually DOING it). It took me a bit to sit down and actually start them. If I were to do it over, I'd have a smaller chisel, or make a wider joint, or do it by machine, outsource it. Literally anything different. :laugh: That's maybe a bit dramatic. I did get them done, didn't I? Super detailed segment here, as this was my first time trying out a mortise joint, and a friend had asked "How?". Skip the next few if you don't really care. So, I first laid them out:

Then chop down the lines:

Chip to the line:

Then do the other side:

Repeat. Repeat. Repeat. Flip it over, go from the other side, so you don't get tearout, and meet somewhere in the middle. Then it's lots of test fit, adjust, test, trim, test:


Then I put all the pieces together (mockup #928) :


Then the rest was easy, by comparison. The top face is faced plywood. We talked about hardwood for this, but it just didn't seem necessary/reasonable/economical/etc. Plus, using plywood, I was able to get the grain to match up across the two compartments:


The smaller compartment is storage, so it has a hinged lid. The hinges require a 35mm forstner, which wasn't in its home in the shop. It was too cold to go hunting for it, so I just used a gouge.

The pocket looks rather oblong in this picture, I'm not sure why:


With both hinges installed, we have a functional cover:

From there it was just a simple matter of cutting out the window for the sink, blowing some 1" holes for the faucet, and a couple #10 holes for the handle and installing all that stuff:

Oh and the faucet folds down into the sink, so it should store really well. We got it here if any of you need one. The drain is also really low profile, again from Ambassador Marine. You can find them here if you're trying to do something similar to this.


And with a floor in the storage compartment, I checked the available space inside.

For reference, that's a medium sauce pan and a small dinner plate. Probably our two most-used items besides cups. They fit with plenty of room. We haven't really figured out what exactly will be stored here yet, but once we do, we'll have to figure out a way to secure it all so it's not a jumbled mess when we open the lid. At this point, I'm waiting on the front wall of the trailer to go up before I can install the drawer, but that will be a really straightforward matter. We already have the slides, which are the same as the ones used for the grill drawer. Other than that, it obviously needs sanding and finishing, but I need to wait for warmer weather for all that anyways.
We're supposed to get like 2 feet of snow right now, so hopefully that will hold you guys over for a bit while I hibernate.
Last edited:
Similar threads
- Replies
- 0
- Views
- 445
- Replies
- 12
- Views
- 651
- Replies
- 2
- Views
- 486


