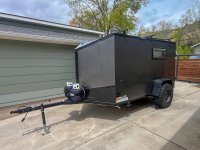
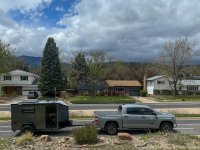
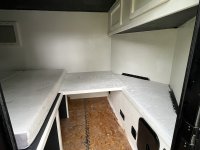
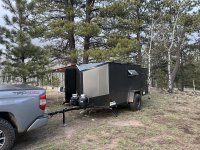
Off Road Worthy 6x10 Cargo Trailer Camper Build

Jmanscotch

is wandering
With their own fleet of transporters and hired transport companies Carmax is well know in the car biz for moving their inventory around the country. Carmax will buy in one area of the country and move their vehicles to another part of the country IF that model vehicle is selling for "Mo Money" in another part of the country.

With all their locations nationwide they are one of the few that use this type of business plan when it comes to their vehicle inventory. Many times Carmax gets their potential customer to pay for part or all of the transport cost as they have the exact vehicle the customer wants at another Carmax location and Carmax is more than happy to move that vehicle for their customer to purchase. This is one benefit Carmax touts to their customers.

It's not matter of moving "rusty" cars from the East to the West. It' much easier to sell a "rusty" car on the East coast than out West. It's all about the money as that "rusty" vehicle sells for "Mo Money" in another part of the country!

Mostly true. From my experience, they don’t mark them up in price for the “new” shipped to market, not initially.

I’ve bought two (and this might be the third) vehicles from Carmax in the last 8 years and each time I’ve had them shipped for free (and the wife too, even when they said it’d be $800 originally).

Each time they’ve been the same price as they were in the original market. This has worked out for me, I feel I’m getting a really fair deal since certain 4x4s have a premium market in Colorado and shipping them in from a less prime 4x4 market can see some savings as a buyer.

My wife wanted a car and had it shipped, ended up passing on it because it was clearly a tidied up undercover police car (or security or something with lots of lights and holes drilled through different interior and exterior panels) and they ended up listing it for several thousand more once she passed on the purchase.

I bought a GX460 from Texas that was ~$4k under Colorados market at the.

This Tundra from Arizona seems very competitively price in the Colorado market, not a steal like the GX was but on the very low end of the market I’ve seen locally.

About 6 years ago, a new dealership took over a shop in town and I was one of their first customers when they opened. Bought a real clean Jeep TJ with low miles and tasteful mods and sold it a week later, private sale, for many, many thousands more. The Colorado off road vehicle tax is healthy.
 
Yeah, Toyotas and jeeps in Colorado go for a lot. The used car market in general is crazy these days. As long as you know what you're buying CarMax doesn't seem too bad. I only say it because I work across the street from CarMax and work on a lot of their cars and have seen some interesting stuff.
 

Jmanscotch

is wandering
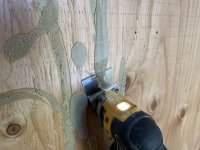
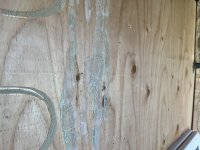
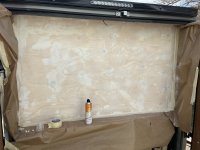
Well, after a bit of a break and a few talks with the wifey, I decided eating the cost of the FRP and ripping it off would make us happier in the end, so I dove in and did one of the most tedious jobs on the trailer yet…scrapping and sanding all of the construction adhesive off.

A flat blade on the oscillating tool was a life saver to get 80% of the adhesive off. I had to be careful not to dig into the wood trying to get too much off at once, yet wanted to get it down to as little as possible as the adhesive gummed up the sanding disks.

IMG_2952.jpegIMG_2953.jpeg

Now it was time to just go around the entire trailer…for about 9 hours, oscillating tool….sanding, more sanding, more oscillating tool, more sanding.

I really, really don’t ever want to do that again.

IMG_2955.jpegIMG_3063.jpeg


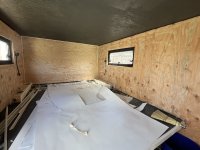
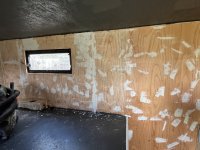
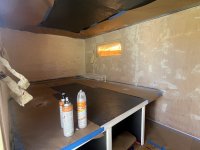
Once that was finally done, I went around and caulked or patched all the wood knots, low spots from sanding, wood chunks I accidentally took out with the oscillating tool and other defects in the wood as I hadn’t picked the highest quality wood for the interior walls as I *thought* I’d be covering them.

Several more hours of filling, sanding, etc.

IMG_3067.jpeg

Finally, in an effort to hide some of the panel issues, I decided to add spray on texture to the walls before painting.

IMG_3068.jpegIMG_3078.jpegIMG_3073.jpeg

Not sure it was worth it, mainly because of the $22 a can the wall texture costs (and using 4 cans), but I think it helped give some visual appeal to the walls.
 

Jmanscotch

is wandering
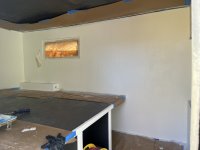
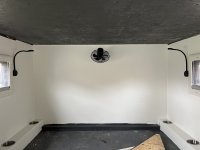
Lastly, I came back in and painted the walls. Since we had thought the bright white FRP was a little sterile looking, we opted to go for a slight off white, Alabaster.

IMG_3084.jpegIMG_3089.jpegIMG_3090.jpegIMG_3087.jpeg

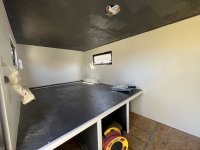
Pretty happy with how it turned out, all things considered. It’s far from perfect, but definitely loads better than the FRP paneling fiasco.

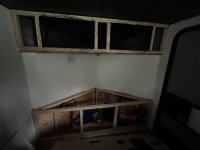
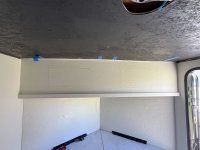
The OSB upper cabinet face wasn’t fixable, I left it for now and am debating on replacing it or just covering it with left over black alcantara fabric. Another days decision.

Our Renogy 100aH Lithium Iron Phosphate battery and our Propex HS2000 propane heater arrived, so installing those next.
 

ITTOG

Well-known member
All that work on the wood must have really sucked. I would have probably been very wasteful and thrown it away and purchase new wood. Good for you for saving it and reusing it.

Sent from my Pixel 7 Pro using Tapatalk
 

Jmanscotch

is wandering
All that work on the wood must have really sucked. I would have probably been very wasteful and thrown it away and purchase new wood. Good for you for saving it and reusing it.

Sent from my Pixel 7 Pro using Tapatalk

I considered that option, but the wood side panels are behind the bed mounts, so I would’ve had to cut out just the sections that are exposed. The side panels are also glued to the furring strips too.

Ultimately, between the time I would spend removing all that wood, cleaning up the furring strips (or replacing them), cutting the new panels to shape, attaching them and the cost of the wood…I figured cleaning it up would still be a better bet so long as it came out ok…which I feel it did.

Very happy to be over that task though and moving on to other details….well, except the upper cabinet face, but that’ll be an easier one.
 

Jmanscotch

is wandering
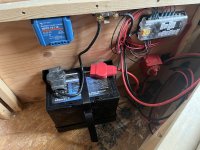
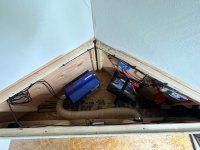
Started in on getting the battery and furnace in.

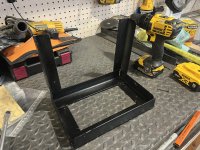
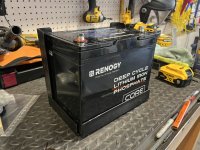
I built a battery holder that’d fit my battery specifically. Just used angle iron, that’d screw to the floor/wall and utilize a strap to hold it down. Lined the inside edges with felt to offer some cushion to it.
IMG_3187.jpegIMG_3188.jpegIMG_3218.jpeg

I forgot to take photos of much of the Propex install, but it’s two holes that go through the floor for fresh air inlet and exhaust, then a 1/4” copper line going to propane.

IMG_3426.jpeg

Mounted the intake/outlet vents and control panel.

IMG_3271.jpeg

Then moved on to finishing some little touches, like mounting the bed fan and remounting the bedside lights.

IMG_3267.jpeg

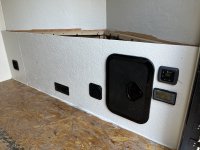
At this point, I started to question why I was keeping the ugly two piece lower bench front when I was going to make the upper cabinet face look nicer…so I decided to take another step backwards and rip that lower face panel (that I had just spent time mounting everything to) off.

IMG_3427.jpeg

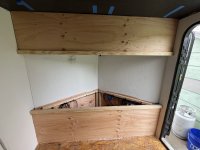
Went and bought new wood, which matches the side walls in its medium clean grade. I also decided to add some trim to the front panels to keep it from being so boring.

IMG_3435.jpeg

Going to let the caulking around the edges dry and then I’ll cut the new holes and texture and paint those face panels…again.

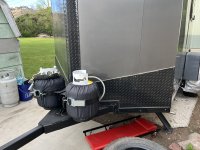
I’ve decided not to build a large front landing like I did on the last setup. I don’t need to carry jacks, the shovel and axe can fit inside the cargo area and the extra tongue weight wouldn’t be worth it for the limited use I’d find for it.

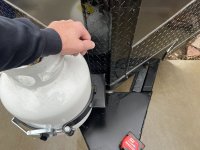
With that in mind, is explored how to securely mount my dual propane setup and found the plated portion of the tongue would work just fine.

My mock up and measuring. There’ll be a mirrored tank on the right side too.

IMG_3246.jpeg

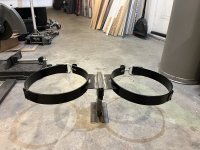
Looked at what spare metal I had sitting around and came up with this basic mount for the two tank brackets. The tanks themselves will rest on the tongue.

IMG_3436.jpeg
 

Jmanscotch

is wandering
Propane tank holder mock up.

IMG_3455.jpeg

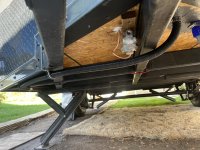
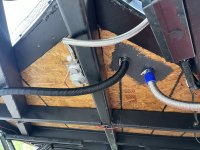
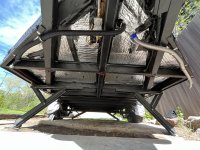
Fresh air inlet and exhaust routed for the Propex. Exited the exhaust on the driver side to keep it away from toddlers hands, fresh air inlet goes to the passenger side so it’s not sucking exhaust. Also remote mounted the propane regulator under the trailer.

IMG_3456.jpegIMG_3457.jpeg

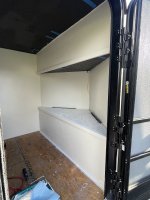
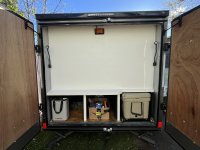
Inside painted, trim touched up to match.

IMG_3460.jpegIMG_3461.jpeg

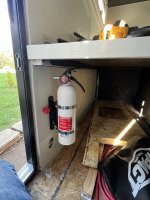
Don’t forget an easily accessible fire extinguisher.

IMG_3462.jpeg
 

Jmanscotch

is wandering
I don’t see too many people dive into their propane tank mount details and they’re usually either strapped down somewhere with ratchets of one of those big price tag fancy ones. I figured I’d dive into the topic a little more, share my opinions and options I find most appealing.

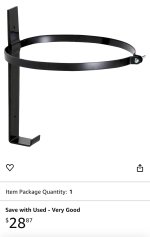
On my first trailer build, I used a cheap (~$40 at the time) one. It worked fine, but left a lot of confidence on the table for the long term shaking it’d see. It also had a bolt holding the tank in, which meant a wrench was needed to get it off and move it around at camp or to refill.

While it does work, I think there’s significantly better options for not much more $.

Pros: can hold a tank unsupported on the bottom, which opens up the mounting locations.
Cons: Flimsy, bolt and nut holding the tank in.

IMG_3543.jpeg

The most common option would probably be the setup always used in RVs, which is a dual tank setup with a base mount and a threaded rod that holds down the inside edges of the tank brims.

These would probably be fine for most, though they aren’t the most secure for off road use. I had this on my A-liner and the retaining nut that help down tension on the tie downs did loosen up some on washboards. You can fix that, but it’s still a kinda flimsy setup for rough terrain.

Pros: readily available, affordable and basic install
Cons: a bit too insecure of a setup for rough terrain, typically for dual tanks, not single

IMG_3542.jpeg

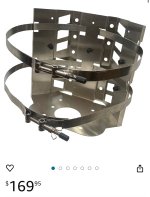
The next option many might consider is the ultra beef “overland approved” versions. They’re stout, and great options, but have the overland price tag. A great option if price isn’t a deterrent.

Pros: robust, double latches, can be mounted in mutiple orientations, often have built in locking ability for theft protection
Cons: high price

IMG_3541.jpeg

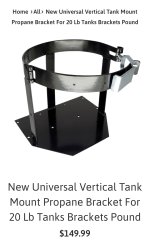
The next best, in my opinion, was what I ran on my last trailer. At the time, it was about $120 I believe, so a notable bit of a savings over the “overland approved” unit.

Pros: well built and stout, has base to it so can be mounted on a flat surface or easily adapted to a vertical wall
Cons: a little pricey, takes up a bit more room with the oversized base plate

IMG_3519.jpeg

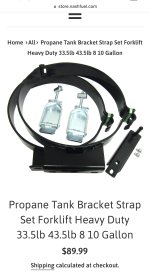
Last is a new option I’ve tried this time around: Forklift propane tank mounting kit, customized to specific mounting needs.

These are the same basic tank straps as the above part, but with no base. They’re strong, latch well and can handle work.

Pros: robust, can be adapted to mount in many different ways, budget friendly ~$45 each. I purchased on EBay, there’s a few suppliers though), can be bought as individual brackets or multiples
Cons: needs a custom mount built unless using the included small bracket, doesn’t have an included base mount, not lockable

IMG_3520.jpeg


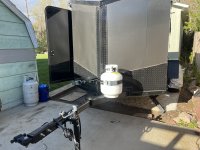
Examples of the last setup on my trailer:

IMG_3496.jpegIMG_3501.jpeg
 

Jmanscotch

is wandering
Hoping to go camping in about 2 weeks, so worked on getting a few key things finished up today.

Reinstalled the heater vents and battery access door.


IMG_3605.jpeg

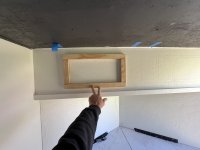
I decided, with encouragement from the wife, to put doors on the upper cabinets for access (instead of open holes with nets to hold gear in.

I started by making a frame of 1.5” wide trim, then used that to draw the cutout line on the inside edge of the frame. Wanting the 1.5” frame to cover the cut outs, I then measured .75” out from the traced line and used my oscillating blade to cut an *kinda* straight rectangle cutout.

IMG_3607.jpegIMG_3606.jpeg

Then I glued and brad nailed the trim onto the cutout section and textured and painted them (though I realized I painted them gloss white, not alabaster like the rest of the inside) and installed them with two hinges on the top and a basic roller friction latch to hold them shut.

IMG_3680.jpegIMG_3682.jpegIMG_3681.jpeg

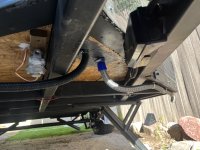
Next, I needed to finish installing the propane line from the drivers side tank to the regulator I mounted under the trailer and then add some basic reflective insulation underneath to keep a little of the wind and chill off the floor.

Hose goin from the propane tank underneath.

IMG_3611.jpegIMG_3612.jpeg

Insulation put up with staples, then taped with Gorilla tape around the edges and over the staples. Not entirely sure it’ll be enough to hold it in place, but we’ll see.

IMG_3622.jpeg

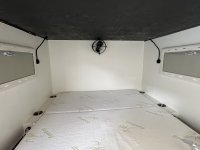
The wife also said the “truckers dash fan” I had installed was too loud and the two settings it had were “super high” and “very low”, so I reluctantly bought the ridiculously priced Sirocco II fan that lots of van campers seem to use. It has great reviews and first impressions are good, but I still struggle to think it’s worth the price.

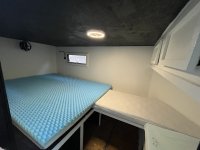
Anyways, installed that over the bed and installed the mattress and air-flow moisture barrier from Mattress Insider.

IMG_3677.jpeg
 

Jmanscotch

is wandering
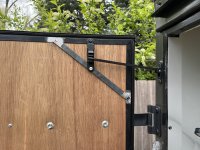
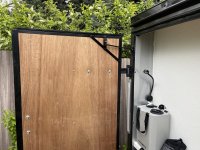
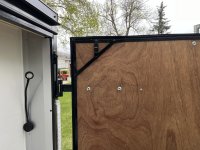
Last item today was the supports to help beef up the rear door stays.

I had planed to weld them on the rear doors (and between you and me, I did start to try to weld them on…) but the rear door framing is aluminum, so I changed my plans and just screwed them down with self taping screws.

IMG_3684.jpegIMG_3686.jpegIMG_3687.jpeg

The CO/LP detector I had purchased was problematic, so waiting on the warranty replacement of that unit, will check the heater for propane leaks and we’ll have the basics needed to head out for our first camping trip!
 

Jmanscotch

is wandering
Happy Mothers Day to all you mothers! Hope all the men spoiled your wife/mother a bunch today too.

We had started to go for a hike, but it started snowing and dumped 6” of wet slushy snow where we were headed, so had to turn around and crawl home down the mountains with a lot of out of towners who weren’t prepared for that. Didn’t get any good photos, because plans changed fast, but back in town it was a nice low cloud and rainy day, which is uncommon for us here in the “high desert”.

Just to rub it in some, here’s the view of what’s effectively our backyard.

IMG_3779.jpeg

Anyhow, it made a good excuse to finished up a few little things in prep for the first adventure. Namely the bedding for the kiddo.

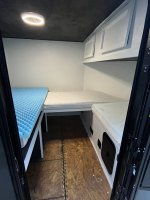
I had just designed and planned for my daughter to sleep under the bed (like waist down would be tucked under there) but the wife didn’t like that idea and wanted a raised bed for her for now. So, with limited options, I came up with a simple board that bridges our bed and the front bench.

IMG_3699.jpeg

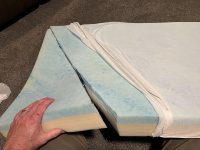
We have the tru-fold mattress from the last camper and had no use for it (it was a full size, we moved to a queen in this camper) so the wife helped disassemble it into individual sections from the three folding sections it was and we begun repurposing it as the custom shaped toddler bed and front bench cushions.

IMG_3730.jpegIMG_3835.jpegIMG_3839.jpeg

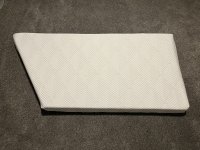
We’ll try this setup for now and when she outgrows it, we’ll switch to her going back under the bed (farthest away from the door) and go back to a full bench seat with padding. It’s the size of a crib mattress…with one corner lopped off, so sheets and such will fit with a corner tucked under.

IMG_3840.jpegIMG_3841.jpeg

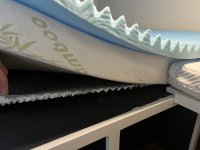
Here’s the moisture barrier platform under the mattress. Just raises the mattress up ~1/2” and has plenty of room for air to circulate to keep any moisture from building up under the mattress.

IMG_3842.jpeg
 

Jmanscotch

is wandering
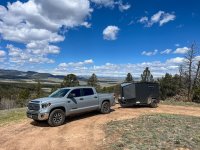
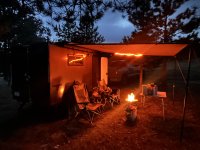
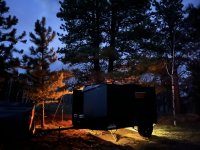
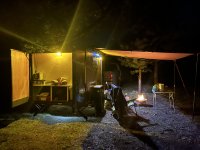
It’s been a couple weeks ago now, but caught up on life a bit and figured I’d come back to post a bit about our first trip.

We had tried to go to a really nice spot we’ve been to before, but trails were closed and we ended up wandering around a bit and found a good enough spot as the sun set.

Trailer towed well, the Tundra definitely makes towing more effortless compared to the Tacoma that does feel like it struggled (mainly just the gearing and weak rear suspension).

Nothing notable broke or jumped out as an issue after a rough ~50 miles towing off road. The zip tie holding the trailer brake cable to the axle broke…which was the only failure.

I did take note that we need a longer fire pit propane hose, we need more usable table space in the galley when we build out the kitchen pullout (to store opened dry food, toiletry bags, kid gear, etc). The heater worked perfectly, the light situation was near ideal for our needs…overall it’s marked as a success.

IMG_3926.jpegIMG_3911.jpegIMG_3914.jpegIMG_3917.jpegIMG_3921.jpeg
 

Jmanscotch

is wandering
Haven’t had much time to dedicate to the trailer, but did carve out some time for a few things.

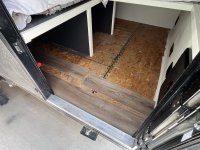
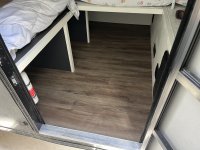
I finally bought some flooring and installed it. It’s just installed loose and floating, I’m going to see how bad it moves around with the temperature swings and off roading before I go back through and secure it.

IMG_4380.jpegIMG_4381.jpeg


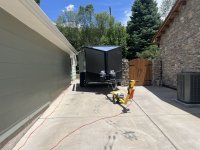
Some of you might recall that I had an issue with sneaking the trailer beside my house and into the back yard. It’s a bit tight of a spot and this trailers wider that any previous ones I’ve stuffed back there. Add to that the new larger Tundra tow vehicle, and I was struggling with being delicate enough to back the trailer into the backyard without hitting the gutters on the side of the house.

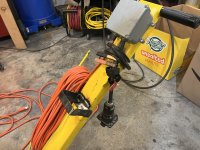
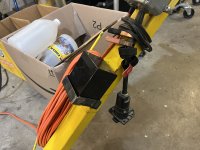
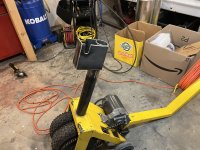
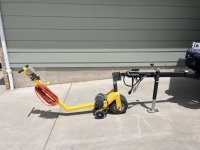
I found an electric trailer dolly for a steal of a deal ($225) and made a few modifications to it so I could hook it up to the Lock-N-Roll coupler and use the trailer brakes on it.

I started by building a simple battery bracket to hold a small 12V battery (that was the trailers original break-away brake battery) so I could use the trailers brakes when moving it. I need a 7-pin extension now, before that’ll work, but that’s on its way.

IMG_4442.jpeg
IMG_4448.jpeg


Then I bought a short tube of 2” ID pipe and cut up some left over plate I had to fabricate a LNR mimicking coupler that’ll attach to the trailer.

This attachment slips over a 2” round post that’s meant to act as a quasi 2” ball for a common ball coupler.

IMG_4443.jpeg
IMG_4449.jpegIMG_4450.jpeg


Mostly a success…but the attachment needs modified so it doesn’t spin on the post and as you can see by the tire marks, the slight incline and weight of the trailer gave me some grip challenges, though it did work. Going to need to see what I can do to improve on that (better tires, lower mount, etc).
 

Forum statistics

Threads
188,206
Messages
2,903,770
Members
229,665
Latest member
SANelson
Top