out with the old in with the new

westyss

Explorer
I wish I was posting to say that I am making great progress on finishing up the rig, but instead I am posting on more temporary items with some permanent ones too. I am just going to do projects in the truck because we are always using it instead of finishing it, which really isnt a bad thing.
So on that note, here are a few things done to get the truck ready for a Death Valley trip for my birthday.


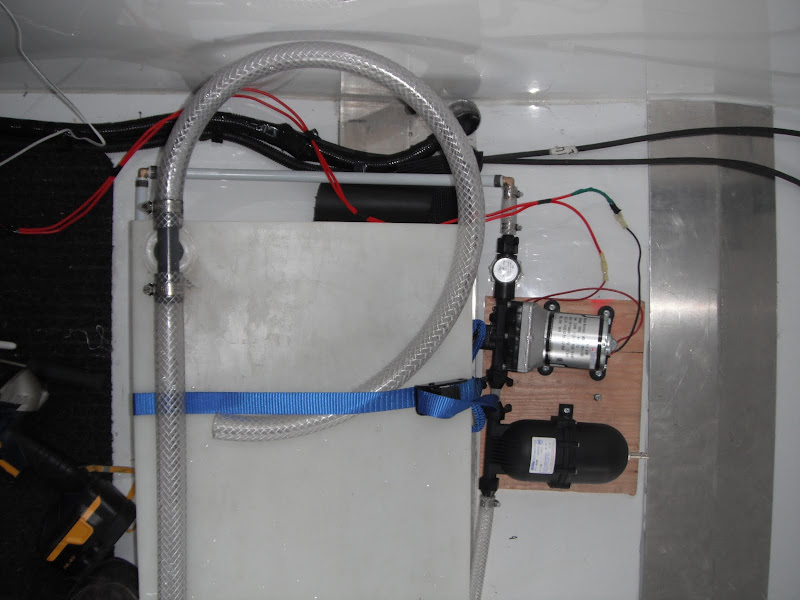
I installed the interior water tanks, they are a permanent fit, but have a temporary pump, accumulator and tap set up. The tanks will be located under the bed forming a step up for the future table layout. They are inter connected by a filler/vent hose and a low coupling, two tanks with sixteen gallon capacity each, along with these will be two bladders between the frame rails at eleven gallons each giving fifty four gallons capacity total.

death%20valley%20trip%20004.jpg


Here is the filter, pump and accumulator in its temporary place, I ran a water line to the side exterior storage hatch door with a tap so water access was as easy as opening the hatch, this came in handy.
death%20valley%20trip%20005.jpg


Toilet in (permanent) just not prettied up yet, wiring and a water line will pass through the base of the toilet, these will be covered with a moulding and the aluminum corner piece painted and sealed.
death%20valley%20trip%20007.jpg


And put all the temporary cabinets back in with some new LED lights all over the place.
death%20valley%20trip%20017.jpg


I also welded up a piece of 1"x2" onto the rack at the back next to the spare to mount a bike rack onto, it has a captured bolt if I want to remove the bike rack. It turned out very solid and the rack itself was already beefed up and solidified.
death%20valley%20trip%20001.jpg
 

westyss

Explorer
Bought a bunch of containers to put our stuff into,

death%20valley%20trip%20025.jpg


Intalled the temporary bed and more containers for clothes, filled the water tanks and hit the road.
death%20valley%20trip%20030.jpg


Just in time for the Friday afternoon rush hour in the Seattle/Tacoma area in just great weather as you can see. We sat in that parking lot for a while then decided to just go get a bite instead.
death%20valley%20trip%20033.jpg


And finally to our first stop in DV. Eureka dunes, nice and hot. stayed there for three days then toured around.
death%20valley%20trip%20136.jpg


For this trip, I wanted to check my fuel consumption closely, and also to see the difference with faster speed, obviously the rate will be greater the faster you go , but by how much. well, as it turned out, I drove as much as possible on the way down at 60mph, on the way back at 65mph, I only calculated a difference of .5 mpg more doing 65 mph, not a huge difference,
I did my calculations twice because I got a pretty good numbers, might be headwind/tailwind difference but my gph are oddly really good.

Going: 1506.4 miles at 14.63 mpg. U.S.(including all the travel in the valley and to Vegas) 17.57 mpg imperial


Back : 1249.2 miles at 14.07 mpg U.S. in two days (not fun) 17.07 mpg imperial.
Any one else getting numbers like that? They are more than my cross Canada trip. Not sure why.

Zero issues with the truck, the new suspension is a life saver, definately worth it, so good that on the way back, we were near Boise until I realised that the seats had no air in the bag, after pumping them up a bit it was even better, especially needed for the terrible road surface of the Snoqualmie Pass.

Now back to a bit more interior work, but in stages.
stage 1: Bathroom walls drain, sink etc.
stage 2: Kitchen cabinets, counter top etc.
stage 3: Bed/ table storage area.
stage 4: Fridge cabinets/ electrical completion

Thats the plan, but could change any minute.
 

westyss

Explorer
Oh yeah, I also installed this outside light, these are great, has a motion detector and came with LED, very bright and works great, recommended! It can be used normally on or set up for motion detection, and will blink red if battery levels go too low. All my light are now LED, as before I was always concerned about leaving a light on, but now dont care.


death%20valley%20trip%20029.jpg


The battery box set up has also passed the corrugated road test and got a thumbs up, if it lived through the Death valley and Snoqualmie pass tests it will live through anything.

Crankshaft Junction
death%20valley%20trip%20193.jpg


middle of no where.
death%20valley%20trip%20194.jpg
 

Xrunner

Explorer
Nice work! Can't wait to see the finishing touches you put on the build.

Do you have a link or source for those outside LED lights with the motion detector?
 

LowTech

Dirt Track Traveler
I wish I was posting to say that I am making great progress on finishing up the rig, but instead I am posting on more temporary items with some permanent ones too. I am just going to do projects in the truck because we are always using it instead of finishing it, which really isnt a bad thing.
So on that note, here are a few things done to get the truck ready for a Death Valley trip for my birthday.


I installed the interior water tanks, they are a permanent fit, but have a temporary pump, accumulator and tap set up. The tanks will be located under the bed forming a step up for the future table layout. They are inter connected by a filler/vent hose and a low coupling, two tanks with sixteen gallon capacity each, along with these will be two bladders between the frame rails at eleven gallons each giving fifty four gallons capacity total.

death%20valley%20trip%20004.jpg

Nice to see someone else that is using their rig as yet unfinished. We just did a round trip of 1500 miles, more than half on dirt tracks, and are working w/ several temp situations in the "field testing" mode.
11-03-30 (45).JPG 11-02-03_0.JPG

How did that water tank set-up work for you? I had a similar set-up, w/ one fill going to two tanks. Each tank was vented (I didn't see that on yours), but the vents were connected as well. Had loads of trouble getting the second tank to fill correctly. I'm now going to one hose input / "Y" splitting it to each tank, that I can control which is getting filled / and bigger air vents that are separate.
 

westyss

Explorer
Nice to see someone else that is using their rig as yet unfinished. We just did a round trip of 1500 miles, more than half on dirt tracks, and are working w/ several temp situations in the "field testing" mode.
View attachment 56046 View attachment 56047

How did that water tank set-up work for you? I had a similar set-up, w/ one fill going to two tanks. Each tank was vented (I didn't see that on yours), but the vents were connected as well. Had loads of trouble getting the second tank to fill correctly. I'm now going to one hose input / "Y" splitting it to each tank, that I can control which is getting filled / and bigger air vents that are separate.

Ive checked your trip reports out, they are epic! especially in those trucks, not sure how comfy they are.
The vent system in that pic is not one I will be staying with. I will have the vent off the right side tank be independant, not interconnected with the fill/vent from the left tank, this should allow for filling no problem, as it was when filling in this set up, the right tank vent line would fill with water, and not vent until pressure built and spewed it out. So independant vents are needed. I would like another vent hole in the left side tank but i may not get it.
 

LowTech

Dirt Track Traveler
Ive checked your trip reports out, they are epic! especially in those trucks, not sure how comfy they are.

Thanks, I'm still updating the recent one.

As far as comfy . . . they rank right up there w/ my other rig, `70 E300. I do think that the big truck has a better seat.
Her rig (the M109) will be getting captain chairs, it already has a partial application of fatmat and a muffler (something that they do NOT have coming from the Military) but it is still loud :wings: she says. I will `mat the under hood, firewall, and sides as well. Every little bit helps :sombrero:
 

westyss

Explorer
Here's a couple of shots from a solo trip for the long weekend, no wife so I was able to go onto a rough road to give everything a good testing, main intent was to get away for a little biking, hiking and relaxing.

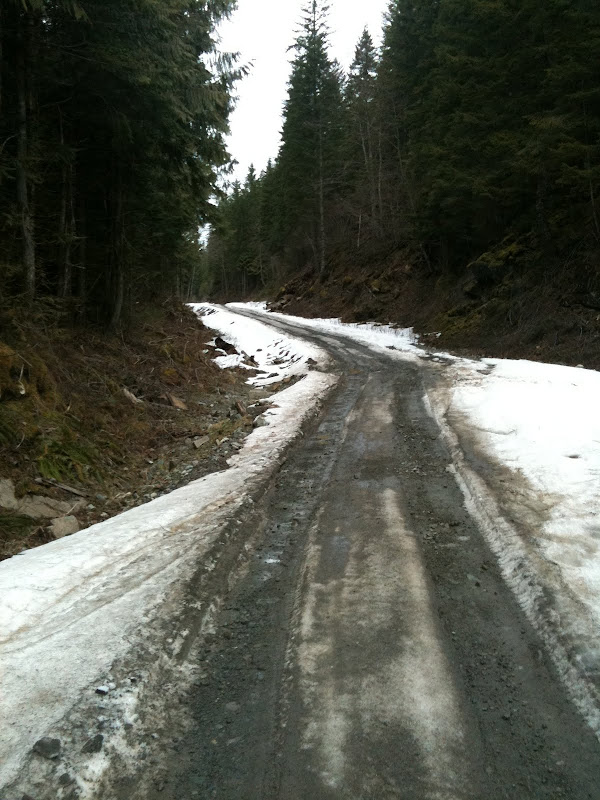
I took the Harrison West FSR, this road was in poor shape, with some work being done to it, a little snow remaining.

solo%20harrison%20west%20FSR%20007.jpg


View was nice ontop of the passes.
solo%20harrison%20west%20FSR%20012.jpg


After about forty kilometers I got to my destination, a beach camping spot that is usually covered in yahoos but today only a few people.
solo%20harrison%20west%20FSR%20019.jpg


One of those people has this 1956 Mog, sleeps in the sleeper unit,
solo%20harrison%20west%20FSR%20023.jpg


and takes this bike with him, a "Rokon" a two wheel drive motor bike that goes everywhere. note the chainsaw on the front, the sleeve in back under the carrier is for a 12 guage.
solo%20harrison%20west%20FSR%20024.jpg


Here's a view out my door in the morning, the weather was great all weekend, got some bike rides in, some big fires and lots of exploring.
solo%20harrison%20west%20FSR%20034.jpg


solo%20harrison%20west%20FSR%20053.jpg

We took the Mog and the Rokon to explore and find some new, hard to access beach camps, we had to get the chainsaw out to get through.

solo%20harrison%20west%20FSR%20059.jpg


solo%20harrison%20west%20FSR%20063.jpg

Another nice beach, I wont be taking the Fuso down here, the Mog had a hard time climbing out, but that Rokon had no problems.
solo%20harrison%20west%20FSR%20064.jpg

maybe this should be in trip reports but just didn't seem worthy.
 
Last edited:

ColoDisco

Explorer
Love your build! Great work!! Cannot wait for the next update pics!

My wife and I camped up in port Moody in 97. Absolutely beautiful! We hope to take our camper up there again.
 

Forum statistics

Threads
188,348
Messages
2,903,637
Members
230,227
Latest member
banshee01
Top