Over-family-landing composite F-550 build

ITTOG

Well-known member
Sure, I made the foam cutter using 18 AWG nichrome wire (sourced from my local electronics hobby shop Norvac) and a (hastily) home made wood tensioning device. I used some left over surgical tubing to keep it tight as you can see on the top. That could easily be a bungie or some other stretchy material. I then attached a regular power cord with one wire going to each end of the wire and used some bolts to clamp all of that together. DO NOT PLUG THIS DIRECTLY INTO THE WALL. I used a variac transformer and started from 0 and slowly worked the winding ratio up until the wire started to cut the foam cleanly. You can also use this calculator and figure out exactly what voltage you need and create it some other way.

View attachment 740015

I then made a jig that held the uncut foam. On the edges I put rails that the nichrome wire could run on to make the appropriate arc cut. I used 1/4"x1" aluminum bar stock, you need to be very careful using a conductive material as the voltage between the two bars is close to the output of your transformer and can hurt/kill you. I didn't have anything flexible, nonconductive and heat resistant, so I made the aluminum work, but we were very careful with it.
View attachment 740014

Then it was just a matter setting up the foam in the jig and dragging the hot wire cutter through it. Run a few tests on some scrap foam first and be in a well ventilated area! Be careful to keep a consistent speed and even progression from each side. Stopping is also a big no-no as it burns the foam.

This was my first time doing it this way, so I am by no means an expert. Youtube "nichrome hot wire foam cutter" and you will find lots of other (better) examples! Good luck with your hot tub cover.
Thank you very much for the details.
 

ben_j_c

Active member
I am back with some updates!

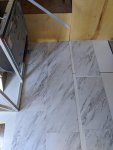
We started to install some adhesive backed vinyl tile that we thinks looks pretty good.
PXL_20220724_020330658.jpg

Then some framing for the under the kids bed storage area.

PXL_20220724_163319554.jpg

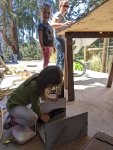
The whole family helped making the drawers!
PXL_20220724_205739409.jpg

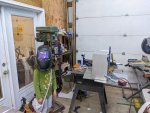
And my oldest is a quick learner on welding!
PXL_20220724_213214065.jpg

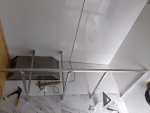
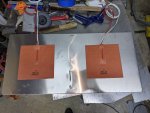
Here is the bottom of the battery box with heating pads installed. This will be placed over some Styrofoam insulation.

PXL_20220726_050840675.jpg

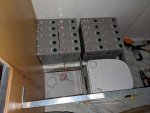
Batteries installed in the carrier with the toilet on rails!


PXL_20220726_061729442.jpg

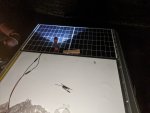
I then got the solar installed on the roof (this is the first of 4 panels).

PXL_20220730_062522557.jpg

At this point we were getting close to a deadline and I stopped taking photos (oops!)

Suffice to say we all felt like this when we left on the trip:
1672871455758.png
 

ITTOG

Well-known member
What are you framing with? Is it 1" aluminum tubing? What thickness?

What are you making your drawers with?
 

wicked1

Active member
Your build is really great!
And as others have said, very impressive how much you're doing! Especially with kids!!! I used to take on pretty advanced engineering hobby projects with lots of planning and year long builds, etc.. But not after having a kid! (My son has that same NASA shirt).
 

ben_j_c

Active member
What are you framing with? Is it 1" aluminum tubing? What thickness?

The frame for the cabinets is 1" 6061-T6 Aluminum, 1/8in thick it is a combination of U channel and 90 deg angle. That lets me get a lock nut behind things easier.

What are you making your drawers with?

They are 5052-H32 Aluminum that I am cutting with a circular saw to a CAD made pattern. I then bend them up on my brake and weld the edges. I am mounting 1/2 maple plywood to the front.
 

Forum statistics

Threads
188,384
Messages
2,903,967
Members
230,274
Latest member
mbauerus1
Top