Pop-Up Camper - Custom Build (scratch built) Oasis-Si

VanIsle_Greg

I think I need a bigger truck!
This is looking great! Pretty stoked that another Canadian is doing a project like this. I'll be starting mine this winter.

Oh yeah? Thats awesome man. I looked around online pretty extensively for months on here as well as on some other forums, and there are a bunch of camper builds out there, but not too many pop up builds. Hard shell or soft side for the pop up.

I am pretty excited to see this coming along, it is becoming a pretty awesome thing. Mike is killing it with his cabinet work, and it is really getting fun now. I love stuff like this, and the feeling of making something from a pile of parts and supplies makes the long hours worth it. There is nothing wrong with buying something off the shelf (I do it often), but there is nothing BETTER than making it your way.

Looking forward to your build thread Flash!
 

VanIsle_Greg

I think I need a bigger truck!
Very nice build. Thanks for writing it up and sharing. Look forward to more pics!

Heh, me too. Need to get some more work done. Life, kids, kids school and work all getting in the way. Should make some big moves in the coming weeks with cabinet assembly, wiring and electrical and the biggest change, the Aluminum skin! Going all natural brushed (satin) aluminum with black trim and black accessories. I might get a graphic made for the sides... but coming up with an idea is tough!
 

s.e.charles

Well-known member
I am looking forward to the "top half" of this.

in the first post, a mention was made to this being a lighter version. with all the woodwork, it appears to be solid and practical, but how is the weight savings being effected?

thanks
 

VanIsle_Greg

I think I need a bigger truck!
I am looking forward to the "top half" of this.

in the first post, a mention was made to this being a lighter version. with all the woodwork, it appears to be solid and practical, but how is the weight savings being effected?

thanks

Well... I'm not sure about "lighter" than a 4WC, but light compared to the mass market campers that say they are 1/2 ton friendly. Most of them are right at the payload of the trucks they are designed for... this 'should' be in and around 1000# - 1100# all in. The steel frame is only 300#. I haven't done all the estimation calculations, but the skin is not that heavy, and the roof is trussed and very light as well so, fingers crossed.

I will go weigh the truck before and then after to see where it sits once completed. The interior is pretty much all there with the exception of a little more woodwork and of course the mattress and the last fittings and electrical. Not much more in the way of build stuff however.

For what its worth I can still lift the front end of the camper up with 1 arm. Sorta. ;)
 

VanIsle_Greg

I think I need a bigger truck!
am I spacing out? did I miss the whole fabric & pop up part or are you guys pulling my leg . . . ? and if so, IT'S NOT FUNNY!
Ha ha... nope not pulling your leg. The fabric part is being planned, and the final design work will be done once we get the top completed. This should be pretty soon actually as we are getting ready to skin this in the next few weeks. The fabric guy we have lined up makes boat upholstery and dodgers etc. Mike knows him well, and he apparently does very good work. He has access to all of the fabric, clear window panels and can make anything I want. He is even up for making the cushions for the sealt and lower bunk too!

So far what I do know. We are making this from Sunbrella, a medium weight, waterproof and very US stable fabric used extensively on boats. This will include a number of clear windows with velcro roll up blinds and even some vents with mosquito netting. How many and their location remains to be determined. I am not sure what this will cost overall yet as we need to work out the yardage and the add-on stuff. For him, this is a short amount of time to build, so the labor costs should be pretty low-ish.

I am going to have him make an awning for over the entry door as well. I want to design up something to keep the rain off the door when deployed, and something that can be easily rolled up and stored when not in use. I have seen some cool designs out there, and have a pretty good plan of attack on that one...

Overall, the fabric portion of this will be very similar to the 4WC design, or any of the other pop up campers on the market. I am even looking at insulating between the 2 layers for a bit more heat retention. More to come.
 

VanIsle_Greg

I think I need a bigger truck!
A quick trip out today to pick up supplies for the plumbing. 1 1/4" inlet hose and fittings for the tank as well some more barbed T fittings. Need to get that hot water from the tank to the tap. The only pieces I still need are the drain parts now. I also picked up a switched LED RV porch light for the back door. Amber or clear lense depending on my mood...lol.

I am getting anxious now as I need to get so much done but my time is so limited. Many hours of sanding and varnishing in my near future. heh
 

VanIsle_Greg

I think I need a bigger truck!
Wow... it's been a few weeks since I posted anything new. I have not had as much time as I would like to work on this (kids school, work, after school activities, work), so progress has slowed down a little. Mike is still working on things as time permits, and when I am able to get away I dart over and put in 4-6 hours on it, mostly Saturdays. Mike has done some amazing work, he laminated up all the doors and drawer fronts from the same wall material used inside (3 layers), and just finished assembling and glueing up the rear (main) door today. That was a bit of work to get that all sorted out and framed up, too bad I missed it. The rear door is made with a solid wood frame and 2 skins of the same thin ply we used for the inner and outer skins. Insulated of course and all cut out for the rear sliding window and RV latch / deadbolt combo. It gets skinned with aluminum as well outside and a natural finish inside.

I in the meantime managed to get all of the walls inside skinned, trimmed up with the router and sanded so the top caps are good to be installed once the skins are on. Lots of little trim pieces to go in still, but that can happen later after we get the exterior and the roof done. I also managed to prime and paint the bottom of the tub, and the PPG storage cubby. That door gets built next. I also put in a 110v plug. This is as simple an install as it gets. I have a NOCO battery charger / maintainer and it has a 110v plug coming in through the tub. I added a 3 way splitter (short extension cord) and plugged this in. Simple, no major wiring to be done, and likely this will rarely get used. Nice to have just in case.

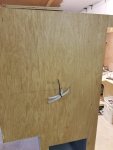
Black 110v plug in for...stuff?
20180930_165023.jpg

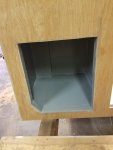
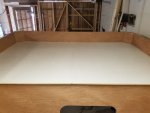
Tub primed one coat and one coat of finish. This is single component epoxy, and goes on nice. It is designed for garage floors...hopefully it stands up!
20180930_165010.jpg

Primed and painted LPG cubby / locker.
20180930_164954.jpg

In primer (pics out of sequence)
20180923_141616.jpg

Bed base filled, sanded and primed and all interior walls completely skinned (finally!)
20180923_141603.jpg

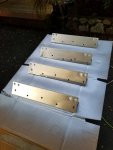
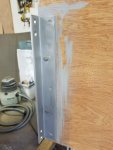
Oh and I spent a few hours bashing the camper jack brackets back into shape and ground them clean. A few coats of aluminum coloured primer / paint and they look like new. These came with my refurbed Hi-Jacker hydraulic jacks.
20180918_180735.jpg

Wow... out of sequence again. Finished the skins inside.
20180915_135017.jpg

One of my favorite details, the cutouts for the tie down hatches. These should work really well and give me decent access to the turnbuckles in the bed. I love the way the trim and paneling looks... it turned out fantastic.
20180915_135006.jpg

Detail shot.
20180915_135001.jpg

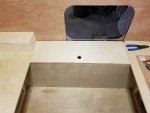
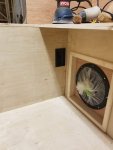
Not sure if I shared a pic of the battery compartment / water tank cubby lid and window yet? Its going to work out great, lots of room for all the electronics and so on.
20180915_134946.jpg

So much more to do! Aluminum skins coming soon to a custom camper near you!
 

VanIsle_Greg

I think I need a bigger truck!
Camper work completed this weekend. I have only been able to work on this 1 day in the past week, but Mike has done some stuff... and it is looking great. I managed to get all the opposite side of the plywood tub prep done in preparation for fiberglassing, and got the underside of the bed (above the truck cab) prepped and the first coat of finish paint on it. Forgot to take a pic however.

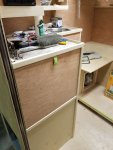
Trim around the sink, drawer slide and drawer for the fridge, under sink panel and door installed and the hanging locker door is mostly installed. This was all Mike. heh

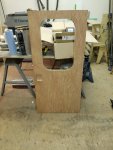
Oh and the main entry door is all framed up, insulated and skinned. Looks awesome and weighs like 10# max so far. Lots of painting and trim work, as well as getting ready to skin this sucker as soon as possible. Once it is skinned the rest is really the picky stuff

Entry door is, well a door now! Mike worked on getting this all framed up, and insulated. It is rigid, and really light. Now its ready for skin and trim!

20181008_122943.jpg

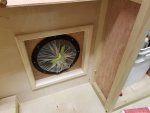
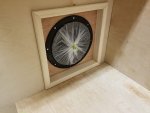
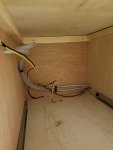
Hot water and return lines run. An eccotemp L5 mounts here in a semi permanent box with a vent cap.

20181008_122930.jpg

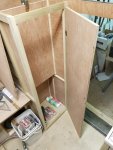
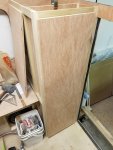
Hanging locker door installed. These doors are made from 3 layers of laminated inner skin material. Pretty rigid and looks great.

20181008_122856.jpg

20181008_122849.jpg

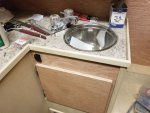
Trim installed around the sink and counter. Looks like a kitchen now!

20181008_122843.jpg

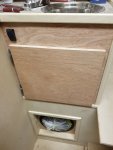
Under sink door is installed and the switch for the water pump installed. Great idea Mike to mount it there...accessible and in a good spot.

20181008_122837.jpg

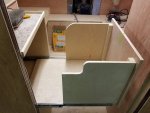
Cubby for the Dometic CF-35 chest style fridge. Wiring for the switch panel near the door and for the fridge as well as plumbing for the Eccotemp HW heater.

20181008_122826.jpg

Drawer for the Dometic CF-35 fridge. Mike designed this, and it looks great.

20181008_122819.jpg

Fridge slide closed, trimmed and ready for a handle / latch.

20181008_122811.jpg

I managed to get some additional painting done and a bunch of prep for the "next' steps. We need to finish the last bit of fiberglass and then I can finish off the bottom tub. Once that is done and all that paint is dry, we can work on skinning it with the natural finish aluminum and corner trim! So stoked about that step. Then windows and roof framing. Still so much to do!
 
Camper work completed this weekend. I have only been able to work on this 1 day in the past week, but Mike has done some stuff... and it is looking great. I managed to get all the opposite side of the plywood tub prep done in preparation for fiberglassing, and got the underside of the bed (above the truck cab) prepped and the first coat of finish paint on it. Forgot to take a pic however.

Trim around the sink, drawer slide and drawer for the fridge, under sink panel and door installed and the hanging locker door is mostly installed. This was all Mike. heh

Oh and the main entry door is all framed up, insulated and skinned. Looks awesome and weighs like 10# max so far. Lots of painting and trim work, as well as getting ready to skin this sucker as soon as possible. Once it is skinned the rest is really the picky stuff

Entry door is, well a door now! Mike worked on getting this all framed up, and insulated. It is rigid, and really light. Now its ready for skin and trim!

View attachment 476945

Hot water and return lines run. An eccotemp L5 mounts here in a semi permanent box with a vent cap.

View attachment 476946

Hanging locker door installed. These doors are made from 3 layers of laminated inner skin material. Pretty rigid and looks great.

View attachment 476947

View attachment 476948

Trim installed around the sink and counter. Looks like a kitchen now!

View attachment 476949

Under sink door is installed and the switch for the water pump installed. Great idea Mike to mount it there...accessible and in a good spot.

View attachment 476950

Cubby for the Dometic CF-35 chest style fridge. Wiring for the switch panel near the door and for the fridge as well as plumbing for the Eccotemp HW heater.

View attachment 476951

Drawer for the Dometic CF-35 fridge. Mike designed this, and it looks great.

View attachment 476952

Fridge slide closed, trimmed and ready for a handle / latch.

View attachment 476953

I managed to get some additional painting done and a bunch of prep for the "next' steps. We need to finish the last bit of fiberglass and then I can finish off the bottom tub. Once that is done and all that paint is dry, we can work on skinning it with the natural finish aluminum and corner trim! So stoked about that step. Then windows and roof framing. Still so much to do!

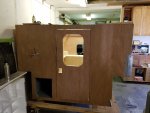
Making progress, looks good.

How are you planning to attach the aluminum trim? Screws, adhesive, rivets?
 

VanIsle_Greg

I think I need a bigger truck!
Making progress, looks good.

How are you planning to attach the aluminum trim? Screws, adhesive, rivets?
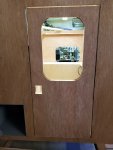
Good question... mostly screws and a boatload of Sika. There is a lot of the corner trim, 2 kinds (ok actually 3 kinds). "T" trim for door openings, "L" trim for edges and corners (the rounded nose detail will be interesting...many darts to cut) and "L" trim with the rubber/plastic insert to cover the screws. I see a LOT of drilling and sealing in my near future.

#Sika #Sealant #LotsOfCleanup

:LOL:
 

VanIsle_Greg

I think I need a bigger truck!
So, Saturday was a reasonably productive day around Mike's shop. I worked on the camper while he worked on flashing for his addition... heh, I think he had the harder job to be honest as that bending looked finicky! Go YouTube!

I started the day by sanding and prepping the bottom of the tub corner for fiberglassing. When we did the tub initially we were only able to get to 90% of it with it rolled on its side. So that left the last bit...the corner. I sanded it up, prepped it and made sure it was all ready for glassing...mixed up some resin and cut the cloth. I am no glass expert, but Mike is so with his advice I got it done. Overlapped the original glass and did a pretty nice job for not having done this for like 30 years. heh

The pic below shows it BEFORE it is trimmed. Was a bit cool in the shop and I wanted working time with the glass as this was a LOT of corners and fiddly bits to piece together. All in all it should be great! This all gets primed and painted as soon as it is cured.

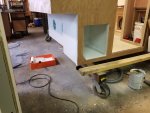
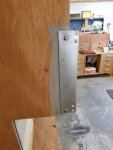
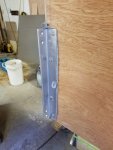
Next up, I installed the 2 corner brackets for the lift jacks. The benefit of using .120 wall steel is I was able to drill and tap all the corners, and then use stainless bolts to mount all of the jacks. These are also bedded in a boatload of Sika, and are not going to leak or ever come off. Ever. Never. The bolts are in there for good... and it is well sealed. Why, you ask, are they on before the Aluminum skin? Great question... with a simple answer. Raw aluminum and steel do not mix. As I understand it combining the 2 will/can lead to electrolysis and the eventual failure of the weaker metal (the aluminum skin). To avoid this we are simply going around the brackets. Maybe not the easiest thing to do, but in the end (and with proper sealant and mounding) it should outlast the camper.

Also test fit the door to see what it will look like...pretty sweet! The big gaps are because there is no door trim on the frame and or the door edging. More to come, hoping to go over and mount the other 2 corner brackets this afternoon.

:p

Starting to look like a camper with the door in there!

20181013_163559.jpg

Mmmmm...door.

20181013_163549.jpg

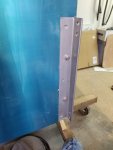
Corner bracket, cleaned up

20181013_163509.jpg

These turned out great, but need another coat of paint once this thing is done.

20181013_163458.jpg

Panorama of the lower tub section glassed up. Needs a good trim, a light sanding, priming and finish!

20181013_154647.jpg

So much oozing...

20181013_154624.jpg

Oozing... that stuff is an amazing product (Sika). Sticks like poop :poop: to a blanket and you can work it like caulking...and its paintable.

20181013_154616.jpg

I also worked on sanding the interior and cleaning in preparation for a LOT of varnishing, flooring and finish details. With an all wood interior, there is a ton of sanding but the finished product will be worth it!
 

VanIsle_Greg

I think I need a bigger truck!
It's been a while since I updated this thread with the stuff we have been up to. This build is taking a lot longer than either one of us anticipated, but with our work schedules and Mike doing a major addition on his house... this is just how it goes.

Over the past few weeks there have been some updates and some items checked off the list. and we are ready now for the skinning, windows and getting the roof built. So far, Mike has done a lot of work around milling up the trim, working on interior finishing and some of the important detail stuff. Its really starting to look like a camper in there.

Trim around the top cap of the camper was going to be an aluminum 'c' channel, but that wasn't going to work out in a way that was ideal for the fabric attaching, and we couldn't get anything in the right size. So we took a different direction, and picked up a few raw planks of poplar (ok, Mike did) and he milled and machined them up into a really nice top cap. This will be routed flush along the exterior wall and has a nice bullnose inside, it looks great. The aluminum skin will be run up and trimmed flush with the top of the trim and then the fabric will attach to the side with an aluminum strip screwed into the side.

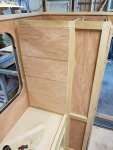
Interior wise, Mike has installed the 4 drawers in the passenger side cabinet as well as made the seat trim which I installed last weekend. This looks great and will work awesome to hold the cushions in place. Booyeah. I also managed to get the bottom of the tub primed and painted, and the 2nd set of brackets installed for the jacks. Lots of little details done, with lots more to do.

Drawers installed. This is a lot of nice deep drawers for food, clothes, whatever.

Resized_20181103_141804_7965.jpg

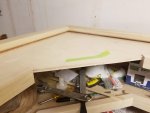
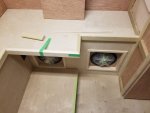
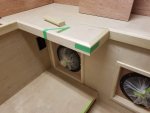
This is the top view of the top cap trim. NIce work Mike, it looks great.

20181027_133537.jpg

More top cap at the upper kitchen cabinet.

20181027_133523.jpg

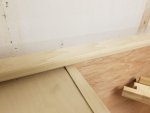
Seating trim. This was just before I drilled, glued and screwed all of the trim in. Nice fit!

20181027_133518.jpg

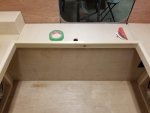
Trim along the battery / water tank box.

20181027_133514.jpg

Passenger side trim pre-install.
20181027_133510.jpg

Up close and personal.

20181027_133504.jpg

I didn't get a picture of the painted tub, the corner brackets or any of the other bits... but most of that looks just like all the rest of the pics before this post. Heading over to the shop tomorrow to work on more stuff, like trim and maybe the door for the LPG hatch?
 

VanIsle_Greg

I think I need a bigger truck!
I managed to sneak out today for about 5 hours to work on the camper. I have been sick as a dog for the past week plus (like 9 days) and finally feel up to doing stuff. Mike was working on the camper a little bit this week, and managed to get the top caps installed and the front round corners milled up ready for install.

Today we routed flush the top cap to the exterior panelling and sanded it all in preparation for the part I have been waiting for these past months...the installation of the aluminum skin. Once we got the area set up it was simply a matter of measuring, trimming and installing the first few panels. With, you guessed...a boatload ok Sika construction adhesive. When people ask me what the camper is made of my answer will be "steel frame and Sika... and a little wood". :LOL:

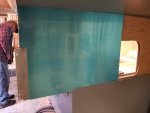
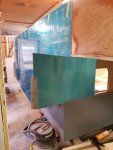
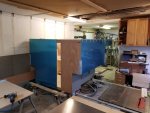
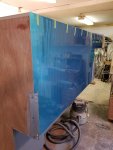
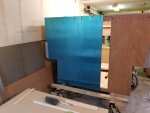
We trimmed up the aluminum panels being careful not to scratch up the finished surface. It is covered by the blue protective film you see from the factory, but it is still vulnerable to scratches. All in all the installs went very well, and we will be ready for the corner trim and the remaining panels in the coming days. I am really glad that I stuck with the rounded corners up front. It was a LOT of extra work, but I wanted this to stand out from all of the other units out there. Plus its a nice architectural detail and sometimes form truly does mean more than function.

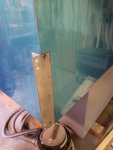
Front corner at the cab overhang. Nice and tight to the corner brackets. There is about an 1/16" th of an inch gap between the steel and the aluminum with a nice fat bead of Sika in between.

20181104_140807.jpg

More bracket cutouts.

20181104_140759.jpg

1/2 the front panel done. Doing this in 2 pieces saves me a whole 4 x 8 sheet of aluminum...and like $120.00. Which is a lot for a sheet of aluminum...though it is dressed and looks amazing in raw finish. Oh and hey, its a pic of Mike...heh. He does NOT like me taking his picture for any of these so no one tell him.

20181104_140749.jpg

Shot down the side.

20181104_140744.jpg

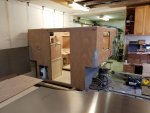
1/2 of the back of the camper skinned. We will be trimming out the doors and the edges after the fact. Funny part...I left some stuff inside the camper and we had to fis it out from the side window. *Doh!

20181104_130516.jpg

Window side.

20181104_130458.jpg

I kinda like the blue.

20181104_115928.jpg

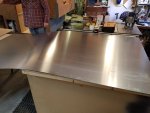
Prepping for the first cuts...

20181104_110637.jpg

Jig saw works amazingly well to trim this with the correct blades. Bosch metal blades, and a nice med speed.

20181104_110629.jpg

We should have all of the skin done by the end of next weekend...maybe. heh
 

Forum statistics

Threads
188,284
Messages
2,904,847
Members
229,961
Latest member
bdpkauai
Top