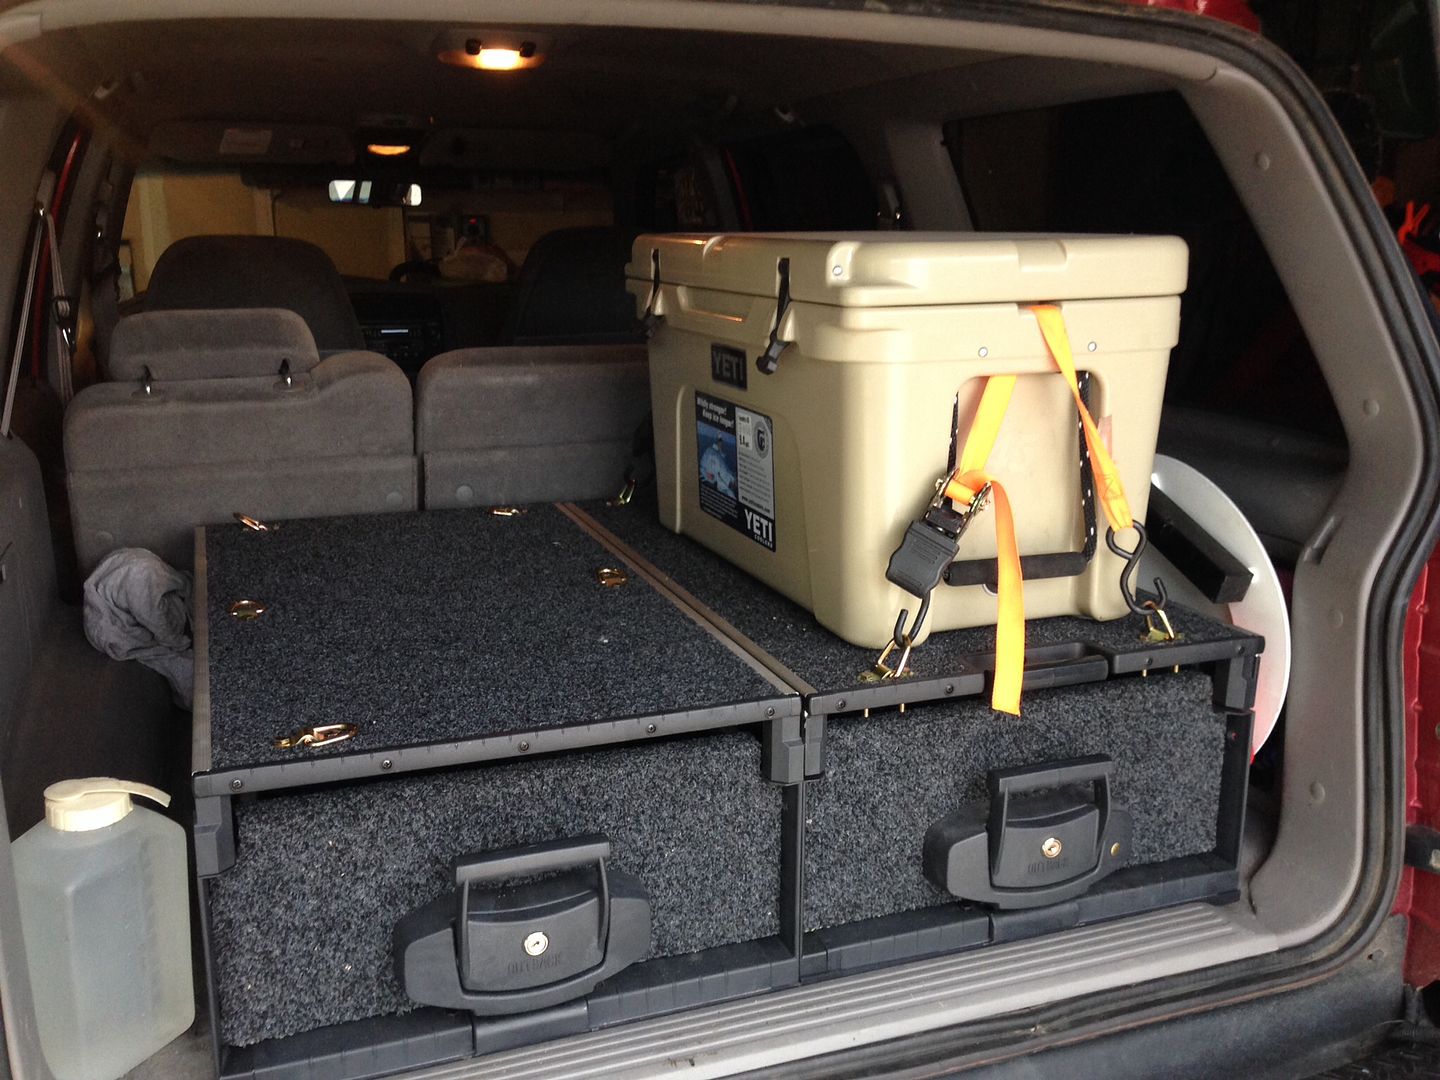
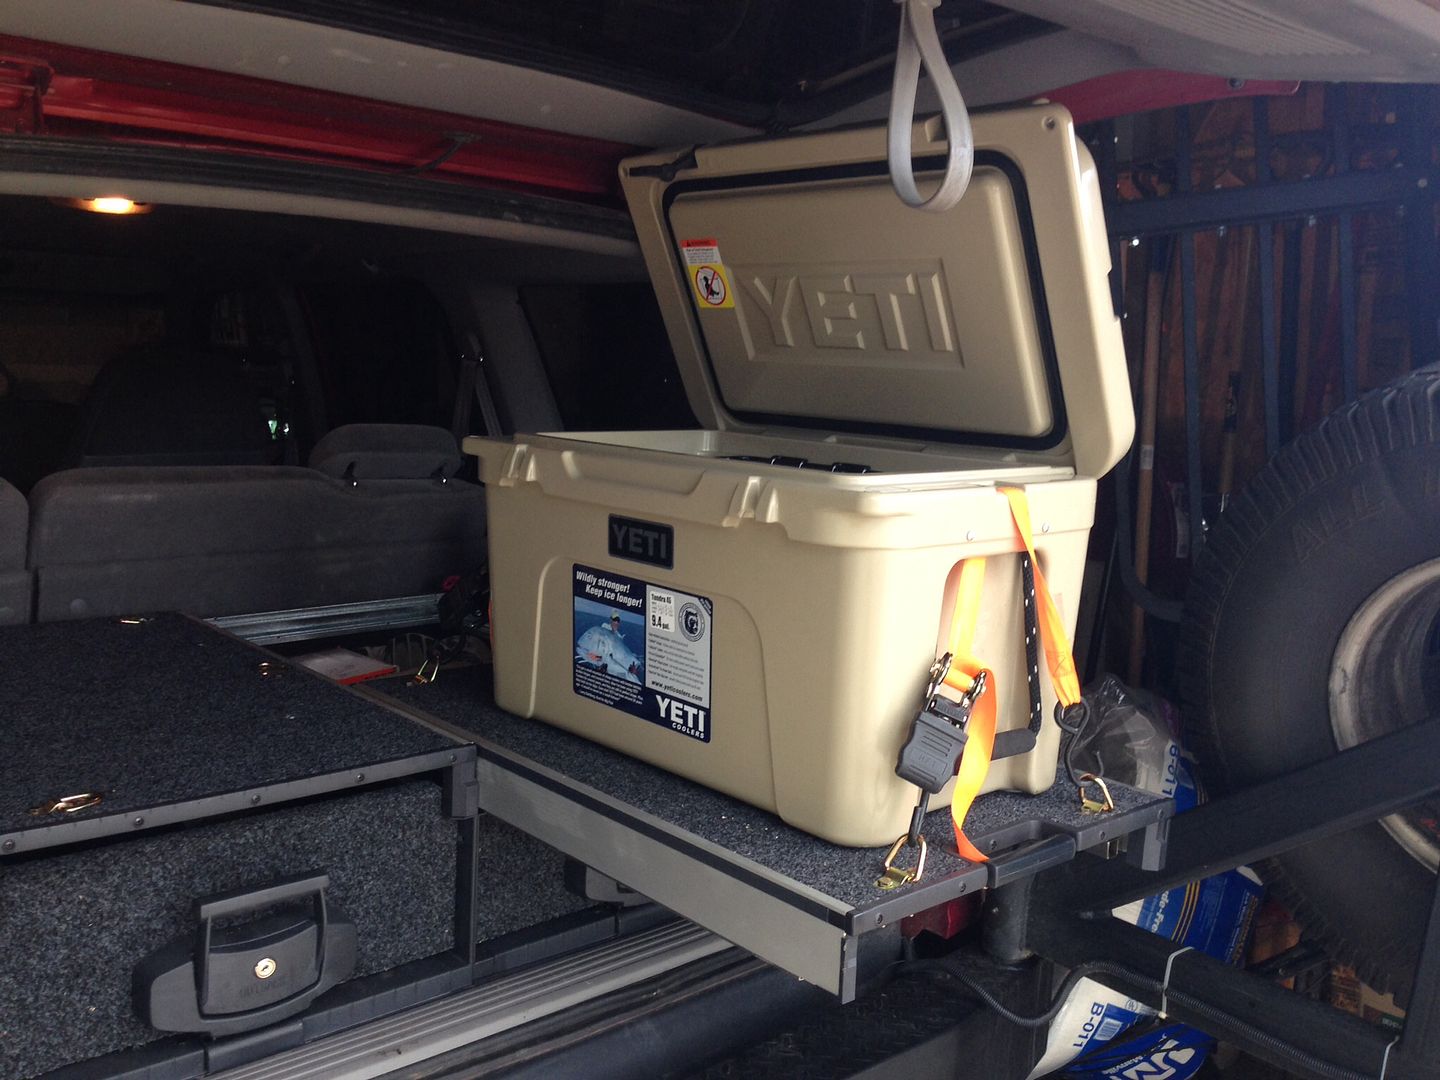
Post up your drawer/storage system

jeepin_idaho

Adventurer
For those of you that have a 2nd Gen Xterra. I just found this company. No idea when it comes to pricing. I am waiting to hear back from them.

http://www.smithoverland.com/
I have seen those in person and they are awesome! Let me know if you don't hear back from them right away. I'm friends with the owner and can pass the message. He does great work though and I'm sure prices them reasonably.

Sent from my SM-G900V using Tapatalk
 

nomadic111

New member
That is exactly like what I have in mind for my wife's Yukon XL. Could you provide some info on what materials you used and about how much the project cost?

Sent from my SM-G900V using Tapatalk

For most of it, I used 3/4" birch plywood. The only 1/2" I used was for the drawer sides. I'd have to go through and add it all up, but a rough guess is that I have 4-$450 in materials. ($125 in ply, $110 for the drawer slides, $50 for the handles, + piano hinges, spring-loaded hinges for the sides, screws, paint, varnish, trunk lining, adhesive,...) I probably didn't need to get so fancy with it, but I was having fun, and I wanted a nice final result.

IMG_20150502_183945732.jpg
IMG_20150502_184209318_HDR.jpg
IMG_20150503_152705207.jpg
 

Attachments

  • IMG_20150502_184013817.jpg
    IMG_20150502_184013817.jpg
    521.4 KB · Views: 265

cruiserpilot

Adventurer
For most of it, I used 3/4" birch plywood. The only 1/2" I used was for the drawer sides. I'd have to go through and add it all up, but a rough guess is that I have 4-$450 in materials. ($125 in ply, $110 for the drawer slides, $50 for the handles, + piano hinges, spring-loaded hinges for the sides, screws, paint, varnish, trunk lining, adhesive,...) I probably didn't need to get so fancy with it, but I was having fun, and I wanted a nice final result.

That looks really nice. I'm impressed. I like the look of the birch plywood. The little cubby on the front is nifty, or is that a speaker hole?
 

Raul B

Explorer
My drawer/ camping setup


331b946fb708ebdba42522355d7056da.jpg
 

scoooooch

New member
Here's mine when it was new...seen a lot of abuse since I built it but still solid as hell. Probably build another one in the near future with some design changes.

All made out of 3/4 ply, sub box is its own sealed unit within the platform making it impossible to steal. Top panel is basically a full sheet of ply that has been scribed for maximum fit. About 1/4 gap around the whole thing, including the flap when flipping it over.

6f68577f01f3770623252c79a475cbed.jpg
198de372e9b8f599ae91e8cc563cf0fb.jpg
73ea75b88f26b87cd49dcb229fdbdf2d.jpg
297e7e8d38e4e983ce0d6d1f8de8b94f.jpg
94c715e3aa983c5656d2d249a6a1c844.jpg
0bf538ff203d8bfc60517544a088ca6c.jpg
 

GP'd

Adventurer
BUILD : http://www.expeditionportal.com/forum/threads/62651-Refreshing-the-TJ-Build-Thread/page23

In progress, but inspired by many of yours here :

I'm a bit further along that the pictures show. Currently the drawers are built, carpeted and used via friction on the carpet plastic sliders until I can save enough for the Accuride 500 lb slides.

Anyway, I ended up using a bunch of 2"x2" aluminum angle paired with 3/8 & 1/2" ply. The Whole system can unbolt from the car, and integrates into the roll bar area.

Plan is to to add Expedition One Water Cans between the roll cage and the windows and gravity feed them to spouts. I'll post up as it progresses.

Front Divider Panel :


Sides going in :


Stove/Drawer/Stove Combo Slide


Mocking up upper jack mounts and tie down points


Construction :


Carpeting. Only went partial because the drawers will be on sliders.


More pics to come once I get the drawers in.
 

rayra

Expedition Leader
The XJ has 4 'D' ring attaching points in the floor. Those would work to hold your box down.


Rather than hinder or complicate a design with turnbuckles and such, the easiest / most direct thing to do is remove those D-rings and use their mounting holes in your design. Countersunk bolts, right into those holes, will allow you to maximize your storage design to fill the available space.
 

Mudchet

New member
For those of you that have a 2nd Gen Xterra. I just found this company. No idea when it comes to pricing. I am waiting to hear back from them.

http://www.smithoverland.com/

Hi there,

I am Kevin Smith, owner of Smith Overland. The Gen 2 Xterra cargo box shown on SmithOverland.com sells for $1100. We do custom builds as well, PM me to discuss. Smith Overland is a small company serving those who want a well built cargo box but don't have either the time or skills to do it themselves. Everything is built by hand in Tennessee with a focus on quality and craftsmanship. Thank you for the post about us.
 

Jason911

Adventurer
WK2 Cargo Drawer(homemade)

After much debate and looking at every post in this thread - I decided to make my own cargo drawer for the back of my Grand Cherokee WK2. As much as I liked the professional looking/built drawers on the market - I could not justify the attached $$$ asociated, and being that my father is a retired school teacher-turned cabinet maker in need a of a new project - what better way to capitalize!

I started with a ¾" hand-panel of birch plywood, and using the original floor as a template, cut to fit.


Then I cut the panel into two sections - one for using as the shelf for the drawer/ARB fridge, and one for loose storage


Covered everything with some black auto-bond carpeting that almost matches the stock interior. Glued the carpeting directly to the plywood using 3M spray adhesive


After installing the panels to check for fitment, I then installed a few short sections of aircraft floor tracking to secure loose cargo to, using spring release floor rings


Set to work on the drawer, which was also made out of birch wood, but 1" thick to give it some rigidity. Learned how to make dovetail ends on my drawer, and then glued everything together.


Using some remnants of the aforementioned carpeting, I covered the 3 exposed sides of the drawer. All that was left was to make a face for it, and attach a pull.

the slides on the drawer are 100b test kitchen cabinet slides(free, thanks dad!) that are self closing - no worrying about the drawers sliding our when parked on inclines.
 

don simon

New member
Learned how to make dovetail ends on my drawer, and then glued everything together.
When did you learn? Those dovetails are excellent and have the mark of a mastercrafstman with many years experience. Looking forward to the finished pics.
 

Jason911

Adventurer
@ Don Simon: Truth be told I did just two, and my father the rest. He has a dedicated router just for making dovetails. Wonderful craftsmanship too.

@ Skygear: the dovetails fit so tight, just a dab of glue is needed. The rest of the drawer was screwed and glued.

The drawer pull was just something I found at Menards, simple, clean and just a bit of style.
The carpeting that I used is almost a direct match - and it attracts just as much junk/dust/crap as the factory stuff. I'm using the drawer to access the stuff I use frequently (d-rings, receiver hitch, reusable grocery bags), as I hated to have to pull the cover to get to stuff, and conversely I really dislike just leaving laying around the back - hate clutter. The only addition I'm adding is going to be a Maple cutting board that will sit atop the drawer and to be used for meal preparing - which will then stow behind the drawer/fridge by the ARB tire patch kit. A few more pictures attached - any questions please feel free to ask.

The fridge is a ARB 37L I acquired from another member of this wonderful forum, the oven is a simple 12V Brunton Stove-to-Go. Designing a simple pull out tray for the fridge to access the contents within.

Total investment costs for drawer fabrication and assembly: $84.18
 

Forum statistics

Threads
188,208
Messages
2,903,801
Members
229,665
Latest member
SANelson
Top