You are using an out of date browser. It may not display this or other websites correctly.
You should upgrade or use an alternative browser.
You should upgrade or use an alternative browser.
Post up your drawer/storage system
- Thread starter neliconcept
- Start date
Rezarf <><
Explorer
Got to this stopping point last summer before I started using it for the season...
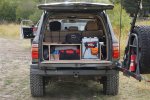
I've been cranking to finish these things up as things thaw out up here in Montana. I built one BIG drawer, fridge and stove combo slide, and added all my auxiliary systems to the side panel near the fridge. All together the system houses the 16 gallon water tank, pump, faucet, sub amp, third fuse panel, pure sine wave inverter, compressor, batter monitor, and power outlets. Gotta' finish up the wiring, latches and drawer faces... then I'll finish the cosmetics like carpet/raptor liner. The end is in sight.
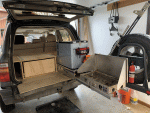

I've been cranking to finish these things up as things thaw out up here in Montana. I built one BIG drawer, fridge and stove combo slide, and added all my auxiliary systems to the side panel near the fridge. All together the system houses the 16 gallon water tank, pump, faucet, sub amp, third fuse panel, pure sine wave inverter, compressor, batter monitor, and power outlets. Gotta' finish up the wiring, latches and drawer faces... then I'll finish the cosmetics like carpet/raptor liner. The end is in sight.

Last edited:
vectorsc
Adventurer
I have these things. Frankly, I think I ************** hate them - excuse my language.
Meets EVERY need but one - the fold down plastic clasp handles are also the carrying handles. the VERY uncomfortable carrying handle. It is uncarryable without the lid on, as the handle exposes only a razor sharp plastic edge when it isn't shut.
Meets EVERY need but one - the fold down plastic clasp handles are also the carrying handles. the VERY uncomfortable carrying handle. It is uncarryable without the lid on, as the handle exposes only a razor sharp plastic edge when it isn't shut.
I haven’t figured out what containers I’m going to use on the top of the box for camping gear. The space is sized for an 8 gallon Rubbermaid action packer.
I did however also find this Plano product that I like the look of (and the $).
View attachment 467916
This is the item, I think
This is the size I’m looking to use
View attachment 467915More efficient use of space than the Rubbermaid and cheaper than the Rigid tool box that will also fit.
rayra
Expedition Leader
I am tossing around the idea of build a new drawer platform.
I was thinking 3/8 plywood for bottom and 1/2 for the sides and top. Then throw a coat of bedliner on it.
For those that build drawers out of plywood, what joins and assebly techniques are you using?
Glue and screw, mostly. Typically I set up for a glue-up, glue and align a joint and shoot it with 18ga brad nails to fix it in place and then go back with a countersink drill bit and then set the wood screws. I have a Kreg pocket jig but haven't used it much yet for my vehicle stuff. But have for some home furniture builds.
If I'm using thicker ply, ~3/4", sometimes I'll cut a rabbet joint into it which is a bit stronger when glued, and self-reinforcing, if you take my meaning.
Depending on what is going on with the structure, I'll sometimes reinforce a joint on the inside of the angle with a 1"x1" strip or something similar.
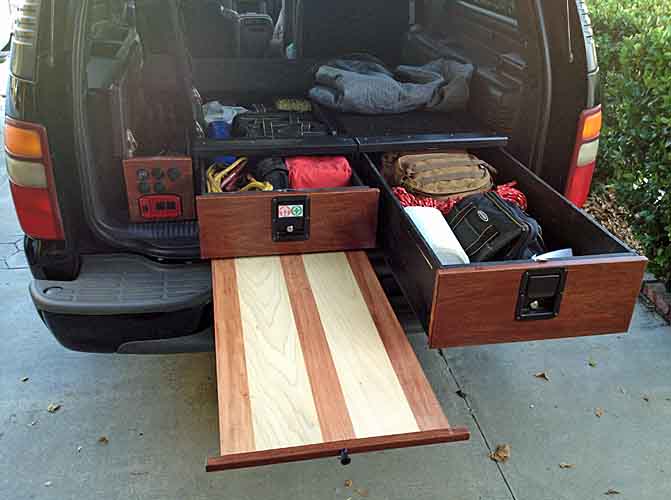

Storage Drawers / Platform for my GMT800 Suburban - WIP
Been talking about it and doodling plans for over a year. I finally started turning money into sawdust a couple days ago. No major progress yet, have been pre-cutting a lot of parts and should have some major pieces built over the next few days / week. My concept for the whole vehicle is sort...
 forum.expeditionportal.com
The 5 pieces of the slide out tray were glued together with full length spline joints. The end trim is attached via Kreg screws from below / behind.
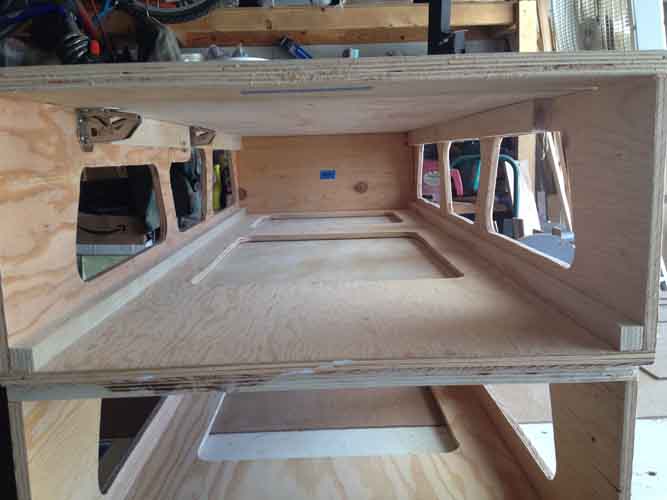
In the pic above I combined that corner / joint bracing function to serve as space blocks / slide rails for the drawer above and nestled a slide-out tray / shelf between them.
Wood is strong in compression but weak in span. So I try to arrange / stack my joints with that and gravity, weight-bearing and shear strength of my fasteners in mind. In other words put the horizontal top deck on top of the vertical sides. Only the top bearing surface needs to thicker. 1/2" ply is plenty strong enough for the rest of the structure. And depending how you intend to fasten the whole thing to the vehicle, you might want thicker for the bottom layer, so you can counter-sink bolt heads and still have enough wood for strength.
Lucky j
Explorer
I have never notice what you are mentionning. But mayby everytime I moved them around in the last 5 years, the lids were always on.I have these things. Frankly, I think I ************** hate them - excuse my language.
Meets EVERY need but one - the fold down plastic clasp handles are also the carrying handles. the VERY uncomfortable carrying handle. It is uncarryable without the lid on, as the handle exposes only a razor sharp plastic edge when it isn't shut.
another_mike
Adventurer
Looks like "Bella" the Chinese spammer is making her rounds on Expo again this morning. Its only been two years since you last posted in this thread.Hi Guys,
Good day!
This is Bella from China, please check what drawers our factory have, if you have interest on any of them, please feel free to contact us.
Bella export01@lonmancampers.com
View attachment 517466

Post up your drawer/storage system
What is everyone using for coatings. I'm wanting to Bedliner my setup but not sure what to go with. I used the aerosol type on a small portion and didn't like the coverage or texture Sent from my iPhone using Tapatalk DIY Bed liner is a great option, but some brands have more favorable...
 www.expeditionportal.com
Seeya in another 2 years! ?
jgaz
Adventurer
I didn’t see this before now.I am tossing around the idea of build a new drawer platform.
I was thinking 3/8 plywood for bottom and 1/2 for the sides and top. Then throw a coat of bedliner on it.
For those that build drawers out of plywood, what joins and assebly techniques are you using?
I used 3/4 for the top and bottom of my drawer box but 1/2” on the sides. As @rayra said, on the top it’s used for strength and on the bottom it allowed me to drill a counterbore that lets a bolt and washer sit below the surface. These bolts screw into my mounting base plate. The 1/2” is plenty strong used vertically on the sides.
I used the Kreg jig and pocket screws to assemble my drawer box. Oh, and plenty of titebond 2 wood glue combined with the screws.
You can kinda see my construction method in these two pictures.
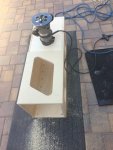
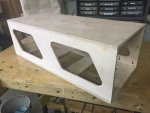
Last edited:
I didn’t see this before now.
I used 3/4 for the top and bottom of my drawer box but 1/2” on the sides. As @rayra said, on the top it’s used for strength and on the bottom it allowed me to drill a counterbore that lets a bolt and washer sit below the surface. These bolts screw into my mounting base plate. The 1/2” is plenty strong used vertically on the sides.
I used the Kreg jig and pocket screws to assemble my drawer box. Oh, and plenty of titebond 2 wood glue combined with the screws.
You can kinda see my construction method in these two pictures.
View attachment 517737View attachment 517738
What does this weigh?
jgaz
Adventurer
The box weighed 22.7 lbs. before, and now weighs 16.4 lbs after all the material was removed.What does this weigh?
The plywood was removed mainly for ascetics, not really the weight savings.
Overlandtowater
Well-known member
Wow that great!
The box weighed 22.7 lbs. before, and now weighs 16.4 lbs after all the material was removed.
The plywood was removed mainly for ascetics, not really the weight savings.
Thank you for this response. This is great information for giving an idea of what kind of weight savings you can see with these cutouts. I'm also mixing 1/2" and 3/4" on my build as weight is a big concern and I'm planning on putting plenty of speed holes where I can.
That is one slick drawer! I’m in the process of designing a similar drawer setup for the back of my Tundra. My current design incorporates 8020 extrusions for the frame and Baltic birch plywood for panels and drawers. Instead of carbon fiber (which looks so cool) I was going with scuff-resistant high pressure laminate (a la Goose Gear). QUESTION: You said next time you would use aluminum instead of wood for the drawers to save space; how would you go about that? How would you fabricating those? Would the bottoms be reinforced? Your fabrication skills are obviously on a “master” level, so I’m confident you already have a good idea how to approach this. Thanks for your time and sharing. JoeCustom under seat drawer I made...I normally woudn't do carbon fiber but my truck has other carbon fibers accents from the factory so I decided to add it to the drawer..drawers are wood. I plan on making them out of Aluminum next to get more interior space.
inexplorata
Member
Went "less is more" in the back of the G. Problem to solve was use of vertical space, and of course the fridge took up half the back between the wheel wells.
Empty space:
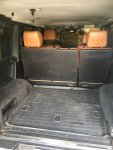
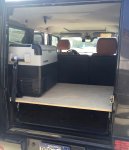
Literally just a piece of 3/4 inch plywood, resting on the wheel wells, cut slightly to sit level with the plastic trim. Bolted turnbuckles underneath to reach the four factory tie-down points. Test fit with the fridge and mission accomplished there.
Classed it up a bit with black speaker carpet, glued and stapled for good measure.
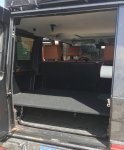
A view underneath, I've attached an adjustable leg there in the middle to prevent any bowing under weight. It's rock solid even when I climb in there now.

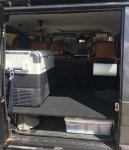
Another test fit, rather than attaching more tie-down (and possible failure) points, I strap the fridge right to the factory tie-downs, around the platform. Also discovered the little rolling plastic bins I already owned for under the bed at home fit perfectly on either side, I can use them or not as the trip requires. Camp chairs also fit perfectly under there.
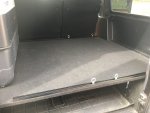
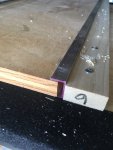
I wanted a little edge protection for dragging stuff in and out, I found this inexpensive aluminum T-track on Amazon, so I can put in these little adjustable lifting nuts to tie things down when necessary. Attached with bolts through the ply.
Finally, I discovered when traveling fully loaded I need someplace to set things I get out of the fridge. Again, 3/4-inch plywood to the rescue, along with some trim I had around and some aluminum edge.
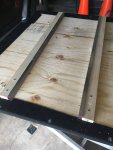
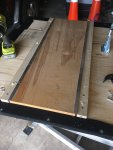
The end result is stiff enough to stay in place wherever, just big enough to slice an apple at a lunch stop, which was my goal.
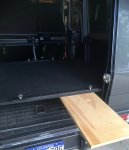
No complaints.
Empty space:

Literally just a piece of 3/4 inch plywood, resting on the wheel wells, cut slightly to sit level with the plastic trim. Bolted turnbuckles underneath to reach the four factory tie-down points. Test fit with the fridge and mission accomplished there.

Classed it up a bit with black speaker carpet, glued and stapled for good measure.

A view underneath, I've attached an adjustable leg there in the middle to prevent any bowing under weight. It's rock solid even when I climb in there now.

Another test fit, rather than attaching more tie-down (and possible failure) points, I strap the fridge right to the factory tie-downs, around the platform. Also discovered the little rolling plastic bins I already owned for under the bed at home fit perfectly on either side, I can use them or not as the trip requires. Camp chairs also fit perfectly under there.

I wanted a little edge protection for dragging stuff in and out, I found this inexpensive aluminum T-track on Amazon, so I can put in these little adjustable lifting nuts to tie things down when necessary. Attached with bolts through the ply.

Finally, I discovered when traveling fully loaded I need someplace to set things I get out of the fridge. Again, 3/4-inch plywood to the rescue, along with some trim I had around and some aluminum edge.


The end result is stiff enough to stay in place wherever, just big enough to slice an apple at a lunch stop, which was my goal.

No complaints.
changingground
Member
Less is more. I like it.Went "less is more" in the back of the G. Problem to solve was use of vertical space, and of course the fridge took up half the back between the wheel wells.
Empty space:
View attachment 520622
Literally just a piece of 3/4 inch plywood, resting on the wheel wells, cut slightly to sit level with the plastic trim. Bolted turnbuckles underneath to reach the four factory tie-down points. Test fit with the fridge and mission accomplished there.
View attachment 520623
Classed it up a bit with black speaker carpet, glued and stapled for good measure.
View attachment 520624
A view underneath, I've attached an adjustable leg there in the middle to prevent any bowing under weight. It's rock solid even when I climb in there now.
View attachment 520625
Another test fit, rather than attaching more tie-down (and possible failure) points, I strap the fridge right to the factory tie-downs, around the platform. Also discovered the little rolling plastic bins I already owned for under the bed at home fit perfectly on either side, I can use them or not as the trip requires. Camp chairs also fit perfectly under there.
View attachment 520626
I wanted a little edge protection for dragging stuff in and out, I found this inexpensive aluminum T-track on Amazon, so I can put in these little adjustable lifting nuts to tie things down when necessary. Attached with bolts through the ply.
View attachment 520627
Finally, I discovered when traveling fully loaded I need someplace to set things I get out of the fridge. Again, 3/4-inch plywood to the rescue, along with some trim I had around and some aluminum edge.
View attachment 520629
View attachment 520630
View attachment 520631
The end result is stiff enough to stay in place wherever, just big enough to slice an apple at a lunch stop, which was my goal.
View attachment 520632
No complaints.
Similar threads
- Replies
- 5
- Views
- 1K
- Replies
- 1
- Views
- 244
- Replies
- 1
- Views
- 355
- Replies
- 1
- Views
- 283

