Post up your drawer/storage system

RedRocker

Adventurer
Great idea. I may do the same thing so I can put the tie downs where I want them.

On a different note, I'm not sure how difficult the trails are that you wheel but from my own personal experience I no longer use bungie cords. Instead I use ratcheting tie down straps. Much more secure.:smiley_drive:

Man, I gotta get finished with my move so I can build my storage unit.

Yeah, I'm still working out my strap setup, on my old rear rack I could use
straps without hooks on the ends, this setup will require that kind of a strap.
 

stevenr

Observer
Here mine for the back of my Discovery.

It is constructed of Birch plywood. I used aluminum plating for the drawer faces and paddle latches that lock. I was on the fence with the carpet color. I decided to go black due to the dirt factor. It is securely mounted to the floor, but with the turnbuckle connections, it comes out in less than a minute. Lastly, I installed some additional tie downs.

Next project will be the subwoofer enclosure and rear door table.

This was my storage solution before:
001_Before.jpg


Here is the plywood box construction test fit:
002_Box.jpg


Inside of a drawer:
004_Inside_Drawer.jpg


The tie downs:
005_TieDowns.jpg


A front shot of it before installation:
006_Front.jpg


Mounted in the truck:
007_Inside_Truck.jpg


008_Drawer_Open.jpg


009_Secured.jpg


I may cut a secondary sheet of plywood and use a piano hinge so to have a fold out platform to cover the rear seats.
 

thecriscokid

Explorer
Here is my 1st multi use bed arrangement. Bikes can be rolled in and tied moto-style (both wheels on) skis can be slid in along the wheel wells. Hi Lift and shovel can easily be accessed from the side doors by un-screwing 2 wing nuts holding the cover/ shelf on. Most importantly 4 people can comfortably sit upright inside during poor weather when the floor is dropped
I have already begun thinking of other arrangements that include a couch on one side and a kitchen on the other, but this will suffice for this falls adventures.
IMG_6324.jpg


IMG_6322.jpg


IMG_6318.jpg
 

SFROMAN

Adventurer
1969 fj40
My requirements for my drawer were:
1. I needed to install a back seat so I could bring the kids out with me safely.
2. Now that I have the kids with me, I needed to secure tools, liquids, and camping gear.
3. maximize space in rear of 40 = one big drawer as opposed to two (although two drawer system would have been more practical).

not finished but here is what I got.


material:
3/4 plywood the good kind
liquid nails
countersink bit
wood screws 1.5" length
4 24" lowes industrial strength sliders (doubled on each side)

I plan on using duplicolor bedliner stuff today to finish it off. I will edit when done.

DEL
 

jamm

Observer
1969 fj40
My requirements for my drawer were:
1. I needed to install a back seat so I could bring the kids out with me safely.

material:
3/4 plywood the good kind
liquid nails
countersink bit
wood screws 1.5" length

I like how your box turned out. How are you fastening the seat to it? Just my 2 cents worth; for safety don't count on the seat staying in place mounted to the plywood top if you have to stop suddenly. Bolts can easily pull thru plywood even with washers or the whole top could pull loose from the box. IMHO, stick with a bolted/welded steel mount.
 

gary in ohio

Explorer
Here mine for the back of my Discovery.

It is constructed of Birch plywood. I used aluminum plating for the drawer faces and paddle latches that lock. I was on the fence with the carpet color. I decided to go black due to the dirt factor. It is securely mounted to the floor, but with the turnbuckle connections, it comes out in less than a minute. Lastly, I installed some additional tie downs.

Next project will be the subwoofer enclosure and rear door table.


Here is the plywood box construction test fit:
002_Box.jpg

What slides did you use on this?
 

Hawkeye

Observer
Here is my latest. I wanted to give the UHMW plastic glides a try. I think I still perfer the ball bearing glides.
PA073784.jpg

PA073798.jpg
 

saburai

Explorer
Finished mine!

Our jeep is set up for two. While I did build in a provision for a small jump seat on the passenger side(to be installed at a latter date), the main focus is to have the bases covered for just us. Anyway, here are a few pics of the deck, drawers and cargo fence:

JeepRTT015.jpg


JeepRTT016.jpg


JeepRTT018.jpg


JeepRTT017.jpg


JeepRTT022.jpg


JeepRTT020.jpg


JeepRTT013.jpg


JeepRTT014.jpg


JeepRTT019.jpg


And one of the new RTT!
JeepRTT007.jpg
 

off-roader

Expedition Leader
Wow, lots of furniture here.:sombrero: Seriously though... very nice 'cabinet' work.

I've gone the drawer/cabinet w/ doors route before and was not keen on the added weight it brings so this time I elected to have my design go on a bit of a diet...

Here's my setup...

For my needs I had just a few design criteria when my buddy (Michael aka Grasscat on here) and I designed & created a storage system for my 1996 Montero...

1) The solution had to be relatively light. As I've noted, I've built a few full blown drawer systems which I felt are simply too bulky and heavy for the benefit they provide. I wanted it to be lighter but also 'heavy-duty enough' a design to carry what I needed for a typical 3-7 day 4x4 trip on even the harshest rock crawling trips including an ARB Freezer fridge.
2) Platform would double as a bed.
3) I wanted to have full use of my middle row seating as required for family outings or airport runs LOL.
4) I decided to use simple sealed under bed plastic tubs.
5) And most importantly keep the design as simple as possible.

Here's what we came up with...
I first removed my 3rd row seats.
I then folded the 2nd row seats forward (flat).
I then installed a platform across the entire rear half of the Montero.
Here's an animated gif of the operation of the bed folding flat. Did it this way so I can still use the rear seats.
DSC_4576.gif


Here's a pic of the setup sans ARB fridge.


Image Notes:
(A) 2 hinges to fold the platform up and back to allow use of 2nd row seats. I still need to trim 2 corners of the folding section at this hinge because I didn't take into account the curvature of the side of the Montero. Currently the platform will not fold back until I trim a 1x6" triangle off those corners.
(B) 5/16" dia metal handles are used for strap points for my ARB Freezer Fridge. Worked great off road BTW!
(C) The platform itself is 1/2" plywood that's 73"x53" which is large enough for 2 of us to sleep on.
(D) This is the 1x2 hardwood cross bracing.
(E) Here you can see the 2x4's being used to support the sides of the platform. They're mounted to the OE mounting points for the 3rd row seats via 1/8" aluminum angle iron. I need to use larger more aggressive screws for attaching the 2x4 mounts to the aluminum angle iron. The small 1/8" dia. screws I used were simply not up to task. I'll use 1/4" fasteners this time.
(F) This is the 1/4 dia. carriage bolt
(G) Here you can see 4 of the 6 Rubbermaid tubs I elected to use. Dimensions are 16.7x13.3x5.3" (x4) and 29x18x6 (x2). I also added 1/2x3/8" door seal gasket foam to the perimeter of the covers to better seal the tubs.
(H) This is one of 4 turnbuckles
(I) Here's the 3" ID PVC pipe cut to size and placed at each of the turnbuckle mount points.
(J) Here's the 'J' bolt end attached to the built in strap points in the floor of the Montero.

That's about it! Very simple design yet extremely effective. Can be completed in a day and even more easily with a buddy's help. Or better yet, just get your buddy to do the whole project for you. That's what I did. :eek: Well truth be known, I was simply swamped with work and I'm sure the GrassCat was just itching for a project. LOL

Thanks again GrassCat!!

Oh, before I forget, GrassCat did mention that this is a patent pending design. ;)
 
Last edited:
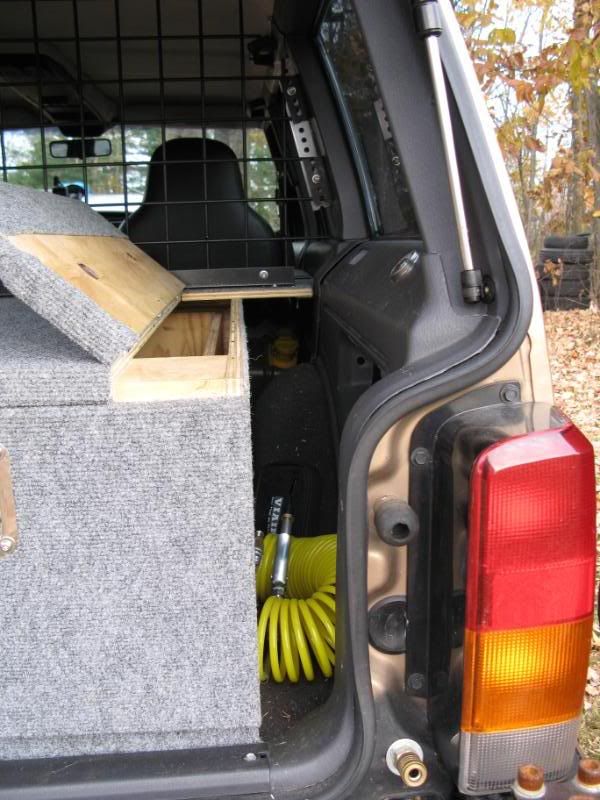
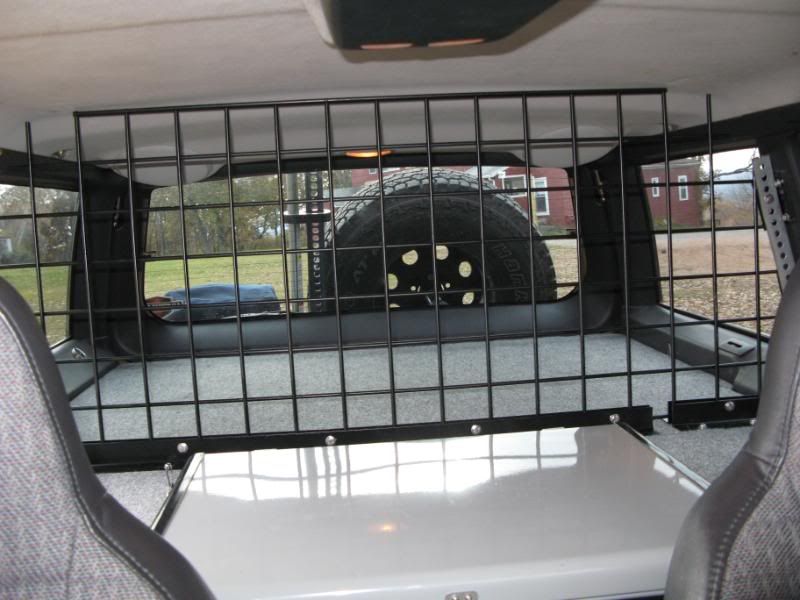
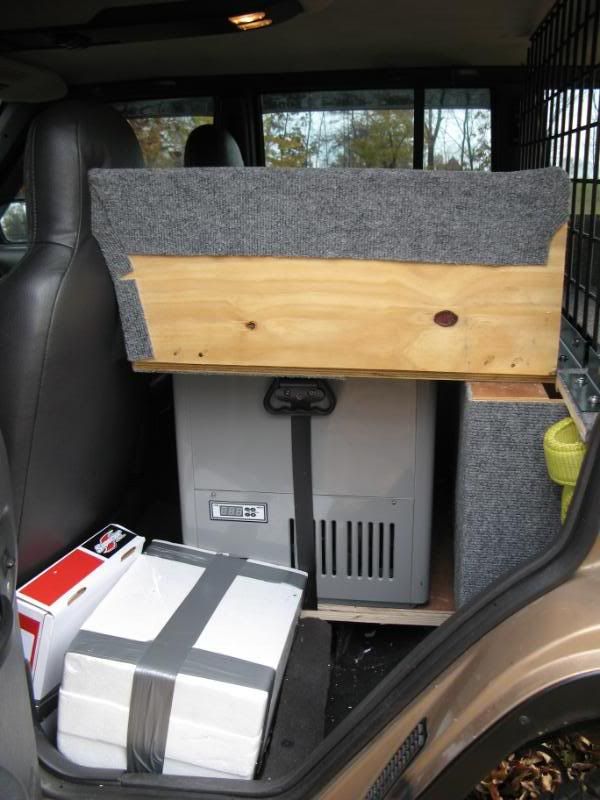
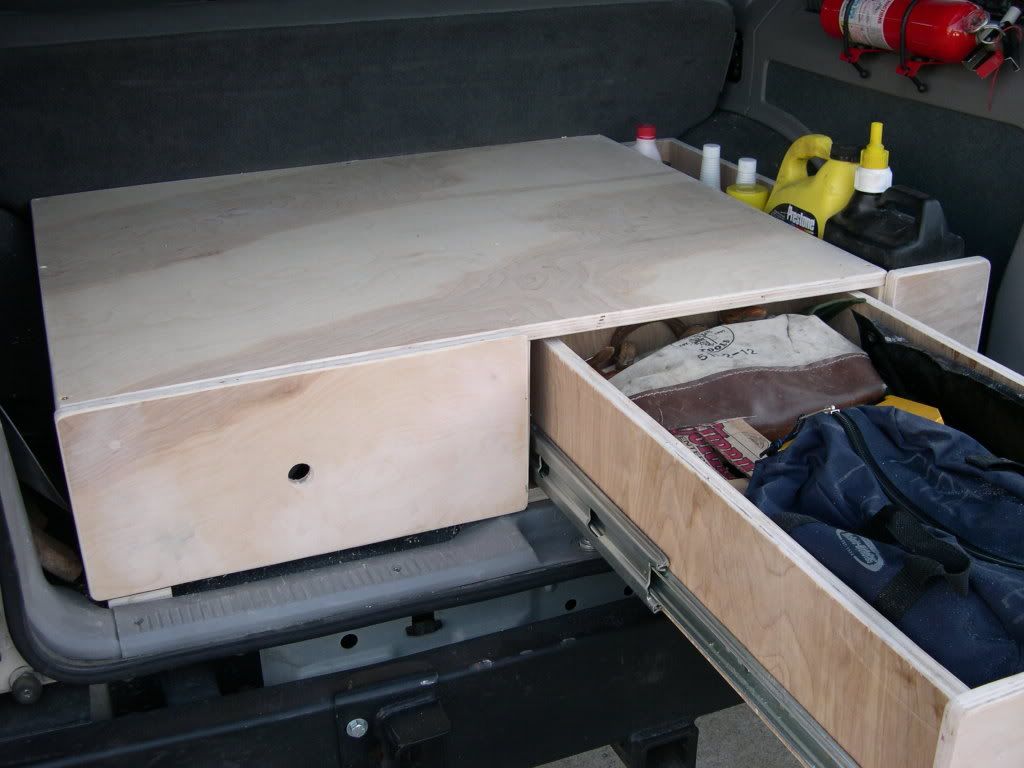
Here are the drawers I built for the XJ. 5/8" birch plywood glued and screwed. got a great deal on 2 sets of 400lb slides. Bolted 6 places through the uni-frame. Marine spar added for durability along with the 4 stock +4 added tiedowns. Room for spare axles and driveline between seat and box. I can honestly say I am organized. Well the Jeep is.:D

jeep033-1.jpg


DSCN5478.jpg


DSCN5475.jpg


DSCN5474.jpg


DSCN5472.jpg
 
Last edited:

Mtn Mike

Observer
Cool thread. I've been lurking on the forum for a while, but this is one of my first posts. This is my expoforum-inspired sleep platform. I got most of my ideas from this thread, but also by reading threads on a few other forums. My drawer system isn't as elaborate as some of yours but certainly serves its purpose well.

I had been in search of the ideal camping set-up for the 4Runner. My fiancée and I do a lot of travel for bicycle racing around Washington, Oregon, and Idaho. During the spring and summer we're sometimes gone every weekend of the month. Hotels get expensive and staying with "host housing" get's old. So we've been looking for a way to "camp" using the 4Runner. Adventure trailers, Travel trailers, pop-ups, and RTTs all have their advantages, but also have associated hassle and expense. So for now we've decided to make the 4Runner as "self contained" as possible.

An internal sleep platform seemed like a good way to go. I made a simple sleep platform last summer which consisted of a piece of 74"x48" edit: 5/8 inch (not 3/4 inch) plywood supported by a few 2x4's. It was okay, but it wasn't that sturdy it was hard to keep stuff organized underneath. So these passed few weeks I've made a drawer system and sleep platform combination. There were plenty of great threads on Yotatech, IH8Mud, and Expedition Portal Forums for inspiration. I didn't copy any one design, but kind of took the best of what I saw. Well, I should say, I did the best that I could with the tools and skills I have, which aren't much :)

img2138i.jpg


I decided to use very simple sliding drawers. Heavy duty slide outs would have been nice, but the sliders are expensive and take drawer space anyway. So I just used bee's wax on the contact points and they slide fine:
img2140o.jpg


I used glue-on speaker box carpet to give a softer sleeping surface. The aluminum angle stock gave it a more finished look:
img2201i.jpg


I'm going to keep the back half the platform tied down full time. It takes just a few minutes to fold down the seats, remove the seat bottoms, and put in the front half of the platform. The drawers are about 39" long x 17" wide x 9" high. I've got plenty of room for tool kits, camping gear, first aid kits, and winter driving gear:
img2232.jpg


This is how the front half the the platform attaches to the back half. The front part rests on the lip of the plywood and is secured by latches:

img00025w.jpg


This is the front half of the platform. Note the fold up legs that will rest on the floor mats (where the passengers normally puts their legs).
img00026c.jpg


The platform in sleep configuration:
img00027.jpg


The platform provides about 75 inches (6'3") of headroom from tail gate to front seat back. I'm 6'2" and I found myself wanting more room. So I slid the front seat forward to give me all the room I needed to stretch out.

Here are some pics of the inaugural camp out with the platform. My fiancée, the dog Stevie, and I went winter camping near the Puget Sound on Christmas weekend. Stevie basically now considers the 4Runner to be the dog house she never had. There's probably more room than you'd think from this picture. We had 5 layers of blankets and padding, which took up about 4 inches of vertical space. Of course it compressed when we were in it:

img2364o.jpg


img2450x.jpg


Anyway, the platform and drawers weigh 100 lbs empty. Not bad at all when you compare that to carrying a person in the back seat. The total cost of the materials was around $110. The lumber store did most of the cutting, so I didn't need to use any fancy saws. I used a drill, circular saw, chop saw, sand paper, screw driver, measuring tape, 90 degree square, level, wood glue, carpet adhesive, three wood clamps, and two saw horses.

So this is yet another platform to add to the many good designs already highlighted on this thread. ~ Mike
 
Last edited:

Forum statistics

Threads
188,172
Messages
2,903,123
Members
229,665
Latest member
SANelson
Top