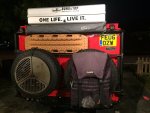
Prepping a defender 130 for around the world..

The Rover Shop

Explorer
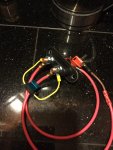
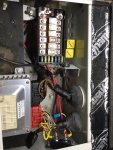
Another one I wanted to do was put a battery disconnect, but it took me a while to find a switch that allows you to remove the key in either the on or off position, I finally found one on eBay that suited what I want... The problem with a battery kill switch is that when you kill the battery you lose radio codes, the clock stops working, as well as remote locking and worst of all is the alarm, so to counteract those I installed a low amperage jumper circuit that allows current to pass through it when the main circuit is separated, this circuit is on a 2amp resettable breaker, this is enough to allow the necessary items to get the power but should you happen to turn the ignition on or try to start the vehicle it pops the breaker and all power to the vehicle. I was going to put it onto an automatically resetting breaker but you can also put it to a manually resetting one, next to the switch so if you happen to forget that you have the main switch turned off and try to start it, it just pops the breaker and you reach down, turn the switch on and push the breaker button back in and you're good to go, keep on mind, the circuit breaker is only in play when the main cutoff is turned off, when it's turned on all of the current flows through the cutoff like normal. This setup also allows your solar charger to still keep your battery topped up, should you want to disconnect the battery completely for long term storage or shipping etc, you just turn the switch off, pop the breaker and voila, total disconnect..
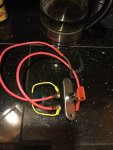
image.jpg

image.jpg

I installed this one into just the power side for the main fuse box, this controls all of the vehicle electrics and has the main 60 amp fuses etc, being a right hand drive the battery is on the far side so it made it less convenient to easily use if I was to do it on the main battery cable, but I would recommend doing it that way...I may finish up doing that also..:)

image.jpg

I put the switch coming through the front of the battery box for ease of access, but you can put it anywhere you want like the back of the box, or right in the side, or hide it completely, I just wanted it easily accessible so it's not a big hassle to operate, means I'm less inclined to forget about using it..
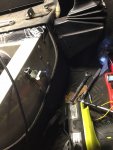
image.jpg
 
Last edited:

The Rover Shop

Explorer
Another thought process on using a auto reset breaker is this, the thermal breaker style that goes in place of a blade style fuse seems to be a slow blow, I connected straight battery power across it and it took a few seconds to blow even though it's rated at 15 amps, I will be running some amperage draw tests on a couple of different fuses to see the results, and here is the reasoning behind this... If a thief wants your truck bad enough there is sweet bugger all you can do to stop it, but my job is to make that little bastard work extremely hard for it... I tested the ignition on amperage draw and it's about 12 amps, not sure if that was with glow circuit engaging, but will let you know after more testing..on cranking the amp draw went up to 16 momentarily... Keep in mind this draw is only through the fuse box and not the main battery cable.. I have a theory that the best way to stop your truck from being stolen is to actually let them steal it.....but 5-10 seconds offer they steal it it dies, right in the middle of the road.....then the thief has a decision to make, does he try and trouble shoot why it just dies in the middle of the street where he is attracting attention and possibly a very irate gun toting owner running down the road after him, or does he just count his losses and hoof it outta there.. So it's kinda like a delayed cut off switch, a constant 10 amp draw on a 10 amp thermal breaker should give you about 10-15 seconds delay, add in lights, brake lights etc and this may vary but I'm going with the constants..I guess another way is to wire in a timer relay..:) keep in mind this is not the primary source of theft deterrent, them getting to the point of driving it is probably 6 or 7 layers of anti theft items in... And even once they have stolen it and gotten around theses and this items, it is not the end of the systems, there is more in store for them after this...lol..
And why am I so intent on these items... Let's just say it's like they said, an ex-thief knows what it takes to steal something...
 

The Rover Shop

Explorer
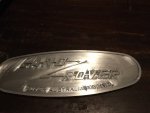
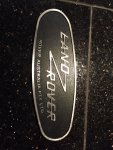
So a friend of mine sent me this the other day that he made for me...
image.jpg

A few minor customizations and voila..

image.jpg

image.jpg

It's the BLING that makes it YOUR thing..:)
 
Last edited:

The Rover Shop

Explorer
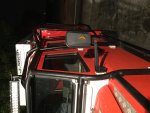
So while going through the parts pile of things to be installed on the truck I came across some LED arrow turn signals I used to install on my enduro bikes and I thought...hmmmmm....2 hours later they are wired into the mirrors... I have to pull the doors and mirrors off in a couple of days to have the truck painted and I will wore them in then,,,

image.jpg
 

The Rover Shop

Explorer
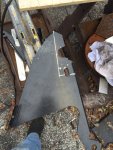
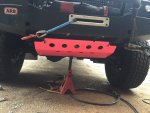
A good friend of mine makes lots of cool goodies for land rovers, a while ago he was doing a run of his heavy duty bash plates and asked me if I wanted one, I said sure... A couple of weeks later he mentions to me that it's done, I ask him what I owe him and he says no charge but you have to put it on the expedition build rig, of course I said I would, so THEN he sends a pic of it....hot pink does not do this color justice.... :)... Due to my custom front ARB/mantec hybrid bumper it required a little bit of modifying to suit, but it ticks up real nice and protects the steering components and makes a nice lead in to the front diff guards... This bash plate is super heavy duty...removed this much and welded the brackets to the front bumper assy...but still kept the rearward mounting points where it bolts through the frame...this sucker ain't going anywhere..

image.jpg

Had to modify the bash plate a bit also to get it to tuck up into the bumper as close as possible...

image.jpg

But the end result is wicked cool...very happy..glad to be rockin the pink...thanks Brewie...

image.jpg
 

The Rover Shop

Explorer
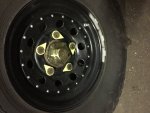
Disregard my comment, it seems they are not safety locks rather than visual indicators of nut movement...

Correct, they are just plastic arrows that indicate if one of the wheel nut should become loose, had a wheel fall off in the middle of nowhere on one of our previous trips, these may have alerted me that the nuts were getting loose...plus they look pretty cool..:) I install them on the direction of rotation as I think they may be less inclined to get torn off in mud etc..
 

The Rover Shop

Explorer
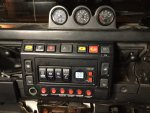
So I think I figured out my layout of switches so I ordered the switch labels I needed...

image.jpgfrom right to left..horn, this is actually the engine kill switch..when its off it looks just like all the other switches, I labeled it horn in the hopes that if they happen to look at it and see horn they aren't going to be likely to switch it on, it's also here because it makes it very easy to turn it off when getting in and out of the car, so I'm more inclined to use it more often... Next is the overdrive, this is here because it can be flicked on with your hand on the gear lever in 5th gear. I have a GKN electric overdrive fitted but was having problems with the control unit so I just hard wired it direct to the solenoid, I have found a company which sells their own control box so I will be installing this soon, that way it cuts it out under a certain speed..and you won't break it forgetting to release it before putting it in reverse.. Next is the aux battery switch, this heavy duty 850 amp solenoid connects the main battery with the aux battery, easy to top up battery while driving, or link them when winching etc etc..next one is rock lights, I will be installing 8 LED rock lights at various points under the car.. Probably never need them but I had them so I will use them, also does make for some really cool night pic shots with a camera.. The next one is blank, haven't found a use for it yet, but I'm sure I will... And the far left one is for the essenbacher diesel fire heater, this is located under the rear seat storage compartment and keeps the truck toasty warm inside no matter what it's like outside....
Higher up I have my dual battery volt meter, This lets me see at a glance the condition of both batteries, next to it the switch marked meter is a push on push off switch that interrupts the ground circuit to the illuminated volt meter, this way I can have it on to check the battery voltage without having to have the key on, also if I don't want it on while driving it doesn't have to be,.
The switch above that marked high lights, this switch interrupts the high beam or flash signal to the front driving lights, I like to have all the lights come on when I hit high beam, in some countries this is illegal and if my wife ever drives the change from high beam with nearly 1000 watts of lights back to stock low beam is too much of a rapid change of light level and she can't stand it..so with this switch in high beam and flash is just regular headlights, with it out you get the whole schebang of lighting..
To the left of the meter is the ARB compressor and front and rear diff lock switches..and then there is the winch control switch to allow me to operate the front winch from in the drivers seat. The standard row of top switches still have a couple of spots left to put more items in yet...
 
Last edited:

The Rover Shop

Explorer
Only one of em is connected...lol...smartasses.. The discovery 2 switches fit into the later defender switch units but only the hazard and hill descent switches are on off, the rest in a disco2 are momentary switches.. When I decide what I want the switches to be I will have a label cover made for them..
 

Forum statistics

Threads
188,436
Messages
2,904,827
Members
230,359
Latest member
TNielson-18
Top