Pro-Rig V2.0 - Home Built Compact Composite Pop-up

CoyoteThistle

Adventurer
I didn't use the Trafficmaster, but its a 100% vinyl plank. Haven't been in really hot yet, but no issues I can tell in the cold.

Cabinets look great! Id love for you to come do mine!

Good to know on the planks. Yours turned out really nice. Did you glue yours down to the sub-floor?

In regards to the cabinets, thanks, but I'm officially retired from cabinet making! :sombrero:


Looking good...any updates on electrical system testing yet?

Nothing much of substance to report. I've done a couple charge cycles to let the cell boards do a little balancing of the cells (they can only shunt 0.7 amps so it takes a slow charge rate and a lot of patience). As others have noted, parallel balancing doesn't do much - I had mine hooked in parallel for a month and the first time I fully charged the bank the cells varied over a range of about 0.1v at ~3.5v per cell - not great. After three or four balance cycles I've got them all between 3.53v and 3.55v. Might do one more OCD-inspired round to get them a little closer but should probably just move on to the next test - I'll over charge and make sure the BMS trips the main breaker.
 

Haf-E

Expedition Leader
Is your pop-up top going to be front hinged? How will the front hinge be sealed?

The best weatherstipping designs seem to use two separate seals - the first one reduces the air pressure / flow across the second one which does the actual sealing. Single weatherstrip seals seem to always have some leakage from my experience. The large bulb type seals like you are using have worked well in the applications I have used them on - but those were in storage box type applications where a little dirt / dust / moisture was not a big issue.
 

CoyoteThistle

Adventurer
Yes, the pop top will be front hinged. The bulb seal will go all the way around the front too - hopefully sealing all the way around.

Hmm, the double seal idea makes a lot of sense. I think I could still do that if needed.

I have been toying with the idea of a positive pressure system of some sort to manage dust - I know some swear by them...
 

java

Expedition Leader
I let my floor floating. Used a foam underlayment under it.

I used a similar 1/4" ish wide bulb seal on my trailer I built all around the lid. Lots of rain and 60+ of the freeway and it was always dry. I did squish it pretty tight though.
 

CoyoteThistle

Adventurer
I let my floor floating. Used a foam underlayment under it.

I used a similar 1/4" ish wide bulb seal on my trailer I built all around the lid. Lots of rain and 60+ of the freeway and it was always dry. I did squish it pretty tight though.

Yeah, free floating probably helps with thermal expansion/contraction, I'll do the same. This particular stuff said not to use foam so I obeyed.

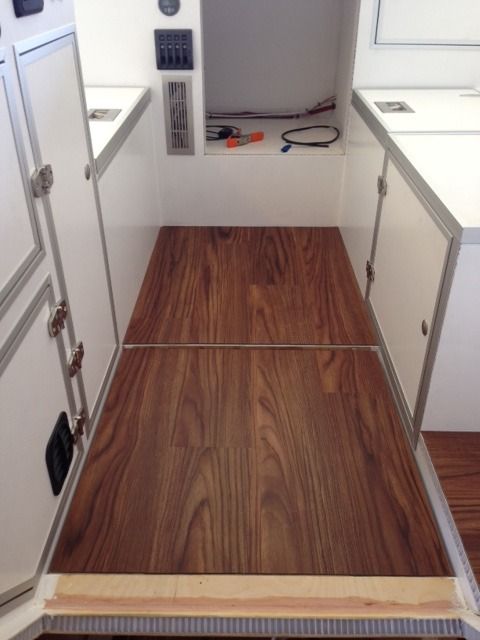
Got the pieces cut and laid out. Need to do the trim and edges still. Nice to get some color/contrast in to the mix!


"Bathroom" at right gets the same floor. Amazing how heavy this stuff is. I think my floor might weigh more than my house battery!:sombrero:


Started work on the door. It will be two pieces so that the interior is accessible when the slide down is down. This part will hinge at the bottom. Got the lock and latch in.


Turns out hole sawing through 3 inches of material is a bit tricky. Eventually got it though. This is ready for glass now.
 

CoyoteThistle

Adventurer
Really nice build man. Top work. Very clean.

Thanks!

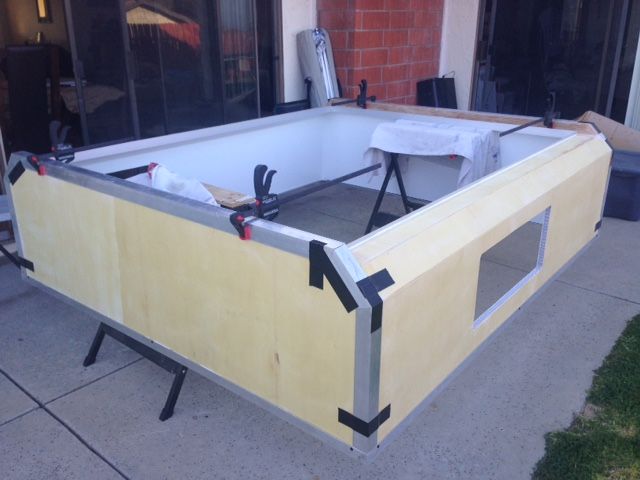
Started a big step finally. Got the slide-up out and got the corners and other aluminum pieces glued in.

Corners aren't perfect but hey, that's what grinders are for!


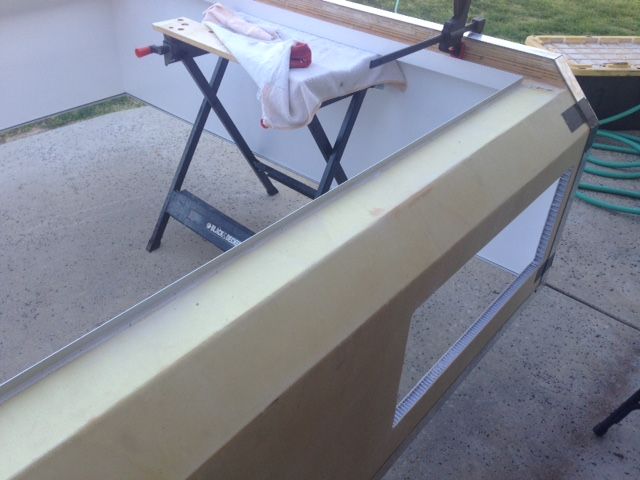
The top inside edge is covered by angle. It will hide the end grain, be the "gutter" to keep water out when the pop top is open, and be the attachment point for the lower edge of the pop top canvas.


Inside is epoxied and riveted. I found tri-bulb rivets hold pretty well through one layer of the plywood skins.

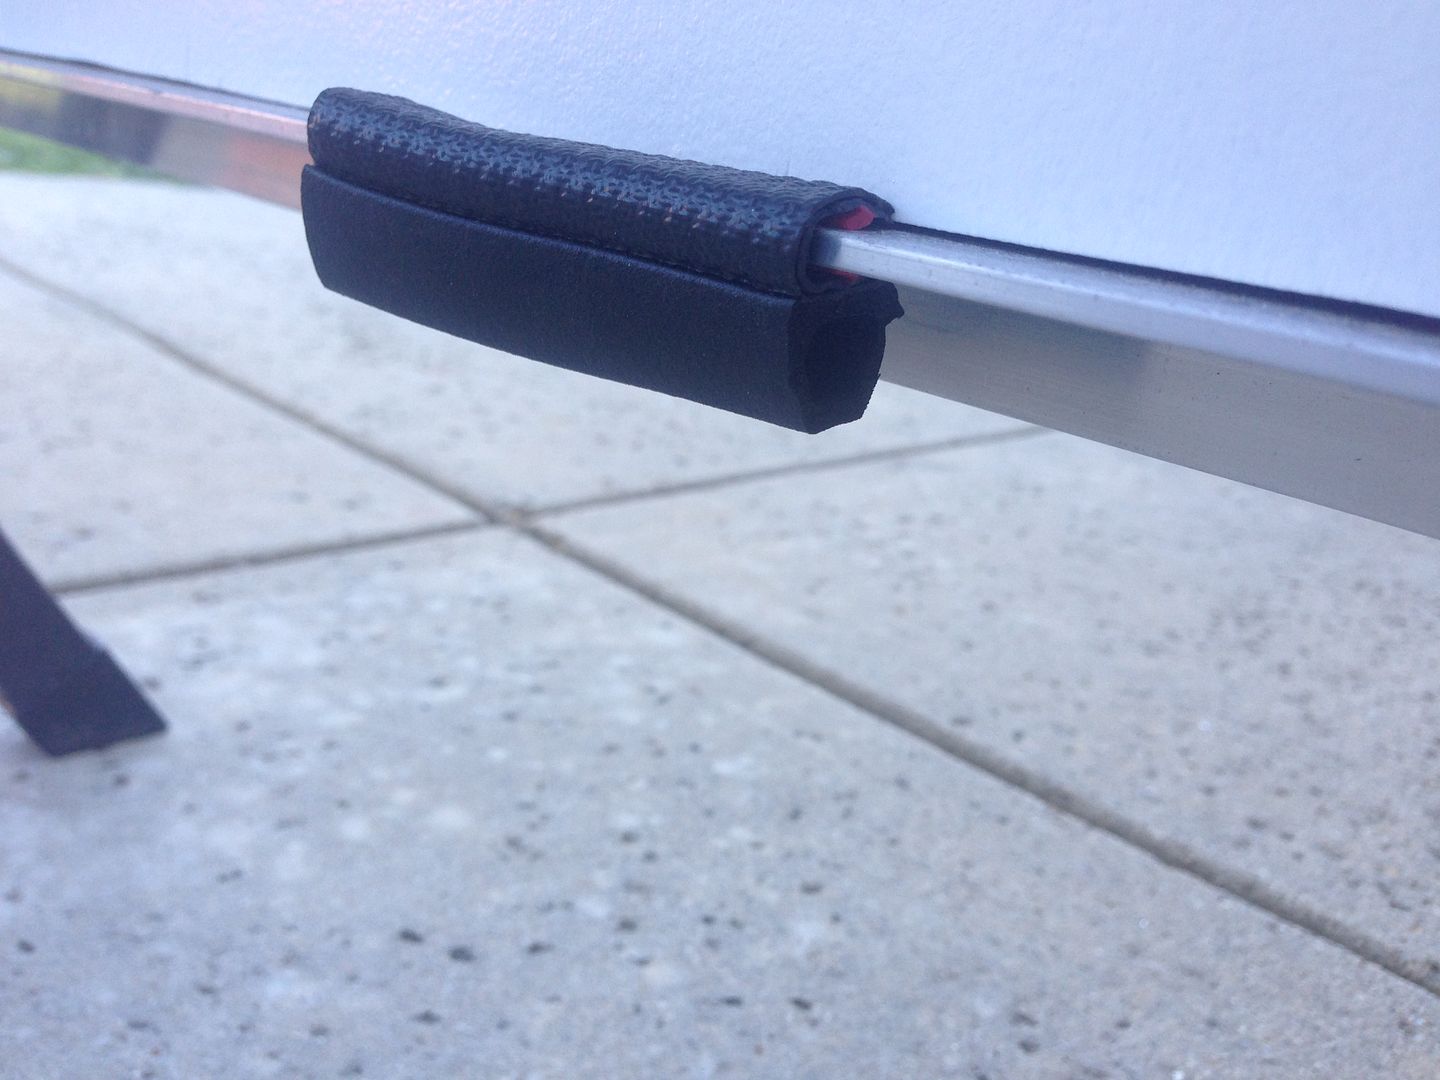
Bottom edge is aluminum T-stock. It covers the end grain and holds a bulb seal like so:


Once all this adhesive cures I'll do a round of sealing the edges of the aluminum with some more 5200. Once that cures, a little more fairing and then it will be time to paint! Exciting stuff.

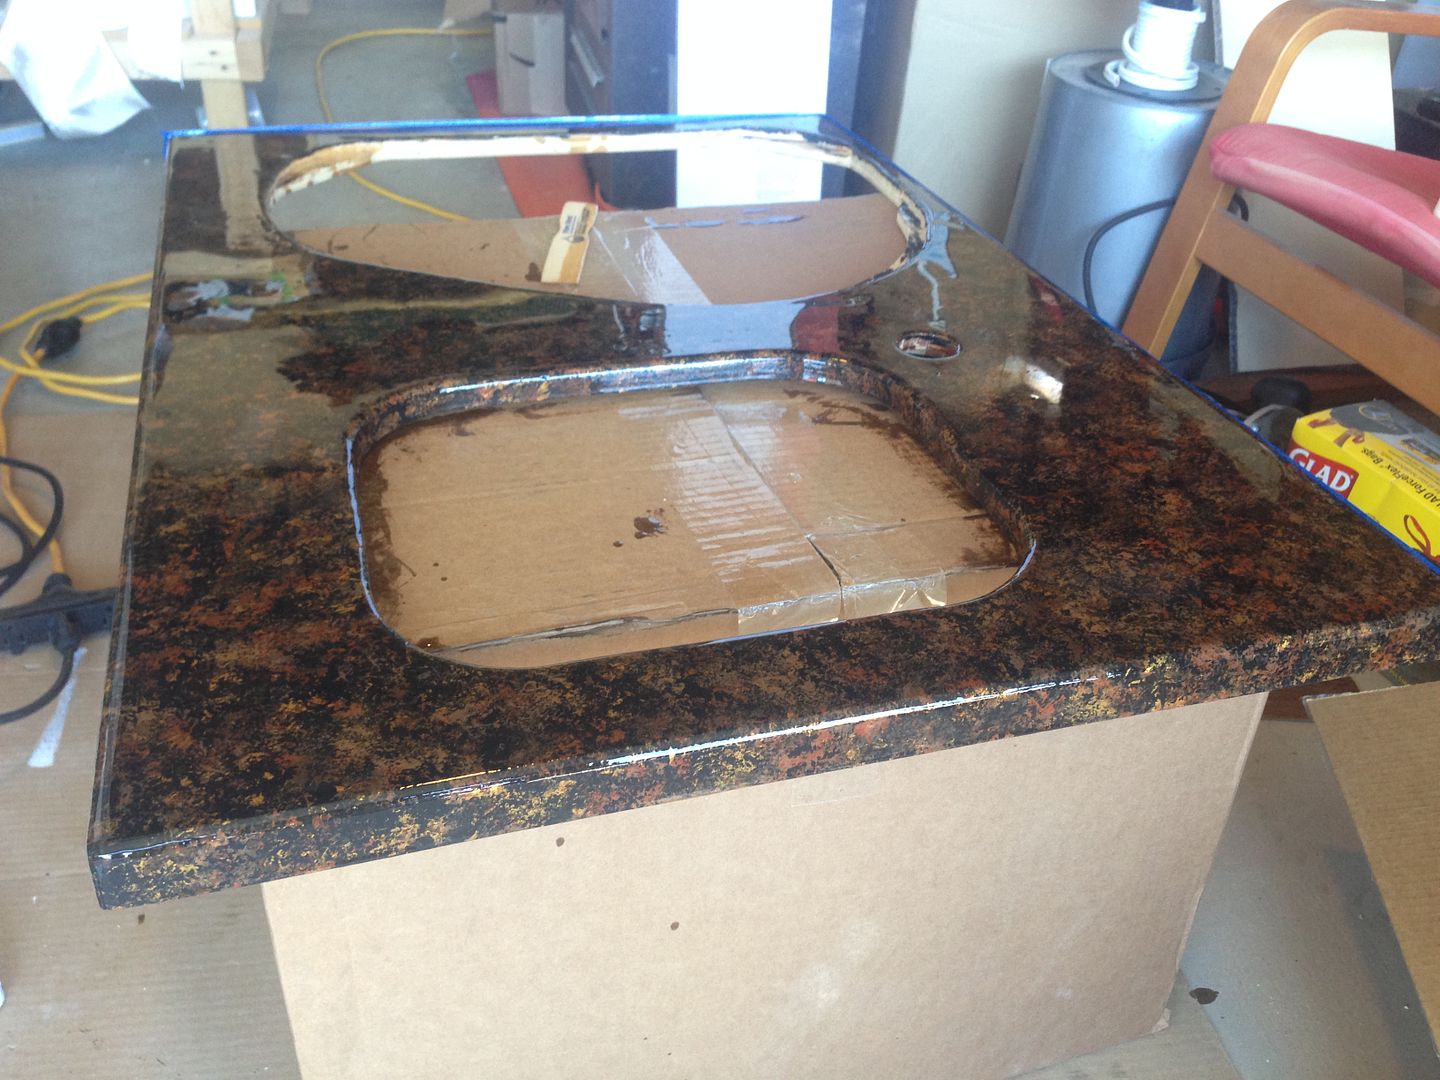
Also been working on the table and kitchen counter. Got a layer of epoxy on the counter today - It's clear and glossy but not super even. I think the faux granite look is pretty convincing. This was a fun little project.


May try another coat to get a smoother finish if the OCD kicks in - frankly I'd rather let it go and keep moving on the next thing - I'll take a closer look when the epoxy dries and decide I guess.
 

java

Expedition Leader
Looks great! You might use 4200,its a lot more UV stable

Sent from my SM-G900T using Tapatalk
 

CoyoteThistle

Adventurer
I'm going to paint over the 5200 so not worried about UV. I am a bit worried about paint sticking to the 5200 but some claim it works fine.
 

java

Expedition Leader
I'm going to paint over the 5200 so not worried about UV. I am a bit worried about paint sticking to the 5200 but some claim it works fine.
Bottom paint sticks to it, only experience is that I have!

Sent from my SM-G900T using Tapatalk
 

CoyoteThistle

Adventurer
Got some help today so made some progress on a few fronts.

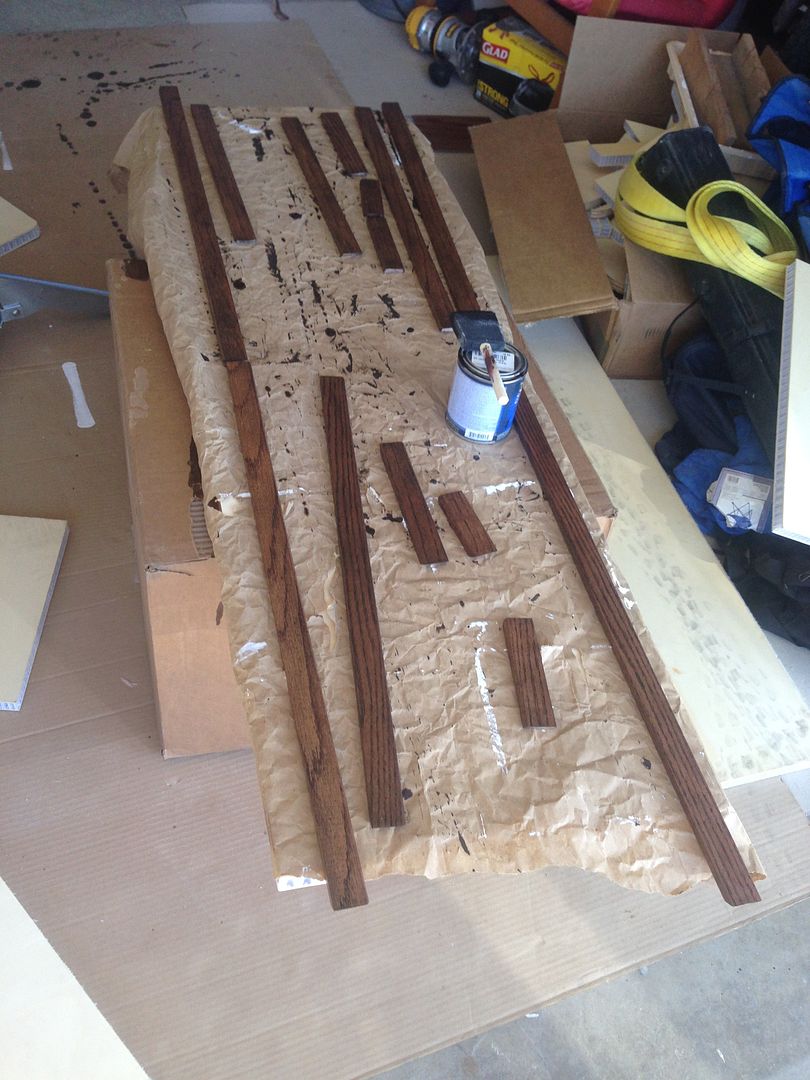
Got the edge/trim pieces of the table cut. Who knew oak was so hard to stain dark? After much trial an error and some interweb searching I found that a real dark stain gel was pretty effective. With my helper wiping the stain on and me wiping it off, this went quick. I think the dark will be a nice contrast with the zebrawood. Lots of pieces:


Probably go with a layer of shellac to finish these off.

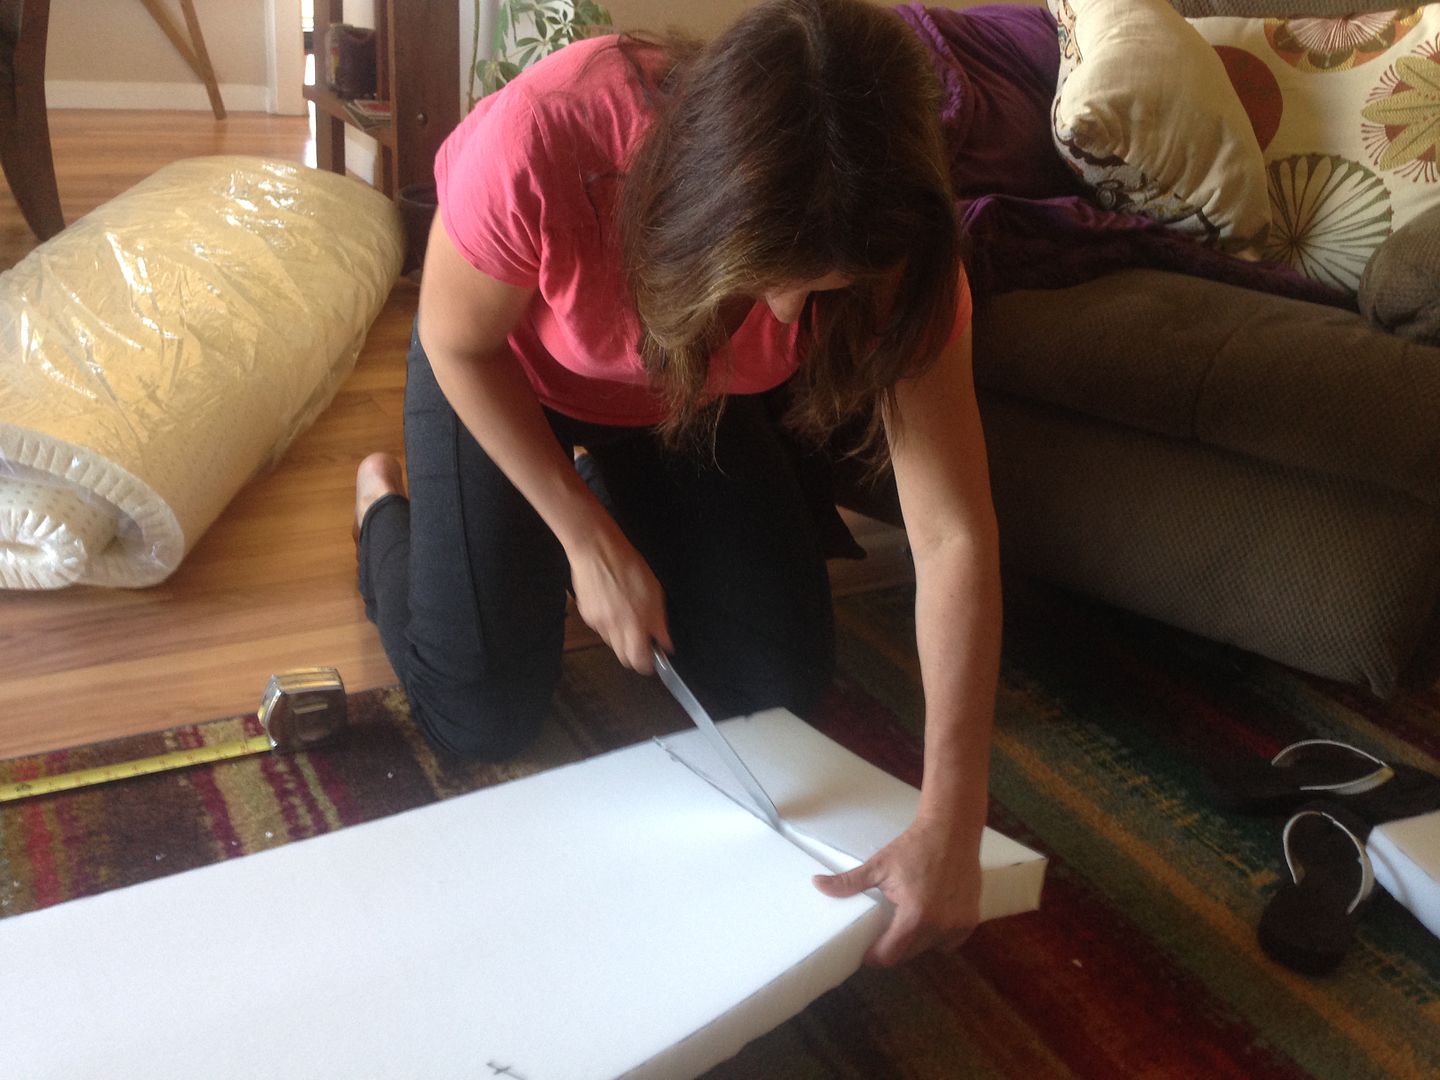
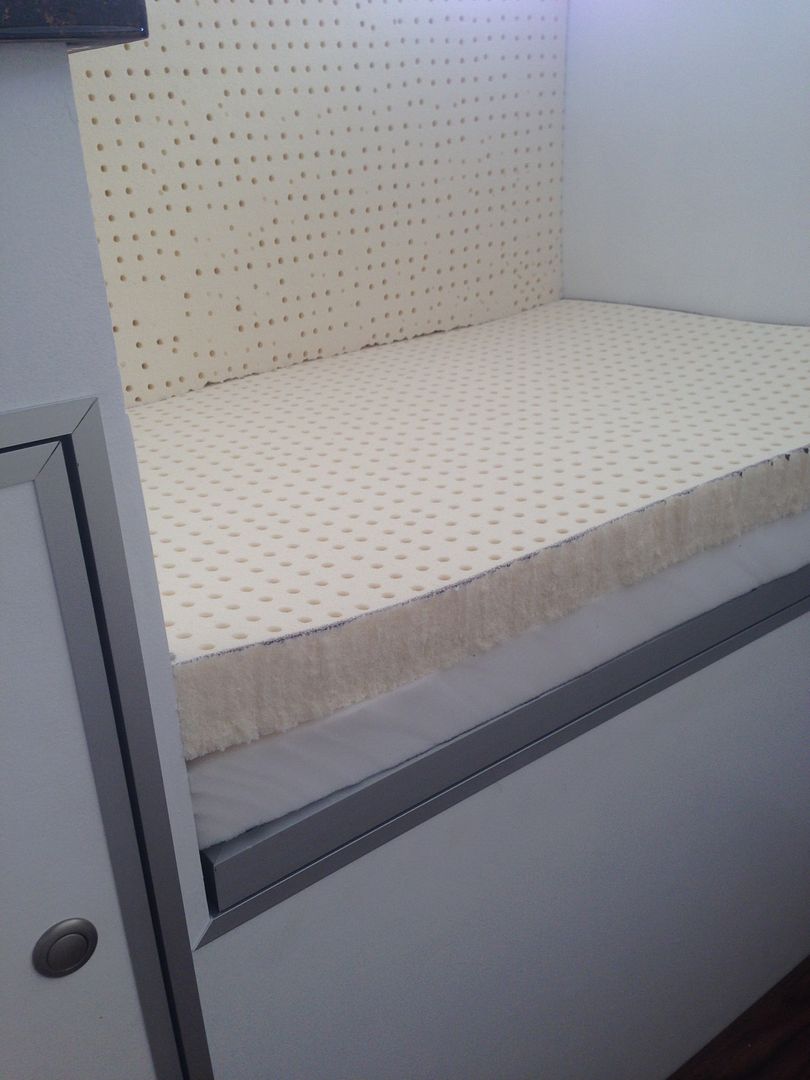
Next bigish project that was much easier with two people was cutting foam for the seats/bed. We only have space for 4 inches of mattress. After much consternation, we went with a Frankenfoam approach. Got a 2” thick “firm” poly foam mattress topper and 2” latex foam topper. We love out Casper bed, which has latex foam as the top layer so thought this might be a comfortable DIY option. Initial testing on the floor of the living room suggests it will be quite comfortable for sleeping but maybe a tad soft for sitting on. We’ll see.

Cut up the queen size pieces to spec.


Started off with a bread knife – worked but was slow. Two-thirds of the way through the cutting our neighbor stopped by and pointed out that we should be using an electric knife, one of which he happened to have purchased recently for cutting his foam mattress in half. Wow, much easier and cleaner cutting - saved the day!

Test fit shows we did okay.


Final task of the day was finishing sealing the slide-up and roof around all the aluminum trim.
 

java

Expedition Leader
Awesome! That's perforated latex is nice stuff. Have that in our RTT.

Stain looks good IMO!

Sent from my SM-G900T using Tapatalk
 

Forum statistics

Threads
188,007
Messages
2,901,050
Members
229,355
Latest member
BDM66
Top