Pro-Rig V2.0 - Home Built Compact Composite Pop-up

CoyoteThistle

Adventurer
There are some upgrades and mods to the camper and truck to report, but first, A few photos from a trip back in late September. We'd been planning a month-long trip to British Columbia before Covid came along. Plan B was to go up the coast in Nor Cal and Oregon, then all of that caught on fire. Plan C was a pretty last minute switch to eastern Oregon and northern Nevada. Seemed like a good place to avoid people, re-learn how to cast a fly, and explore a bit. Long story short, what a fantastic region!

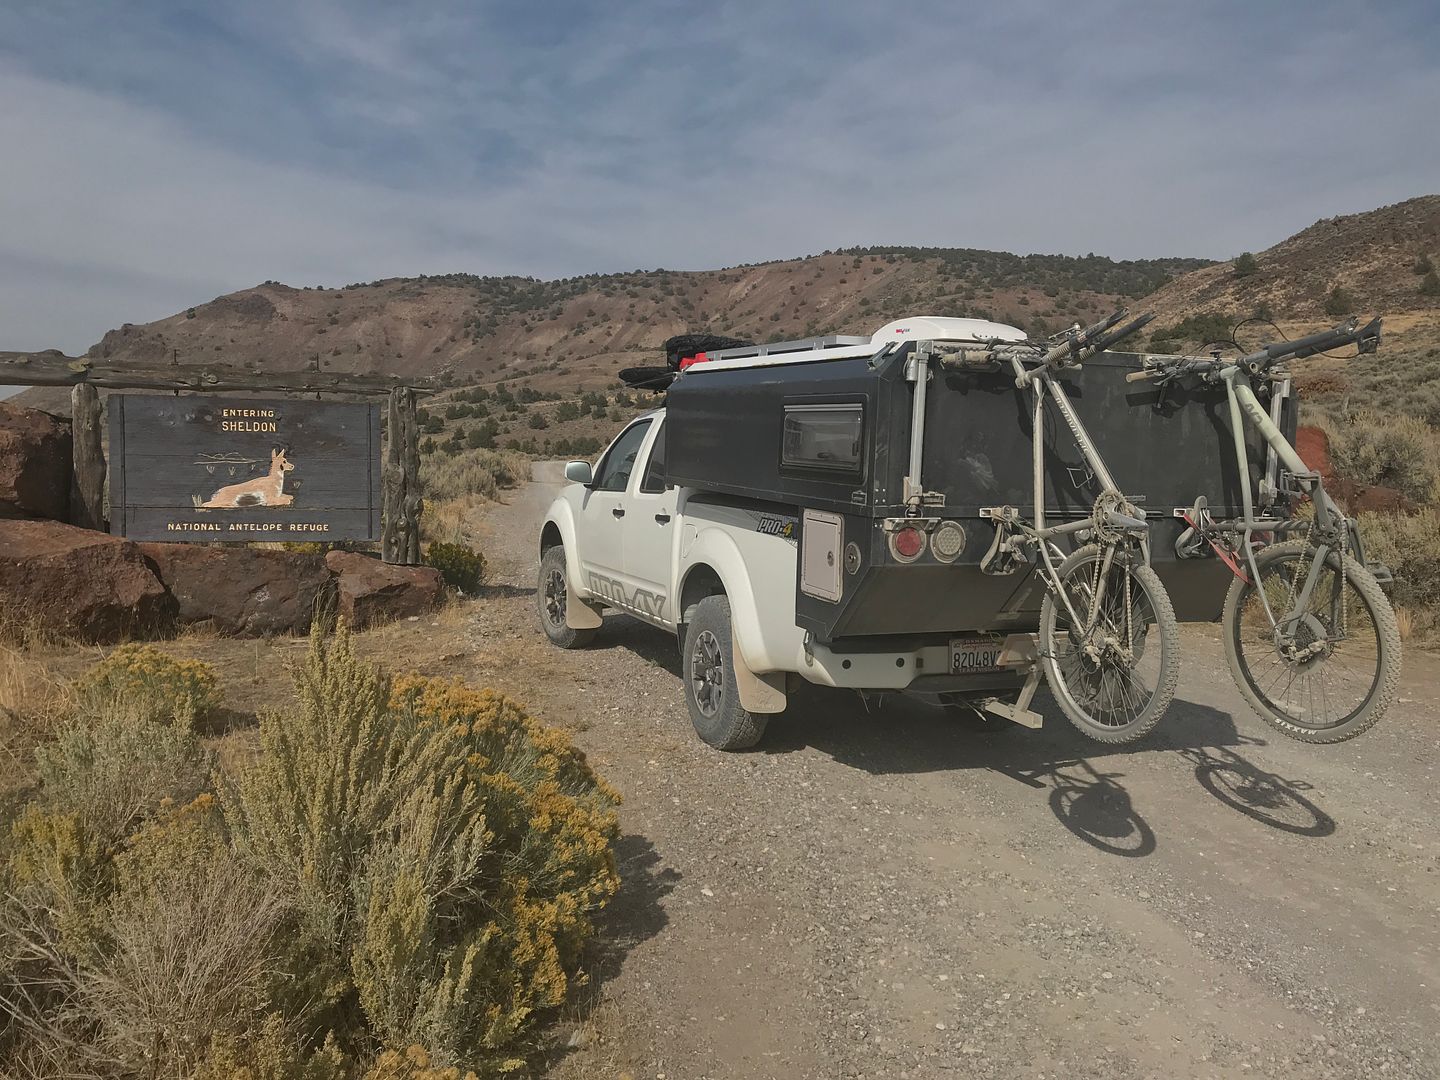
Sheldon National Antelope Refuge
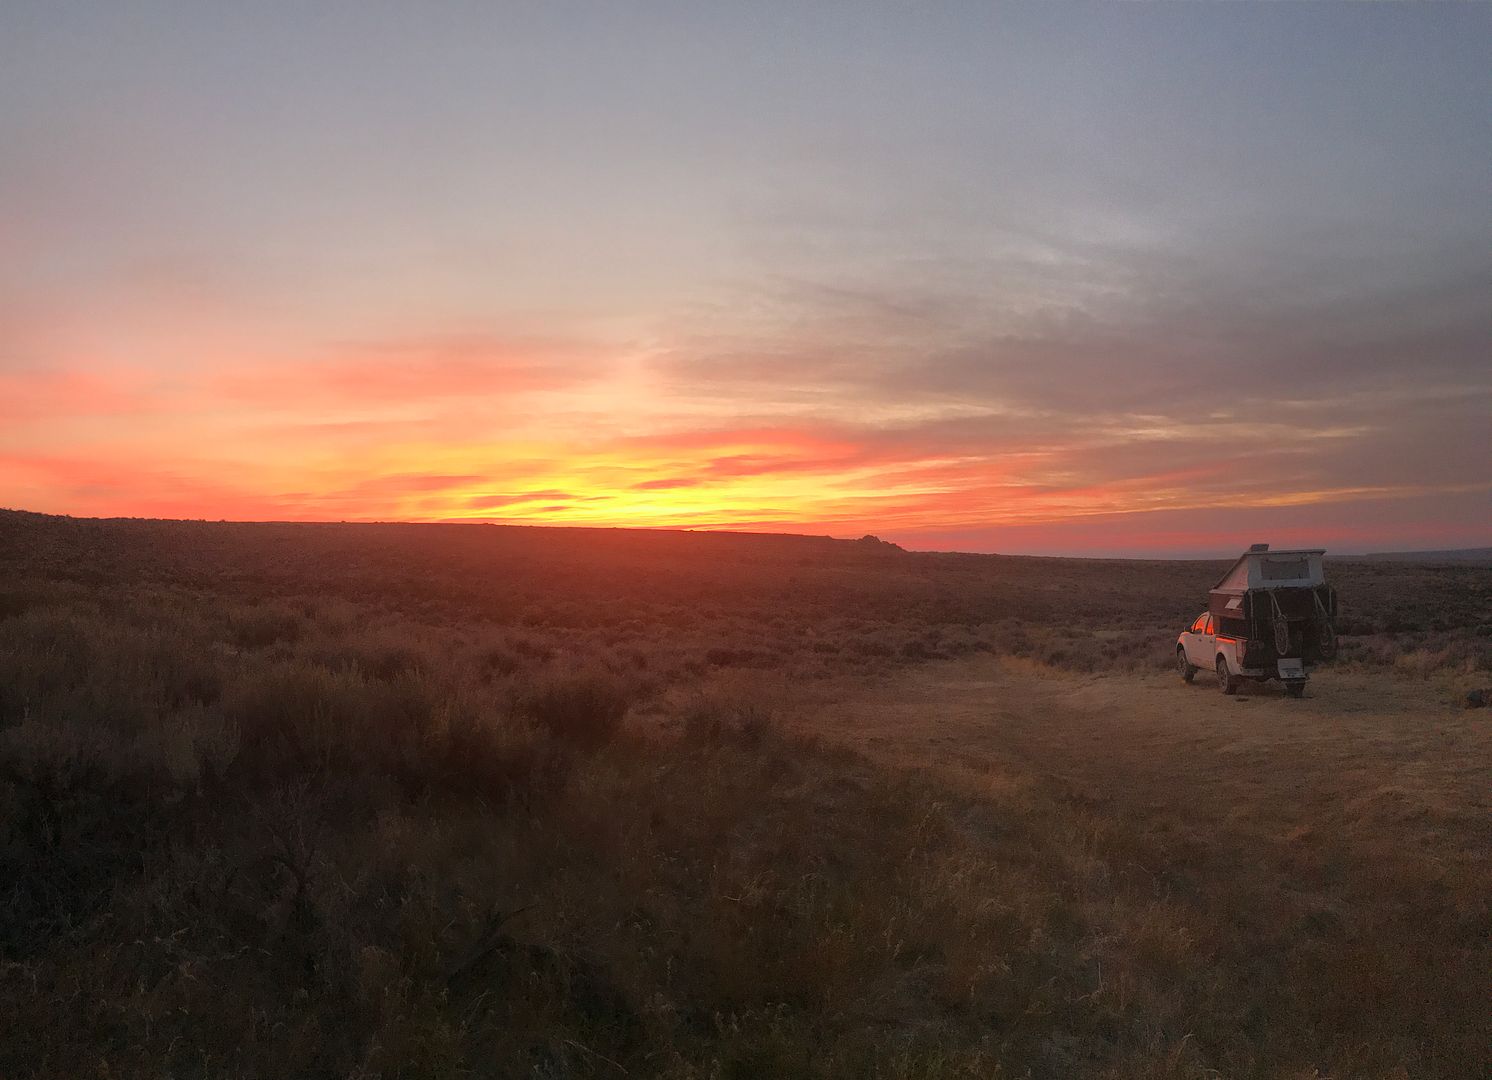

Managed to figure out a way to carry a couple mountain bikes

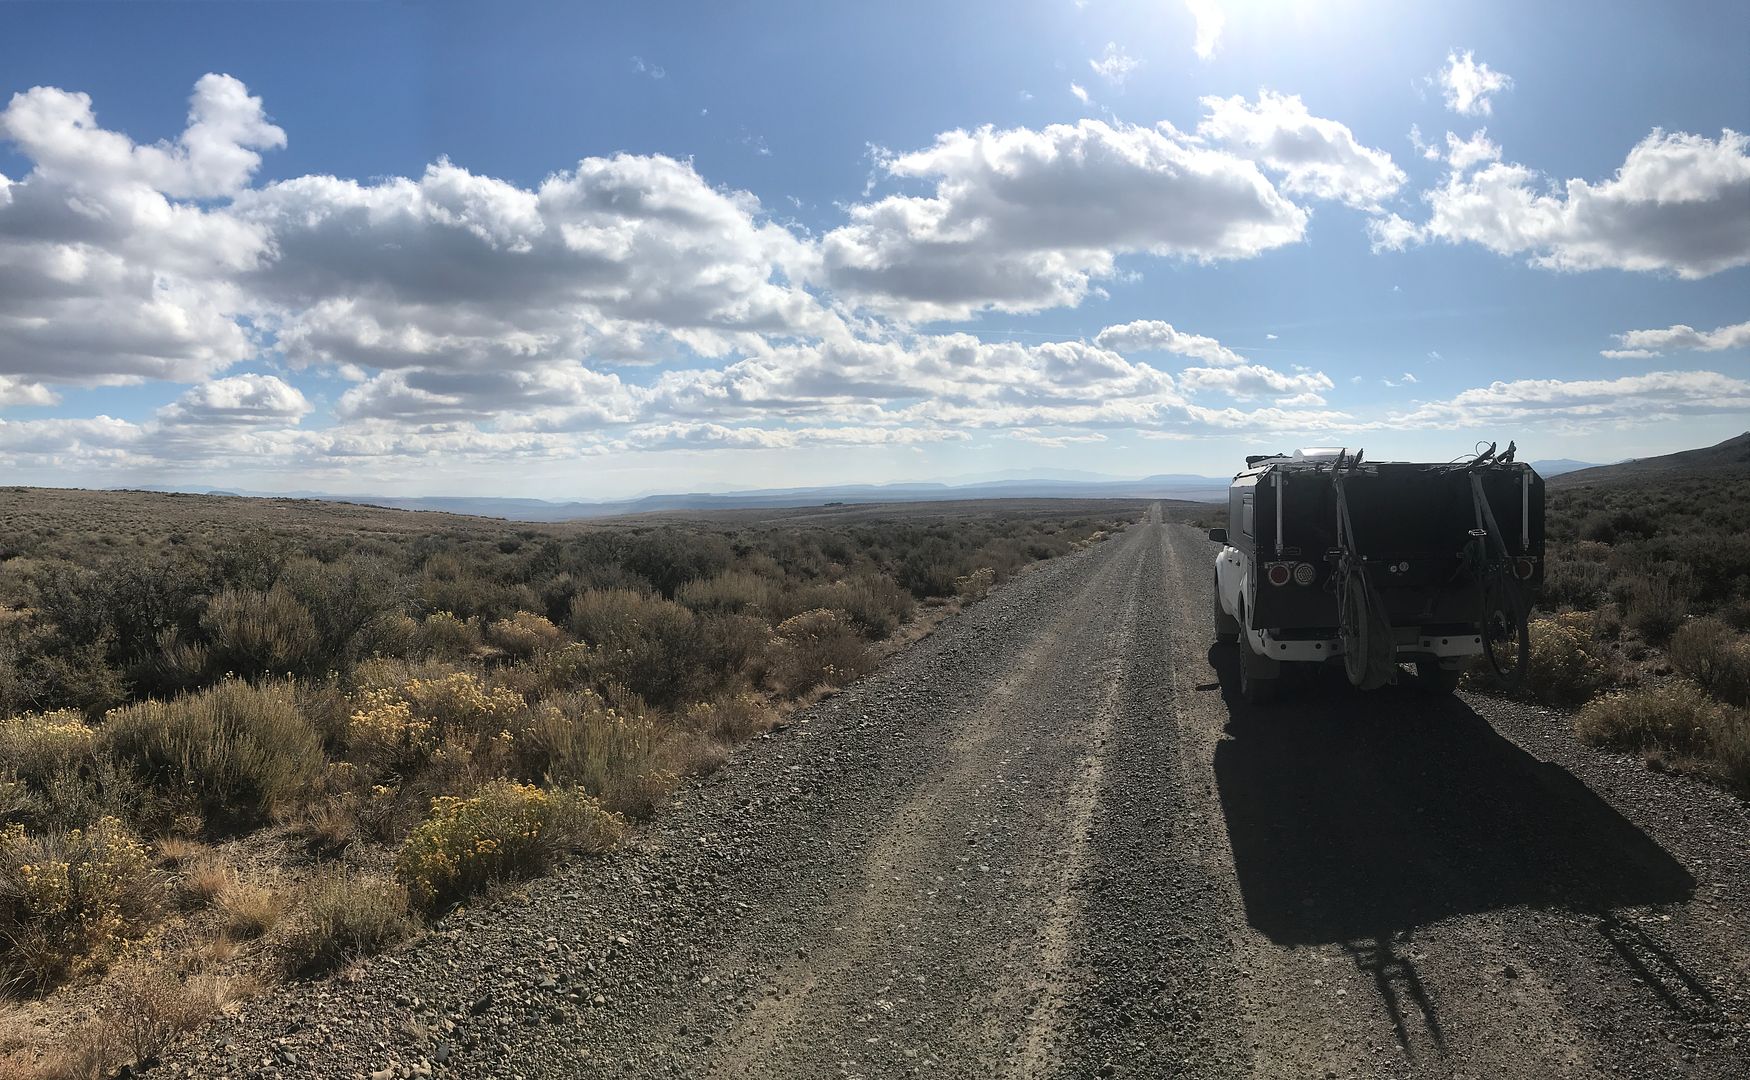
Lots of these kinds of roads and views, somewhere in northern Nevada

Did a 20+ mile loop with lots of ups and downs on the mountain bikes at Hart Mountain National Antelope Refuge

Sheri just got this nice new 29'er. I was on my 25 year old Specialized, rusty chain and all. That was too long for our second ride in the last 5 years. We survived and got to take a nice long soak at the hot springs as a reward.

Steens Mountain
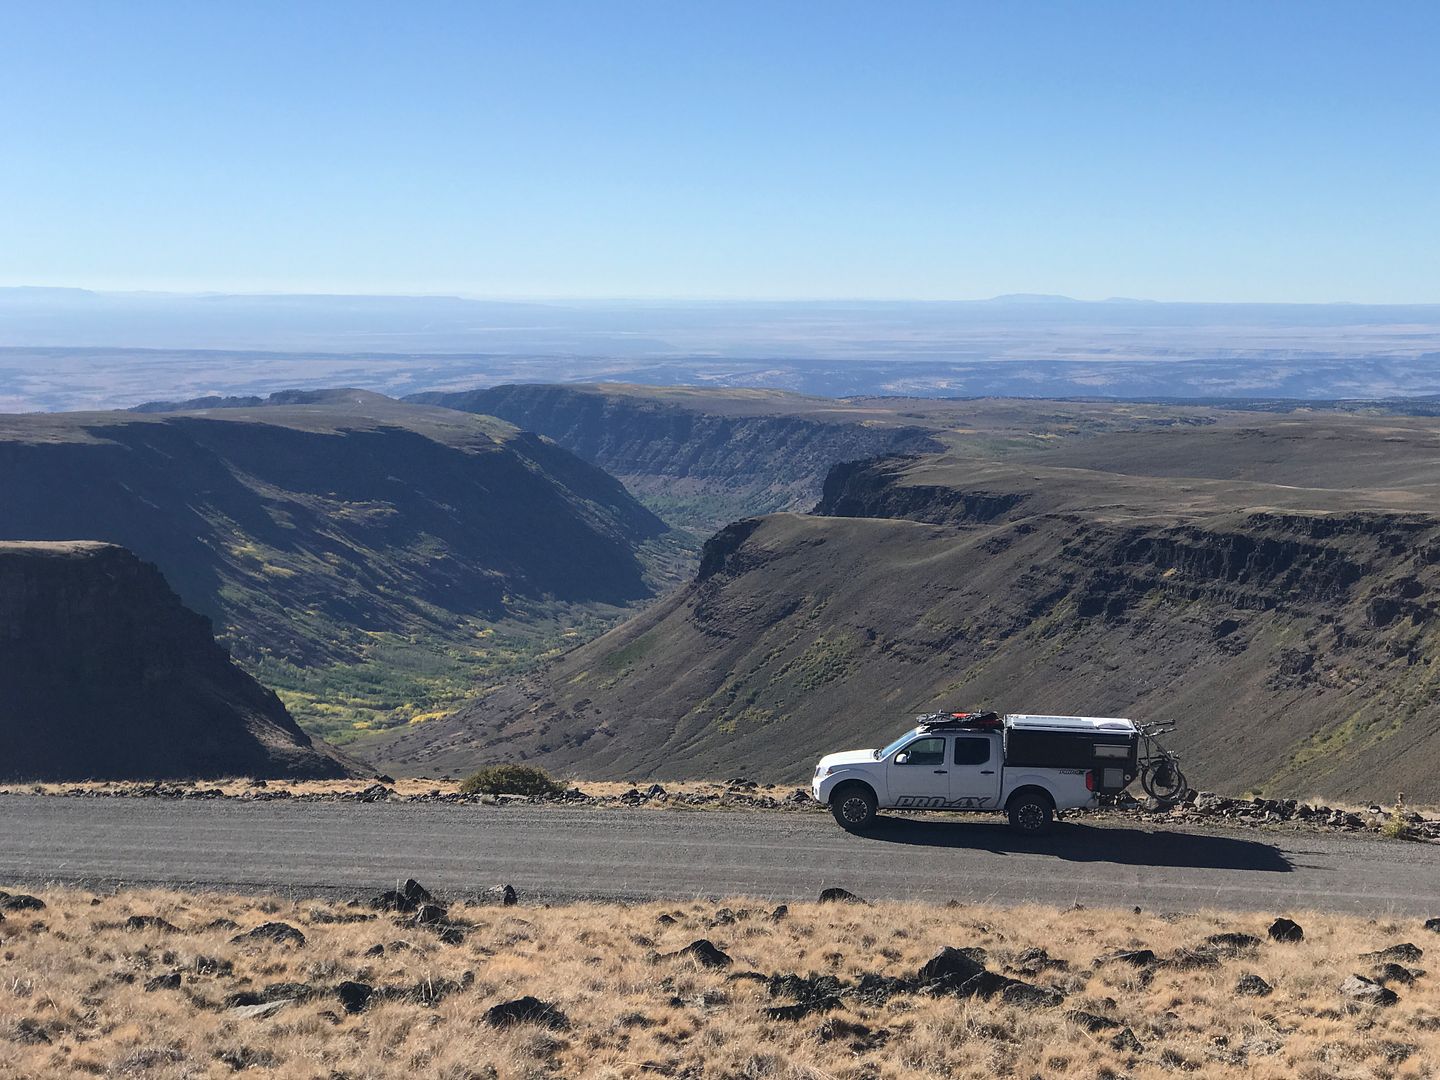
Was not long after this photo was taken that one of my new coilovers came apart. More on that later, but it resulted in a 150 mile tow to Burns, OR and luckily it was fixable.

Wallowa Mountains
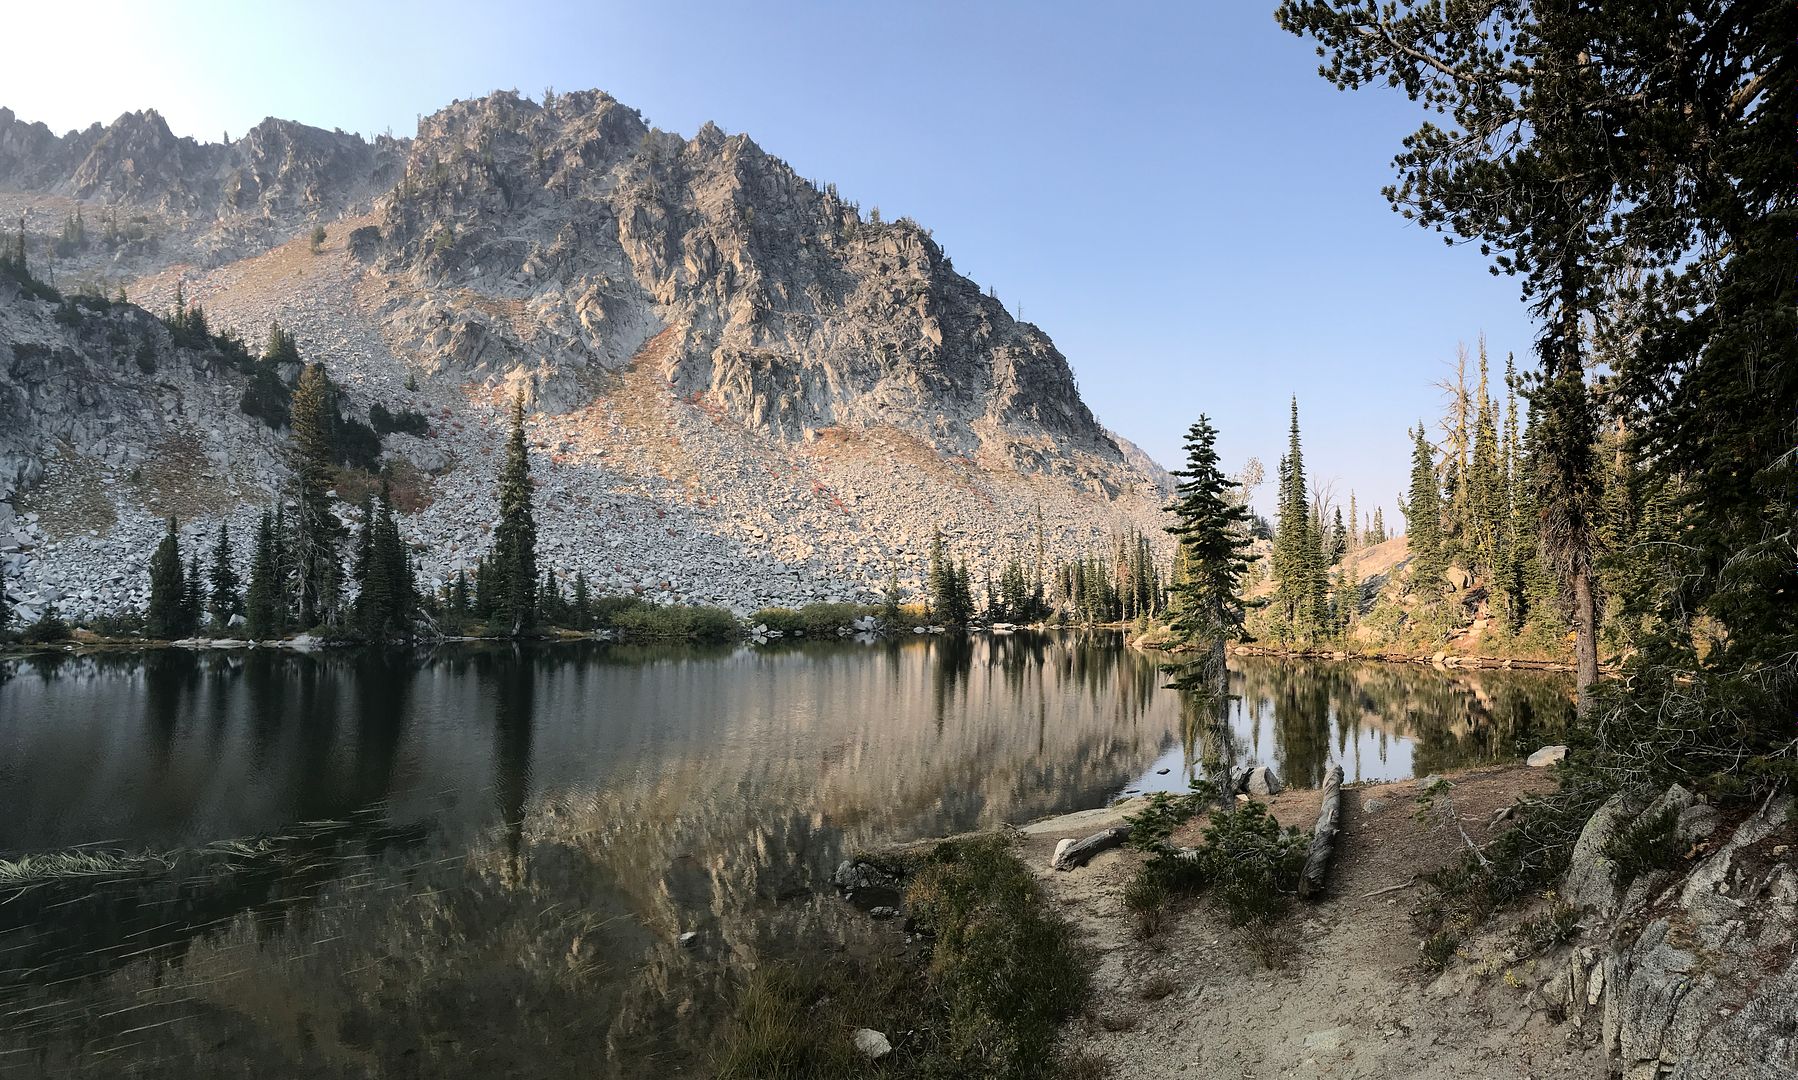


Owyhee River

We've really only ever fly fished in lakes in the high Sierras. We fished a few different rivers on this trip, which was a new experience. I did okay at this spot, a rainbow trout that once hooked, thought he was a flying fish, and a nice brown (which this stretch of river is known for).

Leslie Gulch

Lots of hidden gems like this throughout the trip.

We were pretty relieved to see that most people in the small towns were wearing masks. Even so, we generally avoided towns. I removed the back seat in the truck, made a little platform, and we carried a second fridge there. Managed only two shopping trips in three weeks and always had fresh food. May consider doing this for future trips as well.

Next update to include pre-trip upgrades: custom composting toilet, more solar, and a bike rack...
 

Ramdough

Adventurer
Few updates and upgrades to report on...

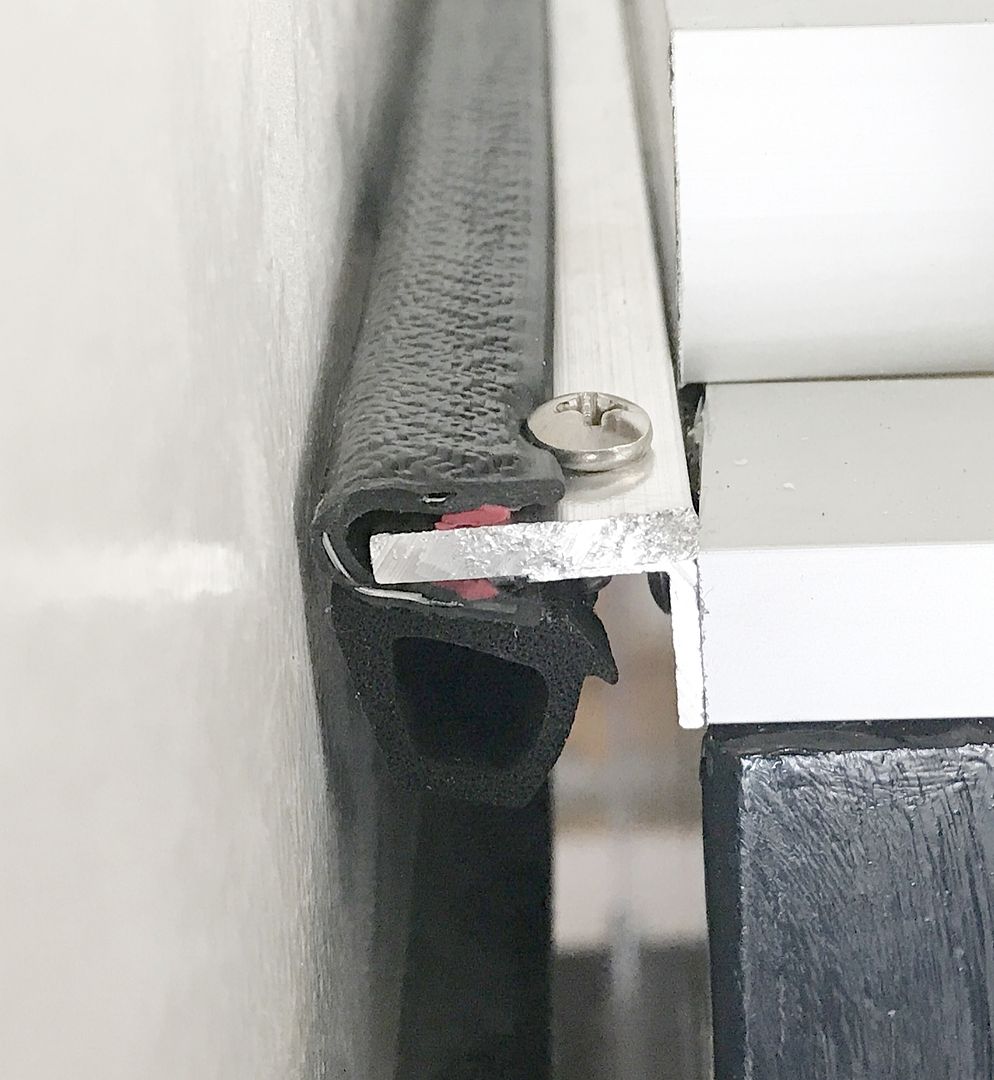
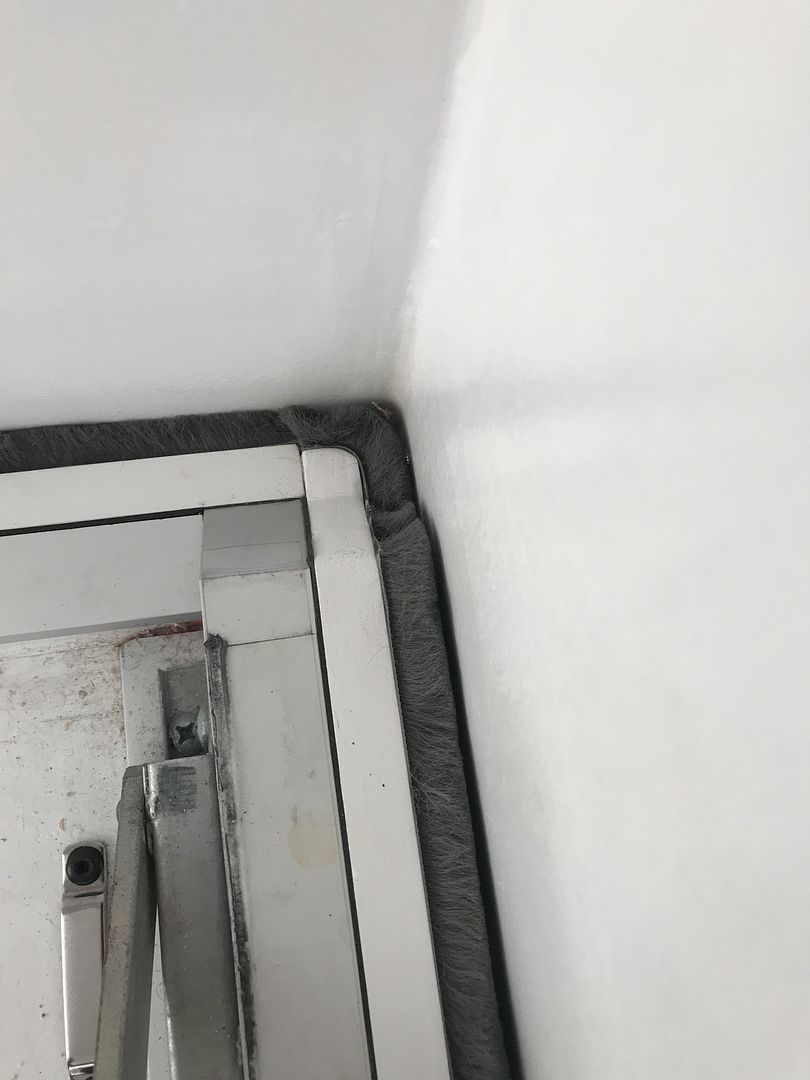
The last trip reminded me of the need to do a better seal between the slide-up and main camper. The existing setup with bulb seals (the bulb meets the black lip below when the slide-up is all the way up)

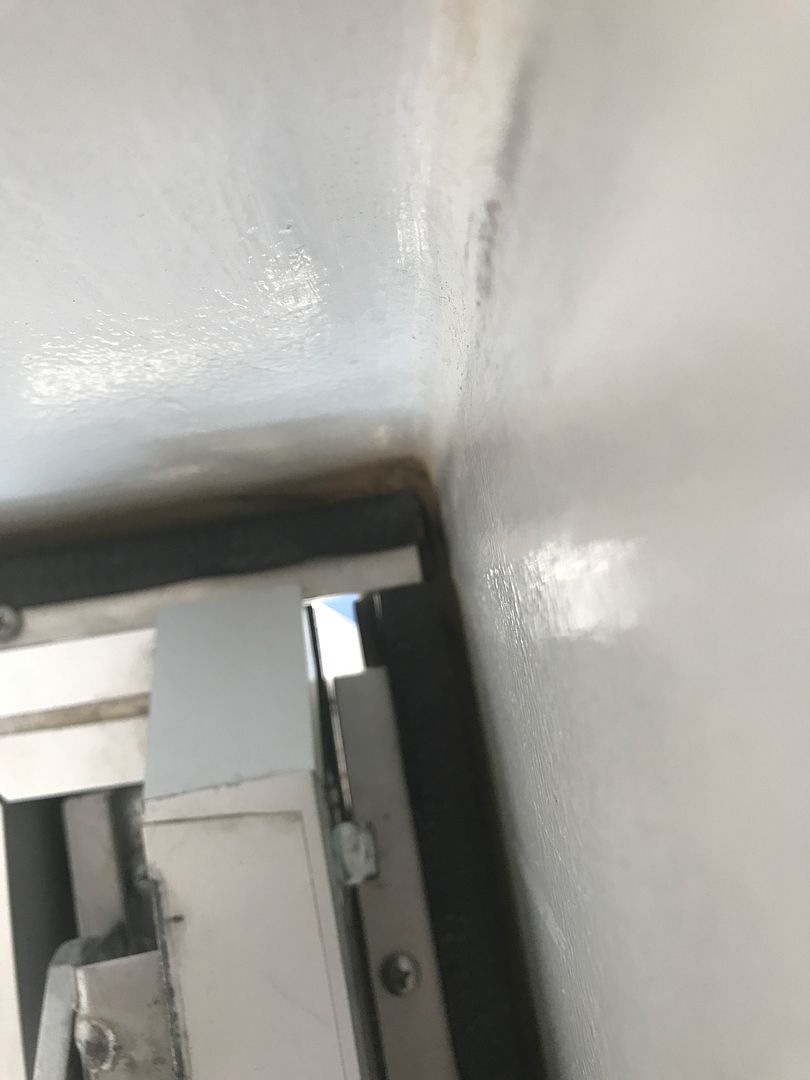
I had several spots where the seal was not at all complete (this is looking down at a corner)

and the aluminum did an all too efficient job of radiating cold into the camper. And maybe worst of all, at night, the light coming through all the cracks attracts bugs and they then easily find their way in to the camper. Needs to be fixed.

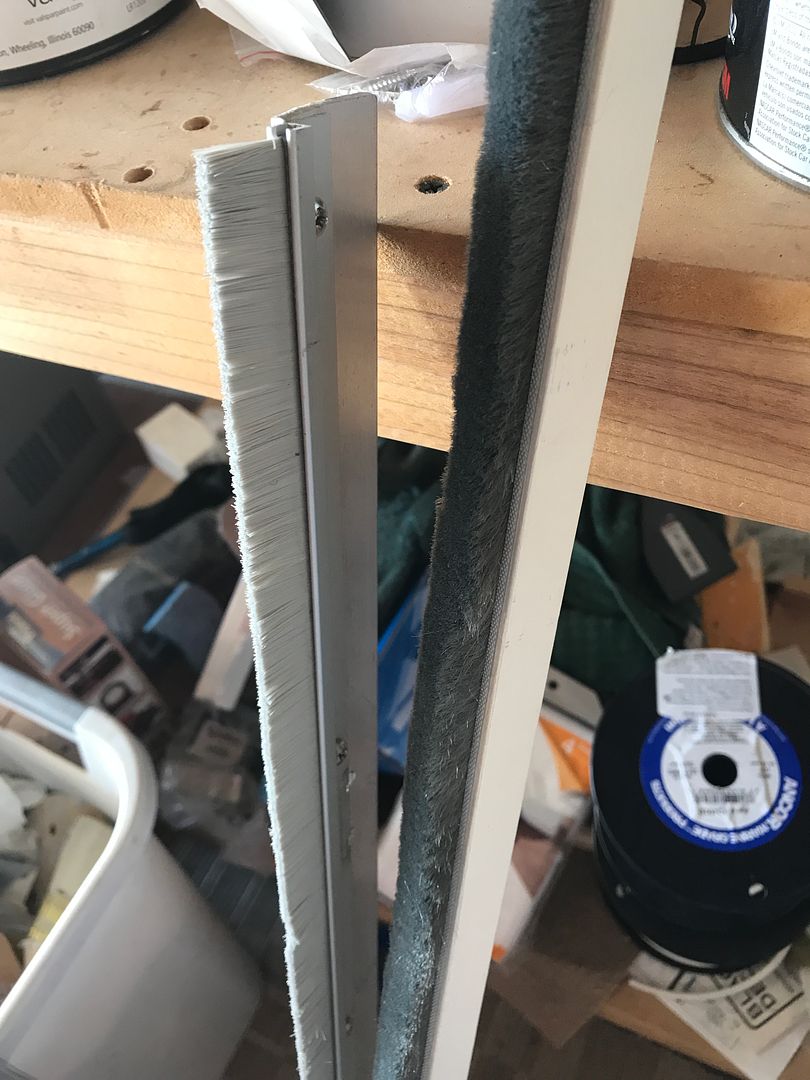
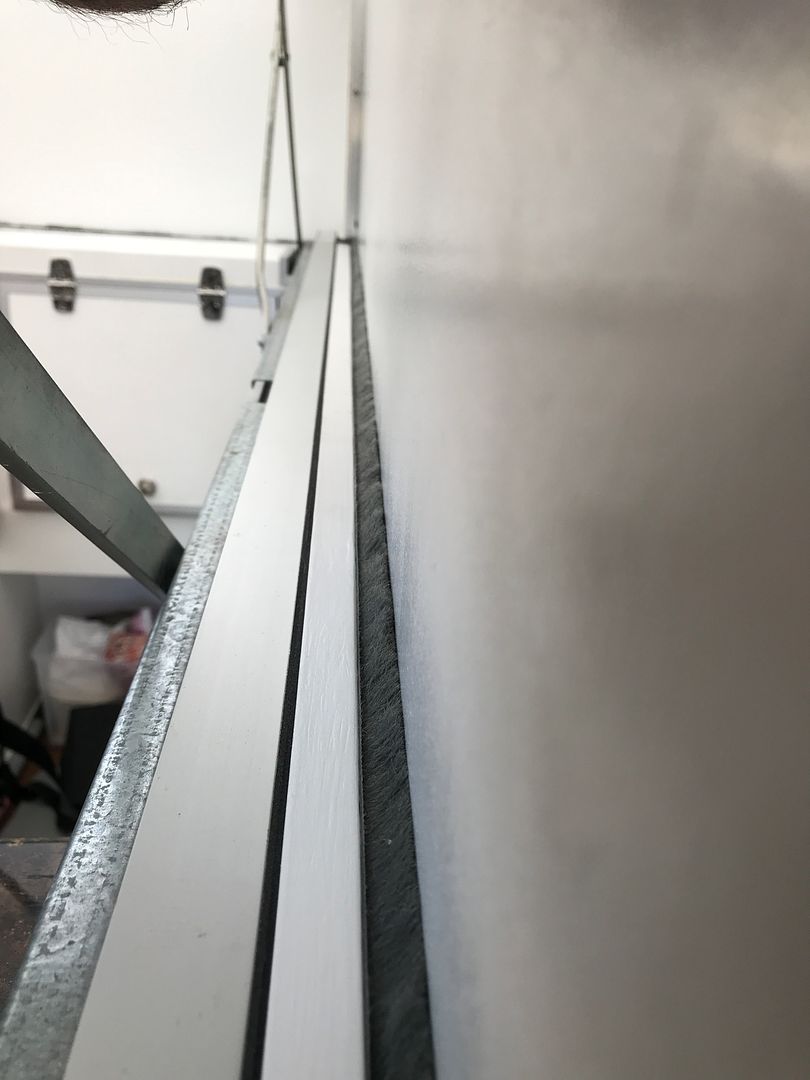
I was using brush seals where there is a bigger gap between the camper and slide up (to clear the inside of the windows). The old setup is on the left and the new brush seal I found is on the right.


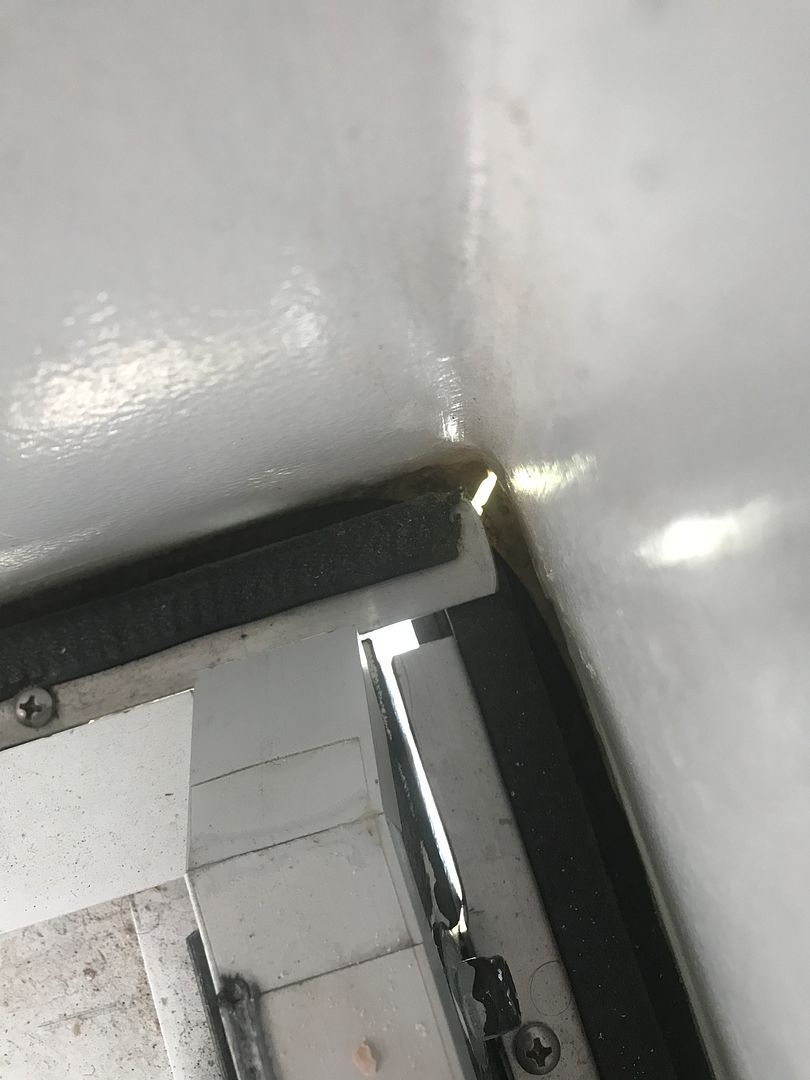
The old brush did a decent job of stopping drafts and bugs, but did little to keep cold out or heat in. And given how stiff the bristles are, it did not slide along the walls well so there had to be a small gap. The new seal is an adhesive-backed brush seal I found on Amazon. I chose the 15mm brush length. Since the gap between the slide-up and camper is 1-1/4" (for the most part), I stuck the seal to 1/2" X 3/4" wood strips, which were painted white (see above). Here's the before/after for another corner:


The adhesive on the seal said 3M and in some tests, it does seem to stick pretty darn well. Just in case, I used small screws at the ends of each section to back up the adhesive. I used VHB double-backed tape to adhere the wood strips to the aluminum trim. Here's another section along the back wall

I let the adhesives set up for 24 hours or so and gave it a test run up and down. To my relief, all the pieces stayed in place. The result is a much, much better seal. Barely any light visible now coming through. I expect it will allow a lot less cold and wind in as well. Good upgrade and way overdue!

Live the build! Do you mind posting the link? I am working on a pop up as well.

Thanks!


Sent from my iPhone using Tapatalk
 

CoyoteThistle

Adventurer
I went through a pretty hectic scramble prior to the above trip to get a few key things done. Priority one was upgrading the potty. The Thetford Curve that we were using never really impressed. Mainly because cleaning it out with #2's in there was a pretty awful experience. Maybe it's because I never had kids or something, but jesus! I'm not cut out for dealing with that. Final straw was the electric pump that puts water into the bowl failed. Only a couple years old and had very little use. Fix costs as much as a whole new potty. Not impressed.

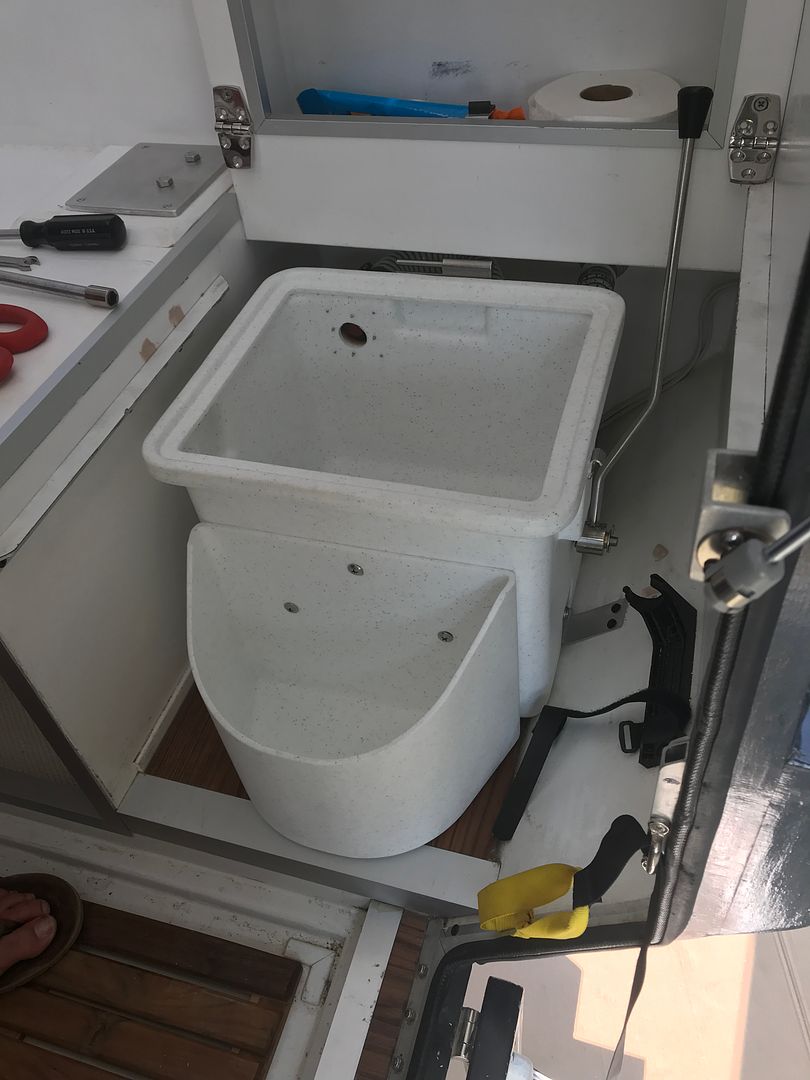
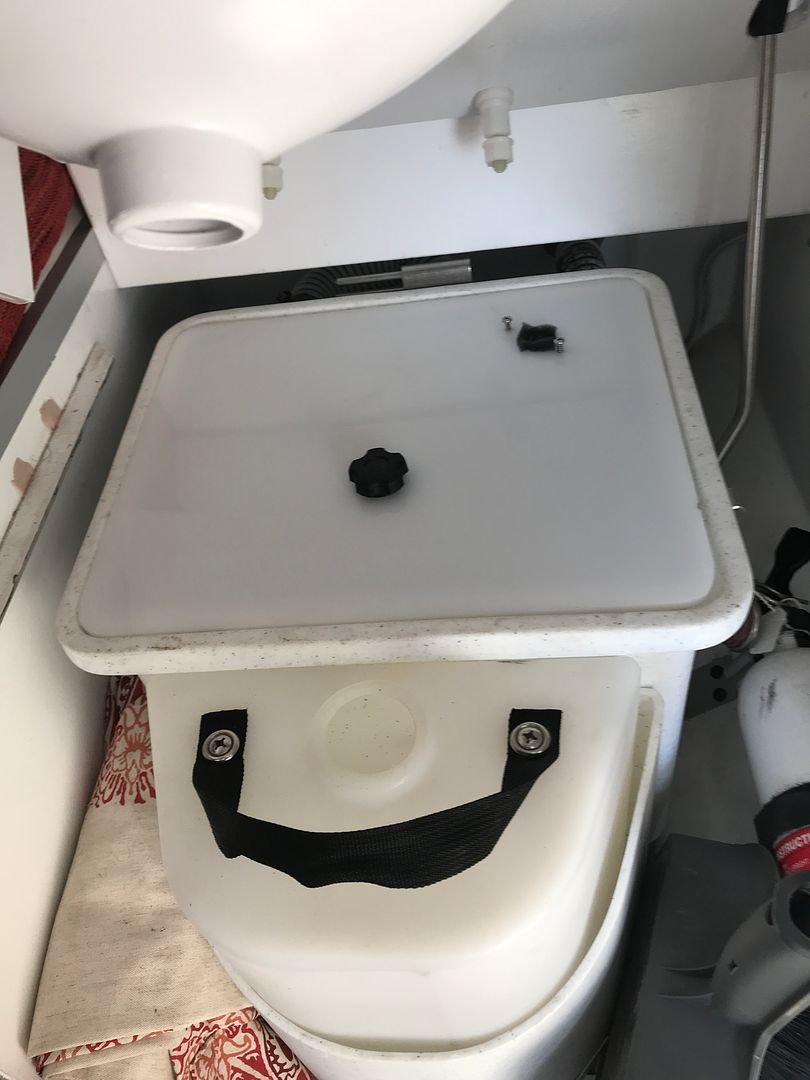
Anyway, knowing we'd be traveling some in the Covid era, I wanted to be truly self-contained and not have to use outhouses, gas stations, etc. All my research around this site and others pointed to a composting toilet. I probably would have pulled the trigger on the ~$1,000 Natures Head despite the high cost, but the thing just wouldn't quite fit in the potty space. I did lots of searching for properly sized containers for a full DIY potty but I wasn't liking what I could find. Then, I stumbled on to the fact that Natures Head will sell you the bottom part of their unit and a pee bottle by themselves. This gives you the mixer built in, a lid for the solids bin, and a pee bottle. The fit was tight, but it looked like it would work. Test fit confirmed it (note, I drilled that hole, see below):


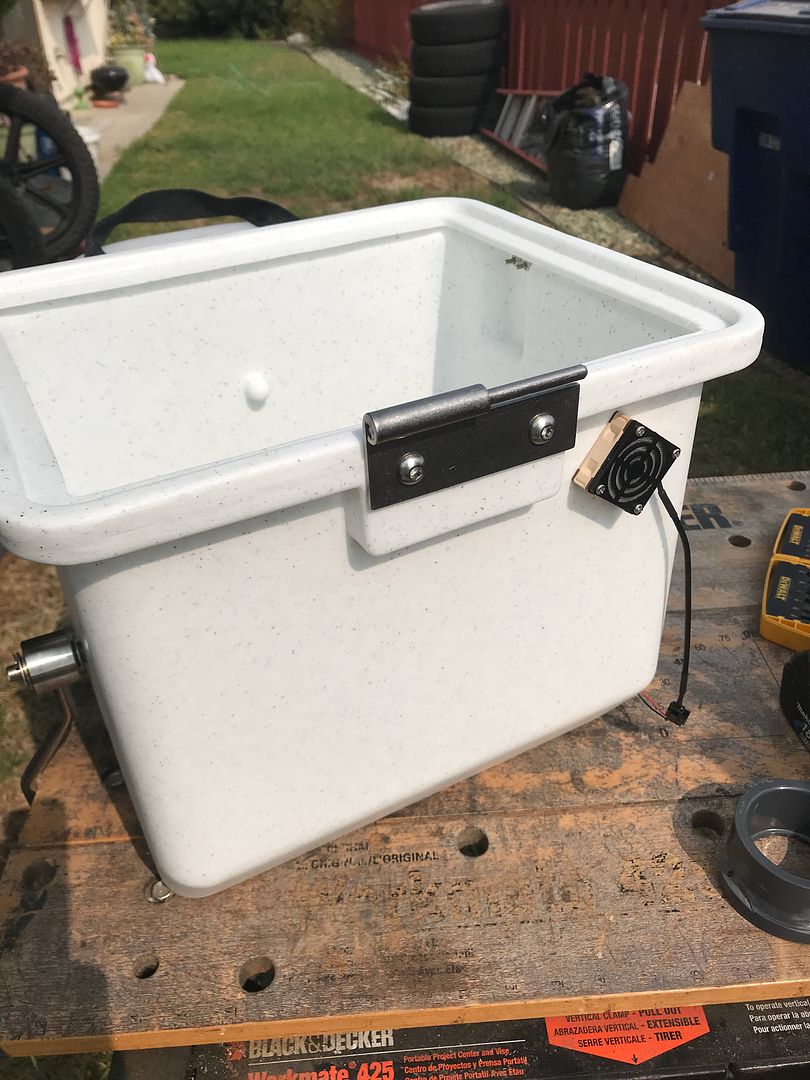
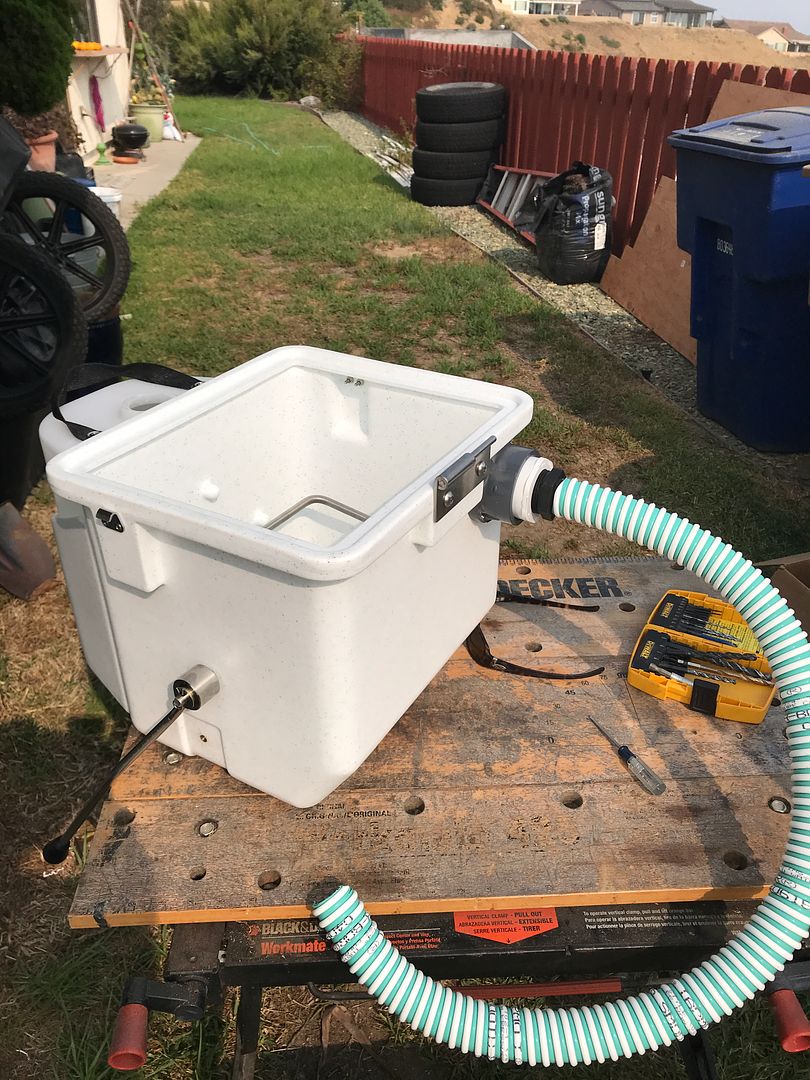
Not cheap at about $300 for this and the pee bottle, but it looks good and has a good mixing apparatus built in (hardest part of a DIY system). First mod was adding a small fan to keep air flowing and promote drying. I got a 40mm fan (the type used for cooling electronics) and drilled a hole in the solids container. Screwed the fan directly to it like so:


Used some PVC fittings to make a flange that connects to some flexible tubing that goes from the fan to an outside vent.


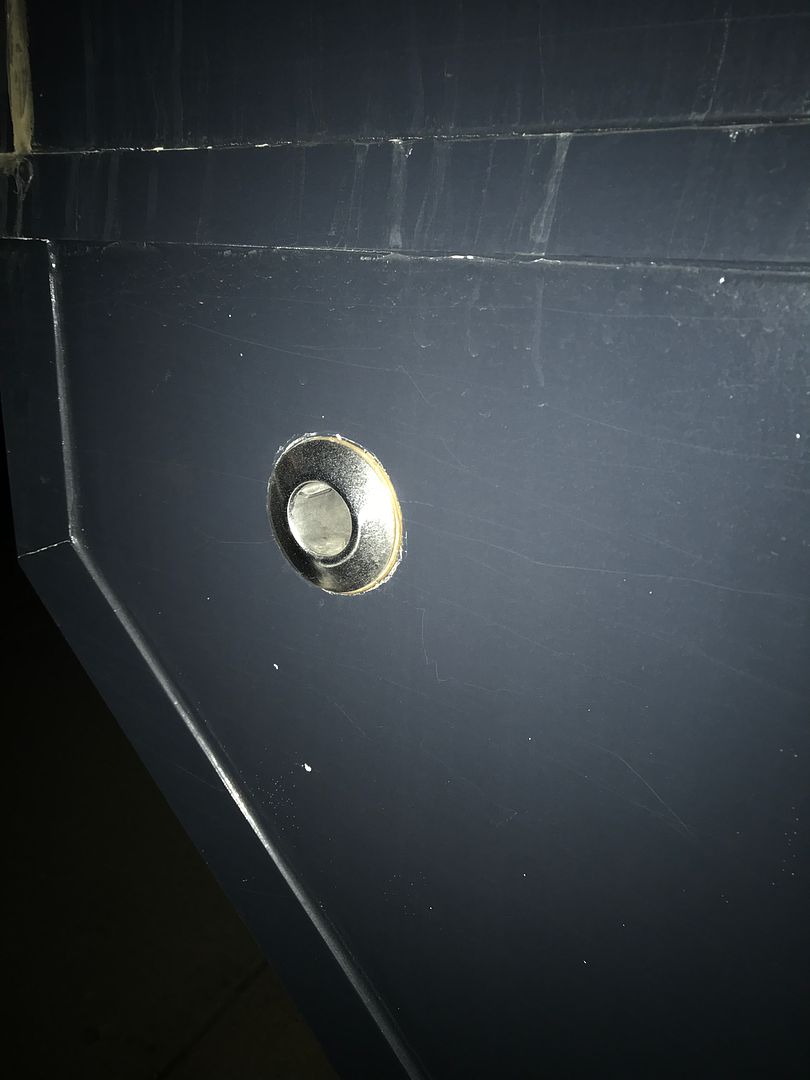
A SS thru hull fitting through the side wall behind the potty completes the vent system.


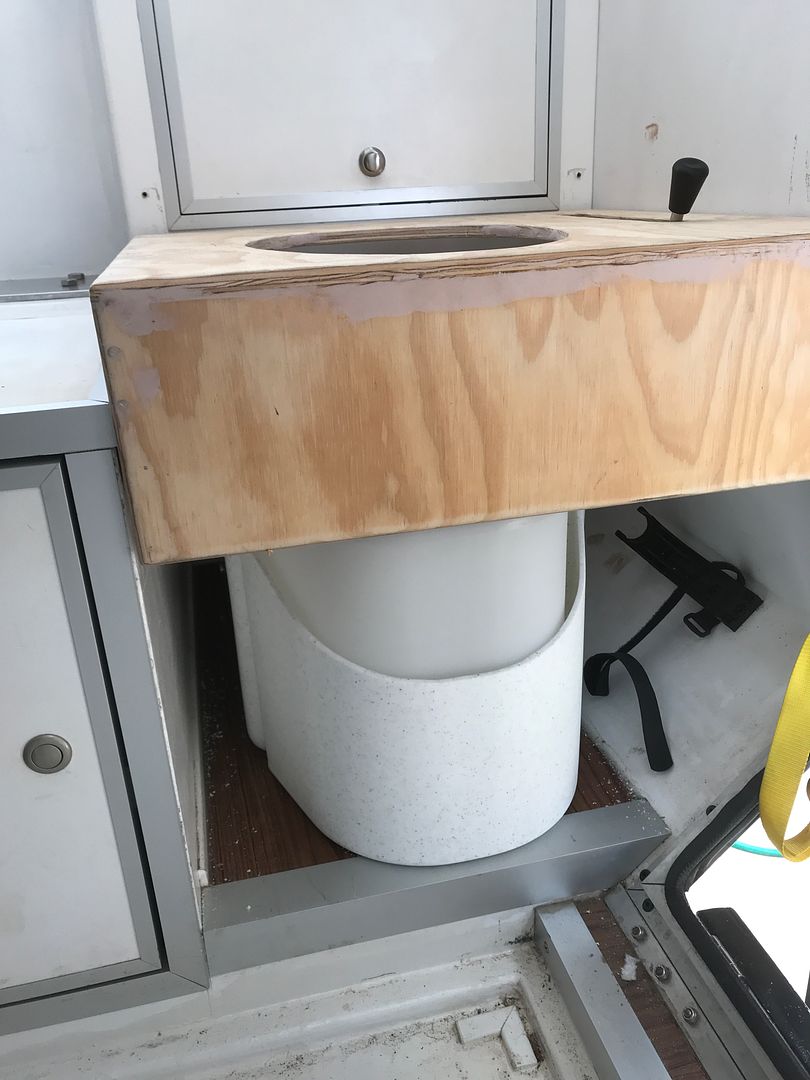
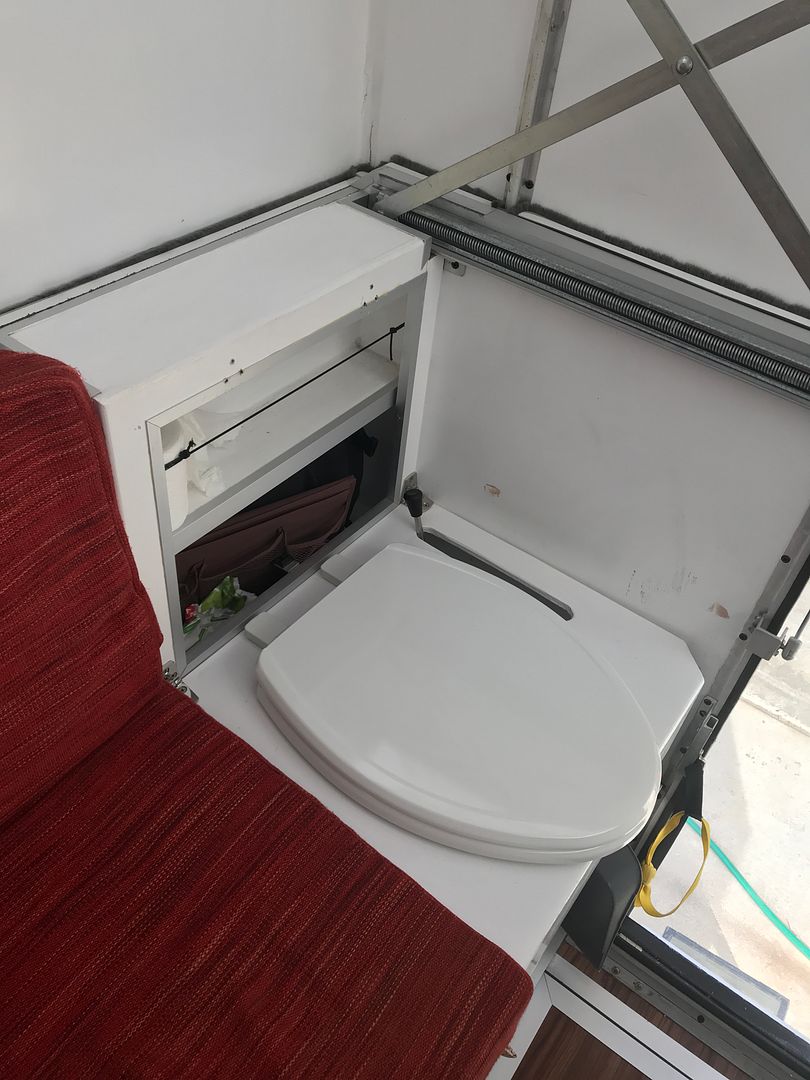
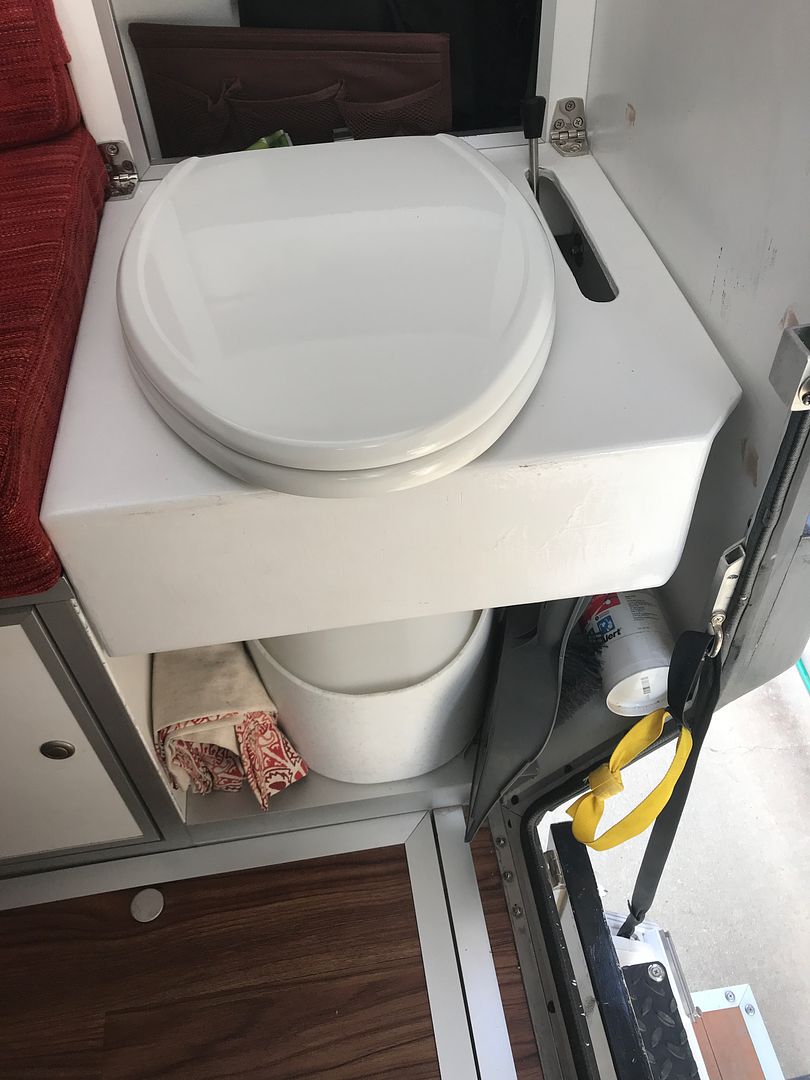
Since this didn't come with the seat or urine collector, had to figure that bit out. Decided to do a hinged platform that spanned the potty area and raised the seat to the right height.


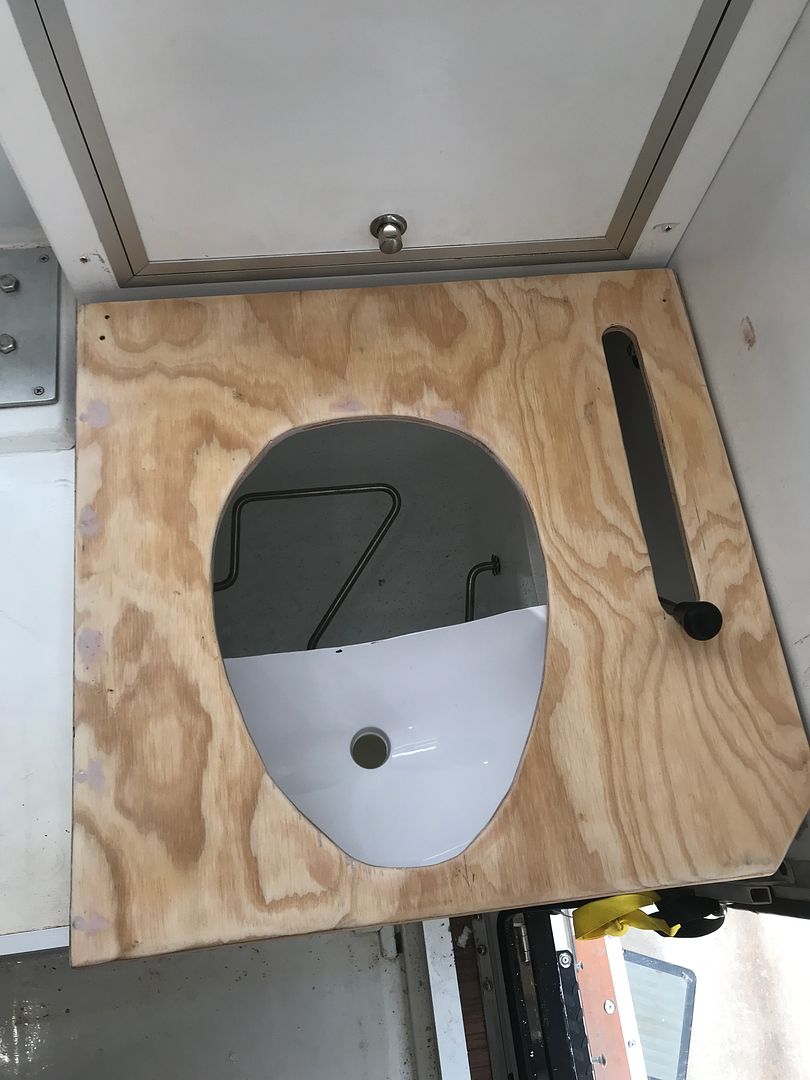
The mixing lever just sticks out above this. It's supposed to work as a ratchet but it's not working great yet with this short throw. Urine collector was a "RV bathroom sink" from Amazon. This was the first round of trimming the oval sink.


We trimmed away a bit more of the back of it in the final design. Some paint and a standard oval toilet seat completes the prototype.


It's still a tight fit, had to remove the door on the "vanity" because it didn't quite clear the toilet seat. This turned out fine as we both found it easier to not have the door anyway.


The lid stays on when not in use.


It comes with a hole for a 40mm fan. I added a small piece of foam air filter material to the hole so keep air flowing and bugs out.

Finished it a couple days before the 3-week trip, fingers crossed. Long story short, it's not dialed in yet, but I was super impressed. Two people used it almost exclusively for three weeks without any smell issues once we got the amount of medium in the solids bin correct. Oh, and you can read testimonials that claim "no odors, even while you are pooping, due to the fan!". I call total BS on that, but once you mix the solids bin up, all bad odors do disappear immediately. Be careful walking by the vent outlet though right after a deposit! Long term though, the smell coming out of the vent is indeed "like potting soil" as folks say. Zero smell in the camper. Haven't dumped it yet, but It doesn't look like a gross experience at all. Dumping the pee bottle was easy; either in the woods or a pit toilet depending on where we were camped.

The only on the road fix we had to do was add a piece of 45-degree PVC to keep stuff out of the fan when mixing. You can see it here at left, just taped in for now:


To-do list includes redoing the part that holds the toilet seat to allow more throw on the mixer and do a better fix for protecting the fan from stuff when mixing. In short, I'm officially on the composting toilet bandwagon!!
 

Terra Ops

Adventurer
I went through a pretty hectic scramble prior to the above trip to get a few key things done. Priority one was upgrading the potty. The Thetford Curve that we were using never really impressed. Mainly because cleaning it out with #2's in there was a pretty awful experience. Maybe it's because I never had kids or something, but jesus! I'm not cut out for dealing with that. Final straw was the electric pump that puts water into the bowl failed. Only a couple years old and had very little use. Fix costs as much as a whole new potty. Not impressed.

Anyway, knowing we'd be traveling some in the Covid era, I wanted to be truly self-contained and not have to use outhouses, gas stations, etc. All my research around this site and others pointed to a composting toilet. I probably would have pulled the trigger on the ~$1,000 Natures Head despite the high cost, but the thing just wouldn't quite fit in the potty space. I did lots of searching for properly sized containers for a full DIY potty but I wasn't liking what I could find. Then, I stumbled on to the fact that Natures Head will sell you the bottom part of their unit and a pee bottle by themselves. This gives you the mixer built in, a lid for the solids bin, and a pee bottle. The fit was tight, but it looked like it would work. Test fit confirmed it (note, I drilled that hole, see below):


Not cheap at about $300 for this and the pee bottle, but it looks good and has a good mixing apparatus built in (hardest part of a DIY system). First mod was adding a small fan to keep air flowing and promote drying. I got a 40mm fan (the type used for cooling electronics) and drilled a hole in the solids container. Screwed the fan directly to it like so:


Used some PVC fittings to make a flange that connects to some flexible tubing that goes from the fan to an outside vent.


A SS thru hull fitting through the side wall behind the potty completes the vent system.


Since this didn't come with the seat or urine collector, had to figure that bit out. Decided to do a hinged platform that spanned the potty area and raised the seat to the right height.


The mixing lever just sticks out above this. It's supposed to work as a ratchet but it's not working great yet with this short throw. Urine collector was a "RV bathroom sink" from Amazon. This was the first round of trimming the oval sink.


We trimmed away a bit more of the back of it in the final design. Some paint and a standard oval toilet seat completes the prototype.


It's still a tight fit, had to remove the door on the "vanity" because it didn't quite clear the toilet seat. This turned out fine as we both found it easier to not have the door anyway.


The lid stays on when not in use.


It comes with a hole for a 40mm fan. I added a small piece of foam air filter material to the hole so keep air flowing and bugs out.

Finished it a couple days before the 3-week trip, fingers crossed. Long story short, it's not dialed in yet, but I was super impressed. Two people used it almost exclusively for three weeks without any smell issues once we got the amount of medium in the solids bin correct. Oh, and you can read testimonials that claim "no odors, even while you are pooping, due to the fan!". I call total BS on that, but once you mix the solids bin up, all bad odors do disappear immediately. Be careful walking by the vent outlet though right after a deposit! Long term though, the smell coming out of the vent is indeed "like potting soil" as folks say. Zero smell in the camper. Haven't dumped it yet, but It doesn't look like a gross experience at all. Dumping the pee bottle was easy; either in the woods or a pit toilet depending on where we were camped.

The only on the road fix we had to do was add a piece of 45-degree PVC to keep stuff out of the fan when mixing. You can see it here at left, just taped in for now:


Oh, and you can read testimonials that claim "no odors, even while you are pooping, due to the fan!". I call total BS on that,

Depends on whether you have a dedicated bathroom, a vent in the bathroom, how well the toilet seat is sealed and lastly diet :)
Your custom diy potty is awesome, welcome to the world of composting! Those black tankers and cassetters don't know what they are missing :)
 

ohiobenz

Member
I went through a pretty hectic scramble prior to the above trip to get a few key things done. Priority one was upgrading the potty. The Thetford Curve that we were using never really impressed. Mainly because cleaning it out with #2's in there was a pretty awful experience. Maybe it's because I never had kids or something, but jesus! I'm not cut out for dealing with that. Final straw was the electric pump that puts water into the bowl failed. Only a couple years old and had very little use. Fix costs as much as a whole new potty. Not impressed.

Anyway, knowing we'd be traveling some in the Covid era, I wanted to be truly self-contained and not have to use outhouses, gas stations, etc. All my research around this site and others pointed to a composting toilet. I probably would have pulled the trigger on the ~$1,000 Natures Head despite the high cost, but the thing just wouldn't quite fit in the potty space. I did lots of searching for properly sized containers for a full DIY potty but I wasn't liking what I could find. Then, I stumbled on to the fact that Natures Head will sell you the bottom part of their unit and a pee bottle by themselves. This gives you the mixer built in, a lid for the solids bin, and a pee bottle. The fit was tight, but it looked like it would work. Test fit confirmed it (note, I drilled that hole, see below):


Not cheap at about $300 for this and the pee bottle, but it looks good and has a good mixing apparatus built in (hardest part of a DIY system). First mod was adding a small fan to keep air flowing and promote drying. I got a 40mm fan (the type used for cooling electronics) and drilled a hole in the solids container. Screwed the fan directly to it like so:


Used some PVC fittings to make a flange that connects to some flexible tubing that goes from the fan to an outside vent.


A SS thru hull fitting through the side wall behind the potty completes the vent system.


Since this didn't come with the seat or urine collector, had to figure that bit out. Decided to do a hinged platform that spanned the potty area and raised the seat to the right height.


The mixing lever just sticks out above this. It's supposed to work as a ratchet but it's not working great yet with this short throw. Urine collector was a "RV bathroom sink" from Amazon. This was the first round of trimming the oval sink.


We trimmed away a bit more of the back of it in the final design. Some paint and a standard oval toilet seat completes the prototype.


It's still a tight fit, had to remove the door on the "vanity" because it didn't quite clear the toilet seat. This turned out fine as we both found it easier to not have the door anyway.


The lid stays on when not in use.


It comes with a hole for a 40mm fan. I added a small piece of foam air filter material to the hole so keep air flowing and bugs out.

Finished it a couple days before the 3-week trip, fingers crossed. Long story short, it's not dialed in yet, but I was super impressed. Two people used it almost exclusively for three weeks without any smell issues once we got the amount of medium in the solids bin correct. Oh, and you can read testimonials that claim "no odors, even while you are pooping, due to the fan!". I call total BS on that, but once you mix the solids bin up, all bad odors do disappear immediately. Be careful walking by the vent outlet though right after a deposit! Long term though, the smell coming out of the vent is indeed "like potting soil" as folks say. Zero smell in the camper. Haven't dumped it yet, but It doesn't look like a gross experience at all. Dumping the pee bottle was easy; either in the woods or a pit toilet depending on where we were camped.

The only on the road fix we had to do was add a piece of 45-degree PVC to keep stuff out of the fan when mixing. You can see it here at left, just taped in for now:


To-do list includes redoing the part that holds the toilet seat to allow more throw on the mixer and do a better fix for protecting the fan from stuff when mixing. In short, I'm officially on the composting toilet bandwagon!!

Great post.
Two questions, in most locations urine is ok to go into grey water tanks, can the pee catcher be mounted separately from the dry tank? I would like to be able to remove the composting tank out the back from the outside instead of carrying it through the habitat.
 

CoyoteThistle

Adventurer
Great post.
Two questions, in most locations urine is ok to go into grey water tanks, can the pee catcher be mounted separately from the dry tank? I would like to be able to remove the composting tank out the back from the outside instead of carrying it through the habitat.

Thanks. The pee bottle sits in a piece that screws into the front of the solids bin. So yes, you could separate the two to make the solids bin come out on its own.
 

AeroNautiCal

Explorer
Having changed countless babies nappies I can honestly say that the experience wasn't as bad as I had thought (tip, give baby something to occupy their hands with so they don't grap their own poo, or worse, flick it at you!).

However, emptying the Thetford holding tank was truly a thing of horror (even though I was dressed in more protective layers than a Pathologist!).

I very quickly realized that I simply couldn't face that nightmare on a regular basis and eventually adopted the bag it and trash it method for solid waste, in conjunction with a pee bottle.

However, your discovery that these proven, high quality composting toilet components are available to self install is something really interesting, because if there's no hideous stench from the compost mix tank and emptying it isn't truly horrific, then I may consider adopting this system.

Thank you for sharing this excellent information.
 

ohiobenz

Member
Thanks. The pee bottle sits in a piece that screws into the front of the solids bin. So yes, you could separate the two to make the solids bin come out on its own.

What did you use to replace the trap door that the NH upper unit has? Or do you just remove and replace the lid on the base?
 
Wow, awesome!

Best camper build yet (for my purposes...) It's really astonishing how much you've fit into that space, and at what weight. Makes my hope for a camper for my family with 2 kids on the back of a 1st gen tacoma not seem insane. You actually proved it can happen.

And a dozen or more great solutions for issues I've been wrestling with in my designs, from actuators to batteries. And a few things I thought I'd invented, but you got to first. Thanks so much for this treasure trove of info!!
 

CoyoteThistle

Adventurer
What stove is that? I don't believe it was mentioned, but it looks nice...

Stove is by SMEV. I got it from Panther RV Products. Very happy with it. The bigger burner cranks and the little one goes down nice and low for simmering. Having the extra counter space while not in use is a big plus in a small kitchen.

Wow, awesome!

Best camper build yet (for my purposes...) It's really astonishing how much you've fit into that space, and at what weight. Makes my hope for a camper for my family with 2 kids on the back of a 1st gen tacoma not seem insane. You actually proved it can happen.

And a dozen or more great solutions for issues I've been wrestling with in my designs, from actuators to batteries. And a few things I thought I'd invented, but you got to first. Thanks so much for this treasure trove of info!!

You're welcome! Glad you found it useful.
 

Forum statistics

Threads
188,044
Messages
2,901,606
Members
229,352
Latest member
Baartmanusa
Top