Project "Autonomous" F-350

b dkw1

Observer
Why not just use a wire wheel on a bench grinder to clean up those bolts? You could be done in less that 30 minutes.

Because the bolts weren't all that great when new. Now that they are rusted they are a liability. Getting them out intact once is lucky, a couple years down the road he will not be that lucky. Getting broken off bolts out of a block is no fun. Much easier to just put in new bolts.
 

pappawheely

Autonomous4X4
Why not just use a wire wheel on a bench grinder to clean up those bolts? You could be done in less that 30 minutes.

Just remember to wear good eye and face protection.

Oh yeah, I love pulling those single wires that break off out of my shirt. I did clean up one but it was pitted.

Because the bolts weren't all that great when new. Now that they are rusted they are a liability. Getting them out intact once is lucky, a couple years down the road he will not be that lucky. Getting broken off bolts out of a block is no fun. Much easier to just put in new bolts.

You covered it. The worst thing would be if I broke one while torquing it or broke one during use that caused a leak. I'm already concerned about a leak from the timing chain cover.
 

Chorky

Observer
In addition to new bolts, I usually slap on some anti-sleaz and spread a very thin layer over the whole bolt. It can help with both proper torque by offering some lube on the threads, and prevent bolts breaking even if rusted (sometimes).
 

Chorky

Observer
Finally finished reading all 123 pages of your build haha.... Nice work so far! lookin forward to seeing the end product. Some questions though.

When working with Atlas springs - what are some things that came up in the discussion so they could build you the right spring for your application? I'm probably going to do the same thing, but I haven't contacted them yet and figured it would be good to do that last when all the weight is added and numbers are 'real'. Was there any consideration taken based on the shocks you would use also?

Unless I misunderstood a while back I read about your custom fuel tank. Where did you actually put it considering the skinnier frame? I previously contacted AeroTank about a larger 45 gal rear and 40 gal front tank, and their ability to make a 3rd midship tank to go on the right side (where the exhaust currently sits). They use either welded steel or aluminum. I know you mentioned using a plastic part due to flexing. I certainly have been brainstorming ideas to keep these larger tanks safe from flex. But they offer a lower center of gravity - I saw pics of two tanks in the bed of your truck, but I think those are planned to go between the frame rails?
 

pappawheely

Autonomous4X4
Finally finished reading all 123 pages of your build haha.... Nice work so far! lookin forward to seeing the end product. Some questions though.

When working with Atlas springs - what are some things that came up in the discussion so they could build you the right spring for your application? I'm probably going to do the same thing, but I haven't contacted them yet and figured it would be good to do that last when all the weight is added and numbers are 'real'. Was there any consideration taken based on the shocks you would use also?

Unless I misunderstood a while back I read about your custom fuel tank. Where did you actually put it considering the skinnier frame? I previously contacted AeroTank about a larger 45 gal rear and 40 gal front tank, and their ability to make a 3rd midship tank to go on the right side (where the exhaust currently sits). They use either welded steel or aluminum. I know you mentioned using a plastic part due to flexing. I certainly have been brainstorming ideas to keep these larger tanks safe from flex. But they offer a lower center of gravity - I saw pics of two tanks in the bed of your truck, but I think those are planned to go between the frame rails?

Atlas builds to the weight of the vehicle. Through their years of practical experience they know how to design the leaf packs, they only need to know the weight. The springs carry the weight of the truck. The shocks control the movement. How the shocks work are more of a shock question and not a spring question. I worked at King Shocks for several years and had the opportunity to work closely with Lance King and Iribe. They always told me that in order to properly tune a vehicles suspension, you need to get the spring rate right first; then you can tune the damping. Atlas will get your spring rate right.

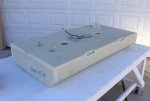
I put my 60 gallon storage tank between the frame rails. I bought it when it was going to be used on the wider F350 frame. On the C&C frame it sits inside the C-channel of the frame. The two tanks sitting in the bed are for another truck I am building. That truck will just have a camper shell on it. It will be more compact than the big camper. The Uhaul will be set up to live in full time.

2Y3A9607.jpg

IMAG0396.jpg
 

Attachments

  • IMG_0331.jpg
    IMG_0331.jpg
    201.5 KB · Views: 52
Last edited:

pappawheely

Autonomous4X4
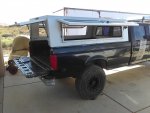
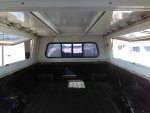
Not sure if I posted here but a snatch strap and D ring went through the back window on my other shell. I have a race coming up where I will have to camp so I took the shell off my trailer and put it on the F350. It was a real job of engineering getting this heavy shell transferred by myself. It took some super human strength and lots of cursing. It will be nice opening the side doors up when it's hot.

IMAG0402.jpg

IMAG0403.jpg
 
Last edited:

pappawheely

Autonomous4X4
Saw this on facebook tonight. Takes the all time prize for overloaded.

Pepin County Sheriff's Office

On Thursday, September 7, 2017 at about 9:30 am, the Pepin County Sheriff's Office contacted the Northwest Region State Patrol requesting assistance with a potential motor carrier violation. The Pepin County Sheriff's Office had report of a disabled semi unit on USH 10 near the Pepin/Pierce County Line west of Durand. The semi unit had left St. Paul, Minnesota at approximately 7 pm on September 6th destined to deliver its load to a location in Neenah, WI. At about 8 pm two tires blew out on the semi-trailer where it became disabled. The driver contacted a tire repair service to respond to the scene to replace the tires. The repair service was not able to lift the trailer in order to change the tires due to its weight. The following morning a second repair service attempted to change the tires. That service contacted a heavy tow truck operator to lift the rear of the trailer to allow the tire changes. The tow operator contacted the Pepin County Sheriff's Office to advise them of the obvious overweight issue. Pepin County Deputies then requested a State Patrol unit to assist. Sergeant Wm. Berger responded to the scene to assist.
The initial tow truck was not able to lift the rear of the trailer so a second, larger 50 ton rotator tow truck responded and was able to lift the rear of the trailer to change the tires. Due to the extreme flexing of the frame and the potential for a catastrophic failure of the trailer frame system extra blocking and jacks had to be used to support the center the trailer while it was being lifted. The unit was eventually weighed on a set of the Wisconsin State Patrol's portable scales. The unit had a gross weight of 165, 900 lbs. The legal gross weight of the unit was 80,000 lbs. All of the tires on the semi-tractor and trailer, with the exception of the steering tires, were significantly exceeding the tire manufacturer's maximum tire weight rating. Some of the tires were carrying more than double the allowable weight allowed by the tire manufacturer's rating. The driver was issued a citation for failure to place the required emergency warning devices for a stopped vehicle in the area around the disable semi unit. The unit was partially in a traffic lane for over 10 hours without anyone contacting law enforcement or placing the safety devices. The company was issued a citation for an 85,900 lb. axle group overload. The bond amount for the overweight citation was $20,287.86. A second citation was issued to the carrier for exceeding the tire weight ratings. Nine other axle weight warnings were issued along with 12 out of service violations for exceeding the tire weight rating limitations. A final warning was issued to the driver under the Federal Safety Regulations for Reckless Driving. The unit was escorted approximately 4 miles where it could be safely offloaded.
 

patoz

Expedition Leader
Wow, I'll bet he doesn't do that again!

sign1.jpeg
 

pappawheely

Autonomous4X4
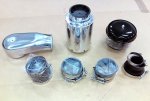
Even when work is not being done, design and parts procurement continue. The time, parts needed, and cost of any project is always underestimated. Here are the components of my air intake. Carb hat, inline filter housing, venturi dirt separator, and flexible couplers. All I need now is some tubing, and to make some mounts.

IMAG0405x.jpg
 

rayra

Expedition Leader
Does the separator drop the material to a bottom that can be removed or opened to clear? Or is it like a shop dust collector where you you have to open the top and clear it out.
Having a base or cap that could be easily opened would be real handy. Pop a binder catch and have the dirt dumped out.


Any plan to rig a large tarp over your shell to make a pavilion of sorts? or at least an air-gapped roof to keep the sun off the camper shell?


/got my trans-cooler installed recently and Monday I start the roof deck MkII. And I just ordered the materials for the 'Hobie Cat' deck trial, as well.
 
Last edited:

pappawheely

Autonomous4X4
Does the separator drop the material to a bottom that can be removed or opened to clear? Or is it like a shop dust collector where you you have to open the top and clear it out.
Having a base or cap that could be easily opened would be real handy. Pop a binder catch and have the dirt dumped out.


Any plan to rig a large tarp over your shell to make a pavilion of sorts? or at least an air-gapped roof to keep the sun off the camper shell?


/got my trans-cooler installed recently and Monday I start the roof deck MkII. And I just ordered the materials for the 'Hobie Cat' deck trial, as well.

The venturi intake spins the air around inside the housing. The dirt gets flung to the outer walls and then drops down when it loses velocity. The top is removable to get the dirt out that gets trapped inside. Yes, I want the hobie cat deck to shade the roof and provide a spot to sit up top.
 

rayra

Expedition Leader
I intend to build the trial over the next couple weeks and intend to borrow the neighbor's 10yr-old for a walk-around-on-it test. Was thinking to lace it to the side rails and to the rear airfoil and a cross brace mounted all the way forward. Roughly 76"x42". Thinking to maybe put the middle cross brace in and stretch the fabric over the top of it. Conestoga style. We shall see. Making home remodeling road trips in both directions again lately and next weekend. Maybe I'll rig it on my next trip to Temecula and can swing by on my return so you can check it out. If the timing works out. 3-4-5 weeks maybe.
 
Last edited:

pappawheely

Autonomous4X4
I intend to build the trial over the next couple weeks and intend to borrow the neighbor's 10yr-old for a walk-around-on-it test. Was thinking to lace it to the side rails and to the rear airfoil and a cross brace mounted all the way forward. Roughly 76"x42". Thinking to maybe put the middle cross brace in and stretch the fabric over the top of it. Conestoga style. We shall see. Making home remodeling road trips in both directions again lately and next weekend. Maybe I'll rig it on my next trip to Temecula and can swing by on my return so you can check it out. If the timing works out. 3-4-5 weeks maybe.

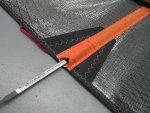
What about using battens; like sails do? http://www.sailingproshop.com/ullman_sails_mainsail_battens.aspx

batten_moth.jpg
 

rayra

Expedition Leader
I think those are made more for keeping a sail from luffing. Don't think they'd be any support to a person standign or sitting on the tensioned surface. I don't even want to look up what a piece of spring or moly steelcould cost for that. I just thought to use the factory crossbrace as a way to control the droop or loft of the deck. But I suppose if it is tensioned well enough it shouldn't have too much vertical movement.
I think I bought the wrong fabric. I bought a heavier but still lightweight silnylon and not 600D or 1000D. No idea how much weight / tensile strength the silnylon has. Guess I'm going to find out. At least it didn't cost much. I was thinking about silnylon for the MkII awnings and I guess I brainfarted. I meant to get the really sturdy stuff for catamaran deck idea. But I did get the 1" woven webbing to use as edge reinforcement for the eyelets. Need to do some edge design detailing research before the sewing starts. A 1" flat reinforcement doesn't seem to be optimum for lateral tensioning. Maybe I should sew paracord within the edge flap / seam, instead. I'll get it figured out before I put a needle to it.
Planning to use paracord for the edge lacing anyway. In a 3" equilateral triangle pattern. perimeter eyelets about 3" apart, about a 1" gap to the inside of the rack rails. With their rail height and thickeness, it ought to take about 3" on each of the other two legs, so lacing cordage should be roughly twice the length of the fabric panel circumference.

Got it all in my head. Havne't got it down on paper yet. Was waiting for when I begin the MkII roof deck, when I have the MkI boards on my work table I can just use them for a fabric pattern.

Have to dig around for tips on how to center a HobieCat deck, too. Instead of having to repeatedly fiddle with it. I can probably do it by just anchoring the panel in place with a couple knotted loops at the corners, then loose-lace the whole thing before tightening it in place.
 

Forum statistics

Threads
188,026
Messages
2,901,332
Members
229,411
Latest member
IvaBru
Top