Project "Autonomous" F-350

pappawheely

Autonomous4X4
Oh joy. I got my priming rod but now I have another issue. The distributer is stuck in the block. Apparently this is a Ford thing. At least it's in the front. I soaked it in tap magic (it's a machining or cutting fluid). After a couple hours I am able to turn it slightly by beating it with a hammer. Hopefully it will loosen up and I can pull it out. I've watched a couple horror movies on youtube with people completely destroying the distributer to get it out. Seems like a silly thing to pray for, but here I am. Help me Jesus.
 

Kingsize24

Well-known member
Not sure if yours is stuck from the electrolysis fit between the block and the aluminum distributor, or if yours is one with a stuck oil pump drive. I've had some twist slightly and lock them in tight, but if you have an air hammer you can try removing the lid and the center tab to peen on the steel shaft a few times to try and loosen things up. If that doesn't work, take the snap ring off the top of the shaft and slide the distributor body off the shaft, then you can work on removing the shaft and oil pump drive.
 

pappawheely

Autonomous4X4
Not sure if yours is stuck from the electrolysis fit between the block and the aluminum distributor, or if yours is one with a stuck oil pump drive. I've had some twist slightly and lock them in tight, but if you have an air hammer you can try removing the lid and the center tab to peen on the steel shaft a few times to try and loosen things up. If that doesn't work, take the snap ring off the top of the shaft and slide the distributor body off the shaft, then you can work on removing the shaft and oil pump drive.
WOW, Thanks for the tips!!
 

pappawheely

Autonomous4X4
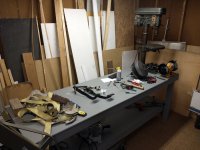
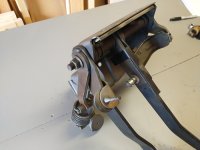
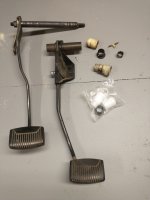
Still working on some maintenance on the F350. It's difficult in the Arizona summer. No shade to park under so I have to wait until the sun goes behind the mountains. Did the heim joint clutch upgrade. The lever arm would not come off the shaft so I had to pull the pedal box. While pulling the brake master and booster off the check valve broke on the master. The booster was leaking anyways I figure, might as well replace it. Checked the steering shaft and found out the slop was not coming from the rag joint, it was the telescoping part of the shaft. Add that to the work list. Once I got the pedal box off and shaft pulled I discovered the hole that the shaft goes through is hogged out. Figuring out a way to weld it up without losing the hole location. All this and waiting for parts deliveries too. I almost forgot to mention the plugged up cat and cracks around the O2 sensor in the y-pipe I had to fix. Now that the cat is no longer muffling everything, I'm trying to find the right muffler to use. Old trucks, love them and hate them.


IMG_20240710_153142050 copy.jpg

IMG_20240710_153243724 copy.jpg

I also managed to build a new work bench.

IMG_20240710_153329782 copy.jpg
 

pappawheely

Autonomous4X4
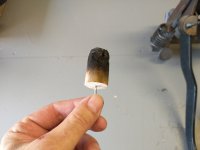
I got the bushings all installed on the clutch shaft. To fix the elongated hole in the housing I made a wooden plug that I put in the hole. That way I did not go overboard on the welds and have to spend hours cleaning it up. It worked ok. Only a slight clean up in a couple spots and the hole was round and true. Now to re-install everything and hope nothing else breaks.

IMG_20240713_125522277 copy.jpg

IMG_20240713_125502873 copy.jpg
 

pappawheely

Autonomous4X4
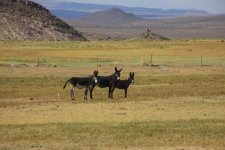
The odyssey continues. I was getting some vibration through the steering wheel. I thought it was the rag joint, but when I inspected it it was the spring in the telescoping shaft. I ordered one from rockauto. After struggling with the installation for hours, I took it apart so I didn't have any misalignment issues at all between the coupler and the input shaft on the box. The splines were not cut correctly in the coupler. It would not physically fit on the input shaft. Tried to return it to rockauto but their robot said it's non-returnable. After a couple calls to their answering machine at headquarters and a complaint to the BBB, they emailed me. I explained to "Josh" that the application was correct. The part number was correct. The part doesn't fit! I guess nobody thought about that when they programmed the computer. I was trying to do them a favor. Had I just returned it, they would have sent it to someone else who would be totally pi$$ed at rockauto now. I sent it back and now have to wait three days after they receive the part to get a refund. Ordered from somewhere else. I am praying it's not the same bad part from the same manufacturer. Their go, nogo gauge is worn out. We will see. When all this is done the truck will be better than ever. Then I can install the camper box and build out the interior. Looking forward to doing some camping in it. I'm thinking of taking up storm chasing and landscape photography. I've taken a few photos of the landscape over the years while covering off road racing.

Copyright_Mikes_Race_Photo_MRP14044 copy.jpg

Mikes_Race_Photo_MRP15234V2R copy.jpg

MRP13333 copy.jpg
 

pappawheely

Autonomous4X4
I got everything together. Had to pull the clutch master cylinder off the firewall again and trim the shaft a little shorter. The bite position was all the way at the top. I figured out how to work on this stuff a little easier. I put mattress pad on top of the engine and lay over the throttle body. Have to be careful I don't break anything. I also had to pull the steering shaft off to get the wheel straight. It went easy too. It's amazing what you can do when it's not well over 100 degrees in the bright sun. The truck runs good and sounds great with the new exhaust. It's still very thirsty on gas. Not sure what it could be, but I suspect it might be the O2 sensor. I'll swap it and see. Next is getting the camper shell on. I buttoned up a lot of little things enough that I can get that mounted now. Then I can build out the inside. I should be able to take some trips this winter and be able to escape the heat next summer; heading to higher altitudes. I'd like to find another property in the mountains where I can spend my summers.


IMG_20240113_103223537 copy.jpg
 

pappawheely

Autonomous4X4
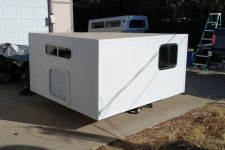
This has been a huge learning experience. I would never do this type of construction again. It is very light and strong, but if I had to do it again I would weld the aluminum frame together first and then attach the wood panels. The box is not entirely square so I'm going to have some challenges getting it aligned on the bed. It will work, but it's not perfect. I don't get there, but I always aim for perfect.

IMG_20240815_113339613 copy.jpg
 

pappawheely

Autonomous4X4
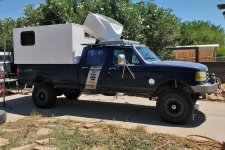
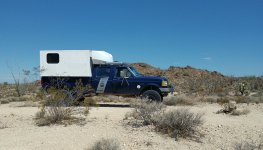
Took her out for a little trip today. Very windy out. It didn't rip off the bed rails. :love: The wind was pushing me around, as it was the tractor trailers on the highway. I was so happy I put that Hellwig sway bar on. The truck doesn't sway in the back. I need to hit the truck scales again to see how much it weighs. I'm pretty happy with the size. I was on a very narrow two track (more like a sandy wash), no problem. The property I was checking out was spectacular. Might have to purchase it.

IMG_20240824_110633014 (1) copy.jpg

That little spec of white is the truck.

IMG_20240824_112121334 copy.jpg


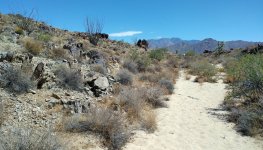
It's hard to see, but I got some new pinstriping. I had creosote on one side of the trail and cholla on the other. The choice is always the creosote.

IMG_20240824_161022182 copy.jpg
 
Last edited:

pappawheely

Autonomous4X4
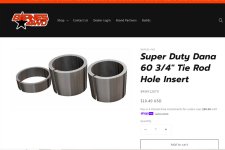
The hits keep coming. I felt some death wobble the other day so I checked my steering linkage. I converted it to heims. I drilled the tapered holes out in the knuckles and used 3/4 inch bolts. I should have retorqued them periodically, but I didn't. They were not loose, but not tight. The hole on one side got sloppy. I'm going to ream them out with a taper and install bushings like I should have in the beginning. These are what I'm using.

bushings.jpg

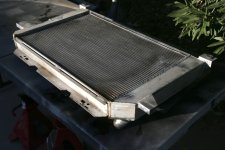
I also noticed my aluminum radiator is leaking. I called champion. Despite it being 10 years old, they have a lifetime warranty so it might be covered. Wouldn't that be awesome!! I try to buy quality parts and their radiators are quality. No epoxy, they are fully welded and use billet filler necks. I've got my fingers crossed.

MRP_9315 copy.jpg
 

pappawheely

Autonomous4X4
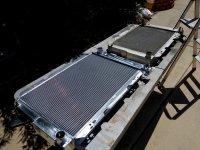
WOW! Monday night I sent photos to Champion of my radiator. On Tuesday around noon I got a response that they would submit the photos to their warranty department. Wednesday goes by and no word. This morning (Thursday), I wonder if I should call and see what the status is on my claim. I go outside and find my replacement radiator already delivered to my door. I missed the email they sent saying it had shipped the same day on Tuesday. What a sharp departure from too many companies today that have lousy customer service and/ or don't stand behind their products. I can't tell you how happy I am, and so glad that I made the right choice when I bought my Champion radiator. WOW! I'm so stoked! I think it's so important to give people credit when they do good.

IMG_20240829_115646627 copy.jpg
 

pappawheely

Autonomous4X4
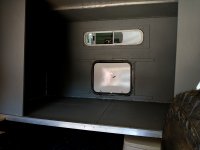
I filled all the gaps on the corners with silicone to seal it and to hopefully resist thermal bridge where the aluminum angle was exposed. Then I painted the sleeping compartment; mostly to seal the wood. I am going to install foam insulation panels on all the walls. The panels will have the foil side towards the wall with an air gap in between. I'll install some wood slats under the panels so I can lean against them when I'm sitting up in bed.

IMG_20240903_104052181 copy.jpg

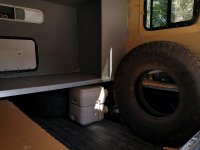
I figured out the layout. I have a full size 37 inch spare under the bed. I'll mount a second on the passenger side. Behind that will be some storage boxes for lighter things. The toilet will fit next to the wheel well. The camp stove will be on a shelf by the window.

IMG_20240903_104036083 copy.jpg

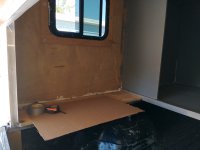
On the driver's side I will make a stand that bolts to the truck bed to hold the fridge. It needs to be up high so I can squeeze the second spare out from under the bed. I cut out a piece of cardboard with the footprint of the fridge to help me visualize. I would like the fridge lower, but this is the best solution.

Mounting the spare and fridge to the bed will transfer that weight to the truck and not the shell. Under the fridge will be a spot to put the floor jack and tool bags. I will also have more storage like on the other side of the truck. This keeps the largest open area in the middle of the truck bed. It's important to be able to have a spot to change clothes, throw things in the truck and carry large items temporarily. I have never understood how people can travel in teardrop trailers. Do they climb in with wet clothes and then try to change while lying down? Yuck.

IMG_20240903_104044949 copy.jpg

This leaves half the bed under the sleeping compartment open. I'm thinking putting a water tank there. Then I need to find some place to put a sink. At least I am finally making progress.
 

Forum statistics

Threads
188,030
Messages
2,901,414
Members
229,352
Latest member
Baartmanusa
Top