Metcalf
Expedition Leader
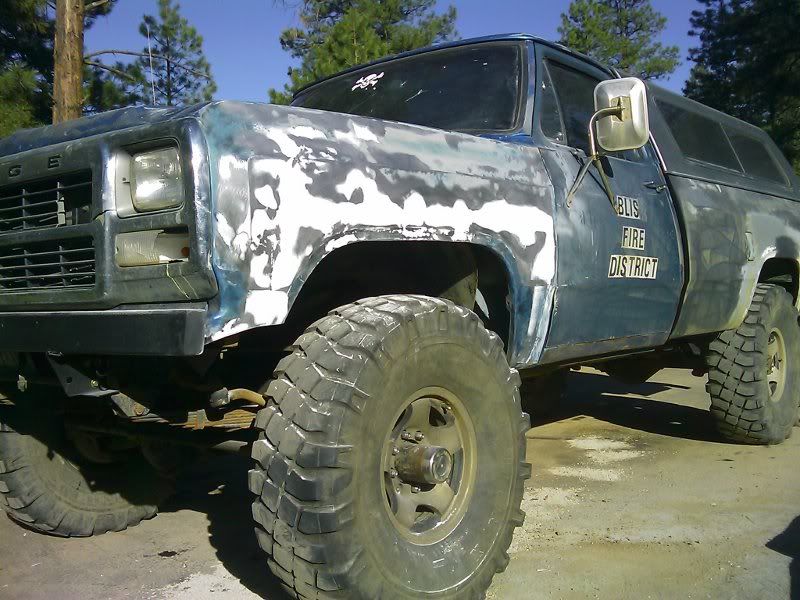
Take that front fender!
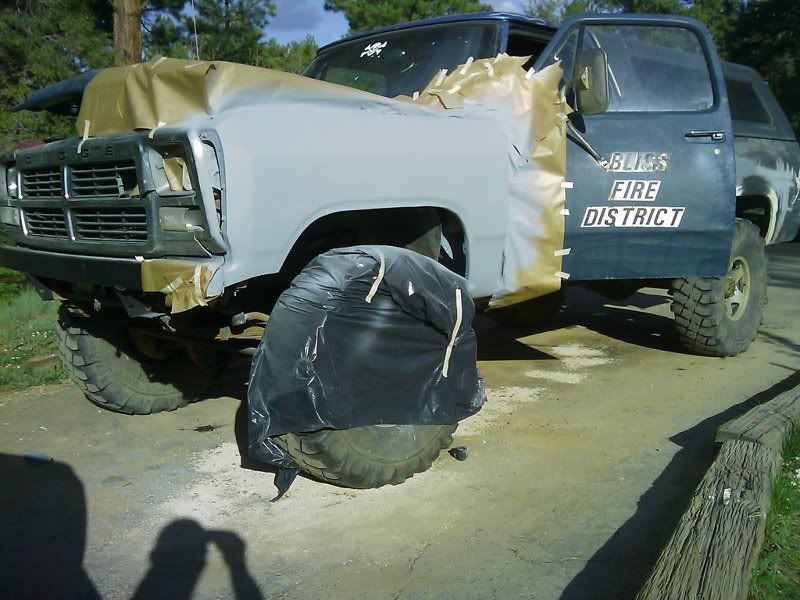
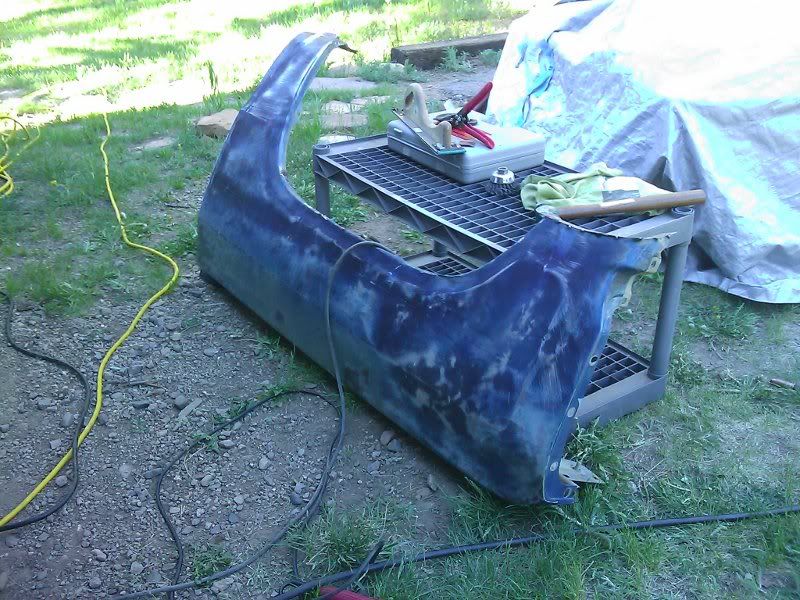
Step 1.5. Remove fender from the truck. This is hard when you don't have anyone to help hold the hood! I tried removing the dents from the fender on the truck, but it was about 10X easier with it off. I could also work in the shade on the back deck instead of in the sun!
I was able to get most of the dents pushed around enough that I felt comfortable using some filler on the low spots. I had a big dent hidden under some old filler on the body line. This took a decent amount of hammer and dolly work with some creative metal shrinking using a wire brush and a wet rag. It didn't come out perfect, but I was pretty happy. When using a hammer and dolly go slow and check your progress with a light coat of paint or blue spray die. I left a lot of cut/weld lines from the fender a touch low since the metal was all moved around from the welding. I think this will work better. I don't think the filler is more than 1/16-1/8" in the worst places. I thought that was pretty good for how many pieces this fender had been cut up into. This fender has two hand made sectioning panels and like 7 seams!
Here you can see the fender after the hammer and dolly session on the back deck. When I cut this fender I made a mistake in the lower front edge where I bobbed the fender. I didn't leave myself the material I needed to make a flange on the bottom. I had to do it the hard way instead. I cut a new flange out of some 22 gauge with the sheetmetal snips.
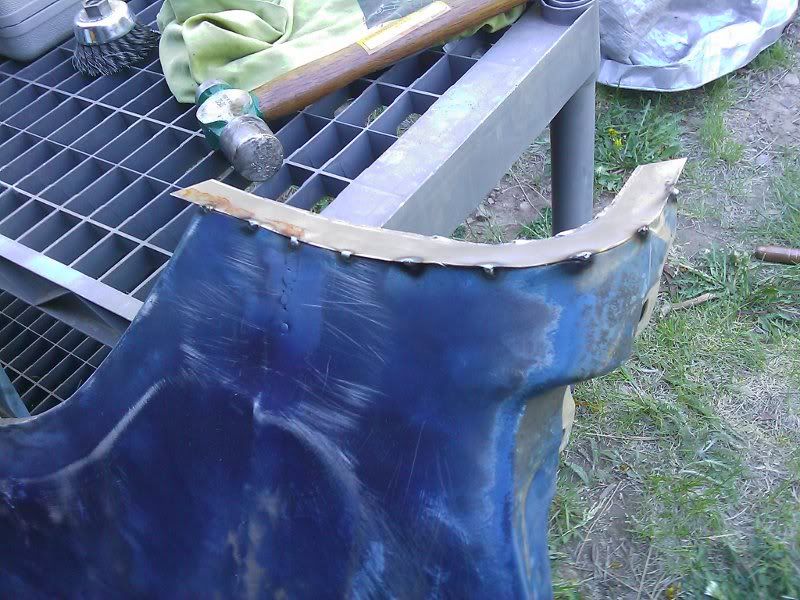
I then tack welded it on in a few spots. I needed a third hand to hold this in position! Once I got it tacked by pushing the edges together with a hammer, I sanded the edges down till they where flush. I then slowly welded up the inside and outside. I also used a copper backer to weld up a few holes in the fender that where left over from the modifications.
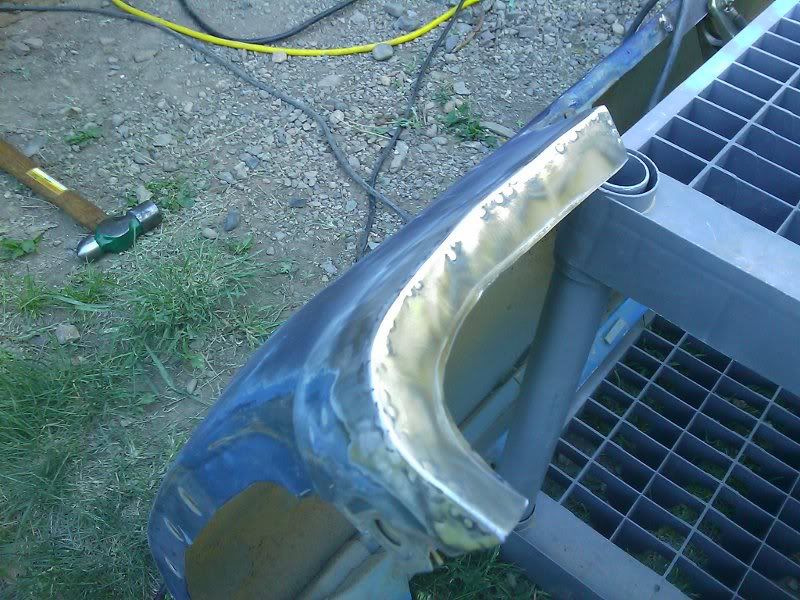
Here is the finished flange. Once I welded it up I carefully sanded it down with a flapper disc. I then primed the inside heavily along with all the seams after a stiff wire brushing. Hopefully this holds off the rust since I won't be painting the backside of the fender.
After some 35 grit to take off the old paint and primer in the low areas I started skim coating the low areas with body filler. This went pretty well. I like to use about 3 thin coats of filler instead of one coat. I hand sanded all the filler with some 36 grit on a long board. My shoulders are going to be SORE tomorrow!
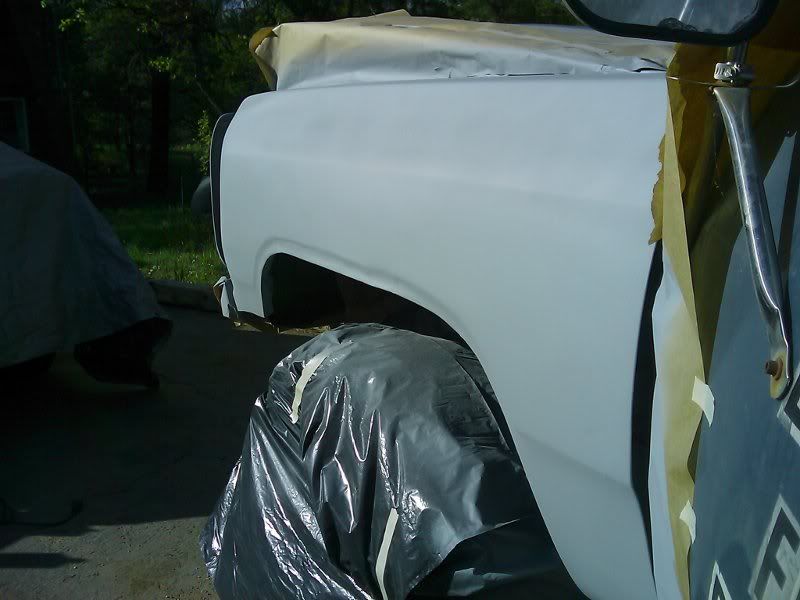
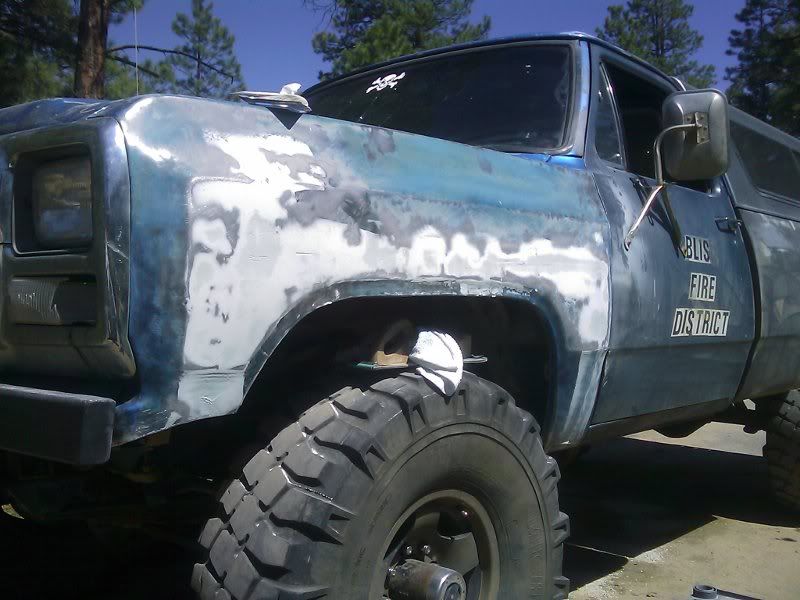
The fender is almost ready for primer! This is after 3-4 applications of body filler and sanding in between each one. I like using skim coats instead of heavy coats. The fender was leveled with 36 grit and then brought down with 80 grit. I will have a few touch ups to do with some glaze after the primer goes on, but this fender turned out pretty sweet. Unless you know what your looking at you can't tell it has been sectioned. From 3' away you really can't tell. Doing the fenders this way is a LOT of work for sure! I think it will be worth it in the end though. It will be one of my ultimate stealth modifications. I'm not going for a glass smooth show quality paint job, but it will be nice to have a 99% smooth truck that is all one color!
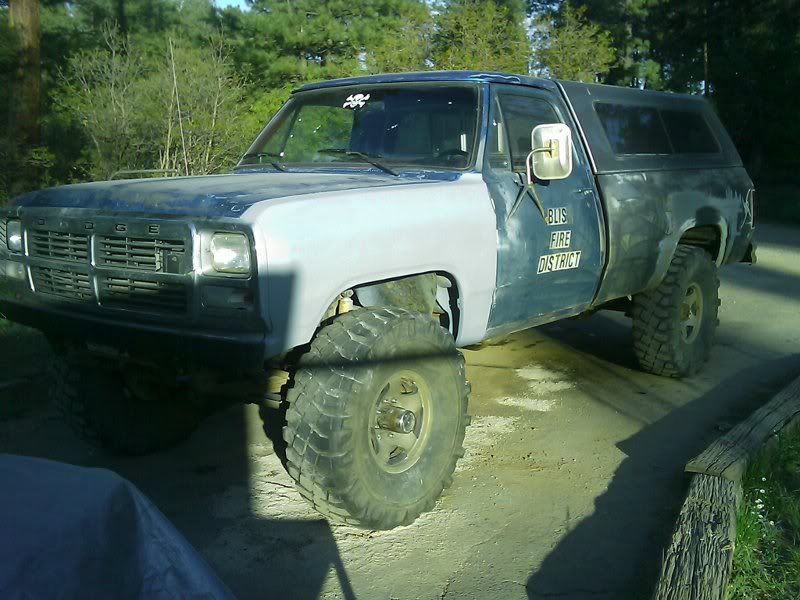
I really like that I can run anything up to a 40" tire with no lift")
I need to pick up some 120-150 grit for my sander tomorrow. I will then sand down the entire fender to get ready for primer. I need to spray about 3-5 coats on it and work my way up to some 320 grit. I'm sure I will have to glaze a few low spots before I spray the sealer coat.
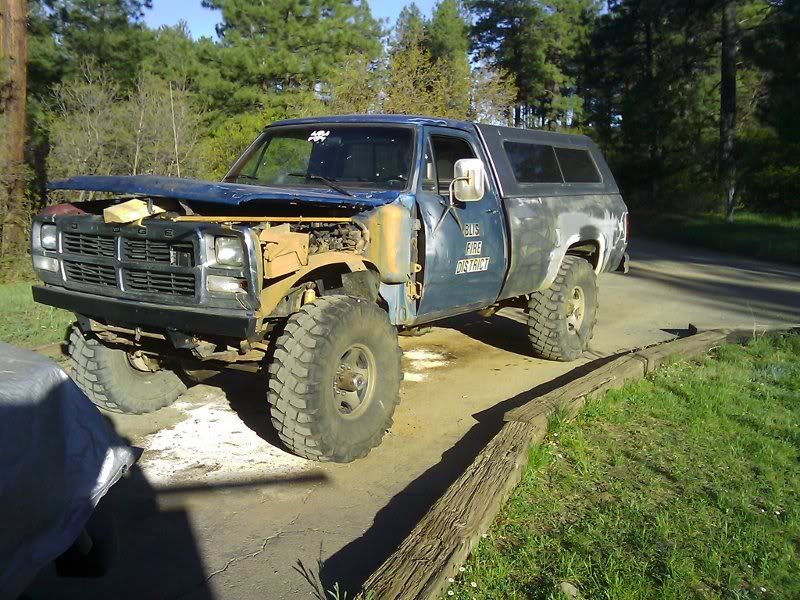
Next up on the list is the other front fender. It's not as bad as this one. I might be able to get away with leaving it on the truck. The hood should be pretty simple it just needs to be sanded down with some 320 for primer/sealer. Its the only straight panel on the truck! I also need to take off the cowl vent and have the sand blasted! there is no way I want to hand sand all those grill slats! That will take care of the front clip, then its onto the doors.....
Speaking of doors. I need some new mirrors. These 3-point things kinda suck. I think I am just going to have to bite the bullet and order up some 1992 factory style replacements. These doors don't have those holes though so I need to make a template, weld up the old holes, and make a mount for the factory style mirrors....
Step 1.5. Remove fender from the truck. This is hard when you don't have anyone to help hold the hood! I tried removing the dents from the fender on the truck, but it was about 10X easier with it off. I could also work in the shade on the back deck instead of in the sun!
I was able to get most of the dents pushed around enough that I felt comfortable using some filler on the low spots. I had a big dent hidden under some old filler on the body line. This took a decent amount of hammer and dolly work with some creative metal shrinking using a wire brush and a wet rag. It didn't come out perfect, but I was pretty happy. When using a hammer and dolly go slow and check your progress with a light coat of paint or blue spray die. I left a lot of cut/weld lines from the fender a touch low since the metal was all moved around from the welding. I think this will work better. I don't think the filler is more than 1/16-1/8" in the worst places. I thought that was pretty good for how many pieces this fender had been cut up into. This fender has two hand made sectioning panels and like 7 seams!
Here you can see the fender after the hammer and dolly session on the back deck. When I cut this fender I made a mistake in the lower front edge where I bobbed the fender. I didn't leave myself the material I needed to make a flange on the bottom. I had to do it the hard way instead. I cut a new flange out of some 22 gauge with the sheetmetal snips.
I then tack welded it on in a few spots. I needed a third hand to hold this in position! Once I got it tacked by pushing the edges together with a hammer, I sanded the edges down till they where flush. I then slowly welded up the inside and outside. I also used a copper backer to weld up a few holes in the fender that where left over from the modifications.
Here is the finished flange. Once I welded it up I carefully sanded it down with a flapper disc. I then primed the inside heavily along with all the seams after a stiff wire brushing. Hopefully this holds off the rust since I won't be painting the backside of the fender.
After some 35 grit to take off the old paint and primer in the low areas I started skim coating the low areas with body filler. This went pretty well. I like to use about 3 thin coats of filler instead of one coat. I hand sanded all the filler with some 36 grit on a long board. My shoulders are going to be SORE tomorrow!
The fender is almost ready for primer! This is after 3-4 applications of body filler and sanding in between each one. I like using skim coats instead of heavy coats. The fender was leveled with 36 grit and then brought down with 80 grit. I will have a few touch ups to do with some glaze after the primer goes on, but this fender turned out pretty sweet. Unless you know what your looking at you can't tell it has been sectioned. From 3' away you really can't tell. Doing the fenders this way is a LOT of work for sure! I think it will be worth it in the end though. It will be one of my ultimate stealth modifications. I'm not going for a glass smooth show quality paint job, but it will be nice to have a 99% smooth truck that is all one color!
I really like that I can run anything up to a 40" tire with no lift
I need to pick up some 120-150 grit for my sander tomorrow. I will then sand down the entire fender to get ready for primer. I need to spray about 3-5 coats on it and work my way up to some 320 grit. I'm sure I will have to glaze a few low spots before I spray the sealer coat.
Next up on the list is the other front fender. It's not as bad as this one. I might be able to get away with leaving it on the truck. The hood should be pretty simple it just needs to be sanded down with some 320 for primer/sealer. Its the only straight panel on the truck! I also need to take off the cowl vent and have the sand blasted! there is no way I want to hand sand all those grill slats! That will take care of the front clip, then its onto the doors.....
Speaking of doors. I need some new mirrors. These 3-point things kinda suck. I think I am just going to have to bite the bullet and order up some 1992 factory style replacements. These doors don't have those holes though so I need to make a template, weld up the old holes, and make a mount for the factory style mirrors....
Last edited: