I re-finished the steering up this weekend. I ended up using the entire re-built box. After I swapped the top cap to get it home I found that it leaked a lot. If your swapping the top cap you pretty much have to have the box off the truck in order to get the o-ring under it into position.....
I was expecting the box swap to take me most of the weekend by myself at home. Surprisingly it only took me about 2-3 hours. Here are a few notes....
-If you going to do a crossover conversion just buy a pitman arm puller! I was expecting the shop where I work to have one...they didn't. I ended up cracking the top cap on my existing box getting the pitman arm off.
-The existing 4wd pressure hose will work with the 2wd box position. No need for the added cost of a new line if yours is in good condition.
-Watch the return line. Mine was frozen at the fitting to the box. The line turned with the fitting and crushed the line. I was able to make a replacement fitting at work.
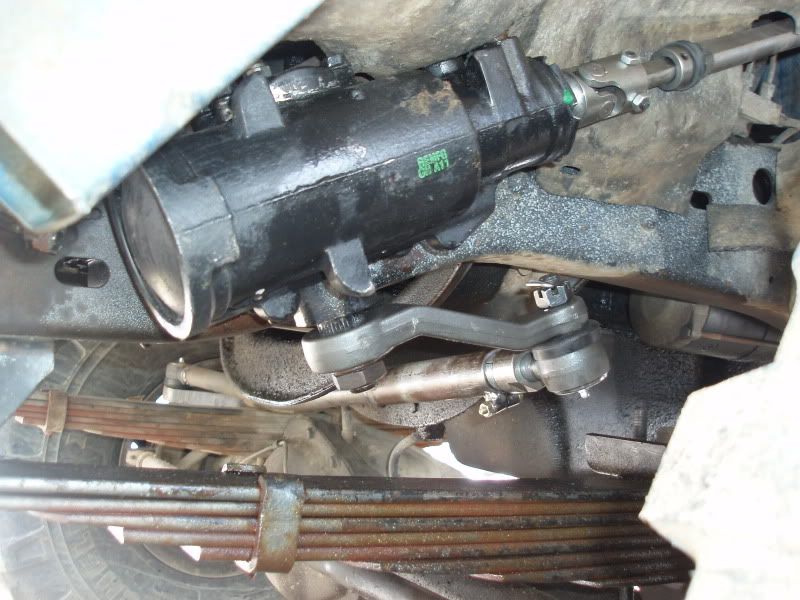
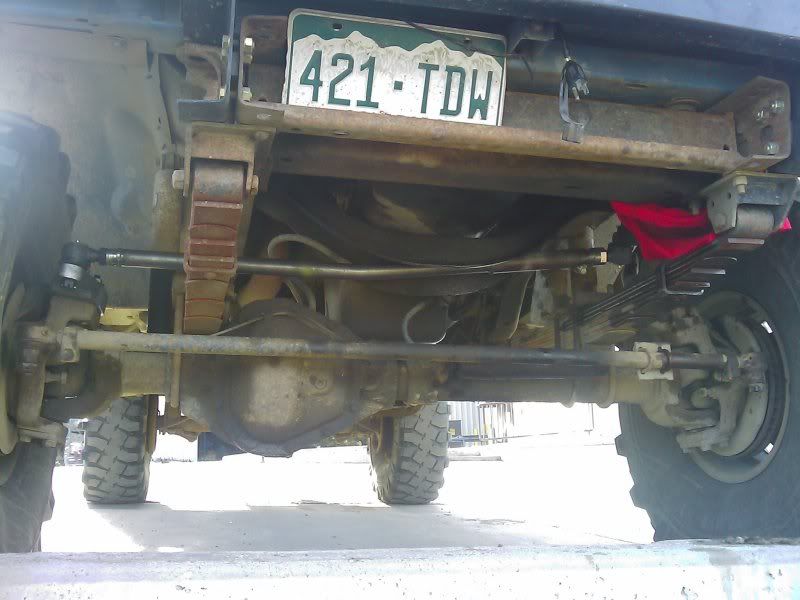
-The WJ pitman arm is just about the perfect length and drop for a system with little to no lift. I have about 3" of up travel before the arm hits. That is pretty good for these old dodge trucks. The arm is also long enough that I didn't have to cut or trim the engine cross member at all. The longer arm provides a bit more 'throw' than stock. This makes it possible to hit the steering stops turning both left and right no problem. The WJ pitman arm is also only like $25 delivered but you have to remove the 'keys' in the splines AND make the taper deeper for the TRE.
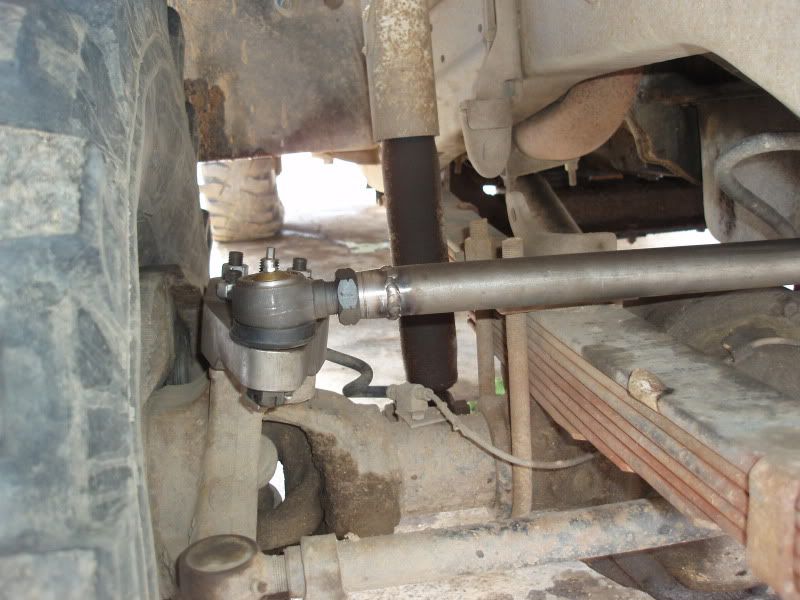
-The custom steering arm I made turned out just right I guess. The 1.5" height is JUST enough to clear my taller spring packs. I didn't need to cut the position for the TRE as I thought. The drag link slopes down under the cross member. All my dimensions for the steering arm worked REALLY well. The arm just dropped on the knuckle no problem. The shorter 6" length of the arm helped reduce the steering ratio a little and provided for full lock to lock steering with the WJ pitman arm. I probably went from 4 turns lock to lock down to 3.5 turns lock to lock. Even with the big tires I still have about 1-1.5" till the tires hit the springs. I have enough throw in the steering system that I will be able to have even tighter turning. I need to look at the axle shaft ears to see how close I am to binding them. The spring less adjustment also worked well.
-The drag link is super beefy out of 1.25" solid material. I did have to put one small bend in it to get enough up travel on the passenger side. The arm did just BARELY clear straight! Talk about close though! The adjuster on the arm worked sweet. It allows you to very easily center the steering wheel with the bent drag link.
The new steering, now that it is functioning well, completely changed how this truck drives. You can now drive the truck in a completely relaxed way with one hand on the wheel. The steering is responsive without being overly twitchy. There is VERY little free play in the wheel. I had to re-adjust the steering box top cap when I re-installed it....I think I got it very close to how it is suppose to be. The wheel is tight without being sticky off center.
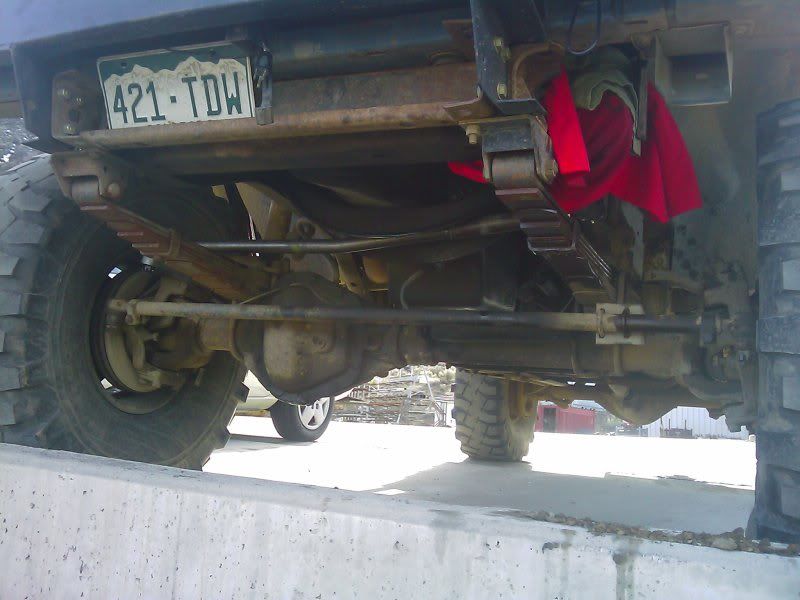
The truck turns TIGHT left and right equally. The steering goes all the way to the stop. There seems to be plenty of force available to turn the big tires.
The steering was previously unable to turn all the way right because of the slight front lift of the leveling springs. The tire also hit the stock pitman arm turning right when close to full travel. Now, with the box in the 2WD position on the frame everything clears no problem. Being able to turn both ways TIGHT makes all the difference for parking and maneuvering the truck around downtown.
With all the problems that I had with the stock steering box bracket ripping off the frame, bad alignment, and crappy steering feel of the stock system this is the probably the number one modification to the 1st gen dodge platform I would recommend! Sadly, I had to do a LOT of measuring and made a decent amount of custom parts to get the crossover steering system to fit with the limited lift and thicker leaf pack. I don't know if the parts to exactly duplicate this system are available in the aftermarket? Here is a list of what you need....
-WJ pitman arm. removed alignment keys, deeper taper for TRE.
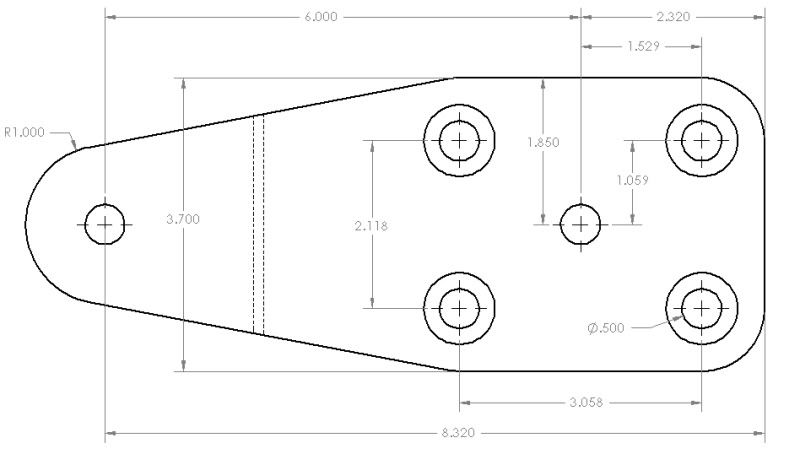
-1.5" tall pitman arm. 6" center to center
-4- 1/2-20 3.5" studs with 60 degree tapered nuts
-slightly bent drag link, 1.25" dia, with adjuster on one end.
-2 GM Tie rod ends. I used LH thread on both ends with the adjuster.
Its tight, but this fit with a THICK spring pack that gives only about 1-2" of lift with about 3" of uptravel available.
I'll see if I can get some pictures when the weather clears up...it snowed a little last night! Stupid high mountain spring!
")