Project Victory_Overland 08 LR3 Build Thread!

pgoodrich

Observer
Project Victory_Overland 08 LR3. Mods and Repairs after crash!

I'm getting ready to pull my OEM rear bumper and start the trailer wiring from Atlantic British and install the Tactical Rovers rear bumper. Is there anything that anyone suggests I do while I am back there messing around with all the stuff removed?

Thanks in advance!

I would re route your rear heater lines if you have the 7 seater LR3 for more tire clearance. I should have done that when installing the TR bumper. And good choice going with TR.
 
I would re route your rear heater lines if you have the 7 seater LR3 for more tire clearance. I should have done that when installing the TR bumper. And good choice going with TR.

Do you happen to have a write up on re-routing the lines? Or a link to a how-to on suggestions of re-routing? If that is a good thing to do, I will surely do it.

Thanks for the advice.
 
Update on my Melvill and Moon seat covers.

My buddy successfully picked up my seat covers yesterday from M&M in Johannesburg, SA. He hand carried them to Japan where he works and is mailing them to me this week. Shipping from Japan to Hawaii is almost as cheap as mainland US to Hawaii and much much cheaper than from SA.

Expect a full initial review in about a week on the seat covers.

Also quoted email from Nicole at M&M below in reference to center console covers with the kits. Score, all come with them.

"Dear Eric,

Thanks for your mail! I have just come back from leave so my apologies for the delayed response. Your seat covers have come with a centre console cover included, we manufacture all of our Discovery orders with this in place.

All the best to you!

Regards,
Nicole

Melvill & Moon Classic Canvas CC
 
Tactical Rover Rear Bumper Install, Trailer Wiring and 3/4" Wheel Spacers

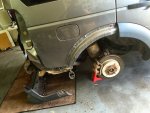
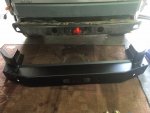
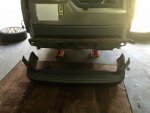
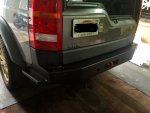
I finished up the bumper installs this weekend. My Tactical Rover rear was ordered with side steps and I had Eric drill and install the dual rear carrier attach points. I have not ordered the spare carrier or jerry can carrier just yet as I might have some custom ideas in mind. Also, I did not reinstall the back up sensors. They will be useless when I put the tire carrier on, so I went simple, capped off the chassis harness connector and weatherproofed it inside the left tail light area. I can go back to stock if needed but do not ever predict that crisis occurring. While I was in there, I realized the right rear wheel well splash guard is super easy to remove, therefore I held off on the trimming and heater hose relocation until I get the future tire size nailed down. I am not going into too much detail on the TR Rear bumper install because it is super easy. I highly suggest a buddy, even if you have a flat motorcycle jack like I do. Again, the hardest part is removing the OEM rear fender flares, rear bumper and the attaching clip brackets that hold the plastic bumper in place. It's not required to remove the rear wheels for installation but I took advantage of the extra space since I was installing wheel spacers anyway.
IMG_9104 2.jpg
IMG_9105.jpg
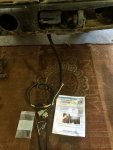
My next step was to install the Atlantic British trailer harness. Follow the instructions, it's super easy and with the bumper off it only took me about 20 min. I would expect more time and routing is not too easy with the bumper on. I am happy I left this project on the shelf knowing the bumper install was taking place in the near future.
http://www.roverparts.com/Parts/YWJ500220ABP
IMG_9106.jpg
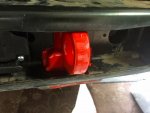
A little cleaning up in there, painted the recovery point red like the front and then laid out the rear Tactical Rover bumper for install. I used my motorcycle jack just like when I installed the front bumper in order roll it around easily and for final alignment. Again, I highly suggest a buddy to help; even though I was able to do it by myself its quite heavy and a bit of a balancing act!
IMG_9109.jpg
IMG_9110.jpg
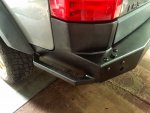
There are two large mounting bolts that hold the majority of the weight/load of the rear bumper to the chassis. There are an additional two smaller bolts that support the corner of the bumper and mount to the rear quarter panels. Four total bolts, no trimming, cutting, drilling or welding required on metal components of the rig or bumper. Minor trimming is required on the trailing corners of the rear fender flares to clear the steps on the TR bumper.
IMG_9136.jpg
IMG_9113 2.jpg
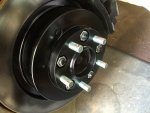
I then installed the front and rear wheel spacers. They are 3/4" spacers and the link is earlier on in the build thread. Install is pretty cut and dry, I cleaned up the rotors and calipers, quick paint job, applied anti-seize to the hub lugs and the spacer lugs. The spacers are anodized and come with lug nuts. Torqued all to spec. The picture is taken at OEM normal height and you can see it pushes the wheel out to near flush to the fender flares.
IMG_9108.jpg
IMG_9114 2.jpg
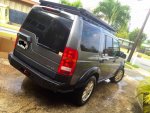
Here is the final bumper and 3/4" wheel spacer install!
IMG_9138.jpg
 
Last edited:
Looks good! So does the TR rear bumper cover the factory tow hitch slot?

TR rear is designed to completely expose the OEM hitch and recovery point. It's kind of like removing the rear cover on the OEM bumper. Look at unseenone's hitch design and you will see how his design fits so very nicely on the TR bumper.

The new hitch is on the budget list now that I am wired for trailer lighting. Then I can get rid of the OEM plow hitch!
 
Beach Body Posing!

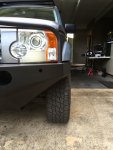
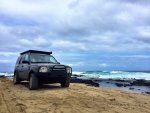
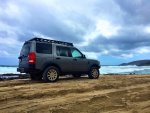
Took a run to the other side of the island today and hit Costco. Naturally, Victory needed to show off her beach body so we took some modeling shots with her new kit!
IMG_9141.jpg
IMG_9140.jpg
 
Melvill and Moons are here!

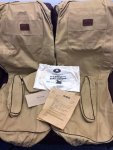
My Melvill and Moon sand/tan front covers showed up today. Thanks to my South African buddy Rob who picked them up, carried them to Japan and mailed them to me in Hawaii to save on almost $100 in shipping.

First reviews on packaging and opening.................TOP OF THE LINE! Once I get the seats cleaned and conditioned, I will post up an install and initial review.

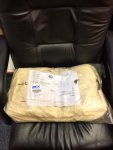
Plastic wrapped in the box in a canvas carrying bag.
IMG_9191.JPG
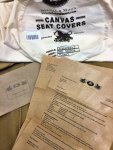
Absolutely awesome and professional packaging. Canvas carrying case, envelope and wax coated paper with install and care instructions and thank you letter.
IMG_9195.JPG
It does fell a bit romantic, doesn't it?
"The Romance of an Age gone by"- Melvill and Moon
IMG_9193.JPG
Here's the total package. 2 x seat covers, 2 x armrest covers and 1 x center console cover.
IMG_9196.JPG
 

MrWesson

Adventurer
Those are great looking covers but leather is remarkably tough and can be refinished in an afternoon.. I see lots of LR3 owners do this and just wanted to hear you guy's thoughts on the topic(without taking over this great build thread).
 

Forum statistics

Threads
188,345
Messages
2,905,905
Members
229,959
Latest member
bdpkauai
Top