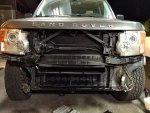
Tactical Rovers front bumper install
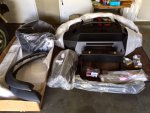
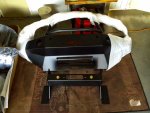
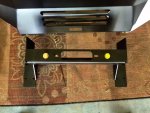
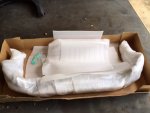
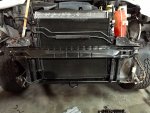
I finally got around to installing the Tactical Rover front bumper tonight. Keep in mind, my front bumper was already completely removed from the crash so that portion of removing OEM parts is probably the hardest part of the entire job. Also, the winch plate is pretty heavy, almost as heavy as the bumper itself due to thickness. I planned to weigh them but honestly forgot.
I put the Youtube link below if anyone wants to see the process recommended by Eric at TR. I will say I followed it about 95% of the way but did a few of my own things to ease my process since I was performing this project solo. The fit is damn near perfect with some minor tapping of adjustments for left and right to my liking.
Tactical Rover Install Video if you chose to watch. If you are installing, a must watch before you start, then come up with your own plan if needed to refine the process like I did.
https://youtu.be/0o_lwhNRInY
Major differences from video to my installation procedure:
1) I measured and found centerline on all components before I even started. I marked the Rover in two places, the winch plate in two places and the bumper in two places that I found would make it easy to have complete alignment once everything was snugged down and prior to final torque. The main purpose was fit the winch plate to the truck, install the bumper and aligned the bumper to the winch plate and then make the final nudge needed to get the winch plate in the exact spot to center on the vehicle. Since I was working alone, the jack and rubber hammer to tap into place were paramount and the above procedure minimized the amount of time taking the bumper on and off for minor alignments. Sorry I'm a perfectionist in this area.....maybe my OCD of sorts for kit! lol To be clear, there is very minimal movement for adjustment as Eric and the team jigged this thing up nicely. It does have some lateral movement for adjustment but vertical and leveling its pretty much spot on which tells me there is no concern for undue stress on hardware for winching or jacking.
2) I used a motorcycle jack to install the bumper and support it when i was moving the main bumper around. Makes the job easy for minor adjustments and supports the entire assembly. I kept the winch mount snug so I could jack or tap with the dead blow in the areas I needed for adjustment to install bolts and level the bumper. With the two front main bolts installed and fairly tight, the entire assembly will move to make small leveling and lateral adjustments of the entire assembly but keep the winch mount and bumper aligned. Once you have it all exactly where you want it, remove the two main bolts holding the bumper to the winch plate and then final torque the winch plate to the Rover. The bumper will now reinstall 100% level and centered if that is where you put it in the first place. Measure three times, install once......like a champ.
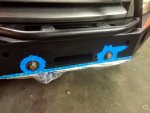
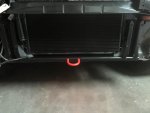
Winch plate installed. Installed the top bolts first, found centerline and snugged to allow it to move a bit if needed. Installed the lower bolts loosely for now.
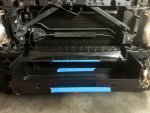
Placed the bumper on the winch plate and aligned to the best I could at this point. Some minor fender trimming is required to allow the bumper to slide all the way into position.
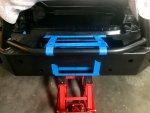
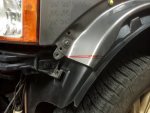
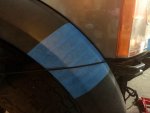
Marked the fenders and fender flares for trimming. Used my cutoff wheel for both. Ensure you do NOT cut off the tab for the OEM flare you see under the cut line of the fender otherwise returning to stock is going to be a problem. Filed, primed and painted. I cut my fender flares level to the bottom of the lights as I plan to install some weather stripping to fill the gaps. You can cut as high or low as you wish, I preferred the line to be high vice low. I marked them with a flat edge on the bumper to the lights. Then used 550 parachute cord to run the line and ensure it was level before I cut. Measure three times, cut once! I will trim a bit more on both once my weather stripping choice is made.
Installed the fender flares and slid the bumper all the way into full mounting position. Verified alignment with the two main large mounting bolts torqued down. I tapped as needed and jacked a bit. There are two bolts on the bottom near the recovery point and removable bash plate. Ensure these fit before you remove the bumper to conduct final torque of the winch plate. Once you confirm alignment, remove the bumper for the final time. Torque the winch plate to spec. Install the bumper on the winch plate, torque the two main mounting bolts and then the bottom two bolts.
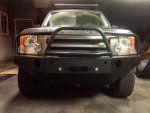
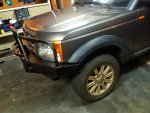
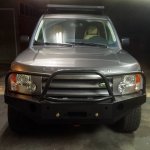
After I was done, I went around and sealed all of the hardware with gasket sealant and painted it black to match the powder coat. The main goal is to hopefully help with some corrosion protection. In the coming days, my plan is to replace all supplied Grade 8 hardware with Stainless Steel Grade 8 hardware once I get to town and visit Fastenal.
