You are using an out of date browser. It may not display this or other websites correctly.
You should upgrade or use an alternative browser.
You should upgrade or use an alternative browser.
Rambo - GMC Ambo Conversion (Roof Raise)
- Thread starter TheRealPapaK
- Start date
TheRealPapaK
Active member
That’s coming up!Sorry. I must have missed it. When are you painting it like the A team van again?
It was a beautiful day so I got the water system all tested out. Only one minor leak due to an o ring that fell out that I missed.
It’s not painted yet but I built a little section to block the winch cables and hide some stuff so I could create a little nightstand type nook
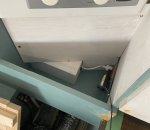
I also got my water tank heater vent grill on. It looks a little filthy after I ground the pipe flush
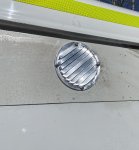
I needed to have some sort of visual progress since I’ve been doing invisible things for weeks so I decided to nail up this backsplash. I went with metal tile because it’s fireproof, light, sharp looking, and doesn’t mind being shaken to bits while driving down washboard. I still need to trim it up and caulk but I think it looks pretty ok

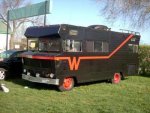
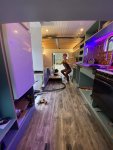
And since I backed Rambo out of the driveway when I tested the water system I thought I would snap a picture since it’s been so long. I think she’s pretty handsome. I’m looking forward to matching the paint on the roof raise and fixing up the decals a bit

TheRealPapaK
Active member
I can’t believe it’s been over a month since I posted. Lots of little things getting finished but mostly yard clean up and spring chores.
I got the cabinet covering the hot water tank install. This panel can screw off if you ever need in there but mostly it’s alway sealed. I decided to wall paper right over it and if I ever need in there, I can cut the seam and trim it when I’m finished doing the work.
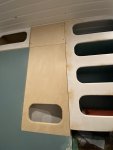
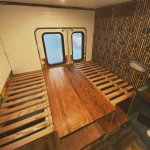
The wall paper is in and sealed and the majority of the work on the dinette benches is finished. The table legs need to be be figured out but I have a rough idea so that it can come up and down easily for such a large table. The table drops down to make a second Queen sized bed if we want bunk beds.

I finally got all the exterior lights wired to the over head panel in the front

I got the cabinet covering the hot water tank install. This panel can screw off if you ever need in there but mostly it’s alway sealed. I decided to wall paper right over it and if I ever need in there, I can cut the seam and trim it when I’m finished doing the work.

The wall paper is in and sealed and the majority of the work on the dinette benches is finished. The table legs need to be be figured out but I have a rough idea so that it can come up and down easily for such a large table. The table drops down to make a second Queen sized bed if we want bunk beds.


I finally got all the exterior lights wired to the over head panel in the front

TheRealPapaK
Active member
TheRealPapaK
Active member
Our girlfriendsIs that seat for a kid or a dog?
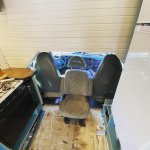
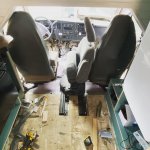
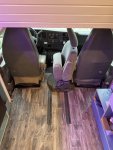
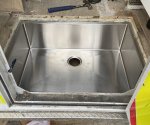
Ok so this is why my build won’t end. I decided since the third chair was in I could do the flooring. I thought long and hard if I was happy with every thing or if I wanted to make a last minute change...


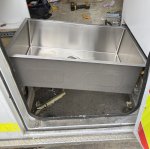
A little tight yet but I’ll get it to fit. I’m going to cut the “front “ off and leave a 1.5” lip for structure. I’m going to build a cedar rack so the floor is flush with the top of the lip. I now have a step that doubles as a permanent shower pan. I also have a place for people over 6’4” to stand up straight
PlethoraOfGuns
Adventurer
Not quite as ambitious as a roof raise, but dang it, I tip my hat sir!
TheRealPapaK
Active member
Ok I got a little bit more done after dinner. If my floor structure was 2” closer together I wouldn’t need to do much to make this fit. But that being said, I need to weld 1”x2” channel all round so the lip has something to rest on. I also needed to make it lower than my existing floor for that 1.5” structural “lip” which I don’t mind. I’ll have a big piece of aluminum angle trim to close it all in. That way if I ever need to pull up my floor for any reason, the sink doesn’t have to move.
Hopefully I get it all welded up on Friday
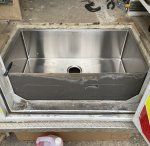
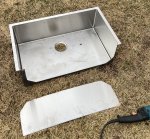
Hopefully I get it all welded up on Friday


TheRealPapaK
Active member
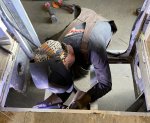
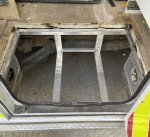
Well I had to weld a lip onto the existing supports for the sink to sit on as well as add some supports to take the bulk of the weight when someone big is jumping in and out of the van. I then put some spacers between the aluminum and stainless to stop galvanic corrosion and bonded it in it place with PL9000 which is good down to -40 which is where my climate can often be in winter. The PL9000 sets up in 15 minutes and both my tubes exploded out the side of the cardboard while applying it. This made a complete mess while I tried to get the product in place, the sink aligned, and the PL cleaned up before it set. Needless to say, I didn’t end up getting any pictures of the bonding.
If anyone in the future is reading this and contemplating doing this my lessonlearned is thus:
While the stainless sink looks very pretty, it needs to by hacked and made to fit in your space. By the time I bought the sink and finagled it to fit in my space, I still don’t have a perfect fit. It could have been 2” deeper so that it brought it right up so my existing floor. Now I need to get creative to finish that out nicely.
What I would do differently is just have a custom aluminum pan welded directly where I wanted it. I would have to worrry about galvanic corrosion and could have welded all the sheets right to the frame at the right height. I would have made the back of the pan a steeper angle towards a drainhole so unless I was parked at a crazy angle it would always flow to theback. Then I would make a cedar landing to level the bottom of that makes sense. I think in the end the cost wouldn’t be much different if you had a decent fabricator that was working on the weekend for some side cash.
Overall though I’m really happy I did this. It looks sharp even before it’s finished and will be a great spot to kick of muddy shoes and sweep dirt into that can just be rinsed down the drains.I have large spot where someone who is 7’ tall can stand and best of all, it is a shower that doesn’t take up any real space in the vehicle as I needed a step anyway.
My plan to finish it off is to put wood trim on top of the lip of the sink that the flooring will butt up flush to.
If the hive mind has any recommendations for water proofing the subfloor I’m interested to hear what you have to say.


PlethoraOfGuns
Adventurer
Very nice! You could trim those floor corners out with some aluminum angle iron. I'm trimming all the corners in my build like that.
TheRealPapaK
Active member
That was my first plan but I think I want to to try to come up with something I can just sweep dirt into and rinse down the drain lol. The lip of the angle might catch stuff. Realistically, that’s probably what it will end up beingVery nice! You could trim those floor corners out with some aluminum angle iron. I'm trimming all the corners in my build like that.
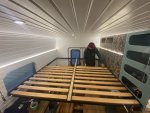
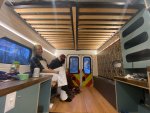
Well a big milestone today as the stowable bed was permanently installed. I need to install some install some metal “tracks” that the bed will be slightly wedged between so it didn’t bang around when raising and lowering it. I also need to attach the mattress fabric better. The flooring should go in this week which will be another big visual milestone
TheRealPapaK
Active member
TheRealPapaK
Active member
Well I got a big push for a couple days and took Rambo out for a night. Not done yet but close enough for a night! The biggest issue is that my hot water tank froze and I have water pouring out everywhere. I had drained it but I was parked on an angle so I’m guessing some water was caught. Pretty big bummer.
Either way I got the folding bench completed, the new table top made, the flush trim for around the shower/step, and it mostly got my drop down bed centering rails setup (I’ll make a post on that later)
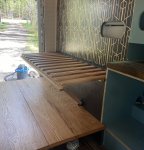
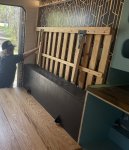

The flush shower/step trim is awesome. I really love being able to quickly sweep down into that area with no dust pan etc needed and no lip to catch dirt
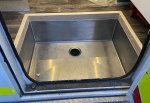

Either way I got the folding bench completed, the new table top made, the flush trim for around the shower/step, and it mostly got my drop down bed centering rails setup (I’ll make a post on that later)


The flush shower/step trim is awesome. I really love being able to quickly sweep down into that area with no dust pan etc needed and no lip to catch dirt


Similar threads
- Replies
- 48
- Views
- 10K
- Replies
- 11
- Views
- 3K
- Replies
- 3
- Views
- 935

