Rango.....1942 Willys MB

Metcalf

Expedition Leader
A little more last night.....


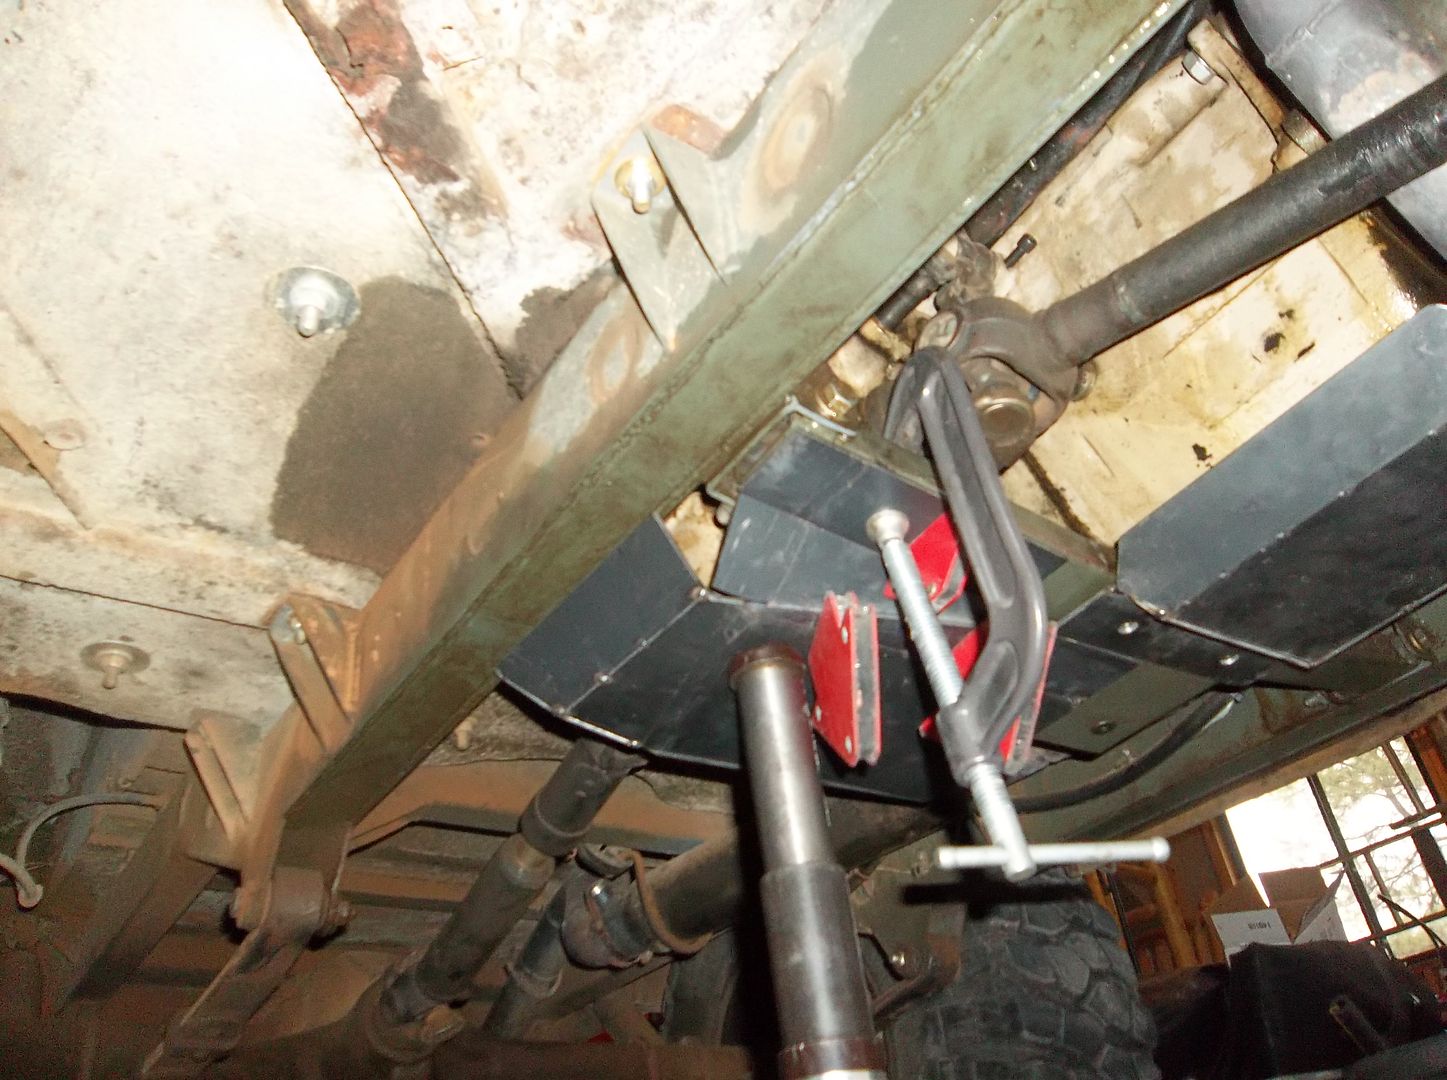
This is the start of the skidplate/bucket to cover up the sheetmetal pan on the transfer case. It ended up being kinda like a modern art project towards the end. I wanted it to mate to existing surfaces instead of having to make new brackets for all the mounting points. That takes a bit more time and a bit more parts.......and clamps....and magnets....

I ran out of material last night but found some more this morning in the short cut rack at work. It shouldn't take me too long to finish up the fab. The welding and cleanup on the other hand will take a little longer!

More progress tonight.

To the people watching that aren't saying anything.....that is pretty boring...
Anyways.....


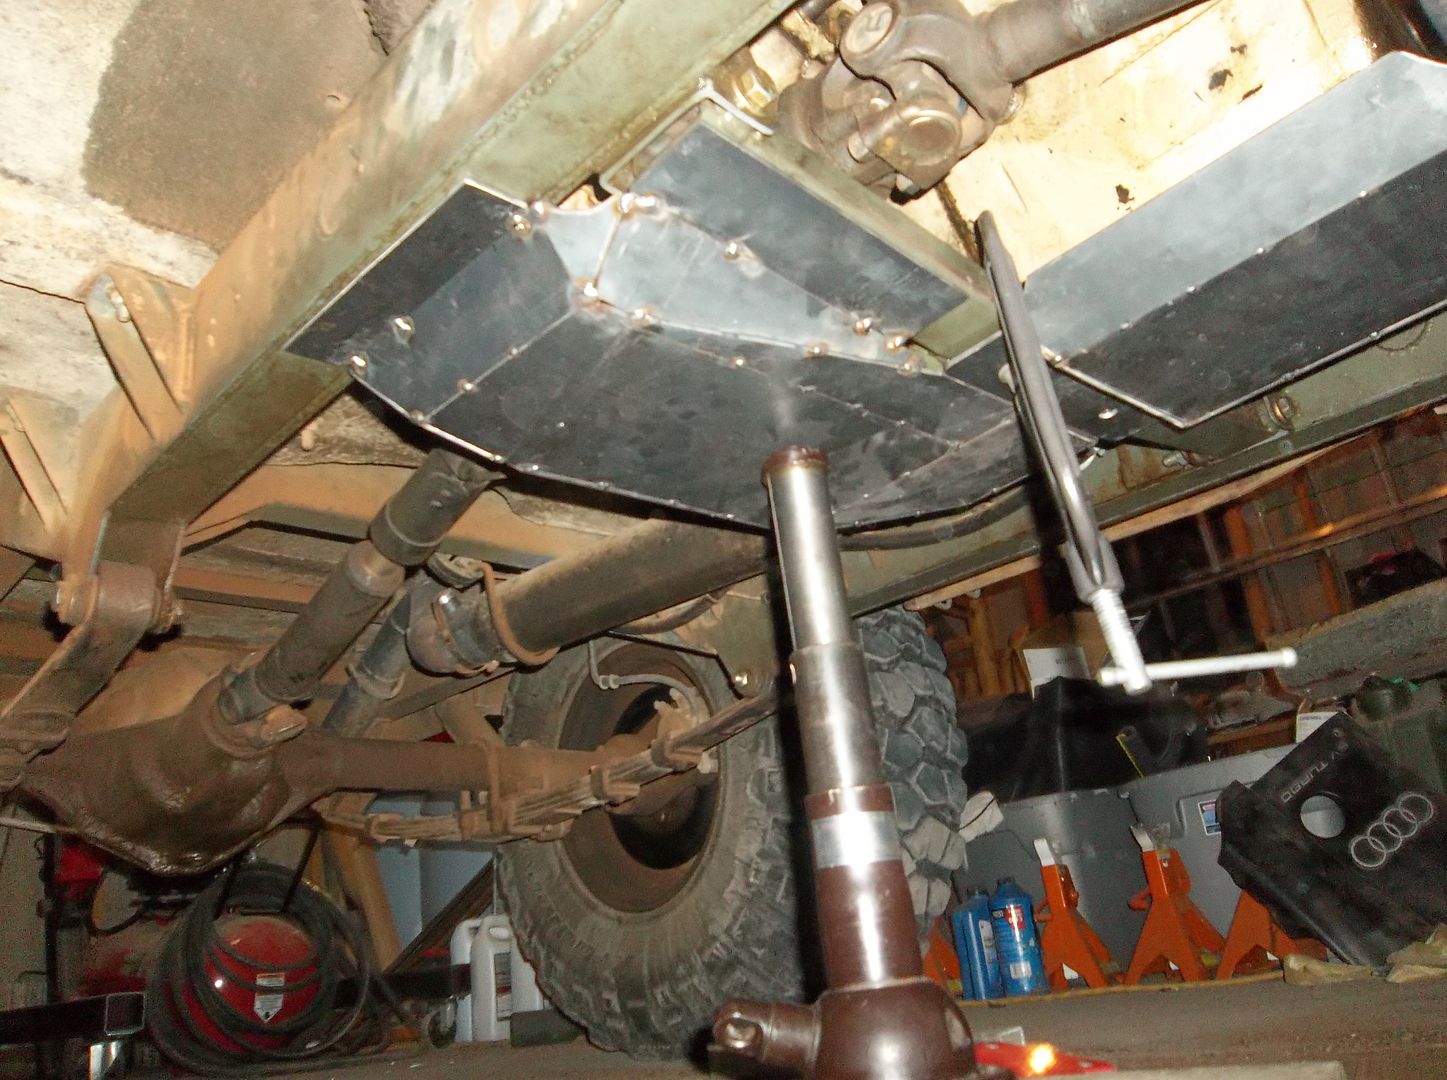
The design and fab work is pretty much done on the transfer case skidplate. I need to drill the mounting holes in the mounting tabs, final weld, finish sand, prime, and paint. Most of that stuff is pretty mindless.....

For mounting points I am going to have six 3/8-16 screws, probably some buttom head allen style units. There will be 2 in the outer frame mounting tab. I think those will have to be riv-nuts since I don't really want to drill a huge hole and weld in the bottom of the main frame rail upside down. The other 4 mounting points will be in the transfer case crossmember. I will mark those and pull it for the work. I also have to tap the two holes for the rear mounting tab on the engine oil mounting skidplate.

All in all I am pretty happy how things turned out. I wanted some more protection on the sheet metal pans without going overkill. I haven't really hit the belly much in the last two years of 'wheeling so I didn't want to weigh the chassis down with a ton of extra steel. The total skidplate package is maybe 25lbs. For protection from the engine oil pan to the transfer case pan I don't think that is too bad at all.

Hopefully this weekend I can do all the finish work and move onto the rocker guards.....
 

skibum315

Explorer
The way you're building that skidplate reminds me of how I sketch out some of the brackets we need in CAD here at work (at least the ones that have to put stuff at funky angles/orientations) ... put the component where it needs to be in relative space, then go to town with simple plates/planes until there's something that passes the sniff test.

Good stuff.
 

jscusmcvet

Explorer
I have always been a fan of skid plating the underside. In your case, even though you have not hit the oil pan and tcase, since you are about to head out on the UA, makes sense to do it. On my last TJ I was skid plated underneath from front to rear for the most part. On 33's easily followed fellow Jeeps on 37's cause I knew I could drag across rocks etc... with no worries.

Your mods are looking great and are well thought out as usual. Congrats on your magazine spread also.

John
 

shmabs

Explorer
Congrats on UA, that will be the trip of a lifetime for sure! Your skids looks awesome, I'm glad to see someone else favoring a lighter material with more bracing/bends. It looks like you have the ability to dimple die, any thoughts on doing that to the skids?

Mike
 

Metcalf

Expedition Leader
Congrats on UA, that will be the trip of a lifetime for sure! Your skids looks awesome, I'm glad to see someone else favoring a lighter material with more bracing/bends. It looks like you have the ability to dimple die, any thoughts on doing that to the skids?

Mike

Thanks! It should be a blast.

I have one dimple die that I made. I thought about doing the skids, but I wondered about getting sticks and stuff up in the holes. Plus, now it won't have as many leaks.....at least till the skidplates fill up!

I have always been a fan of skid plating the underside. In your case, even though you have not hit the oil pan and tcase, since you are about to head out on the UA, makes sense to do it. On my last TJ I was skid plated underneath from front to rear for the most part. On 33's easily followed fellow Jeeps on 37's cause I knew I could drag across rocks etc... with no worries.

Your mods are looking great and are well thought out as usual. Congrats on your magazine spread also.

John

Thank you.

The skidplates have been on the list for a bit. The UA trips just moved a few things up on the list a little faster!

Looking good. I like that you are making it functional and minimal at the same time.

Jack

That is my basic style I guess. Get by with less...
 

Metcalf

Expedition Leader
A bit more.....


The skidplates are all welded, cleaned up, primed, and painted. That was a lot more work than I anticipated. I wish I would have had a TIG welder to eliminate a bit of cleanup on the welds.


Onto the next project....rockers. This is going to be fun.
 

Metcalf

Expedition Leader
Small update tonight. I did more head scratching, measuring, and planning than anything.

I did finish up the engine motor mount crossmember that holds up the front of the engine oil pan skidplate. I needed to add the mounting points basically. Here is what I came up with.....


Drill one side about 1/64th over your mounting hardware size. I am using 3/8-16 hardware so I did a 25/64th hole. The opposite side of the 1" box tube I drilled out to 5/8" which just happened to be a tight fit for the maximum diameter of a 3/8-16 coupling nut. Use a hammer to tap in the coupling nut, it was JUST long enough to go almost flush with the opposite side of the tubing.


Stick a short bolt with a few washers to suck everything up on the working side....


After you weld the seam, grind it down, and hit it with a chamfer bit it looks like this.

All in all I am very happy how this turned out as a way to add threads into some square or rectangular tubing. The threads are nice and long so they won't get pulled out or messed up that easy. You can run a tap all the way through or clean the threads out pretty easy. A tig welder would be really easy with minimal cleanup time. If I ever strip one out you just have to hit the top with a 5/8" drill bit and it will cut the weld and you an replace the nut.

Once that was done I cleaned up the unit and stuck it on a stick for priming and painting. I need to go the same thing for 2 mounting points on the transmission crossmember....tap 2 holes....and do something else for two holes. I also need to add riv-nuts in the bottom of the frame for two holes....

The rest of the night was measuring. I need to upgrade my onboard air system for the new locker. I have been looking at the ARB twin compressor...


This is my high tech mockup model.....


It will actually fit under the front of the passenger seat! I think I will remote mount the air filters for it somewhere behind the seats. I can see having water on the floor someday since the vehicle is so low. Its only about 37" to the bottom of the dash....
 

locrwln

Expedition Leader
Very nice. I too am looking at the ARB twin compressor. I like your "mock up." I was able to borrow a friend's compressor that he hasn't mounted yet to figure out where to mount it.

Jack
 

Metcalf

Expedition Leader
I got a few more things buttoned up tonight.....


I pulled the transfer case crossmember out to mod it with the mounting holes it needed for the skidplates. I was able to tap the two holes for the engine skidplate where the material was double thick. The center holes for transfer case skidplate I was able to weld a nut to the back side of the plate. On the side mounting holes I did the coupling nut on one and a riv-nut on the other that was too close to the transfer case torque mount to do anything different. Then I put it all back together again. Somehow that took me almost 3 hours...

Using the riv-nut reminded me how much I hate those things. I need to figure out something different for the holes on the bottom of the frame. Anyone have any ideas?
 

Metcalf

Expedition Leader
A little more! Both skidplates are bolted in....


I ended up going back and revisiting the install of the rivnuts I bought. I did a little google-****-ing and came up with this for an install tool.

B

The nut needs to be modified.....


Basically you need to drill/bore the threads out to make it smooth in the middle. The other key part is the star style lock nut. This is what I was missing before when I was trying to make a tool. The star washer keeps the rivnut from twisting and spinning when your trying to put it down tight.

You basically end up holding the bored out nut with an end wrench to keep the nut and rivnut from spinning. Then you take a socket or end wrench and TIGHTEN ( turn clockwise ) the main bolt. This collapses the rivnut from the bottom up into place.

After a test part with the new tool I decided to use them on the bottom of the frame like I originally intended.

It all worked out really well. I had to drill out a few of the mounting holes another 1/32nd of an inch to make up for some pulling during welding and the transfer of the mounting holes. All in all I was pretty happy with that for so much welding on the complex shape.

Tomorrow I start on the rockers!
 

Metcalf

Expedition Leader
Today was a nice long day in the shop. The misses is out of town for a wedding so I basically spent a LOT of time in my man cave....


A few days ago I cut up some 1x3, 1/8" wall rectangular tubing to form this 'J' shape. The tall leg is 2.75" tall. The short leg is 1" tall. This was a complete pain in the rear! I cut it all out with a cut off wheel in a grinder, that kinda sucked. I really need to buy a plasma cutter!


This J-shape forms the main part of a rocker guard like this. I used 4" bolt spacing from the corner with a 2" start. This worked out well to clear everything on the inside of the body.


On the short leg of the J-shape rocker I added a mounting flange to the bottom of the floor. This was made out of some 1x1, 1/8" angle iron. This spreads the loads out from the lower part of the rocker back into the floor pan.


On the inside I used a piece of 2x2, 1/8" angle to bridge the upper leg vertical mounting holes to the bottom mounting flange. This ties everything together top to bottom.


I recreated the factory step profile out of 1/8" material to make it a little more durable. This should make everything look mostly stock from a distance.

The new rocker system only costs me about 1/8-1/4" under the factory body line. I think it will be pretty strong without going into complete overkill territory. I could lighten up the inner brace with some holes if I want to ditch a pound. I didn't really feel like sitting on the drill press for an hour today.


With the passenger side complete I hung it up for priming and painting. I will be using some nice stainless 5/16 machine screw hardware during the final install along with some nice flanged all metal lock nuts.

It was a long day. I hope that I can get the drivers side done tomorrow. It will be a little more complicated with the cutout for the axe and the mounting hardware for everything on that side.

More tomorrow.....
 

Metcalf

Expedition Leader
Another good day.....


Here is what the passenger rocker looks like all installed. I think it turned out pretty well for a one day home fab unit? I think one the paint gets weathered up and fades a bit it will be hard to tell there is even a rocker guard on the body. That is what I was going for, the best protection with the minimum loss in ground clearance, minimum weight, etc.


Here is what those new skidplates look like from more than a foot away. There is a slight reduction in ground clearance, but not much.


The rocker guard for the drivers side is hanging in wet primer right now....

Good day.
 

Forum statistics

Threads
186,490
Messages
2,886,592
Members
226,515
Latest member
clearwater
Top