Hellwinger
Member
Just for the record, three EP members who are Trailblazer owners (besides Hellwinger) have made themselves known: AdvWife, Country, and OFFRDRV. All are welcome.
A recent inquiry asked about leveling solutions in regards to the refer. Ammonia-cycle fridges need to be level to work well.
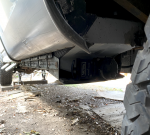
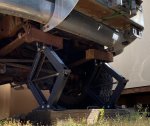
The photo below (2015) details the jacks bought, and the (soft) wooden interface blocks made with pins to fit the holes in the top of the jacks (which are intended to be bolted onto the bottom plywood of a trailer, at the corners). Shown is the storage configuration for the Phoenix, normally nose-down. So, it’s parked on 4” blocks at the front wheels, which get close, and then the jacks bring the nose up just a bit. How much lift those jacks can handle depends on how much weight they are taking off of the suspension springs. Park accordingly.
There are bubble levels (pitch & roll) mounted on the outside at front and rear (2020 & 2023), as well as inside the RV (2022, on the dash with illumination) to fine-tune the jacks. The dash-mounted levels come in handy when first parking at a camp spot. The illumination is needed for nighttime arrivals. The jacks can also be placed at the rear porch corners, depending. The outer levels are handy for first adjustments of the jacks. The interior levels confirm. Keep a headlamp handy for jumping out and doing things at night.
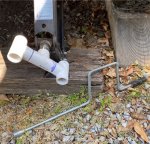
Image 2016 shows a quick-jacking solution. The PVC holder for the socket driver can be quickly crazy-twiddled with a finger to get the jack close to the desired extension. More reliable than a cheap rechargeable drill motor and almost as fast. Greater torque can be applied with the handle that comes with the jacks.
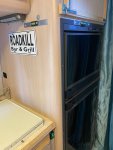
Photo 2017 shows the levels mounted near the fridge. They are calibrated in relation to the body of the fridge, which may not quite be level with the floor of the coach.
Photo 2018 shows a storage solution under the stove that also hides the water heater and space heater. Note the green switch at upper right. This is a more convenient location for the water pump switch, being within arm’s reach of the shower stall and the vanity sink aft of the fridge. It is in parallel with the stock switch, which is in the door well, forward of the sink. And frustratingly out of reach of the head.
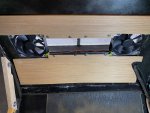
Photo 2019 shows a venting solution for the rear coils of the fridge. The stock config was a microwave on a shelf above the fridge that pinched the convective flow. The upper rear edge corner of the micro was too close to the coach wall. Behind the sealed metal in the (now storage) cabinet are two muffin fans that exhaust upwards out the roof vent. They are controlled with a purpose-adjusted bimetal switch that is mounted on one of the cooling coils. It is all scaled properly because the fans only engage on the hot part of ~85F days. Or when aerodynamic pressures overcome convective forces whist rocketing down the road.
IMG_9174 shows the fans, situated behind the curved metal cabinet back in IMG_2019. They blow up, out the roof vent for the fridge. Note unobstructed path between them for nominal convective flow.
Note two spares in image 2023. When out in the sticks, a single spare means service station anxiety when a flat happens. With two spares, the potential need to return to civilization is reduced. This mode is a result of experience and also running with used tires, which are much less expensive than new, but more prone to failure. However, the Phoenix has new tires now. Hopefully two spares will not be needed.
So far, tire failure modes have been highway blowout (YIKES, one in front, two on tag axle), sidewall cuts due to tight turns, from sharp rocks camming into the sidewall in deep road cuts, blowout due to under-inflation on a dirt road (actually probably operating at too high a speed for the inflation level), and a sharp piece of obsidian on a pioneer wagon toll road over a volcano on Thanksgiving Day.
- Hellwinger
Attachments
-
 IMG_2015.jpeg298.7 KB · Views: 28
 -
 IMG_2016.jpeg560.8 KB · Views: 29
 -
 IMG_2017.jpeg297.2 KB · Views: 28
 -
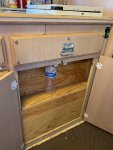 IMG_2018.jpeg420.3 KB · Views: 28
 -
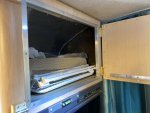 IMG_2019.jpeg265.9 KB · Views: 27
 -
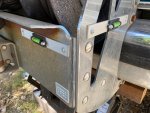 IMG_2020.jpeg342.7 KB · Views: 29
 -
 IMG_2022.jpeg361.3 KB · Views: 28
 -
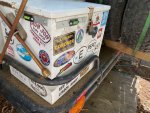 IMG_2023.jpeg492.4 KB · Views: 30
 -
 IMG_9174.jpeg464.3 KB · Views: 26
Last edited:


