S10 Build getting started

Meili

Adventurer
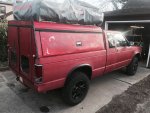
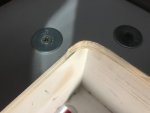
Went over to mock up the mount this am. Ended up putting on my big boy pants and started cutting. Yikes!

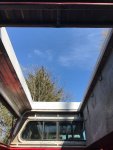
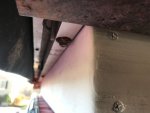
I hit the inside perimeter with spray paint to mark the cut line. Couple hours later, a nice big hole, 37" x 67" to be exact.

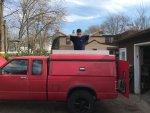
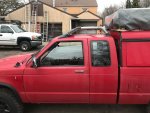
The big dork in the picture (Me) is 6'2", the top of the mount is 44" from the bed. Will have plenty of head roof being 7 foot (estimate) at the RTT peak.

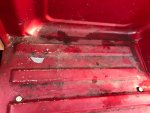
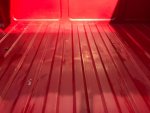
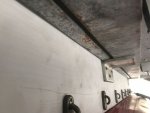
Since there is no roof I had plenty of room to move around so a cleaning was in order. The bed had both black and green stuff growing in it.

The whole cap and bed were scrubbed with bleach/simple green. Smells good now and I have no fear of sleeping with little unwanted fungi.

More coming just not sure what the limits is on posting pictures, stay tuned.

527
 

Attachments

  • s10 cut.JPG
    s10 cut.JPG
    77.5 KB · Views: 90
  • s10 cut 1.JPG
    s10 cut 1.JPG
    129.8 KB · Views: 94
  • s10 cut 2.JPG
    s10 cut 2.JPG
    152 KB · Views: 85
  • s10 cut 3.JPG
    s10 cut 3.JPG
    94.5 KB · Views: 92
  • s10 mold.JPG
    s10 mold.JPG
    78.3 KB · Views: 85
  • s10 mold 1.JPG
    s10 mold 1.JPG
    49.6 KB · Views: 83
Last edited:
Meili

Adventurer
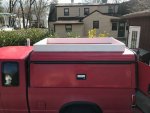
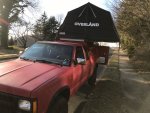
So I get home and my neighbor asks what the white thing on the roof of my truck is? After explaining the plan I suckered him into to helping me

throw the RTT on.

I need to mock it up so I could mark my interior cuts lines.

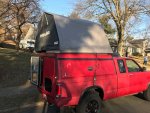
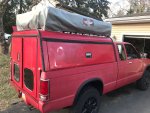
Moment of truth, slipped right on and fit great if I do say so myself!

The ladder is off since the bottom is now the top and visa versa. The top wood has some soft spots so that what I will cut out.

Right now I am very happy that everything is lining up, you don't know how much I was sweating cutting the hole!
 

Attachments

  • s10 mock 1.JPG
    s10 mock 1.JPG
    45.2 KB · Views: 84
  • s10 mock 2.JPG
    s10 mock 2.JPG
    88.4 KB · Views: 90
  • s10 mock 3.JPG
    s10 mock 3.JPG
    115.3 KB · Views: 93
  • s10 mock 4.JPG
    s10 mock 4.JPG
    117.1 KB · Views: 94
  • s10 mock 5.JPG
    s10 mock 5.JPG
    69.7 KB · Views: 93
Last edited:
Meili

Adventurer
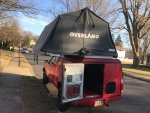
Pulled the frame this am, added cap tape to the bottom and bolted it down. The tape was set back a little from the edge so I can seal it with Quad later.

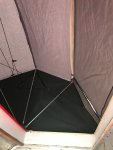
Got home and cut the floor out of the tent, another stressful act! Also remove a bunch of hardware and the ladder to be reinstalled/repaired later.

I was able to get it back on the roof by myself. Sure my back will remind me how stupid it was tomorrow morning.

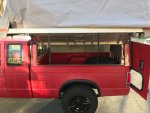
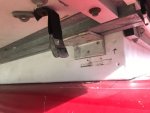
Added 2 piece of aluminum angle for additional support, may add the 3rd in the middle.

Nice and roomy inside.

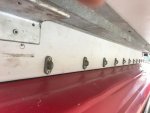
There are a number of hooks that I never used and were in odd locations. Used them and the normal one to secure the cover.

Should be fine for Saturdays storms!

645
 

Attachments

  • s10 mounted rtt.JPG
    s10 mounted rtt.JPG
    50.2 KB · Views: 86
  • s10 mounted rtt 1.JPG
    s10 mounted rtt 1.JPG
    90.7 KB · Views: 91
  • s10 mounted rtt 2.JPG
    s10 mounted rtt 2.JPG
    48.5 KB · Views: 90
  • s10 mounted rtt 3.JPG
    s10 mounted rtt 3.JPG
    93.1 KB · Views: 89

Meili

Adventurer
Today was nuts and bolts day.

Added ,moved or replaced at least 100 nuts,bolts and screws, about $40 worth.

Went one size up because, just about everywhere, since some of the screws spun coming out.

The pivot/hinge had a replacement bolt that was too small and the holes were ovalled. Drilled them oversize and used grade 8, really tightened it up.

Pretty much everywhere there was a screw I added one between the factory ones and then went back and replaced the factory ones also.

Installed the ladder, used oversize fender washers to spread the load.

It's not rock solid yet but getting closer.

724
 
Last edited:
Meili

Adventurer
Had a pretty good front come threw yesterday, tornado warning and all, found no leaks!

I did notice the truck seemed low in the rear. Was actually almost level, only down a 1/4 on d/s.

I was concerned since I thought I had planned for the extra weight with the extended shackles. Especially since there is more weight to come.

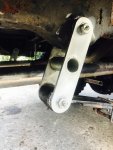
Turns out in my haste to get the truck inspected I never did swap over the shackles from the 88, DOH!

The bolts on the 85 were seized to the collars inside. 2 hours later, got them out intact. Had to leave stock bushings for now, started to get cold

and running out of day light.

The result was a 1 1/8" change in ride height, rear up 1", front down an 1/8.

Here are a few pictures.

Don't worry my cat was not impressed either!

793
 

Attachments

  • s10 shackle.jpg
    s10 shackle.jpg
    129.5 KB · Views: 50
  • s10 shackle 1.jpg
    s10 shackle 1.jpg
    86.1 KB · Views: 49
  • s10 shackle 2.jpg
    s10 shackle 2.jpg
    108.6 KB · Views: 57
  • s10 shackle 3.jpg
    s10 shackle 3.jpg
    41.5 KB · Views: 49
Last edited:
Meili

Adventurer
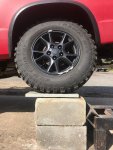
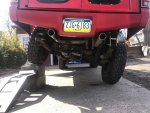
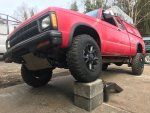
Warning poser pictures within. Not really, just doing some static testing. To all, the cinder blocks are SOLID, I am crazy not dumb!

For being stock, with the exception of extended shackles, the rear suspension impressed me.

At 17 inches, no tire contact with frame or body, only the ground. The shocks were neither fully extended or compressed although

the P/S only had about a 1/4 to go before totally compressed.

Very happy how the body stays aligned with bed, my bushings are working. The body was only leaning 4" at the rear.

Could have tried more but knowing the front is going to be the weak link, stopped there.

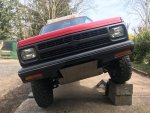
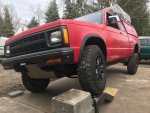
Now the front.

At 16 inches the P/S A-arm was on the bumpstop, plus the hole front twisted with the wheels.

Not sure when it made contact since I really could not stop while going up the ramp,

The front stayed with 3 inches of the block height, not good.

I have a few tweaks to help the front, but dont want to stray to far from stock.

Now I have a baseline.

The last shot is cross-up, l/f and r/r on 11 inch ramps.

929
 

Attachments

  • s10 twisted 1.jpg
    s10 twisted 1.jpg
    563.4 KB · Views: 51
  • s10 twisted 2.JPG
    s10 twisted 2.JPG
    91.2 KB · Views: 47
  • s10 twisted 3.JPG
    s10 twisted 3.JPG
    109.5 KB · Views: 53
  • s10 twisted 4.JPG
    s10 twisted 4.JPG
    99.1 KB · Views: 49
  • s10 twisted 5.JPG
    s10 twisted 5.JPG
    100.8 KB · Views: 50
Last edited:
Meili

Adventurer
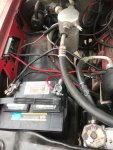
Part 2 , Electronics. I has noticed at night the headlights seem to pulse, got worse under load.

The alternator was putting out between 14.3 and 14.9 volts and pulsed/cycled never staying constant.

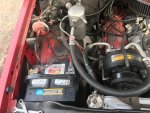
At the battery and a main junction, I was getting around 13 volts. Where was that volt and a half going?

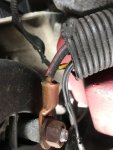
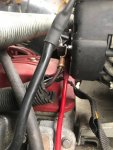
First I looked at the connection on the back. Oh boy, poor alternator have to try and push voltage threw this connection.

On all my cars, I run and dedicated charge and grounds to the battery from the alternator.

Ran the wires using stuff I had laying around.

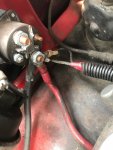
Next was the mess behind the 4wd vacuum solenoid. It is a starter solenoid being used as a junction block?

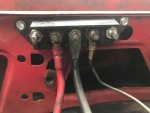
Ripped it out and put a junction block I got junk yarding.

Keep in mind this is a quick fix since I will eventually relocating the battery.

Now the alternator floats constantly around 14.6/7 volts . At the battery is only .1 volt down from the alternator output. Yeah.

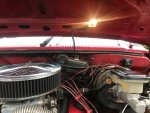
The most important thing that was done was installing a junk yard under hood light!
 

Attachments

  • s10 alt 1.JPG
    s10 alt 1.JPG
    113.6 KB · Views: 43
  • s10 alt 2.JPG
    s10 alt 2.JPG
    123.6 KB · Views: 43
  • s10 batt 1.JPG
    s10 batt 1.JPG
    96 KB · Views: 46
  • s10 batt 2.JPG
    s10 batt 2.JPG
    139.2 KB · Views: 44
  • s10 batt 3.JPG
    s10 batt 3.JPG
    51.1 KB · Views: 41
  • s10 batt 4.JPG
    s10 batt 4.JPG
    147.4 KB · Views: 41
  • s10 light.JPG
    s10 light.JPG
    82.3 KB · Views: 42
Last edited:
Meili

Adventurer
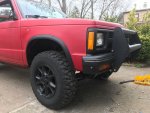
Installed the push bar today. Not sure of the it original application so I had to contour it to match the bumper better.

Made some mounts from angle iron, ended up nice and strong.

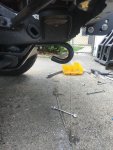
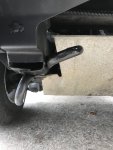
Next was the tow hooks. These are from a junkyard trip off a S10 Blazer.

Did not like the stock location, hung too low. Tried existing hole inside frame rail, too high and will interfere with receiver I am working on.

Ended trimming back the body mount bracket and installed them outside the frame rail. Tucked up nice and easy to get to.

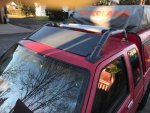
Last was starting to mock roof rack/spoiler. Starting cutting down a Xterra rack.

I really am mostly interested in trying to get air to flow up over the RRT since the rack is going to be small.

1018
 

Attachments

  • s10 bar.JPG
    s10 bar.JPG
    89.2 KB · Views: 43
  • s10 hook 2.JPG
    s10 hook 2.JPG
    188.5 KB · Views: 52
  • s10 hook 1.JPG
    s10 hook 1.JPG
    129.8 KB · Views: 46
  • s10 hook 3.jpg
    s10 hook 3.jpg
    71.4 KB · Views: 43
  • s10 rack 1.JPG
    s10 rack 1.JPG
    106.6 KB · Views: 49
  • s10 rack 2.JPG
    s10 rack 2.JPG
    83.6 KB · Views: 53
Last edited:
Meili

Adventurer
Had to stay around the house for the AM so started some wiring.

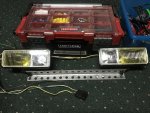
I decided to use a flat four trailer plug to wire the lights so if I need to do any work, 2 bolts and unplug and they are off.

In the afternoon worked on the rack.

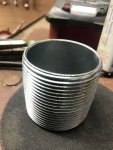
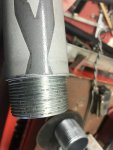
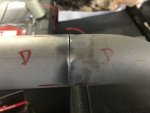
Since I cut the roof rack shorter, had to figure how to reattach the ends. Found 2 options, pipe or conduit collar.

Ended up running the cutting wheel down the side of the conduit collar since it was oversize. It was tough going but they threaded in and

made a real strong joint.

I mocked it up and installed 4 bolts to hold it down. I think it looks good except for saying Nissan. Later it will be hit with either textured paint or

bed-liner in black.

1163
 

Attachments

  • s10 light 1.JPG
    s10 light 1.JPG
    101.9 KB · Views: 41
  • s10 rack 3.JPG
    s10 rack 3.JPG
    129.4 KB · Views: 38
  • s10 rack 5.JPG
    s10 rack 5.JPG
    69.7 KB · Views: 31
  • s10 rack 4.JPG
    s10 rack 4.JPG
    122.5 KB · Views: 35
  • s10 rack 7.JPG
    s10 rack 7.JPG
    48.7 KB · Views: 42
  • s10 rack 8.JPG
    s10 rack 8.JPG
    82.2 KB · Views: 43
  • s10 rack 9.JPG
    s10 rack 9.JPG
    98.7 KB · Views: 40
  • s10 rack 10.JPG
    s10 rack 10.JPG
    77.2 KB · Views: 41
Last edited:
Meili

Adventurer
Not much to report.

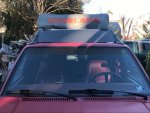
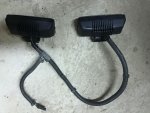
Finished the lights. All connections are soldered and covered with heat shrink.

I recycled some wire loom from a harness I had laying around.

Hoping I don't have to but the lights comes off with 2 nuts and an unplug.

Still have the under-hood wiring to do, parts should arrive this weekend.

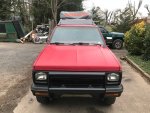
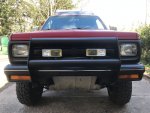
Atleast it is "looking" like an Expo rig!

1227
 

Attachments

  • s10 light 2.jpg
    s10 light 2.jpg
    81 KB · Views: 30
  • s10 light 3.JPG
    s10 light 3.JPG
    88.1 KB · Views: 28

chilliwak

Expedition Leader
Meili you sure are a busy:Wow1: guy! I love :drool:the idea of the roof top tent that can be accessed from the inside of your camper/canopy. That is a cool set up. You have also been doing a lot of mechanical upgrades including your suspension. Your shackel flip conversion looks like it gives you the travel you need. Nice job! Thanks for posting pics of your build. Cheers, Chilli..:)
 

Meili

Adventurer
Thanks for the kind words, was getting paranoid, lots of views /no comments? Funny thing ,I read your build "many" years ago as a lurker!

This am, on the trip over to the shop, sounded like someone with a jackhammer was trying to come threw the roof.

Turns out the leading edge of the air dam was flexing down hit the roof. It is really windy today. More on that later.

As well as windy, it is cold, never got above freezing today. Oh, the garage perfectly blocks the winter sun, yup, cold,windy and in the shade!

Started sanding in the tent. Thought about firing up the Little Buddy heater but thought better of a enclosed space with plenty of

combustible saw dust in the air.

Standing in the truck was not bad, between the sun beating on the canvas and my body heat it was somewhat comfortable inside.

Just getting started on the sanding so be nice! Also I am more of a impact gun type of guy vs knotty pine type of guy.

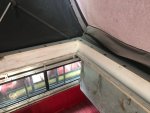
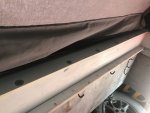
While sanding I noticed something weird, the sawdust was blowing up at the hinge seam. It got worse with my weight on it.

Added 1/2" weather strip to the seam and added another aluminum angle support, problem solved.

I ended up adding some black door edge guard to the front edge of the roof air dam. It was a real pain to install, as it got colder, it did not want to flex.

Good news, no noise on the way home, win!

1294
 

Attachments

  • s10 sand 1.JPG
    s10 sand 1.JPG
    68.1 KB · Views: 48
  • s10 sand 2.JPG
    s10 sand 2.JPG
    61.7 KB · Views: 50
  • s10 sand 3.JPG
    s10 sand 3.JPG
    29 KB · Views: 46
  • s10 sand 4.JPG
    s10 sand 4.JPG
    49 KB · Views: 47
  • s10 gap 1.JPG
    s10 gap 1.JPG
    40.4 KB · Views: 46
  • s10 gap 2.JPG
    s10 gap 2.JPG
    43 KB · Views: 46
Last edited:
chilliwak

Expedition Leader
Looking good Meili! I am curios as to where you will be sleeping. Is there enough room up in the tent to sleep with the bottom cut away for access or are you going to sleep down in the canopy? It will be cool to see how you set the whole thing up when you are done. Glad that my build gave you some reading/watching material and hopefully inspired you in some way. Sometimes you just have to get out there with your ideas and make it happen. Its a trial and error kind of thing with refinements and improvments you implement along the way. Keep up the good work. Lots of us are watching. Cheers, Chilli..:)
 

Meili

Adventurer
Actually there will be a bunch of sleeping options.

The plan is to run baseboard upside down around the perimeter down about 1/2" inch to make a ledge for 2 inserts ( approximately 3' x 3' ).

The inserts will be flush on the top.

They will be supported on 3 sides, removable. One or both may get hinges. I kinda design as I go!

So with both inserts out, I can sleep just in the overhang but cant stretch out. It's 5' 8"ish and I am 6' 2". Still have full access to pick up bed.

One insert in, I can lay stretched out with plenty of room in all directions. This is what I plan on doing when its just me. Still have access to P/U bed.

Both inserts in, room for 2 maybe 3 people up top. Would have to enter and leave via the exterior ladder or shuffle around to remove one insert,

which I think would get old fast! Limited access to P/U bed.

If alone and real nasty out, I could leave the inserts in,RTT closed and sleep in the P/U bed. It's a 6" bed.

My daughter goes to the races with me. Most likely , I will be up top (1 insert) and her down below on bench/bed. She is shorter then me.

I hope that all makes sense.
 
Last edited:
Forum statistics

Threads
188,005
Messages
2,900,948
Members
229,233
Latest member
cwhit5
Top