Sandy: 2003 Land Cruiser 100 Series Build & Adventure Thread

wreckdiver1321

Overlander
So I spent some time doing a little work on the Cruiser last night and had a chat with my friend who has been helping me work on it. After getting into the minutia, I think I've deciphered my main concerns with regards to the rust:

1. Body. Just about everything above the side molding is in great shape, but things below there are less so. Most of it is still solid, with a few bits here or there. My concern, more than anything else, is that the rockers or pinch weld might rot and I'll spend the next several years playing catch-up or futilely trying to repair them. I'm not overall concerned with any other parts of it. Pretty much everything else is easy to either repair or replace the panel.

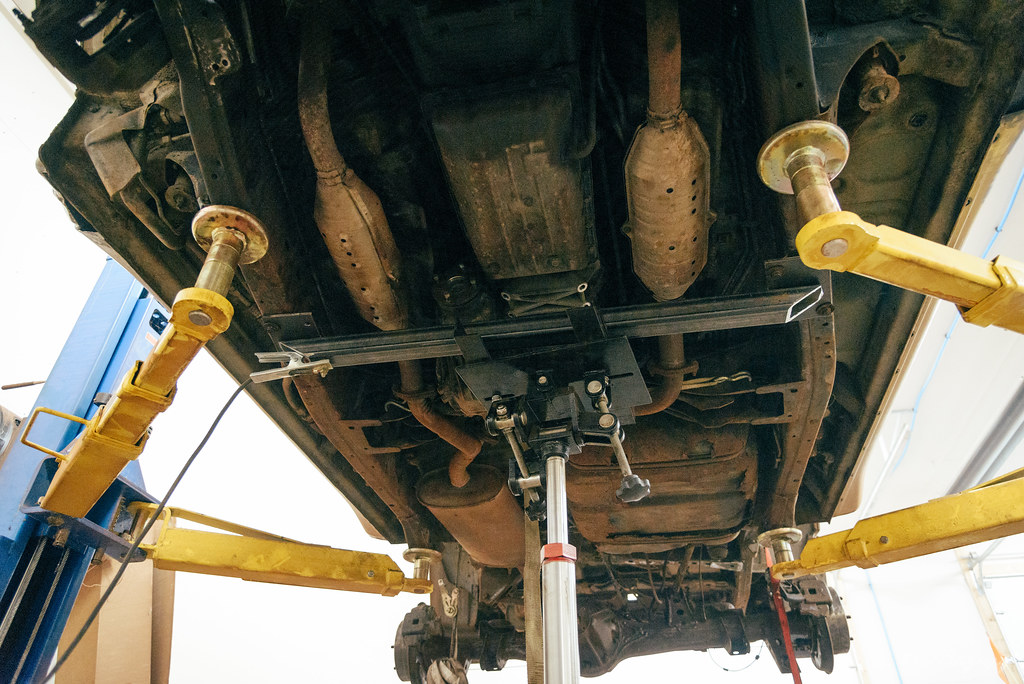
2. Rear end. I'm utterly and completely unconcerned with everything underneath from the rear LCA frame mounts forward. All of that is in pretty good shape and cleaned up really nicely. There's barely any pitting in most spots. What does worry me are things like the rear control arm mounts on the diff. I'm not necessarily concerned that the diff itself will crack or something, but I do worry that those mounts, being a thinner material, will. I'm also worried about brake lines, but those are a simple thing to remedy. I worry about the upper shock mounts because we weren't able to do a stellar job reaching the top of them for rust removal. I do worry a tiny bit about the very back of the frame near the rearmost crossmember, but I think with the bumper mounting plates and hitch receiver, which I may weld on, there's plenty of beef there to keep it going indefinitely.

What does ExPo think? Most of these issues are solved by replacing the rear diff with a locked one from 98 or 99. If I do that and replace the factory fuel tank with an LRA 40 gal, I could probably reach those top shock mounts more easily and fix my concerns with the control arm mounts. I can always weld more steel to the back of the frame too if I get concerned.
 

wreckdiver1321

Overlander
have you thought about separating the frame? it'll give you better access & you have a lift at your disposal.

So, yes and no.

I do have the lift and pulling the body has crossed my mind, but all of the body mount bolts are pretty well rusted and would be a headache to remove. Also, I've been using my brother-in-law's lift for about four months. I'd like to let him have it back since he's so graciously lent me his shop and tools and supplies. I think the best way forward would be to find some way to clean the top of the shock mounts (one of my bigger concerns) and coat them with POR15.

I'm leaning more towards keeping it every day, but that may change once we get into working on it again. ?
 

wreckdiver1321

Overlander
Picking up where we left off....

The repair panels went on the frame pretty easily, and luckily we didn't find any other spots that needed to be patched. Using a plasma cutter and grinding stone makes this job pretty quick, then it's just a matter of getting them welded on. I believe our patch panels are thicker than the actual frame steel, so they shouldn't be an issue in the future. I did take the opportunity to coat the inside of the frame with rust reformer while the holes were cut, so hopefully that helps stop any further corrosion.


During our next shop session, we started in on the rocker panel repairs. Luckily, these were pretty isolated and didn't require much in the way of metal work. We cut out the damage and made some new patch panels. I hosed the cavity with rust reformer to prevent any further issues that we can't see, and then we welded the repair panel in place. It did take a bit of time to get the shape right, but we were okay with being imperfect as this spot is mostly covered once the fenders are on.


With this project being tackled by my brother-in-law, I started work on my new transmission crossmember/skidplate. I wanted something pretty similar to Trail Tailor's Creeper design, as this truck is not intended to be a rock crawler so maximum coverage is being nixed in favor of weight. Another benefit is replacing the rusted factory crossmember, which looks like it's spent some time submerged in the ocean. My overall plan is to have this and an ASFIR front skid, which should be good coverage with minimal weight. Also, thanks to my brother-in-law's scrap pile and my friend's job having some extra plate lying around, this project has thus far cost me... $25.

I started by measuring the area needed for the mounting plates and transferring that to the steel plate.


Then I drilled out the mounting holes and cleaned them up before doing a test fit. I cut a piece of 2" square tubing to length, lined it all up, and tacked it in place.


I ended up burning it in solidly and cleaning it up a bit bore calling it a night well past 12 AM.
 

wreckdiver1321

Overlander
Our next stint in the shop, I decided to get to work on the mechanical baseline before we jumped into more rust repair. I had a big list of preventative maintenance that I wanted to accomplish to get the truck as fresh and reliable as I possibly could.

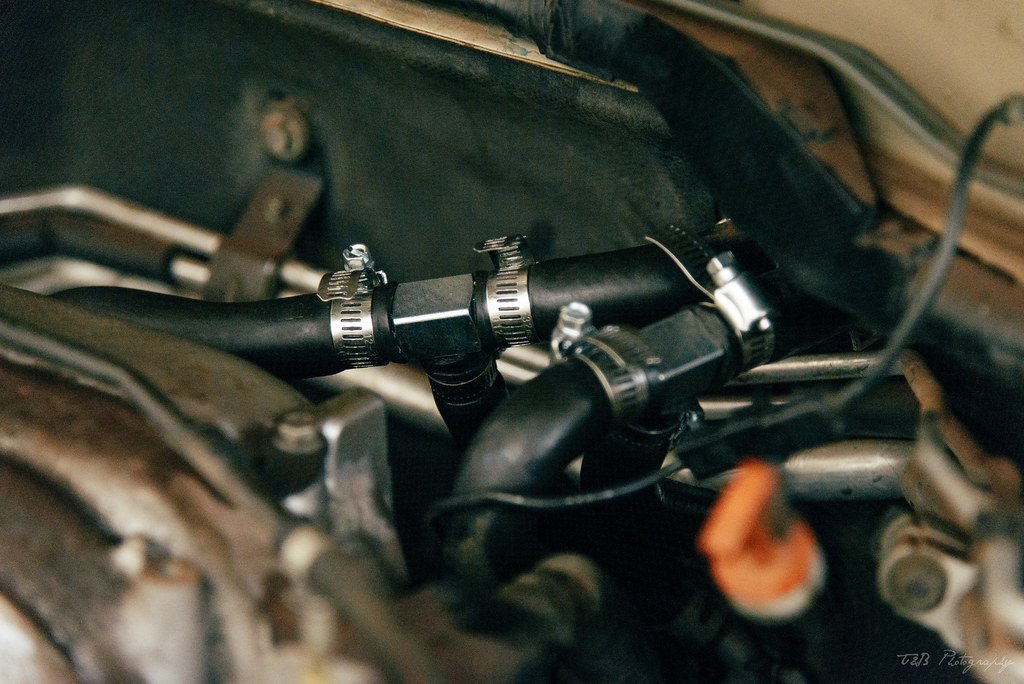
I started with the notorious heater tees, which were definitely brittle but not to the point of failure - yet. I replaced these with the Dorman metal tees and new worm gear clamps.


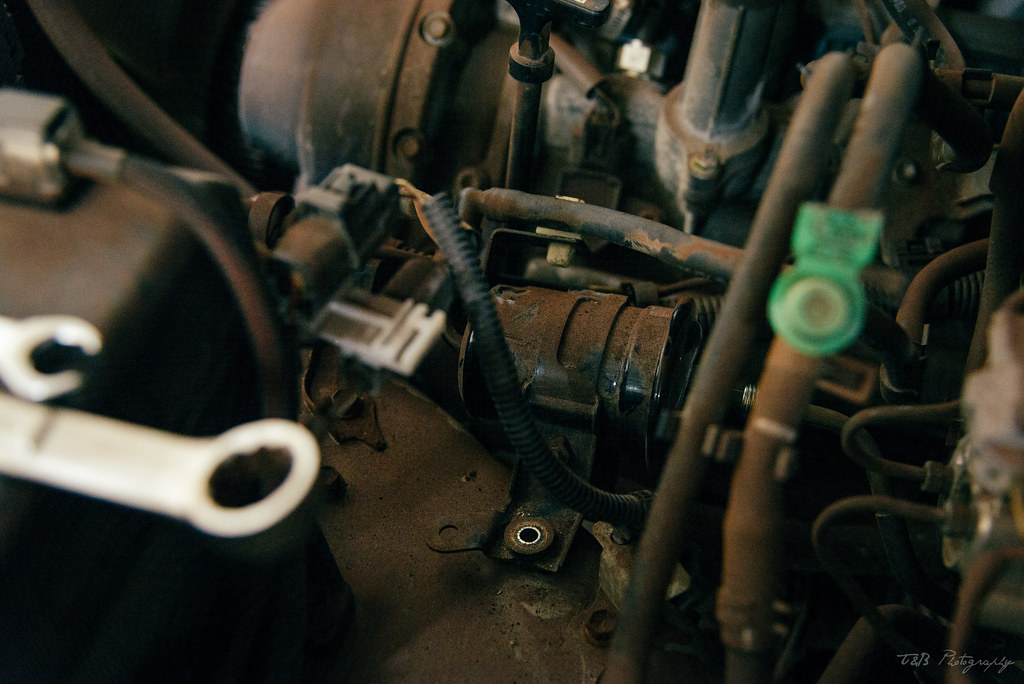
My next target was the fuel filter. This was probably not necessary as the truck has pretty low mileage, but I figured better to just replace now while the Cruiser is apart and have all of the consumables at the same baseline. We pulled the old filter and replaced with a Wix.


Following that, I drained the coolant in preparation for replacing the radiator hoses. Again, probably not necessary, but now I have spares and the hoses are new.


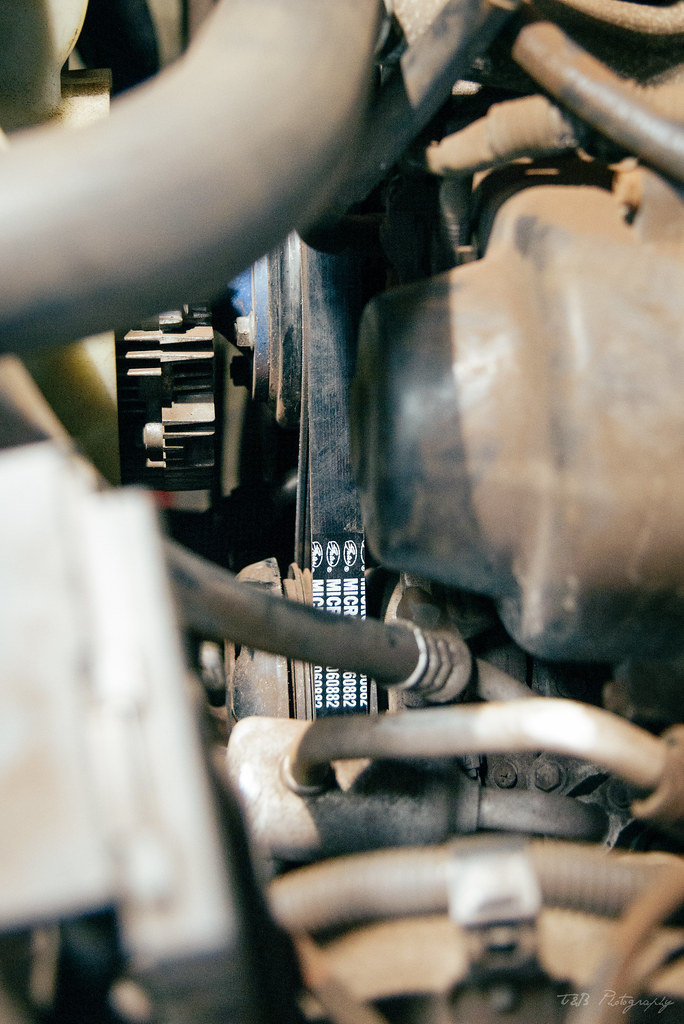
I also took the opportunity to swap out the serpentine belt and save the old one as a spare. A quick check of each pulley confirmed they were all turning smoothly, so no worries there.


With a good chunk of the preventative maintenance done, we resumed stripping and grinding the frame. We were just about finished with the rear axle and most of the frame sections, so the final thing to look at was the rear bumper. As I suspected, every single bolt was rusty enough to snap, and the metal structure under the plastic had the consistency of a Ritz cracker. The bumper cover, metal structure, and spare tire lift were all thrown in the scrap pile. Given that I was planning on replacing the rear bumper with a Dobinsons, I didn't need any of it anyway.


The downside was pulling the bumper cover showed us the extent of the rust in the rear quarters was worse than we anticipated. Luckily this is all covered, so it's not critical for it to be a perfect repair. But it's more work to do. Oh well, such is life.


wreckdiver1321

Overlander
With the teardown mostly complete, I took inventory and made decisions on what needed to be replaced, what could wait, and what was a good idea to do given the current state of the Cruiser.
  • With the places we travel, the front bumper is absolutely essential, so I called a local dealer and got an ARB Deluxe front on order. I'm a bit miffed that I waited as long as I did, because they're now on a backorder of indeterminate length. I guess the positive side is that the truck is still months away from being in a driveable state, so I'm in no rush. I love the look of the ARB on... well, pretty much everything, but especially the 100 series, so it was always going to be that bumper.
  • The factory front skidplate was off and it was rusty, so it made sense to just order up the ASFIR 4x4 plate and save myself the hassle of messing with the factory stuff.
  • @Mtkid had a set of lower control arms he was willing to part with for cheap, and I frankly did not want to mess with my crusty lowers, so I arranged to pick those up from him. They're Moog, but I already had planned on replacing the ball joints with 555s from @cruiseroutfit, so I figured I'd have clean metal and high quality ball joints. Win, win.
  • I ordered replacement front ABS sensors from carparts.com for $70 per side since I had to cut the old ones off.
  • We had to do some cutting to remove the front shocks, a lot of cutting to remove the torsion bars, and some cutting to remove the rear shocks. The rear springs were super flaky. Since all of this needed to be done, it made complete sense to just order the OME suspension and get it all sorted out in one go. Since I was doing that and the front diff crossmember was out, it also made sense to throw the Slee diff drop in. I can still feel the heat from my credit card.
  • With the sway bars off, it was a great time to replace the endlinks. I ended up going stock for the front and Super Pro for the rear. I may upgrade the dronts at some point, but with the small amount of lift I'll be running I'm not sure I need them. Yet.
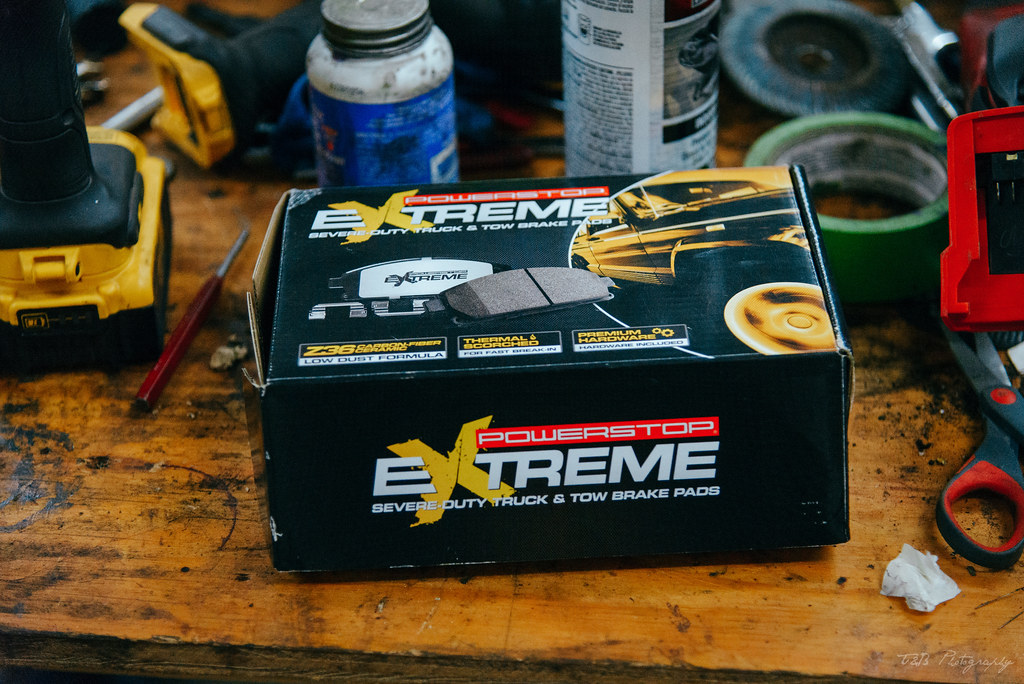
  • The front brake pads were pretty thin, so I ordered a set of PowerStop Z36 pads.
  • The roof bars I originally attempted, with Gamiviti brackets and Front Runner bars, wasn't going to work thanks to wind noise, so I opted to order a set of Rhino Rack load bars. Using a parts list for a two-bar kit on the Rhino Rack Australia site, I pieced together a kit from etrailer for around $400.
  • With most of the rear bumper sitting in the scrap pile, it was time to look at rear bumpers. My favorite design aesthetically is the ARB, but it's somewhat cost-prohibitive to get one full kitted out. Instead, I opted for the Dobinsons, which I think looks great and is a killer price. I managed to snag it during a sale and only paid $100 for shipping, so that was great.
  • I also ordered the AC drain extension from Cruiser Garage to prevent my sway bar mount from turning to paper. Again.
  • Finally, I needed a set of front brake dust shields, as a little corrosion made them paper thin in a few spots. Big thanks to Jason @cruiseryard for picking these for me.
With that big spend out of the way, I took a few parts home to my garage in order to clean them on a bench grinder with a wire wheel and get them coated with rust reformer. The spindles, sway bars, and a bag full of bolts got a royal treatment.

Our next evening in the shop had us doing more body work. We were able to get both rockers closed up and ground smooth, which checked a box for us. We also finished repairing the front sway bar mount and were able to knock out the last little bit of undercarriage rust removal, bringing the most unpleasant task to a close.


Our next task was to get the frame coated before starting the mechanical reassembly!
 

wreckdiver1321

Overlander
I THINK I have a solid plan for de-rustifying this thing and keeping it solid long-term.
  1. I have a drain auger that attaches to a drill inbound. I found a YouTube video that showed how to use it to break up rust inside a frame. I think this is a good idea to give me a cleaner surface to work with. Once the rust is knocked off and powdered, I can use an air compressor and a shop vac to remove it.
  2. Eastwood sells an internal frame coating that I will use to prevent any further corrosion and convert any current rust into solid material. I can also use that inside the rocker panels to keep them from rusting. There's a tiny bit of surface pitting in a few areas that I want to stop dead.
  3. I'll clean up the bubbling on the pinch weld by grinding it off and fill-welding, then grind it smooth and prime it. I plan on making pinch-weld sliders, so I don't want to use any sort of filler here. I'll also probably reinforce the back of the pinch weld with some bar stock.
  4. On the back side of the pinch weld, I can apply a layer of POR15 to keep it from becoming a problem later.
  5. I'll figure out a way to clean up the upper shock mounts and slather them in POR15. Maybe use the hole-cutting method a lot of people use for shock replacement? That would get me great access.
  6. The rear end will be replaced with a regeared 98 or 99 locked rear end. I can spend a little time making sure it's clean, replacing the brake lines, and then paint it with POR15 to ensure I don't get corrosion.
  7. During the axle swap, I can replace the panhard bar, and remove all the upper and lower rear control arms for better access to the inside of the frame mounts. Those can get POR15 as well.
  8. I was able to source body panels cuts for behind the rear doors, so I can do the repairs there and have that filled, sanded, and primed before taking it to paint.
  9. The rearmost quarter panel damage will be easily addressed with a bit of panel fab. I can be quick and dirty here because it's going to be covered.
  10. This leaves a little bit of damage on the lift gate, a little on the DS rear door, and a tiny bit on the PS front door. What I'll probably do there is remove the rust on all of them and prime them, then hunt for a replacement door and lift gate to have painted at some point. No rush on that though if we're thorough on the rust abatement.
I believe these steps should address all of the concerns I have with corrosion long-term. Luckily Montana is a pretty dry state and we don't salt our roads in the winter, so it will very likely stop in it's tracks and never be a problem again. Besides, this isn't my daily driver, so I'm not going to be keeping it wet during the winter by driving to work.

I think these steps should keep the rust from reappearing and giving me trouble later on down the line. They'll also likely make the body shop bill A LOT smaller, since it will just be some spot-painting. If anyone has any other ideas or things I should look at, let me know!
 

wreckdiver1321

Overlander
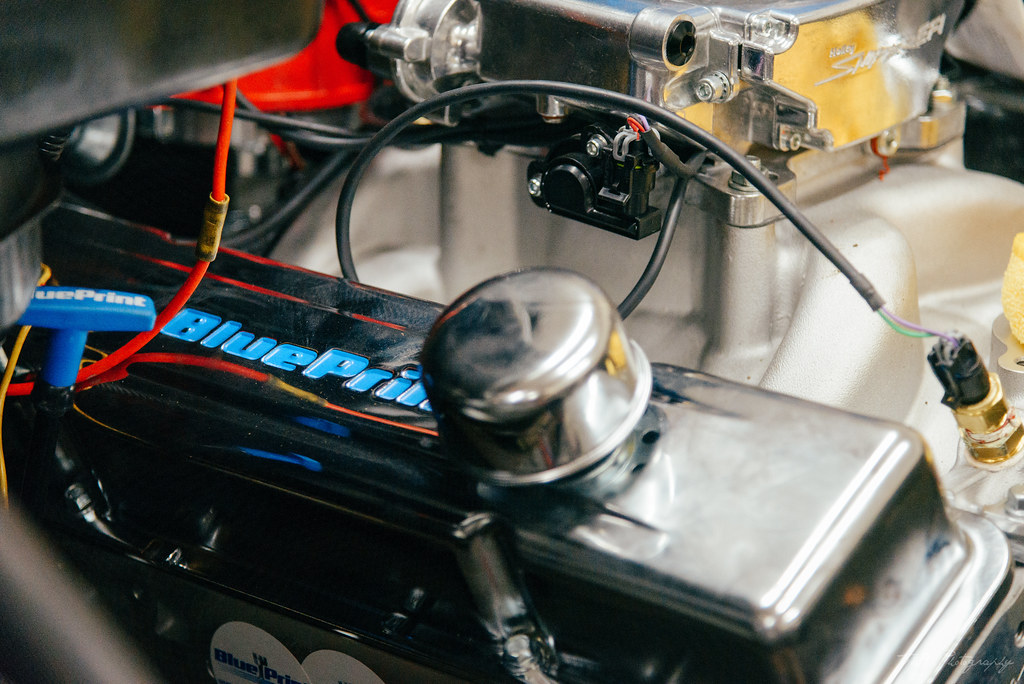
As a fun aside, this is what the Land Cruiser is currently sharing shop space with - a 1965 Chevy pickup once owned by my father in law. It's been well taken care of and just received a heart transplant. A brand new thumping small block built by Blueprint engines with a Holley Sniper EFI system. It took a bit of work to get it dialed in, but it's a hell of a ride now. Been fun to help tinker on this thing. The simplicity is unreal!


This engine was pulled as it holds oil slightly better than a fishing net. This will be rebuilt for my nephew's 1986 squarebody Chevy that his dad just bought him as a project. He's currently 9, by the way.


Anyway, back to Land Cruiser stuff!

With the front end apart and all of the frame cleaned and coated with a drying layer of rust reformer, I started in on cleaning up the spindles. A couple hours worth of work with some masking tape, a wire wheel, and some paint made them pretty darn fresh. I also cleaned and painted the dust rings to ready them for installation with new gaskets from Toyota.


With that paint drying, I moved on to the ball joints. I quickly made a cup for the upper as that was giving me some real trouble, but luckily I was able to get it done without a lot of fuss. The ball joints that came off were not really in need of replacing, but it was a preventative item to me and at such a reasonable cost, there wasn't a lot of reason not to freshen up the front end.


In between the ball joint swaps, I was able to lay down a few coats of paint on the frame. Now it's really starting to look like something!


We also managed to reinforce the front sway bar bracket with a small piece of angle iron and a bit of welding. Access kind of sucked, but we got it done.


Paint went on pretty quickly and fairly smooth. There were, of course, a few hard to reach spots, but I tried coming at the frame from every angle I could think of and it worked out pretty well I think.


The rear diff is obviously pitted, and I am considering how necessary swapping that assembly would be because of the control arm mounts. Is that worth concerning myself with? Or is it just a great excuse for a locked rear? I may have to do more research... ?


Even the back of the frame cleaned up pretty well. There's obviously a good amount of corrosion inside the frame rails, but it's serviceable. I think with a little reinforcement, it will be solid for decades.


Getting a few more coats on between ball joint jobs. The front end cleaned up exceptionally well in my opinion,


I ended the day by getting the lower trailing arms hung from the front mounts and getting the rear shocks bolted up. With shiny new parts, it's really starting to feel like the project is coming together!

 
Last edited:

wreckdiver1321

Overlander
The following day, I had some more time off to work on the Land Cruiser thanks to some time off work. I started in on the front end rebuild first, getting the lower control arms hung loosely in place before installing the spindle. A few clicks of the torque wrench and a couple of cotter pins later, and it was good to go.


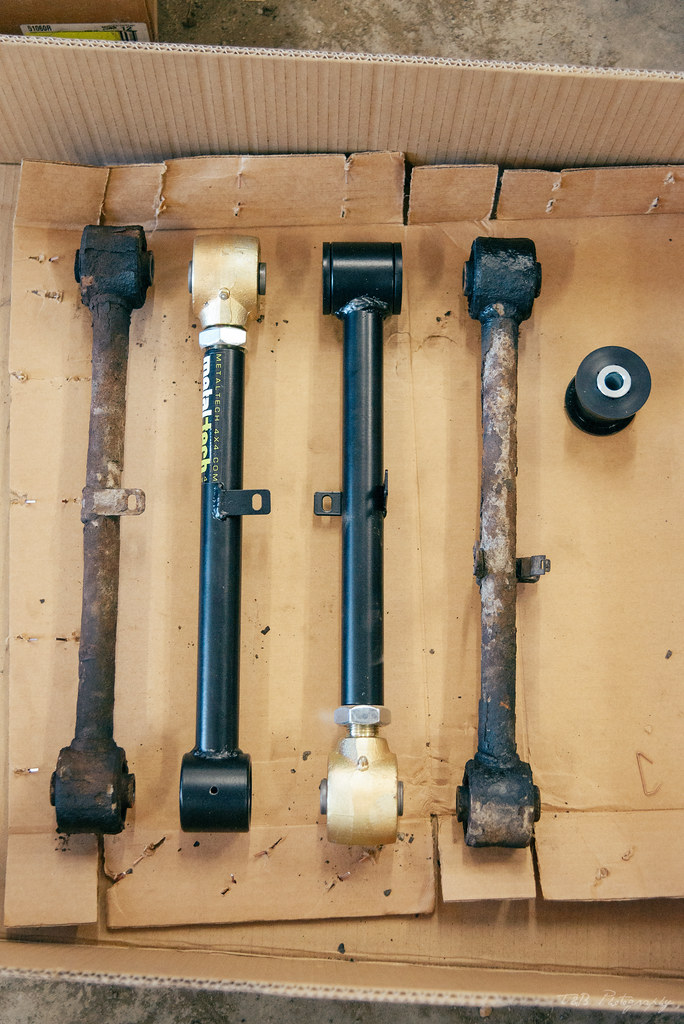
With the front end put together, I moved on to the rear. I have no idea why I decided to do one side at a time rather than one end at a time, but that's how it ended up. I pulled the upper trailing arms out as I was planning on cleaning them up, but the PITA factor coupled with wanting to be able to adjust the pinion angle pushed me to MetalTech adjustable arms. We shortened them by two turns on the Johnny Joint as a guesstimate to compensate for the lift. Then the rear spring was installed, followed the shock. I liberally applied grease to the bushings on the control arms, and slapped them in.


Check it out!


With one side done, my friend announced he had finished cleaning up the rear sway bar, driveshaft, and sway bar brackets. I hit them with a couple coats of rust converter before laying down three coats of paint all during breaks in working on the passenger side suspension. Again, I started in the front and finished by getting the rear all buttoned up.


Now that those major components were in place, I cleaned up the bolts for the remainder of the front suspension parts and laid rust converter on them. Then it was on to the dust shields. Again, big thanks to Cruiser Yard for these.


I got those installed and then cleaned up and reinstalled the tie rod ends onto the spindles. Again, a few clicks of a torque wrench and a couple of cotter pins finished off the job. Then it was time to pack it in for the night and make plans to complete the front end rebuild.
 

Dmski

Adventurer
I was wondering when I'd next see your build thread. Solid start and sorry to see the rust problem unfolding. If its mechanically sound I'd probably be inclined to say run with it, especially in the current market climate. But if you cleaned it up you would certainly make money on it if you wished to sell during the Covid used car market madness. It just makes finding another that much harder. I was looking at GX470 and 460's recently and became more and more disgusted before giving up on the idea and shutting my laptop. Same with the used motorcycle market. Project bikes for cheap are rare to nonexistent...

will you be towing with this rig or strictly overland/wheeling? RTT in the future?
 

wreckdiver1321

Overlander
I was wondering when I'd next see your build thread. Solid start and sorry to see the rust problem unfolding. If its mechanically sound I'd probably be inclined to say run with it, especially in the current market climate. But if you cleaned it up you would certainly make money on it if you wished to sell during the Covid used car market madness. It just makes finding another that much harder. I was looking at GX470 and 460's recently and became more and more disgusted before giving up on the idea and shutting my laptop. Same with the used motorcycle market. Project bikes for cheap are rare to nonexistent...

will you be towing with this rig or strictly overland/wheeling? RTT in the future?

Hey man! Happy to have you onboard for this one as well. This one has been a doozy, that's for sure. The rust is annoying, but I think I caught it in time for the amount of rust on it. It's manageable with a proper plan and putting in the work, which I am going to do regardless of my future plans for it. I'm pretty confident that the next few steps I'm taking on the frame will be enough to keep it solid more or less indefinitely, and the body rust issues are something I can solve before next year's season.

The great thing about it is the state of the mechanical bits. The entire drivetrain is just a peach. Everything is smooth and tight. Even totally unaligned and with bits of the body missing, it feels like a brand new truck to drive now. I'm kind of amazed. Also, I cannot over-stress how nice the interior is. The leather is all in really great shape, the carpets are clean, no cracks or weird stains in the trim or dash, nothing. Once I get the rust all taken care of, this rig will be just about perfect, so I'm currently 95% that I'm going to keep it.

I'm not going to tow with it really, except occasionally using a small utility trailer for home projects or moving furniture. It will likely get a hardshell RTT at some point if I keep it long enough. I'd like to go to that for when my kids are big enough to not go on trips or sleep in a different tent.
 

wreckdiver1321

Overlander
NEWS: The Cruiser now has a name again! Ladies and gents, she shall be known as Sandy.

In other news, I took Sandy for a drive last night to get gas. It's been about six months since any new fuel was put in it, and I've been trying to burn through the stuff in the tank as it's been sitting in the shop. I'm super pleased with how the truck drives. The ride is decent but definitely needs the weight of bumpers. It's a bit bouncy right now. Otherwise, it's tight as a drum.

I did a few throttle on/throttle off/throttle on tests and can confirm there is now zero drivetrain clunk or looseness, so obviously the hub flanges and CVs did the trick. No hip wiggle either thanks to the new rear control arms, but it's in dire need of an alignment once the work is done.

I need to update this thread with the remainder of the work I've done to this point, but it's feeling like I'm getting somewhat closer!
 

wreckdiver1321

Overlander
Back in the shop again, I was finishing up the final steps to get the truck mobile and off the lift. My brother in law was going in for surgery, and I wanted him to be able to move it if he wanted. His convalescence involves a lot of working on his many cars, so I didn't want to be clogging it up more than necessary.

To start, I finished the last coats on the driveshaft and sway bar parts.


Then it was time to button up the suspension as the other parts were drying. First up was reinstalling the freshly painted front differential with the Slee diff drop. Pretty easy install on this one with it on the lift and a transmission jack.


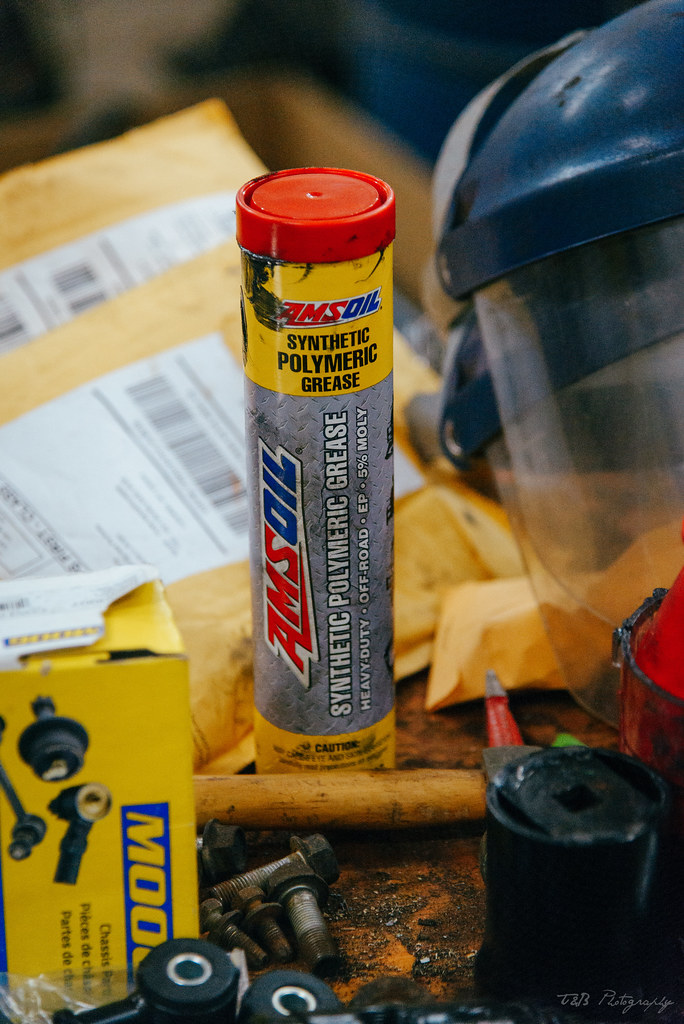
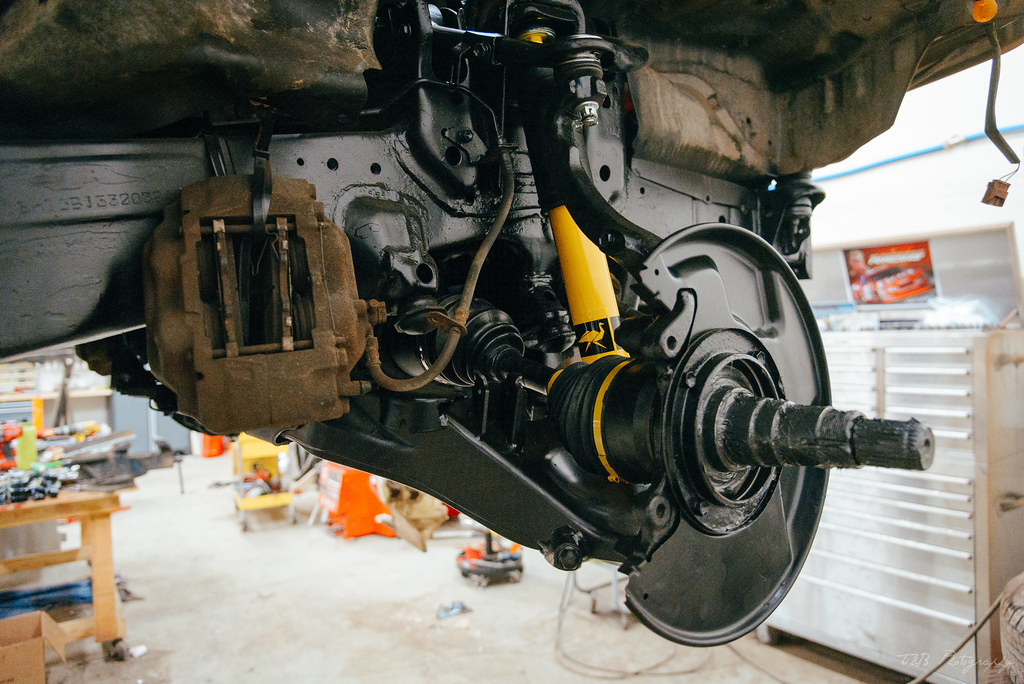
With the front diff and diff drop in, I popped the CV shafts in place. The brand new CVs with brand new c-clips took some serious force to slide home, but I got it all lined up and popped into place. I also got the LCA reinforcement brackets lined up, drilled, and bolted into place. Being aftermarket LCAs, the brackets didn't quite fit as intended. Some persuasion with a hammer solved that problem nicely. Then I got the new(ish) brake dust shields bolted in place with new gaskets and liberally applied Amsoil grease to the spindles in preparation for the hubs.


Brakes are looking pretty grubby.


But the rest of the front suspension is looking awesome!


Crazy to think of how far this project has come at this point. Hard to believe it's the same vehicle sometimes.

BEFORE:


AFTER:


Next up was the hubs. The wheel bearings came out nice and clean with new-looking grease. Using my brother in law's new parts washer (the guy has yet to meet a tool he didn't think belonged in his shop) I was able to clean them to like new. Then I was able to get the bearings repacked using my friend's handy bearing packer, which makes quick work of this job. I gotta get me one of those.


With the wheel bearings resting in a small tub of grease, I cleaned up and regreased the hubs. The spindle bearings were in good shape and the bushing looked barely used. With new grease filling every void, I popped the bearings into place, slid the hubs onto the spindles, and installed the new Toyota spindle washer, nut, lock ring, and the other nut. I set the preload using a store-bought fish scale. This job was a lot less finicky than many of the treads and videos made it seem. The YouTube video I found made it dreadfully simple. Then I slid the new hub flanges in place, which was a lot harder than disassembly thanks to brand new parts. No slop at all. A new c-clip was put on and I reinstalled the cone washers and flange nuts before doing a final torque and slapping the dust cover on. Talk about satisfying!


A fresh coat of paint to clean everything up and it looks damn near new!


Then I repeated the process on the other side. I used some matte black paint to finish this off, which was very easy to clean off of the brake rotors with some carb cleaner and a paper towel. No masking required!


At that point, it was late at night and I was a few beers into a BS and wrench session with my friend. We cleaned up a bit and got everything organized, then I got a wild hair to practice my welds, as I was close to moving to the next phase of building my corssmember/skid plate.


Feels like I'm improving!

With this bit of fun, we finished up the shop work and shuffled home. Getting Sandy awfully close to being back on her feet!
 

wreckdiver1321

Overlander
Next up was the front brakes. I had checked out the front pads and they were looking worn, so I ordered the PowerStop Z36 pads to replace.


I installed the calipers on either side, then knocked the dirt and debris off each. Then I shot a few coats of paint on to clean them up. The whole front end is looking close to new now! Sometimes I stand back and just look at it in wonder of how far it's come.


I pulled the pins and took the old pads out. Then I coated the back of the pads and the slide pines in a layer of Permatex brake goo before reassembling. The front caliper design on these is really clever, never seen anything quite like this. It did take a bit of fiddling to figure out how to get the pistons pushed back enough, but I got it to work and the pads installed.


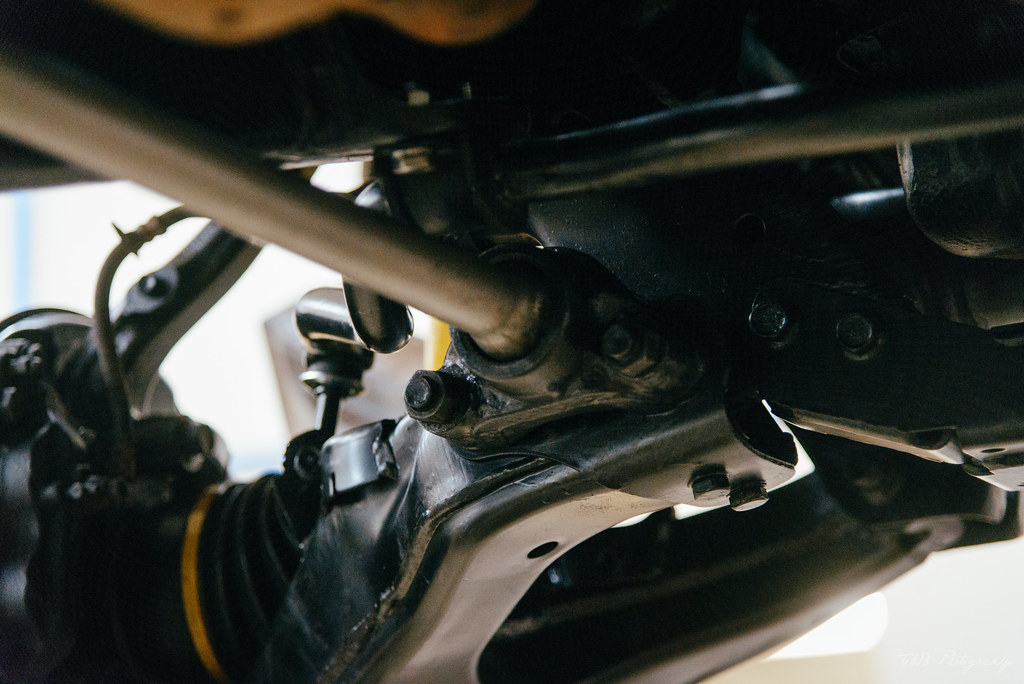
Then the repainted sway bar got put back in place with new bushings and end links. I did have to drill out the captured nuts on the frame as they were rusted solid, so bigger bolts and nuts were used instead. I left the end links loose until the full weight was put on the truck. I may go with longer end links for the front at some point, but I'm not sure how necessary it will be. There's not much lift on it.


Next up was the torsion bars. If you recall, I had to drill holes in the back of the tensioning arms in order to press the old torsion bars out. Even then it required heat and a lot of pressure in the press to get them free. So I refurbed the tensioners by grinding the crud off of them, welding shut the holes, and cleaning up the splines. Then they received a coat of paint.


It took me a minute to figure out how the torsion bars were supposed to be installed. I tried with the front anchors installed, but a quick Google search revealed I needed to dismount them and have them dangling on the bars while I sorted out the back. There were a ton of different opinions on how to install these, from counting teeth to making marks and measuring, etc. In the end, I put the adjustment bolts in the rear with only a couple threads engaged and zip-tied the tensioning arms as high up in the frame as they would go. Then I installed the front anchors before clipping the zip ties and adding more tension to the adjuster bolts. This, in theory, should provide me with the maximum room for adjustment. I took a wild guess at how much tension they needed, then moved on to the next step.


I refilled all of the fluids that had previously been drained. The engine got Pennzoil Platinum 5W-30 and a Mobil-1 filter. Normally I'm a Wix filter guy, but they didn't have the "premium" version available at O'Reilly during my last visit, so Mobil-1 it is. Then the radiator got filled with 50/50 Toyota red and a bottle of Redline Water Wetter, which I've had really good results from in the past. Then the diffs and transfer case received Amsoil Severe Gear.


While burping the coolant, I did some more work on my skid plate build. My friend works in a machine shop, so sent it off to have him machine the bolt holes for the transfer case/transmission mount. With those done, I did a test fit of the crossmember, and it fit perfectly. Then I grabbed the metal I was using for skid plates and tacked them in place. Then I did some shaping for the transfer case plate before burning them in 100%.


I also cut out the side gussets for the transfer case, cleaned them up, and welded them in place.


As I waited for that to cool, I popped the driveshafts in place and greased the u-joints, followed by the rear control arms. Then I did a quick test fit of the skid plate and whooped with joy. I did a bit of fiddling before pulling it and welding the side gussets onto the transmission skid.


To finish off the night, I got my Asfir aluminum front skid installed, which looked even more awesome. I did have to drill out the front mounting holes as they didn't line up quite right, but that was minor. I did have a longer bolt ready to go for the center, so no problem there. I was really feeling it come together, and my excitement was growing. I'm starting to see the light at the end!


wreckdiver1321

Overlander
Just got a call from the local off road shop. My ARB bumper has been shipped and should arrive by the end of the week.

AWESOME!

I mean, the truck is nowhere near ready to accept it but still! Getting closer all the time. That also means I can ditch the stock bumper cover and crash bar. Probably have to store it outside for a bit though, space is at a premium in this shop.

I'm now somewhat convinced I need to order a winch and have that installed in the bumper before it goes on the truck.

It never ends.
 

Forum statistics

Threads
188,205
Messages
2,903,753
Members
229,665
Latest member
SANelson
Top