You are using an out of date browser. It may not display this or other websites correctly.
You should upgrade or use an alternative browser.
You should upgrade or use an alternative browser.
Sawtooth XL Build
- Thread starter DanCooper
- Start date
Never done it personally, but seen it done successfully. Steam box, or steam bag, for bending the plywood. Big boat builder technique apparently.
Yes, all true. Unfortunately, beyond my skill set. Jess Neal did it (bent the kerfed plywood) successfully on a 6-inch radius (compared to the 7-inch radius in this edition of the plans) using rags onto which boiling water had been poured. Since I tried bending the kerfed plywood twice and destroyed all the material I had on hand, I needed new material to apply. That is why I bought and applied the new stuff. Should have made that clearer earlier.
I think any future builder should be very careful (more so than me) in the selection of the 1/4 inch ply they will use to skin this thing, use a digital caliper to get their depth right, and a track saw to cut their kerfs. Then use the boiling water technique described by Jess to effectuate the bends. Also, the clamping jig is very helpful. I think it can be done if the builder is careful. I chose an easy way out because I am losing my helper for a day or two, and I must move this thing along. Hopefully, others can learn from my mistakes.
When doing fiberglass layups, filling the exterior fiberglass layer isn't just about epoxy. We add whats called micro-balloons to the epoxy to create a slurry mix. This works amazing for filling in the weave of the fiberglass and creates a glass-like smooth surface.
I dismissed this comment too easily. I should have paid closer attention to someone with experience . . . The MonstaLiner does not fill in and cover the weave, as I found out when I laid some cloth on the fender well sides. You can still see the weave under the coating, from which I learned that the Monstaliner does not "hide" nor cover surface imperfections.
I have also learned that the epoxy does not set up as fast as I thought it would using the regular speed cure. And it takes a lot longer to set up as a solid than I thought it would. Perhaps they have changed the formulas to make it idiot proof? Anyway, it sags on vertical surfaces and I have to keep going back and prop it up. I think I may get the faster hardener so it doesn't take as long.
But I am learning. I am in that stage where the exterior is skinned and I am trying to fill all the cracks and holes to have the smoothest surface possible before I tape the edges and fair everything up. Lots of epoxy and sanding. Nothing very photogenic, but here is a snap of the body with the exterior skinned.
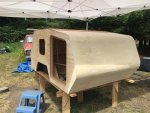
Also working on the galley hatch hinge, and the hatch itself. Perhaps some photos of that tomorrow.
Thank you for the encouragement.excellent thread thanks for taking the time to put this up.
cheers
Gren
Looks beautiful Dan
Still a work in progress! I sanded the first round of filling and fairing and put a second coat on. I used the 205 fast hardener this time, along with the 407 filler. I'm probably doing this wrong, but I put it on with a wooden spatula, then smoothed and faired with my hands. After several minutes, I came back and faired it in with a plastic scraper, about four inches across. It looks pretty good, and I think that after sanding, I will be ready for getting some glass tape on the edges for strength.
Zeiderman
Adventurer
Are you spraying or rolling the Monstaliner? Both techniques return a different result. Next time I use it I will definitely be spraying. Seems to get better coverage and easier to handle than the rollers. I covered up some heavily pitted spots on my hood and it covered that up really well, pretty much I'm the only one that can see them.
Sent from my SM-T230NU using Tapatalk
Sent from my SM-T230NU using Tapatalk
Are you spraying or rolling the Monstaliner? Both techniques return a different result. Next time I use it I will definitely be spraying. Seems to get better coverage and easier to handle than the rollers. I covered up some heavily pitted spots on my hood and it covered that up really well, pretty much I'm the only one that can see them.
Sent from my SM-T230NU using Tapatalk
Semper Fi!
I'm rolling it on. It was a pretty warm day when I rolled it on, and it thickened quickly. The roller seemed to be pulling or lifting it up. Or it may have been that I was not loading the roller properly.
Zeiderman
Adventurer
Hmmm, that's interesting, it should roll on like regular paint. And it shouldn't be lifting, if you use the roller to long, the roller will disintegrate and embed in the liner. The base you're applying to has to be really clean or it will not hold. If I were you I would let it set up and then check for lifting, Jeep Forum has a really great thread on it and pretty much covers any and all. Also when I had problems with the roller they were very helpful, the owner is also available on JF thread as well.
Sent from my SM-T230NU using Tapatalk
Sent from my SM-T230NU using Tapatalk
indiedog
Adventurer
Hmmm, that's interesting, it should roll on like regular paint. And it shouldn't be lifting, if you use the roller to long, the roller will disintegrate and embed in the liner. The base you're applying to has to be really clean or it will not hold. If I were you I would let it set up and then check for lifting, Jeep Forum has a really great thread on it and pretty much covers any and all. Also when I had problems with the roller they were very helpful, the owner is also available on JF thread as well.
Sent from my SM-T230NU using Tapatalk
You got a link to that thread?
Zeiderman
Adventurer
Yup, the owner is on here quite frequently, this is where I went when doing mine.
https://r.tapatalk.com/shareLink?ur...share_tid=875162&share_fid=91020&share_type=t
Introducing MONSTALINER™ UV Permanent DIY Roll On Bed Liner
I use Tapatalk, so I'm not sure if the link will work if you're not, but the last line is the title of the thread.
Sent from my SM-T230NU using Tapatalk
https://r.tapatalk.com/shareLink?ur...share_tid=875162&share_fid=91020&share_type=t
Introducing MONSTALINER™ UV Permanent DIY Roll On Bed Liner
I use Tapatalk, so I'm not sure if the link will work if you're not, but the last line is the title of the thread.
Sent from my SM-T230NU using Tapatalk
Yup, the owner is on here quite frequently, this is where I went when doing mine.
https://r.tapatalk.com/shareLink?ur...share_tid=875162&share_fid=91020&share_type=t
Introducing MONSTALINER™ UV Permanent DIY Roll On Bed Liner
I use Tapatalk, so I'm not sure if the link will work if you're not, but the last line is the title of the thread.
Sent from my SM-T230NU using Tapatalk
800 + page thread is kind of hard to find information in, but thank you for the resource. I think my problem was I was not loading up the roller enough.
Final Post for a Few Weeks-Part 1
I have t dash off to Birmingham to help my daughter-in-law with my grandkids. Who wouldn't do that for a chance to see all three grandkids, plus maybe drive Highway 2 back across the so-called northern tier states?
Anyway, the photos are fairly self-explanatory, except for the first one. This sign is on a neighborhood driveway. The chickens share the same green space as two goats and a donkey. Why don't the goats and donkey get to play?
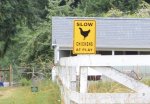 Maybe they are large enough for folks to see them, so no warning signs are necessary but in this day of striving for equality, I think fairness requires such signage.
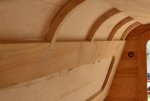 Interior shot showing nose and window framing.
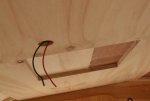 Interior shot of fan location and wiring stubbed in.
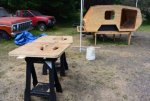 Parts laid out for application of CPES.
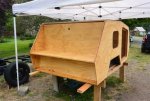 CPES applied.
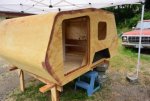
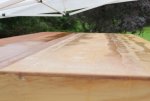 Seams taped on the roof.
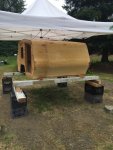 Preparing to put the cabin on the trailer.
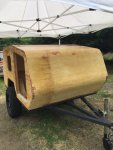 On the trailer and loosely attached.
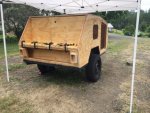 Rear panel installed with light housings attached. I used Bondo to glue them on then put screws in from the back of the panel.
At my limit for images . . .
I have t dash off to Birmingham to help my daughter-in-law with my grandkids. Who wouldn't do that for a chance to see all three grandkids, plus maybe drive Highway 2 back across the so-called northern tier states?
Anyway, the photos are fairly self-explanatory, except for the first one. This sign is on a neighborhood driveway. The chickens share the same green space as two goats and a donkey. Why don't the goats and donkey get to play?
 Maybe they are large enough for folks to see them, so no warning signs are necessary but in this day of striving for equality, I think fairness requires such signage.
 Interior shot showing nose and window framing.
 Interior shot of fan location and wiring stubbed in.
 Parts laid out for application of CPES.
 CPES applied.
 Seams taped on the roof.
 Preparing to put the cabin on the trailer.
 On the trailer and loosely attached.
 Rear panel installed with light housings attached. I used Bondo to glue them on then put screws in from the back of the panel.
At my limit for images . . .
Similar threads
- Replies
- 8
- Views
- 2K
- Replies
- 32
- Views
- 5K
- Replies
- 13
- Views
- 3K
- Replies
- 2
- Views
- 742
