Scott B.'s 2015 AC Build - Expo Style

Scott B.

SE Expedition Society
Hood Blackout

White is a very reflective color (obviously). The white hood, coupled with a low angle of sun, sends the reflection right in my face. Since I can't change the sun, I decided to change the "white".

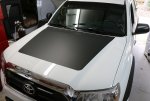
I found 3M vinyl at Crawlorado.com, custom cut for the hood of the Tacoma.

Installation was a breeze - we spend more time aligning the vinyl on the hood than actually peeling and sticking.

We decided to locate the rear edge of the vinyl at the crease in the rear of the hood, rather than at the rear edge of the hood. It seemed like it would fit better at the crease, but after installing the vinyl, I think it would fit fine in either location. As it turns out, I really like the inch or so of white at the back edge of the hood.

The best part is, the sun reflection into my face is gone! Flat black really works.

Here is a view right after installation:

p1.jpg

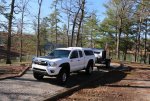
Here we are, camping at the lake:

p2.jpg

And, I think it looks cool, too!
 

4runnerteq

Explorer
Man, Taco looks great. You suck though, lol, cause of you and Bill we now own a SoCal Teardrop. Hope we get as much use out of it as you do the Little Guy. So far its been great.
 

Scott B.

SE Expedition Society
Man, Taco looks great. You suck though, lol, cause of you and Bill we now own a SoCal Teardrop. Hope we get as much use out of it as you do the Little Guy. So far its been great.

31 nights so far this year. Appalachian Rendezvous will add 3 more, and probably a few more nights here and there. Yeah, we like ours a lot.

I would like to see your SoCal - I have never seen one up close and personal. You will appreciate it next time you have to pack up in the rain - or the nighttime temps dip down below freezing.

We'll have to meet up in the Smokey Mountains again. When is the next adventure for SEES?
 

4runnerteq

Explorer
31 nights so far this year. Appalachian Rendezvous will add 3 more, and probably a few more nights here and there. Yeah, we like ours a lot.

I would like to see your SoCal - I have never seen one up close and personal. You will appreciate it next time you have to pack up in the rain - or the nighttime temps dip down below freezing.

We'll have to meet up in the Smokey Mountains again. When is the next adventure for SEES?

Yeah, weve been 9 nights in it so far. Been great. Hick Hop is coming up at Land Between The Lakes the weekend after Expo. Oct 6th I think. We have a group site already reserved and paid for. All you would have to do is show up, bring some food and maybe a little "liquid corn" . You guys would be more than welcome.
 

Scott B.

SE Expedition Society
Front Brakes

As the miles have been rolling by, I picked up a vibration from the front wheels when I applied the brakes. As I am sure you have read on here, this is unfortunately a common problem on these trucks.

Miles tend to wear brakes, and I have plenty of miles. And, I had almost worn out brakes. No time like the present to upgrade!

I looked at several different upgrade options utilizing the stock calipers. I considered going with Tundra brakes, but I didn't want to buy 7 wheels again.

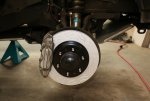
I decided on Raybestos brakes. They have a new Performance series that seems competitive with other vendors performance products. Having used their brake products before, and having good luck with them, I thought I would give these news one a try.

b1.jpg


I did not want drilled rotors, but have been curious to try grooved ones. These are grooved, but not in the traditional manner. I am not sure if the groove design is marketing or engineering - sure looks like marketing - so it will be interesting to see how well they work.

Raybestos also has new pads in their performance series - Element 3. These pads have shims attached to them right out of the box! No more messy, sticky lube to quiet the pads!

Installation was a breeze! I took everything apart, pushed the pistons in, popped the new rotors on, and reassembled. (I wiped a thin layer of grease on the hub, under the rotor hat, to keep rust from forming in the future.)

I bled the entire braking system, not just the front wheels. I like to flush the brake system once a year, to remove water from the system and prevent rust from forming.

b2.jpg

Purdy!

How do they work, you ask? Very well. I have done a panic stop against a tape measure, but the truck does stop shorted than it did with the worn factory brakes.

EDIT: Part numbers for the pads and rotors

Pads - Raybestos EHT976H
Rotors - Raybestos 980670PER
 
Last edited:

Scott B.

SE Expedition Society
Dual Batteries, Part 1

My original - pre truck - plan included dual batteries. I planned on setting up a system similar to the one I had in my Ranger. Along the way, I had many conversations about dual batteries, and read many write ups on both single and dual batteries. There are different viewpoints out there, all of them backed with valid ideas. There is no wrong solution - only different.

I evaluated my intended use of the truck, and added in my many years of experiences of failed batteries. I compared different setup ideas, mapped to my experiences, and decided to run duals. Multiple batteries makes the most sense to me, redundancy being a good think.

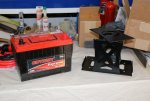
The next big question is which battery(s) to run? And what size? Stock, the truck came with a Group 27 battery. I want to run AGM batteries, and heavy duty ones at that. I decided on Odyssey batteries, their Extreme series. So what size? They don't make a Group 27 size. The options are Group 31 and Group 34. G31 is quite a bit larger, and G34 is a little smaller. I decided on two G34 batteries. A G34 is 28 pounds lighter than a G31, and 2 G34s have more power than a single G31. The big thing is getting weight off the front suspension. The second battery is going in the bed. Future plans call for heavier front springs, so any weight reduction is a good thing.

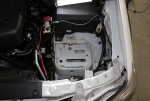
I have never cared for factory style battery hold downs (j-bolts) and wanted a cage for the batteries. I found a nice cage by Artec - steel and not too expensive. I had them powder coated black, so they should last a long time.

db2.jpg

Installation was very straightforward.

Starting here -

db1.jpg

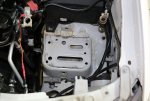
Battery removed -

db3.jpg


I drilled 4 holes for the mounting screws, and painted them to help prevent rust -

db4.jpg

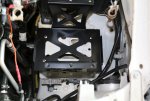
Cage installed -

db5.jpg

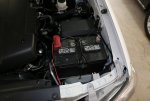
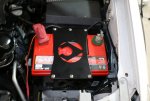
The end result -

db6.jpg

As of yet, I have not changed any of the factory wiring. That will come with I install the second battery.
 

Scott B.

SE Expedition Society
Air Springs

The rear suspension of this truck includes heavy-load bearing Deaver springs, to accommodate the shell and interior, and all the stuff I normally carry in the truck. There is a little extra in the springs to accommodate the teardrop, yielding minimal sag.

However, when loaded for a multi-week trek, with trailer, extra fuel, water, food, etc., the rear end sagged more than I preferred.

I have known about air springs for many years, but never thought them the right solution for my use - which includes off-road travel. As it turns out, three of the trucks that usually accompany us on our westward travels run air springs. Their vehicle use is very similar to mine.

That knowledge set me to re-thinking my situation.

A big negative factor to me was the limiting of downward travel of the rear axle. My research led me to Daystar Cradles, which allow the bottom of the air spring to freely separate from the axle, allowing full suspension droop. Firestone specifically says not to use them. Without the cradles, the air springs would not fit (work) within my design parameters. I have read about many successful uses of the cradles out there, so I figured I would try them also.

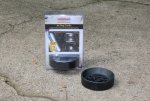
The air spring kit, designed for a Tacoma.

as1.jpg

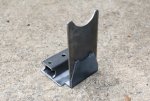
These are the bottom mounting brackets. They normally mount the bottom of the air spring, but instead will carry the cradle.

There is one more issue with these. Stock Tacomas mount the u-bolts with the nuts down - I have a u-bolt flip, with the nuts up. These brackets need to be modified to clear the u-bolt nuts.
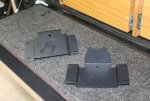
as2.jpg

The cradles.

as3.jpg

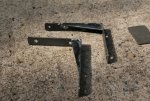
Modified brackets to the right, the spacer blocks and vertical support plates I made.
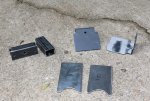
as4.jpg

The spacer blocks will sit like this, on the bottom of the Firestone bracket. The lighter color on the bracket is where I sandblasted off the finish for welding.
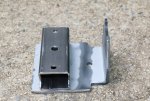
as5.jpg

A mock-up of the pieces.

as6.jpg

Welded and painted.

as7.jpg

I got a new set of 5/8" u-bolts from RuffStuff. U-bolts are a one-time use fastner.
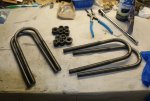
as8.jpg

Continued...
 

Scott B.

SE Expedition Society
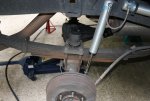
Here we go. What I started with:

as9.jpg

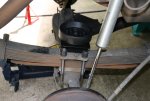
The lower bracket with the cradle mounted.

as10.jpg

A view showing the vertical support sitting on the axle.

as11.jpg

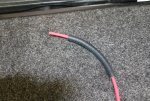
I ran the air lines (red) inside fuel hose, for added protection.

as12.jpg

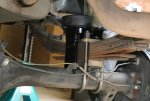
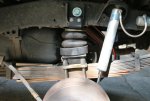
The finished product. The upper mounting bracket and air spring are mounting just as Firestone specified, so I did not include that here.

The red lines behind the shock are extended brake lines.

as13.jpg
I finished the installation right before my multi-week trip to California in September, and the springs worked very well. No issues or problems.​
So far, I am very pleased with this mod.​
 

Scott B.

SE Expedition Society
Bed Braces

Reading through the forums, (which is never good for the wallet!!) many people have found the sides of their truck beds splaying or spreading under load - bed rack, shell, etc. This problem is not limited to our composite bed trucks - full steel beds have been known to as well.

My truck bed did not exhibit much of a problem, but seeing as I have a shell, and go off road, I thought it better to be safe.

There are several companies that build braces for our trucks. Aside from the cost, none of the ones on the market will fit in my bed with the sleeping platform, without doing some modifications. Not only that, I have a welder. So, I decided to build a set myself.

A few minutes of figuring, and I came up with a workable design. By keeping the cross brace somewhat short, I won't have to modify the platform. Even short, it should be long enough to get the job done.

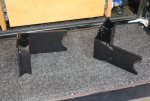
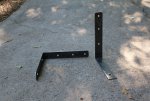
To get started, I bent and drilled some 3/16" steel:

bb1.jpg

I cut some 1/4" steel for the cross braces. And, made some really ugly welds...

I was having some problems seeing, but got sufficient penetration. Strong, but ugly.

bb2.jpg

Fortunately, the paint does a good job of hiding the mess.

I had some leftover ARP bolts from my 5.0L engine project, which dressed up this project nicely. Along the bottom, I used the factory bed bolts.

bb3.jpg

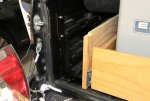
Here, you can see the cross brace stops just under the platform.

bb4.jpg

Assuming the welds hold, the bed sides should never splay.
wink.png
 

Scott B.

SE Expedition Society
Oil Pressure

I guess you can say I am somewhat old school. I always like to monitor what is going on in the engine - with analog gauges. I have always been leery of "idiot lights".

When I added the transmission temperature gauge, I also added an oil pressure gauge. I finally got around to installing the sender. To be fair, one reason it took a while to figure out how to mount the sender was the location of the factory oil pressure sensor. I wanted to tap into that port, but doing so would interfere with an upcoming mod. More on that later.

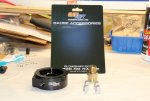
I found this adapter plate made by GlowShift.

op1.jpg

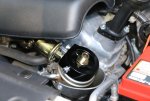
It installs between the oil filter and the engine.

op2.jpg

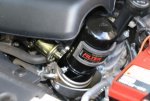
The filter mounts on top of the adapter, as normal.

op3.jpg

This turned out to be a very simple solution to the problem - much simpler than I was originally thinking about.

So far, it works well, and does not leak.

And, it gives peace of mind knowing/watching the oil pressure.
 

Forum statistics

Threads
188,386
Messages
2,903,982
Members
230,274
Latest member
mbauerus1

Members online

Top