SETO - the DR(D4-7R) Moto

Overland Hadley

on a journey
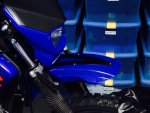
I turned my droopy fender into a sexy fender!


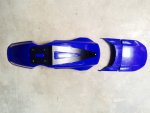
This story started when I found a replacement fender on ebay for super cheap. That gave me the currage to cut up my current one, as if it did not work out well, then I could go back to stock.


Process is simple. Cut the front of the fender off, then place it on the fender to trace out the pattern. There are some extrapolations to make, but some string and masking tape make it easy.

I made the cut with a plastic grinder bit on the dremel tool. Then hand sanded to take the melted rough edge off. And the finishing touch was to hit it with the heat gun to give it a nice molded look.


The good: so happy with the way it looks.
The bad: just may have cut it a little short! Only with some rides will I be able to tell. Really hope it is not too short.


Photos!
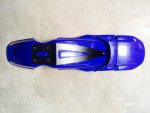
fenderfull.jpg

fendercut.jpg

fender.jpg
 

Overland Hadley

on a journey
Nicely fabricated. Looks the business, too.

Thanks Mike! I am super happy with how it turned out, just hope it is still big enough for the trail riding I plan to do. But is does just look right, less 80's dirt bike and more adventure/dual sport/enduro touring.

And thanks for commenting on my thread, kind of quite around here....
 

Overland Hadley

on a journey
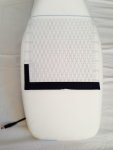
Great winter fun over the weekend, put the new seat together! It is a Seat Concepts in Tall, with a custom combination of grippy fabric.


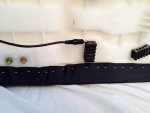
Put the new seat heater on the new foam.

seat1.jpg


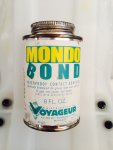
Used some old kayaking foam glue for the foam to seat base mating.

seat2.jpg


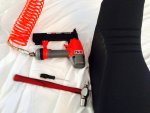
Tools.

seat3.jpg


Lots of little staples. The 1/4 crown staples are not ideal, but it is what I had to work with.

seat4.jpg


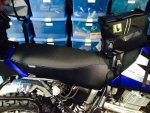
Finished! Looks good! And the additional 1"+ in height will definitely be nice for me.

seatf.jpg
 

mhiscox

Expedition Leader
Did the comment about the 1/4" crown staples not being ideal mean that they were too short, or that there is a better way to do the fastening? What would you think is the ideal way to fasten the cover down? (I'm curious re: my DR-Z's seat.)
 

Overland Hadley

on a journey
Did the comment about the 1/4" crown staples not being ideal mean that they were too short, or that there is a better way to do the fastening? What would you think is the ideal way to fasten the cover down? (I'm curious re: my DR-Z's seat.)

Comment was regarding the small crown size, as I think most upholstery is done with 1/2 crown. The factory staples were 1/2 crown. Although I just did a little research and it seems upholstery is done with 3/8 and 1/2 crown, and one site did mention using 1/4 on some material.

Using the 1/4 crown did work, just need to be careful as each staple is grabbling such a little bit of fabric.
 

Overland Hadley

on a journey
Had a little bit of time, so did a little bit of work on the moto.


Before

FullSizeRender.jpg


After

FullSizeRender-1.jpg


Details

ProCycle Case Saver
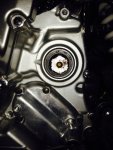
Countershaft Seal Retainer
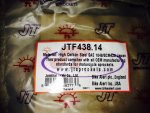
JTF438.14 Sprocket
ProCycle Sprocket Retainer (needed for the small 14T sprocket)


I was not able to finish the install of the Case Saver, "#7. - Go for a ride and never worry about your case again". Damn winter!


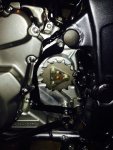
Front Sprocket Details:

FullSizeRender-2.jpg
 

mhiscox

Expedition Leader
You should have moved out west for the winter. Nothing like an epic warm spell to help the motorcycling. I've been out about ten times as much in the last three months as has been my Portland norm.

Oh, well, it'll be warm soon, even in the Upper Midwest.. :sombrero:
 

Overland Hadley

on a journey
You should have moved out west for the winter. Nothing like an epic warm spell to help the motorcycling. I've been out about ten times as much in the last three months as has been my Portland norm.

Oh, well, it'll be warm soon, even in the Upper Midwest.. :sombrero:

Yeah.... sigh....
 

Overland Hadley

on a journey
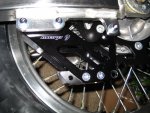
Warp9 lower chain guide.

Needed this because of gearing down to the 46T rear sprocket from the stock 42T. (And it looks ************ compared to the plastic stock guide.)

rcg.jpg
 

WU7X

Snow on the Roof
I just read through your writeup. Excellent job and I am impressed with the logic behind what you are doing. By any chance have you put together a spreadsheet showing the components you installed, date installed, where you purchased them, and prices? This may sound a little OCD but I've found it helpful. Add in oil and filter changes, mileage, etc., as you go along. Just an idea.

BTW, where are you from in MN? I was born and raised in Red Wing.
 

Overland Hadley

on a journey
I just read through your writeup. Excellent job and I am impressed with the logic behind what you are doing. By any chance have you put together a spreadsheet showing the components you installed, date installed, where you purchased them, and prices? This may sound a little OCD but I've found it helpful. Add in oil and filter changes, mileage, etc., as you go along. Just an idea.

BTW, where are you from in MN? I was born and raised in Red Wing.

Thanks WU7X! I am glad you see some logic behind what I am doing. This is my first moto, so I am feeling my way along.

I have lists, no spreadsheet, but I am OCD enough that I should be doing that. I was trying to keep to a tight budget, but when I went past that I quit keeping track of each item. So my lists only go through the beginning of winter. Most everything I have installed can be bought from ProCycle.com, they are a great resource.

I am located at the other end of the state, near Grand Marais along the lake. Red Wing will see spring about a month before we will.... this time of year I am located to far north.
 

Overland Hadley

on a journey
Tach


I really want a tachometer. They say that with a bike like this, that has a torquey engine and likes to live in lower RPM, you do not need a tach. Well poop on that, I want to know the details! If I could hook up a ScanGauge I would!

It looks like I will be waiting to put together my dash/rally tower, and I am not totally sold on the Trail Tech Vapor. I have read reviews that indicated the rpm "meter" on it is hard to read for the low rpm's of the DR650.

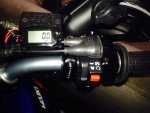
Then I found the Trail Tech TTO. It is just a nice little and simple tach and hour meter. The only downside about it is it runs on a non-replaceable battery, so after a few years the battery will die and it gets tossed in the trash. I hate disposable things, but I decided to give it a try. (One review I read did say that they can be about 600rpm off, so it is fine for knowing the general rpm but not for tuning.)

I must say that I am ok with it, it does not look or feel cheap and disposable. I was not sure where I was going to put it, but when I took it out of the package I was shocked by how small it was. So I decided to just zip-tie it to the throttle cables for now. And I kind of like the placement.

We will see how useful having a tach turns out to be. But I am happy to have it on for now.


Oh yeah, zip-tied on!

TTtach.jpg
 

Overland Hadley

on a journey
spring.jpg


I will be away from the bike for a while. Once the spring is bouncing in the sun everyday I will be back and the bike will come out to play.
Much more to follow.... I am so excited to have a moto and to continue learning to be a competent rider.


mhiscox

Expedition Leader
Then I found the Trail Tech TTO. It is just a nice little and simple tach and hour meter. The only downside about it is it runs on a non-replaceable battery, so after a few years the battery will die and it gets tossed in the trash. I hate disposable things, but I decided to give it a try. We will see how useful having a tach turns out to be. But I am happy to have it on for now.
Hey, it's just like the TinyTach I put onto CamperMog long ago. I had to watch my redline on that truck. (Sadly, redline was about 54 mph. :( )
 

Forum statistics

Threads
188,348
Messages
2,903,633
Members
230,227
Latest member
banshee01
Top