Sewing Thread....A discussion on making your own adventure textile gear.

Herbie

Rendezvous Conspirator
OK, here's a topic I'd like to hear from the experts on:

Sewing folding or semi-rigid containers. I'm talking stuff like the Front Runner Flat-Pack Storage cubes, or the various organizer/storage cubes from Ikea or any of a million Chinese firms - the kind of thing with panel inserts to help them keep their shape.

I have a set of the FR Flat-pack cubes, but they're just too tall to fit under the bed/bunk in my van after recent rework, and they weren't perfectly sized anyhow. At the moment, I'm using an Ikea "Skubb" (underbed zippered soft-box), which fits, but it isn't perfectly sized either, leaving unused cubic inches. The Ikea and Chinese stuff is also cheap as hell, which I don't love. It's a good thing the Skubb was like $6 (so I bought a 2nd one) since the first is already coming apart at one seam where it got man-handled a bit.

I don't necessarily need the "Fold Flat" capability, but I'm looking to sew my own such cubes to maximize the available dimensions and use heartier materials and construction.

I sew "OK". I have a weak hobby machine, but with good needles and patience I've been able to sew canvas and upholstery fabric for a few jobs including HD seat covers for our bench/bed. I can handle sewing a "box", and I think I can figure out the steps for a zippered lid, but once I add in making lined panels with a stiffener, I start to lose the ability to visualize the steps...

A follow up to this. I got a good deal on some factory-2nd 12oz bull denim (minor color variation issues, but I will probably wax the material anyhow). At $2.69/yd, it was cheap enough to justify the attempt.

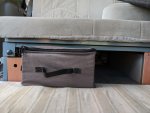
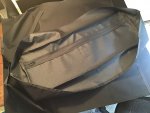
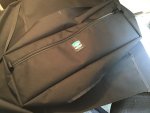
IMG_20200101_100950.jpg IMG_20200101_104936.jpg
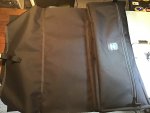
IMG_20200101_103511.jpg IMG_20200101_104523.jpg


So I ended up with a basic rectangular box with a zippered lid, nothing fancy, but it replaces the Ikea "Skubb" underbed storage we were using as a "drawer" under our van's bed/seat. Since I've been doing a lot of organization with corrugated plastic lately, I went ahead and just built a basic unlined box and then cut coroplast panels to friction-fit and make the semi-rigid box hold its shape. After cutting the main pattern, I found I had some waste material that was perfectly sized to add a zippered pocket to the front edge, convenient for small items we want to keep handy.

This is the first of two bags (of different dimensions) so that I can optimize the available space, while each is perfectly sized to hold our packing cubes that we use for clothes, etc. Aside from not filling the available space, the other issue with the Ikea unit was that it was too large (and undivided) to easily carry it like a bag (e.g. when bringing all the clothes in after a trip, or if we stay a night in a motel and want to bring all the clothes in from the van). Having two smaller bags with better handles and D-rings for shoulder-straps means these will better serve as both "drawer" and "luggage".

Aside from a couple of wonky stitch lines, I'm really happy with how this turned out. Total investment <$40 in materials (with a lot of leftover fabric and zipper for future projects).
 

BritKLR

Kapitis Indagatoris
A follow up to this. I got a good deal on some factory-2nd 12oz bull denim (minor color variation issues, but I will probably wax the material anyhow). At $2.69/yd, it was cheap enough to justify the attempt.
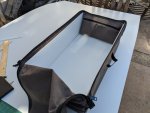
View attachment 559284 View attachment 559285
View attachment 559298 View attachment 559299


So I ended up with a basic rectangular box with a zippered lid, nothing fancy, but it replaces the Ikea "Skubb" underbed storage we were using as a "drawer" under our van's bed/seat. Since I've been doing a lot of organization with corrugated plastic lately, I went ahead and just built a basic unlined box and then cut coroplast panels to friction-fit and make the semi-rigid box hold its shape. After cutting the main pattern, I found I had some waste material that was perfectly sized to add a zippered pocket to the front edge, convenient for small items we want to keep handy.

This is the first of two bags (of different dimensions) so that I can optimize the available space, while each is perfectly sized to hold our packing cubes that we use for clothes, etc. Aside from not filling the available space, the other issue with the Ikea unit was that it was too large (and undivided) to easily carry it like a bag (e.g. when bringing all the clothes in after a trip, or if we stay a night in a motel and want to bring all the clothes in from the van). Having two smaller bags with better handles and D-rings for shoulder-straps means these will better serve as both "drawer" and "luggage".

Aside from a couple of wonky stitch lines, I'm really happy with how this turned out. Total investment <$40 in materials (with a lot of leftover fabric and zipper for future projects).

Love it! A couple of questions/suggestions.

Did you sew a patch on the backside of the handle where they're X-boxed? If so, cool! If not, sewing a patch on to the backside will increase the strength and longevity of the fabric and reduce the chance of the handle being pulled off.

Will your machine sew through the plastic liner? If so, a couple of bartacks along the seam will help lock in place.

Cheers.
 

Herbie

Rendezvous Conspirator
Love it! A couple of questions/suggestions.

Did you sew a patch on the backside of the handle where they're X-boxed? If so, cool! If not, sewing a patch on to the backside will increase the strength and longevity of the fabric and reduce the chance of the handle being pulled off.

Will your machine sew through the plastic liner? If so, a couple of bartacks along the seam will help lock in place.

Cheers.

Thanks for the tips! I did not put backing on the handles, I will add that for bag #2. My machine will definitely not handle the plastic, but I was thinking of adding a "flap" to the inside when I stitch the zipper in place. When it flips to the inside, it would be a little lip that helps secure the plastic the way the front pocket does.

I need to locate a zipper foot for this machine too. I thought I had one, but couldn't find it in my box of sewing bits, so it made the zipper operations more challenging than they needed to be, I think.
 

Herbie

Rendezvous Conspirator
A small update to my project for underbed semi-rigid bags:
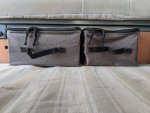
IMG_20200111_115714.jpg IMG_20200112_102015.jpg

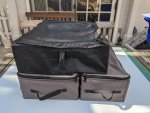
I completed the second bag to fill up the space. At Paul's suggestion, the carry handles now have backing material, and as discussed, I sewed a "flap" around the sides that folds over the coroplast liner to help hold in place.

You can sort of see the wasted volume I recovered vs. the black Ikea Skubb, but what's hard to show is that I can really fit a LOT more stuff now. I made the bags in two different sizes so that I can maximize the number of standardized packing cubes that fit. (Everyone in the family uses the same brand/model in different colors.) Four cubes fit exactly in the smaller bag, four more fit in the larger, with extra room for bulky items like jackets or a dirty clothes bag. With the Ikea, we could sort of (almost) fit six of the same cubes, with extra stuff crammed into the corners, so with this change we've actually increased our usable volume by more than 30%.

A more complete writeup is on our blog here.
 

BritKLR

Kapitis Indagatoris
A small update to my project for underbed semi-rigid bags:
View attachment 561001 View attachment 561002

I completed the second bag to fill up the space. At Paul's suggestion, the carry handles now have backing material, and as discussed, I sewed a "flap" around the sides that folds over the coroplast liner to help hold in place.

You can sort of see the wasted volume I recovered vs. the black Ikea Skubb, but what's hard to show is that I can really fit a LOT more stuff now. I made the bags in two different sizes so that I can maximize the number of standardized packing cubes that fit. (Everyone in the family uses the same brand/model in different colors.) Four cubes fit exactly in the smaller bag, four more fit in the larger, with extra room for bulky items like jackets or a dirty clothes bag. With the Ikea, we could sort of (almost) fit six of the same cubes, with extra stuff crammed into the corners, so with this change we've actually increased our usable volume by more than 30%.

A more complete writeup is on our blog here.

Looks great! It’ll be interesting to see the abrasion wear on the bottoms/corners overtime. If you can add 1500D or a slicker material on the bottoms it may aid with wear over time. But, still an awesome project!

We’ve been contracted to produce a line of specialty vehicle wrench rolls (unique wrenches for a unique purpose) for a large line of green/coyote colored vehicles over in the sand. Working on the green ones today. God bless and be safe to those that’ll be using them! (Sorry, can’t show the entire project)
 

Attachments

  • A46285CF-ADF0-47C9-80AC-4EA5972AF41E.jpeg
    A46285CF-ADF0-47C9-80AC-4EA5972AF41E.jpeg
    2.6 MB · Views: 60

Josh41

Adventurer
Does anyone know what these are called and/or where I can get them. I saw them at the Rocky Mountain Overland Rally, took a picture but that's it. They are grommets with snaps that you can sew on.
Any help appreciated.
20190803_104141.jpg
 

BritKLR

Kapitis Indagatoris
Does anyone know what these are called and/or where I can get them. I saw them at the Rocky Mountain Overland Rally, took a picture but that's it. They are grommets with snaps that you can sew on.
Any help appreciated.
View attachment 565439

They don’t look like anything from a textile/hardware catalog, that I’ve seen. Since it looks like the snap is installed overthe top bar tack stitch, it looks like the loop can be sewn separate out of webbing. The grommet hole can be burned or stamped and then the entire thing is sewn onto the tent material (if wanted) and the snap screwed/riveted through the the webbing, tent material and into the awning frame. Not too difficult. Good luck.
 
Last edited:

rayra

Expedition Leader
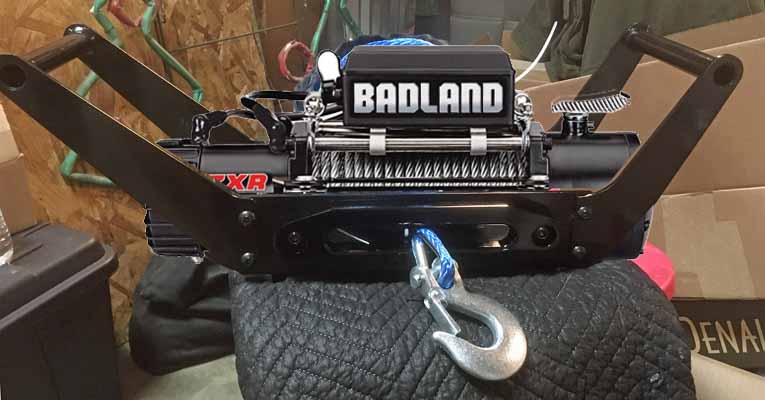
Next sewing project, a winch cover from 1000D fabric, for a 12k winch in a hitch-mounted carrier. Photoshop image / mockup

winch011 mockup.jpg


Envisioning a sock sort of thing that slides on from the left and a nice big tooth YKK zipper that runs from the front right upper corner, back along the right handle, down the diagonal on the back of the handle and across the bottom back edge to the receiver hitch, to close the end of the bag.

in the middle of gathering in all the parts and have some plugs to install front and rear of the vehicle and the winch to buy before getting around to the sewing. But I have all the sewing materials already. I could fake the winch motor end protrusions with some paper towel rolls taped into the carrier and get the cover sewn up before I have the winch.
 

alia176

Explorer
I don't have much to contribute to this awesome thread except that as a 52 yo single man who sews on occasion, seems to turn women on for some reason ;)
 

BritKLR

Kapitis Indagatoris
Please Note: This is a joke. Thanks

Remember........All you guys that know how to sew will be the google/facebook/twitter tycoons of the future (alongside the mechanics) since someone will need to make all the crazy apocalyptic clothing for people to wear....forget about the TP and buy up that thread
and material!

LOL


and 0296DAF6-3EA6-4122-AD10-2FA9E20BAE9B.jpegE24E7D8A-7C71-44D3-9E3C-866A812023C8.jpeg
 
Last edited:

BritKLR

Kapitis Indagatoris
Work continues. Building out three spec bags for some government world travelers (Sightseers I think....) This is just the internal panel that will be sewn to the external panel. It contains 15 separate pieces, 1000D Cordura, #8 /#10 YKK zippers, Ballistic nylon on bottom with 8 internal gear specific pockets inside 1 zippered pocket and 1 quick access pocket with tension strap/ buckle. The external panels, straps, handles, zipper panels and pockets get put together later.

268A8D26-E912-44F5-A7F0-557A29EA3FE3.jpegE45C4CF4-72D8-45B4-A5D8-661FBB22DECF.jpegA0A300C9-F65F-4AC0-9955-684C673798A5.jpeg
 
Last edited:

Herbie

Rendezvous Conspirator
This is just the internal panel that will be sewn to the external panel. It contains 15 separate pieces.

Wowza. Can you keep a build like that all in your head, or do you need an assembly checklist? (I needed a list for my much simpler rectangular bags.)
 

Forum statistics

Threads
188,259
Messages
2,904,624
Members
229,805
Latest member
Chonker LMTV
Top