Silnylon vehicle awning ideas for a lightweight compact flexible design

cruiserpilot

Adventurer
Really amazing ideas here. I have the same philosophy, keep it simple without a bunch of stuff attached and screwed all over the truck.
I can attest to the idea of the alum track from sailrite above. It is similar to what a lot of jeep bikini tops use to secure along the top of the
window. Looking forward to the finished product and how you do it.
 

blazer296

New member
Loving this awning set-up. Never thought of doing it as a stuff sack type, though I dont know why. Just always see them as some sort of roof/rack mount deal.


On the adjustable poles, I made one similar years ago, though I dont recall the sizes now.
Biggest difference, it was infinitely adjustable within its range.

Large pipe/small pipe just as you guys have mentioned, but instead of pin and holes - slots and a (hose) clamp.
Hopefully this will make sense, I dont have a picture of my old set-up.
On the larger "outer pipe" cut two slots 180* apart and about 1/8" wide running 5-6" down the length of the "top" end.
Get a wing nut style hose clamp (I prefer t-bolt over worm gear as they are stronger).
Rough up the outside of one half of the outer pipe right up by the slit end, you'll want it right at the end but not hanging off for the best leverage. Epoxy the hose clamp in place to that roughed area, so it dont get lost. The epoxy can only be on ONE side of the slit pieces, so the other side can slide as it tightens. The epoxy just holds the clamp in place, so you dont drop it down the pole while trying to adjust it. I left it humped up around the clamp a bit, so when it breaks free of the clamp (and it will) it still prevents it from sliding off/down the pipe.

Slide the inner pipe to where you want it, and tighten the clamp to lock it in place. Keeping the slots a little long gives it better "grip". If they are too short it wont grip very well.


Hope that makes sense.


Tip for any tarp pole, PVC or otherwise, NEVER lay it on the ground "for just a second". Thats when somebody will decide to move a truck and you will hear crunching noises before you realize where they are moving to.

Jim
 

wanderer-rrorc

Explorer
Loving the thread!! Ive ordered enough ripstop to keep me busy all winter!! Flip-pac build and some hammocks..and an awning...little things ya know?
 

rayra

Expedition Leader
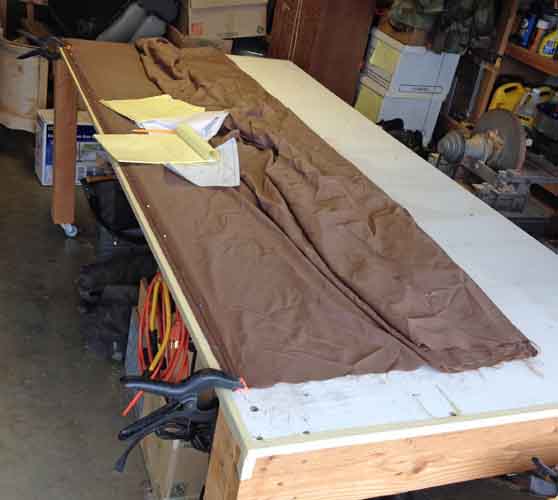
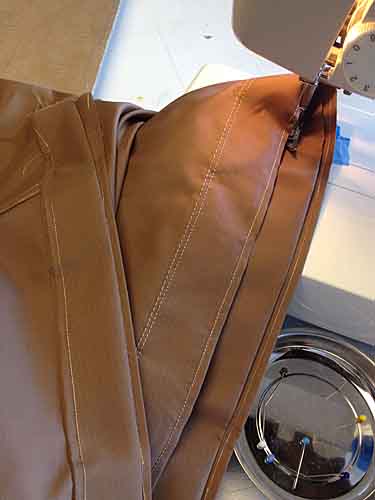
Finally got back to working on the awning project. Took me a while to get my mind around it again. The felled seams oriented to better shed water runoff and the complicated multi-fold edges all make keeping track of what side of the fabric you are working from quite important.

Fortunately I had a lot of notes and sketches and I was back to ironing and sewing in under an hour.

awning47.jpg


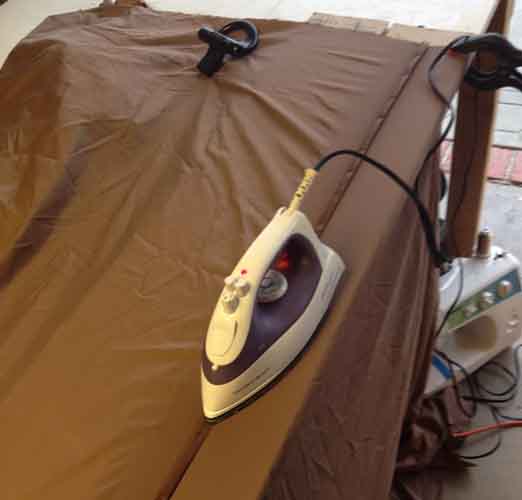
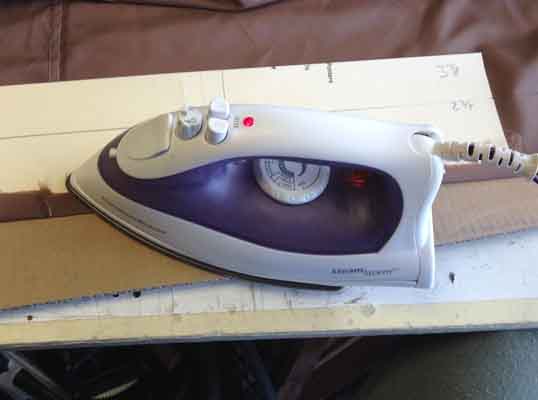
I did a little fold ironing for tucking the loose ends (selvedge) of the fabric sections into the felled seam. Creasing the fabric is helping me feed the seam thru the machine a bit easier, instead of trying to hold the fabric just so, or messing wtih a bunch of pins.

awning49.jpg


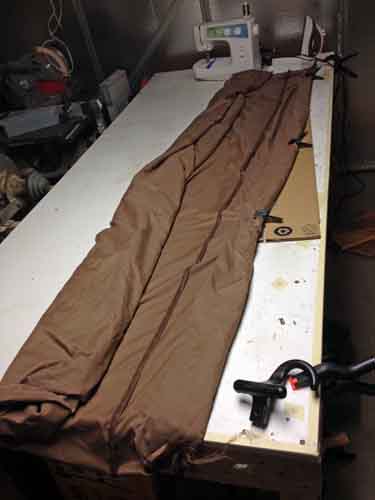
Part of the issue is that these 3-panel trapezoid shapes are ~15'x8' and even with the lightweight ripstop fabric - or even because it is so flexible - it's cumbersome to work with. I'm having to make a lot of fan-folds in the fabric to gather up all the excess and make it easier to control going thru the machine.

awning50.jpg
awning51.jpg
awning54.jpg


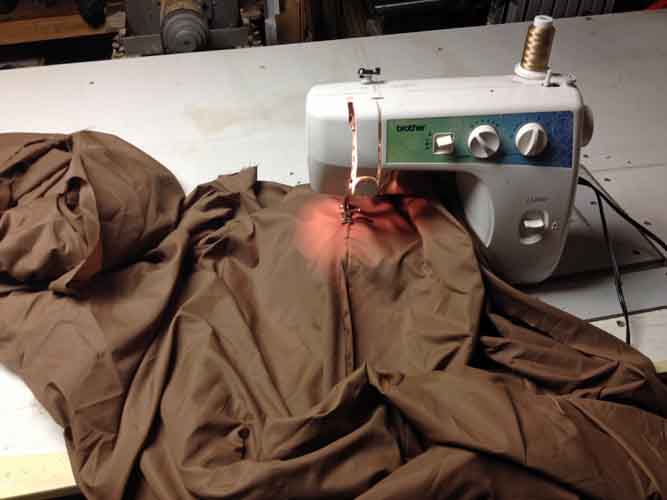
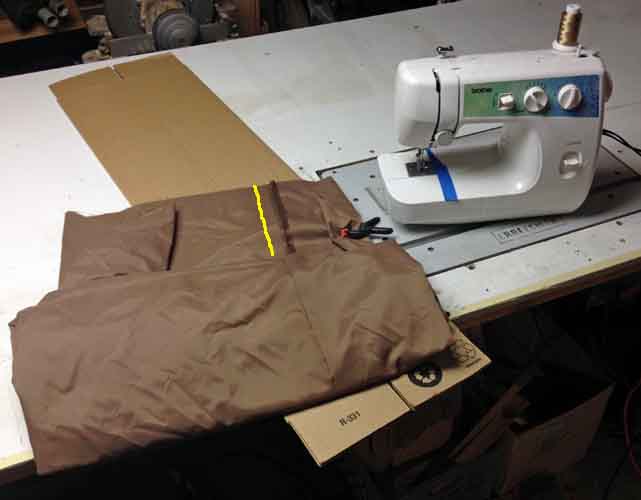
Here's the bundle ready to go thru the machine. The yellow line is where I'll be sewing. The bundle is bascially in my lap and I feed it thru.

awning55.jpg


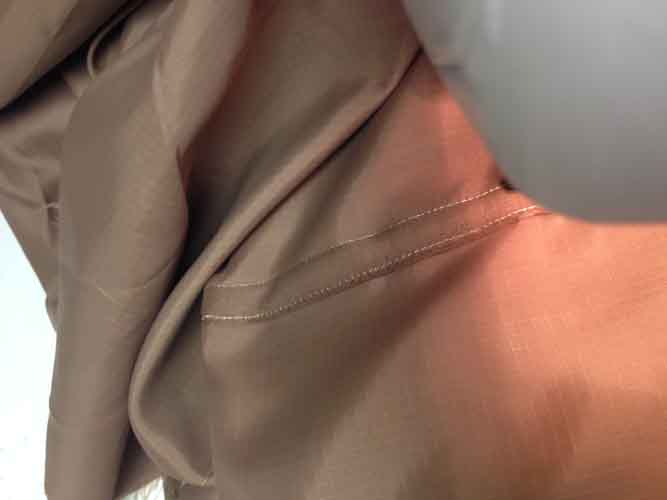
All that work to make a simple felled seam joining two panels together. This is basicalyl the same seam used on the inseam of your pants.

awning52.jpg


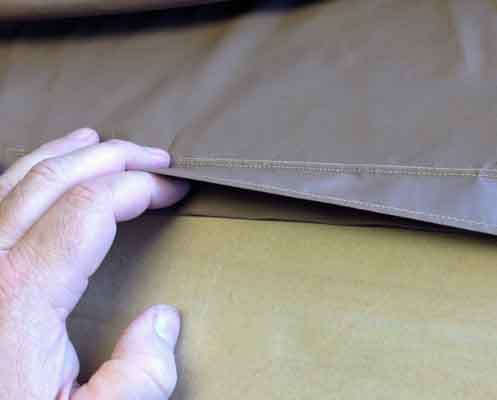
Here's the outer / obtuse corner of the trapezoid panel, showing how the felled seam has been oriented so the 'open' side is towards the outer edge, to help with rain runoff. Kind of like the way a shingle overlaps.

awning53.jpg


So far the biggest issue and trick with sewing this fabric is how thin and 'slippery' it is. It doesn't feed right in either direction thru the pawl / foot of the sewing machine. It isn't stiff enough to shove thru, or be taken up properly. So basically I have to get things positioned just so and then use my hands to tension the fabric and help the feed thru. I've got the feel for it now, no more problems with things bunching or thread getting snarled by misfeeding fabric. And that 'skill' came right back after 6mos of idleness.

I'm pushing thru on finishing things out now. I've got an idea for where I want to stage things when I set up all the permutations of the awnings for photography, and I've got a very narrow window of time to get it done.


I've also recently made a set of adjustable poles to go with these awnings, which I detailed in another topic, linked in my sig below
|
|
V
 
Last edited:

rayra

Expedition Leader
ilnylon vehicle awning ideas for a lightweight compact flexible design - ALMOST DONE

Almost done with the awning project. I've been working steadily on it the last few days, whenever I could, pushing to finish and finish in time to take the whole mess up to the CA Poppy Preserve as a photographic backdrop for all the configuration photos. Trying ot finish by this weekend.


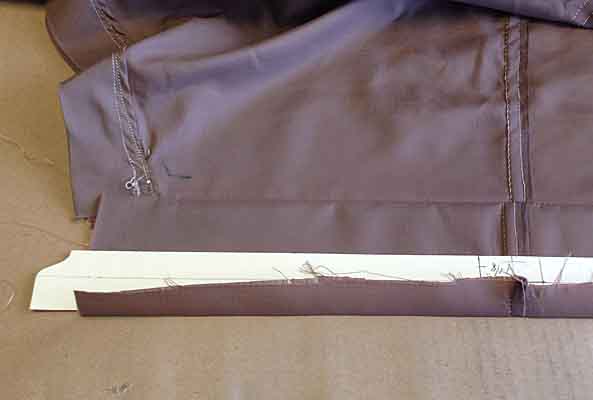
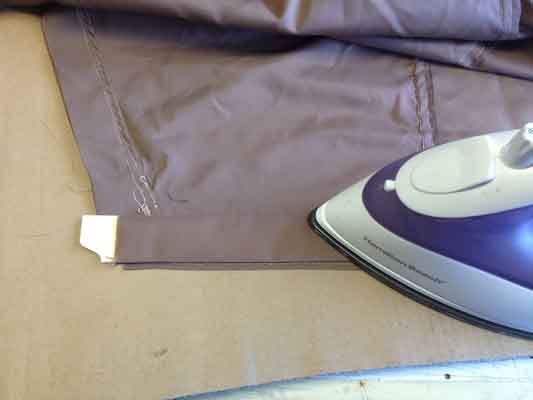
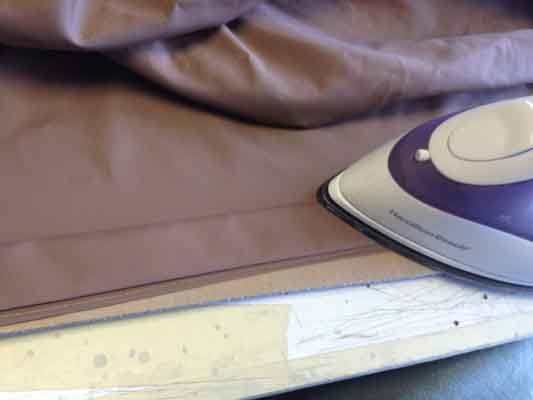
Here's some photos and verbiage on how I'm setting the complicated edges on these tarps with a no-budget method. I'm using a set of thin card stock (cut from manila file folders) templates / guides and setting the folds / creases with an iron, prior to sewing things up. It works pretty well, it's free, but most importantly it's fast. IIRC this project is about 150 linear feet of five-fold edging.

I figured out that I needed ~5" of material to create the edge I've previously described. So that dimension is added all around the base edge measurements of the panels.

My first design had this folding done so the final upper edge with the grommets was sewn-attached to the overall panel, making the thread the weak point. I caught that as I worked the first edge of the first trapezoid and changed things around so the first edge fold IS that upper edge, a continuous run of the main panel. Then the rest of the folding is underneath and the stiching is attaching the no-load portion to the panel.

NEED DIAGRAM OF FOLDING


Part of that process, using those templates -

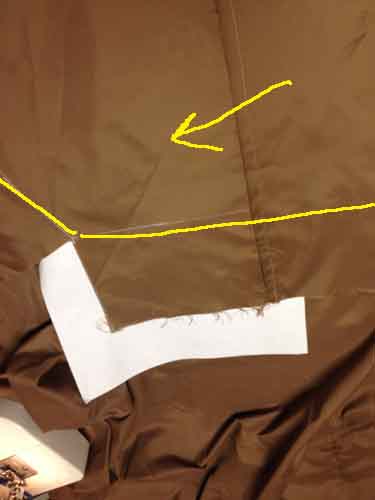
Here I'm folding over the selvedge / loose cut edge, about 1/2", creasing it to fold into the crease and be sewn thru / shut, trapping the loose ends.

awning57.jpg


This is the underside of the awning, the grommet fold is hidden underneath. Here I preparing to fold up the bottom flap, which will run under the grommet flap. The card stock template is 1-1/8" wide. It's folded twice, so it lines up on the seam line of the first fold, and ironed in place. You can see the grommet fold peeking out along the edge, it's a bit wider (happy accident)

awning58.jpg
awning59.jpg

awning59.jpg
awning60.jpg


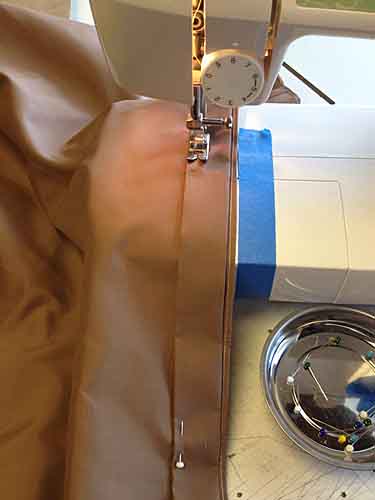
I then pin this folded flap in place along the entire edge, prior to feeding it all thru the sewing machine. The second pic is some of my best work to date. Some of the earlier edges were a bit ugly, some complications which I'll get into later.

awning61.jpg
awning63.jpg


Here's the completed edge, with the top side up and you can see how the double flap edge lays

awning62.jpg


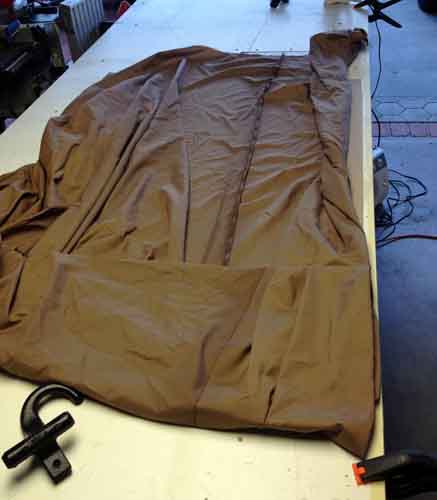
Here's the first trapezoidal panel laid out. I already think it's a 'size' too small. We'll see when I get everything done and put it all together. This panel is ~14' on the base, 6' at the 'top', and the diagonal sides are 8' long. And it's 7' wide / deep (which doesn't seem like much). Total area about 70sq' for this panel. This was all driven by my desired 2' spacing on the grommets, so the panels work together in many arrangements.

awning64i.jpg


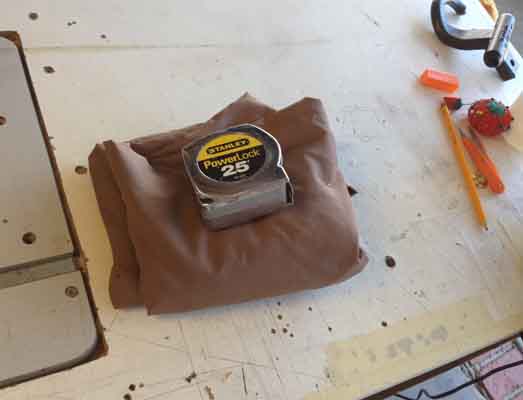
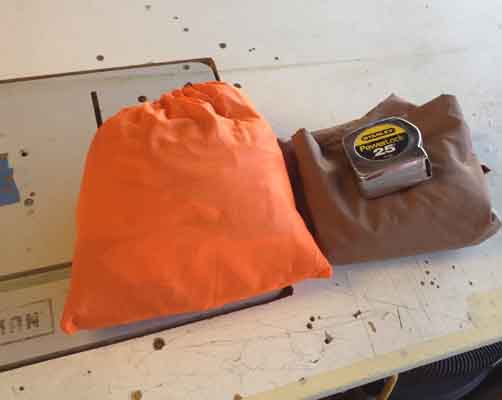
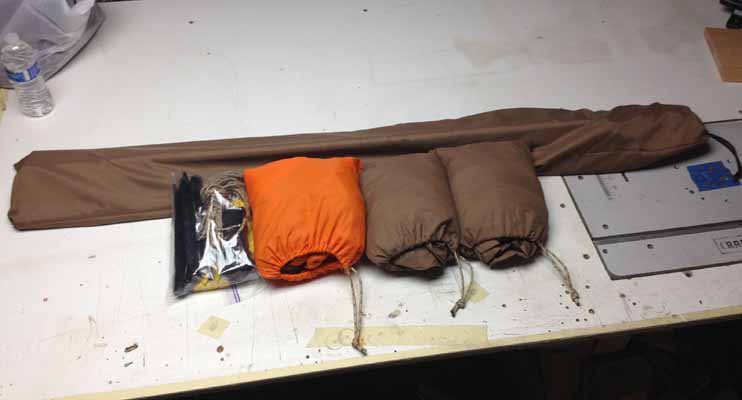
Folded up it takes very little space. The second pic compares it with the earlier vehicle-shading panel, which is two layers thick. That orange stuff sack is 11" x 10" flat / empty and about the size and heft of a football, stuffed full. The trapezoid panel bags will be about 2/3 the size and include sets of stakes and cordage to erect the panels.

awning65.jpg
awning66.jpg


On the trouble -

The fabric has a lot of flexibility, it's almost like silk. It takes a good deal of care to keep two sections even, under equal tension as you feed it thru the machine. It took some experimentation to learn how to handle it, and I'm getting better as I do each side. It's too thin and 'greasy' to feed properly thru the foot of the sewing machine, you have to hold it in tension between your hands, positioned both before and behind the foot of the machine and feed it thru as the machine wants it / takes it. Similar to feeding a tablesaw.
Without manually feeding it, it quickly bunches up and jams the needle / machine. That's true in both directions. Only when the fabric was about 4 layers thick did it feed anything like a 'normal' tight-woven clothing fabric.
I also am having some difficulty in the diagonal-edge sections, since I'm not creasing the fabric on the weave pattern. That really takes some close pinning to overcome. It would probably be a better idea to use that hem-gluing tape on the diagonal sections. And it might also serve to help waterproof some of the seams. Especially the felled seams in the middle of the panel. That's an experiment for another project.

Oh and those Harbor Freight grommets are even more horrid than I thought. They're not even really brass. They're ferrous metal, brass plated. They'll rust in a jiffy in a higher humidity climate or rainfall. I discovered this by accident, I took to using my little magnetic parts tray as a pin catcher while sewing. After I moved it a couple times it was wobbly and I found the "brass" grommet set I was checking things with was stuck to the magnet on the tray bottom. %$%&#!
I'll have to find a real bargain on preferably plastic grommets, in the near future. I'm pretty sure this is the 'Mk1' version of this project and someday there'll be a bigger / improved 'MkII'

More to come on this soon, I'm hoping to finish the other panel tomorrow, and the grommets tomorrow night / Friday. With photos early next week.

(9,950 views!)
 
Last edited:

rayra

Expedition Leader
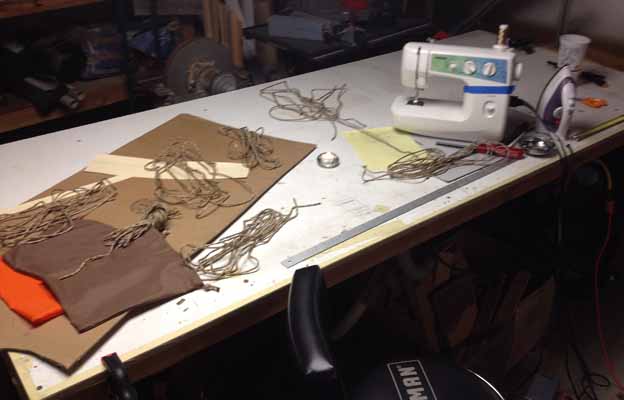
awning sewing is done, should finish everything else tomorrow. All the major sewing is done. Trapezoidal pieces completed. Tomorrow I put all the brass grommets in, make two more metal poles, and chop an aluminum flat bar down into little bits to form guyline tensioners. And sew a stuff sack for 6 poles. Friday's it's off to the Poppy fields for a photographic backdrop. Right now I have 18 configurations - make that 19, just thought of another - in which these three panels can be arranged, both connected to the vehicle and off it. I intend to erect and photograph them all.


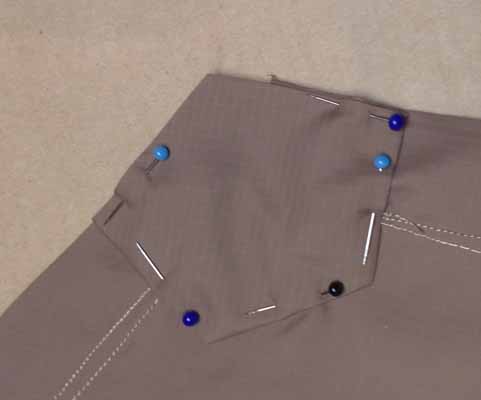
Today's work, as I finished the trapezoids. They're a little rough, learning process and all. In figuring and changing my complex edge-fold on the fly, I came up a little short in my corner overlaps. On the short 'top' of the trapezoids I left an extended flap on the wrong portion of the fabric, and once the complex fold was done those obtuse corners come up short, without proper overlap of the sides, so no strong corners there. So I experimented with different ways to finish those corners, including gussets and various ways to fold and reinforce / sow the ends. We'll see which ways survive actual use.

awnings67.jpg


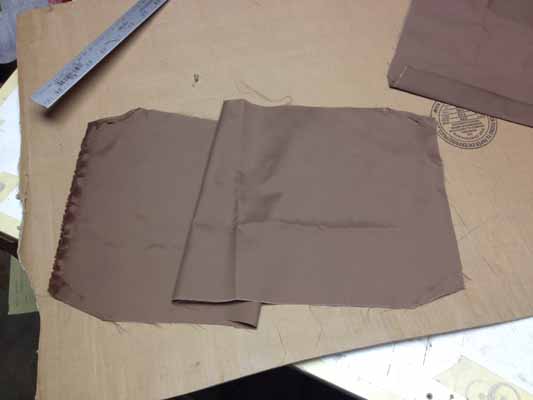
I also whipped out the two stuff sacks for the trapezoids. It's pretty easy to make them, especially if you aren't too finicky.

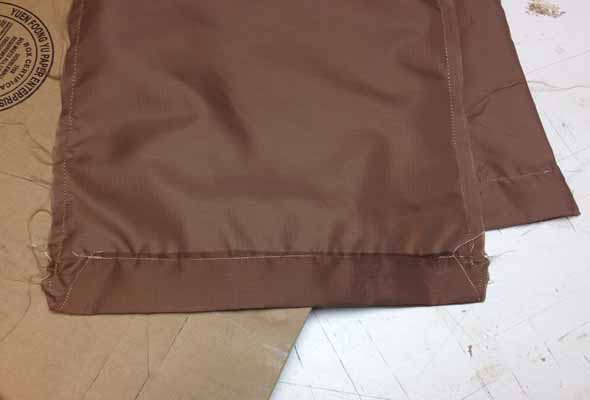
I start off with a long narrow rectangle, folded in the middle, the fold being the bottom of the bag. The mouth ends will have a drawstring thru them, so you have to fold and edge the ends of those before you sew up the bag.

The starter piece, with the corners dog-eared and stiched to form the mouth of the drawstring folds.

awnings68.jpg


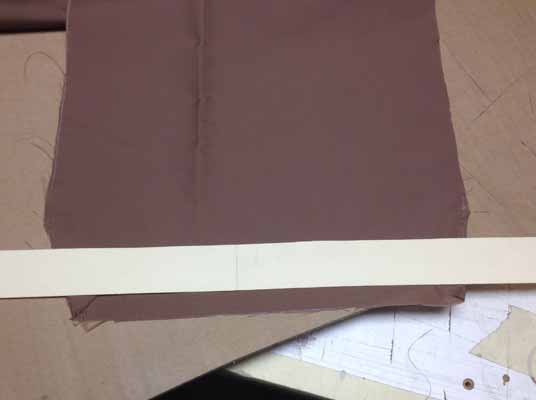
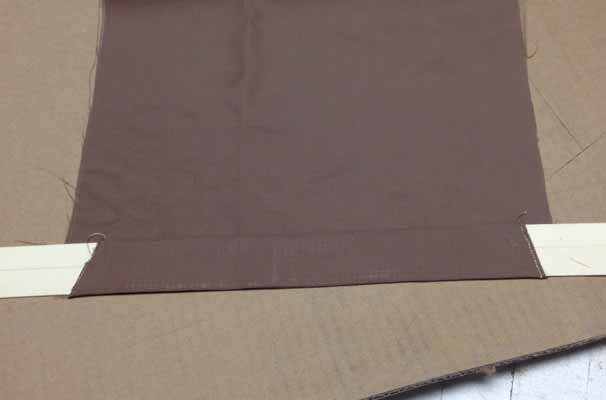
Then I used the same card stock template to fold the ends over and form the drawstring channel.

awnings69.jpg
awnings70.jpg


Once the ends are seamed, you fold the bag in half - with the drawstring fold side 'out' - line up the top and sew the sides shut. Stopping about a 1/2" short of the top.

awnings71.jpg


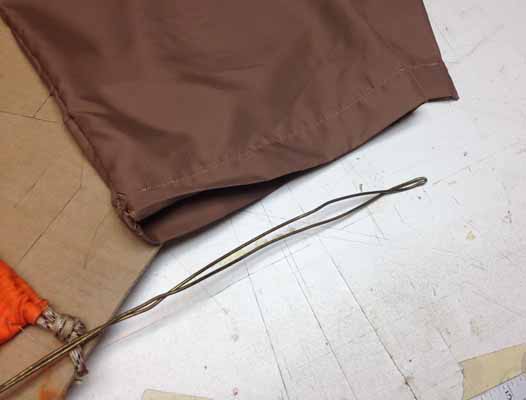
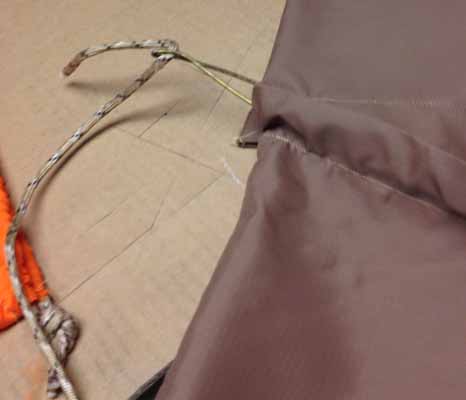
When it's done you turn the bag outside-in. Then it's time to thread the drawstring. I use a bent coathanger, bent in a way that pinches the cord so I can quickly pull it thru without knots, tape or any other attachments or snagging.

awnings72.jpg
awnings73.jpg


Bags complete

awnings74d.jpg


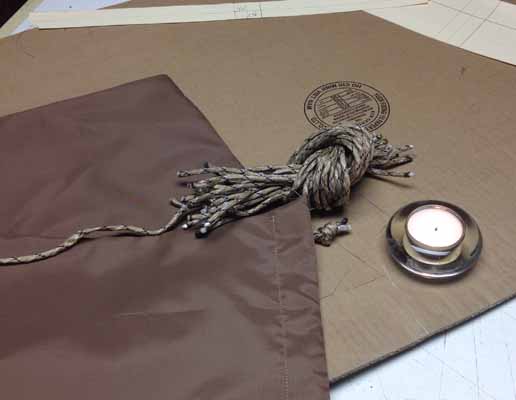
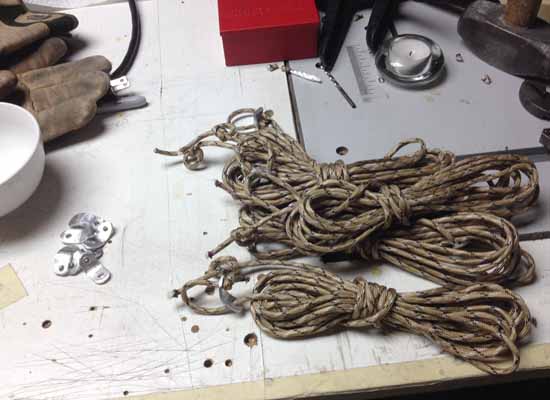
Then I cut up a bunch of paracord. About (20) 16" pieces, these will be strategically tied to corner and midpoint grommets on the panels, so they are readily available for tying the awnings to anything or to each other. And I cut up (6) 16'+ guylines, for my planned (6) poles. 7' pole, 7'-8' offset to the stake, that's roughly a 12' diagonal. Plus I'm using tensioners, so you want a couple feet overlap at one end. plus a little extra.
I don't have a proper hot edge cutting tool, so I just cut the cord with scissors and used a candle to melt the ends to prevent unraveling.

awnings75.jpg
awnings76.jpg


I've set Friday for the 'photo shoot', so final pics of the 'Mk1' awning set should be posted Fri nt or saturday.


views 10,200
 
Last edited:

rayra

Expedition Leader
Another few hours today. Lots of odds and ends to finish this project.

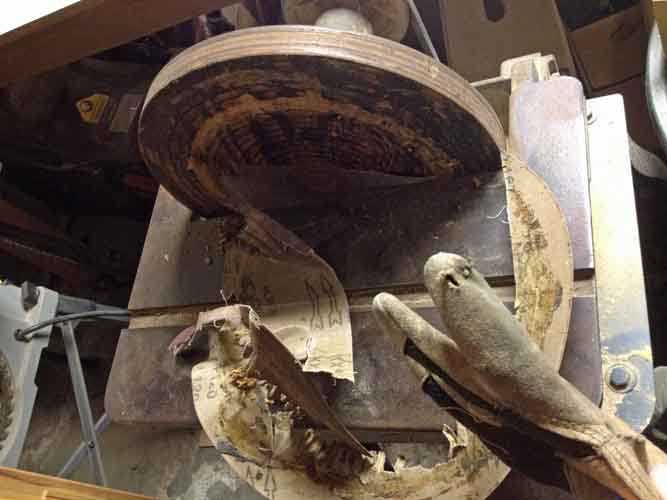
Built another pair of poles, for a total of 6. Used some square shaped link pins, couldn't find more of the type / size I already used. It went quickly, until a foolish mistake and a smashed fingertip. Accident while trying to bevel the points of the link pins to make them easier to insert thru the poles. I was turning them on a huge old table mounted belt driven 12" disc sander. HAD MY GLOVES ON STILL, from drilling the holes in the EMT tubing. Was working close to the table surface of the disc sander as a support and got sucked in. Left index finger, glove, link pin, everything, jammed between disc an table. sanding surface shredded, gouge dug in the plywood backer plate. Crushing laceration to the tip of my finger, profuse bleeding for a bit. Treated and throbbing now. Then, I bound it in a paper towel and kept working.

Picture of the carnage, heed my foolishness and take warning.

awnings90.jpg


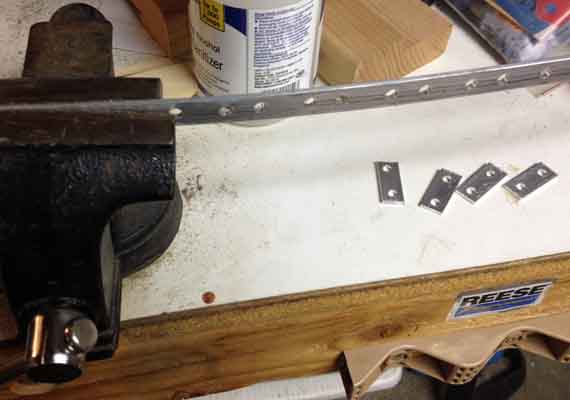
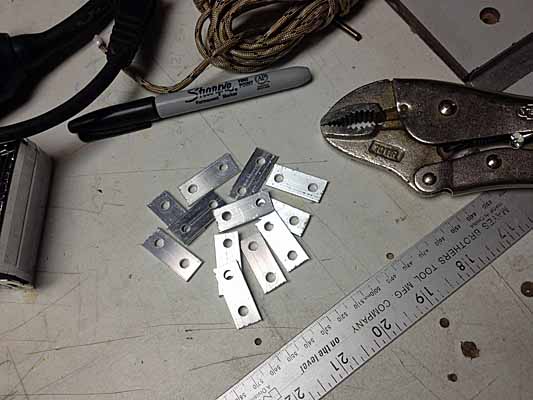
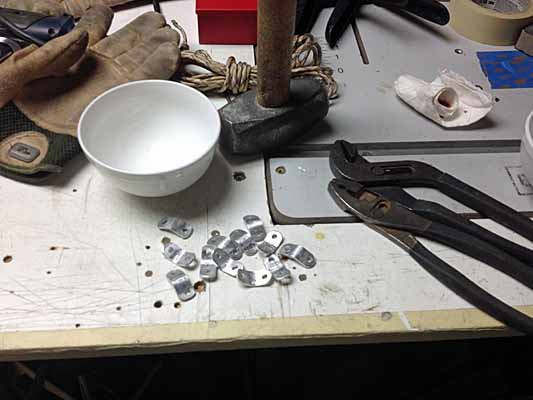
Fabricated a bunch of guyline keepers / tensioners, out of a 1/2" wide aluminum flat bar. None of the outdoor stores or departments in my area have them, and couldn't be arsed to order them. So I drilled a bunch of 3/16" holes at measured intervals and hacksawed the bar into segments. The segments were then clamped with ViseGrips and their corners were ground round and wire brushed, on my bench grinder. Then I bent them with a couple sets of pliers. A little crude, but they'll do.

awnings77.jpg
awnings78.jpg
awnings79.jpg


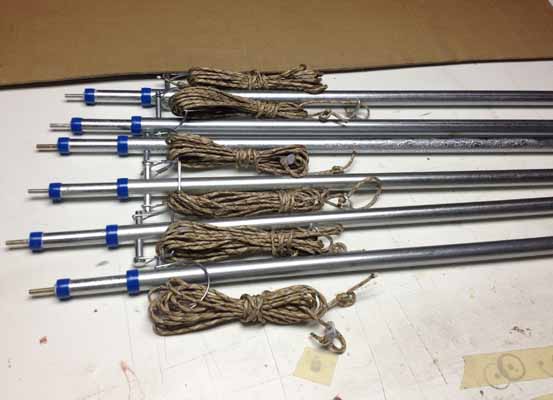
Then I combined all those parts into pole sets. Another handy use of the link pin wire loop. Then the six sets were measured up for making yet another stuff sack.

awnings80.jpg
awnings81.jpg


For demonstration purposes, the whole awning set kit. The ziploc has stakes, more keepers, more cordage, a few other related bits. Everything but the poles will likely go into a 12" tool bag once I build my storage drawers.

awnings89.jpg


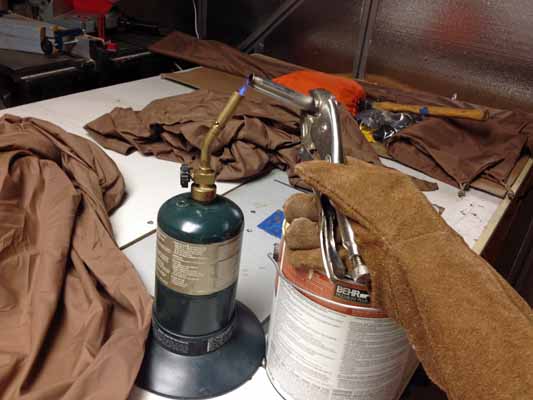
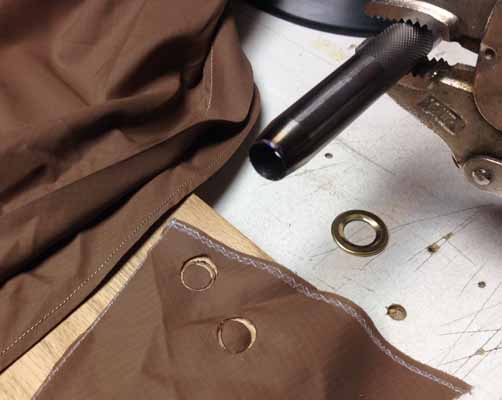
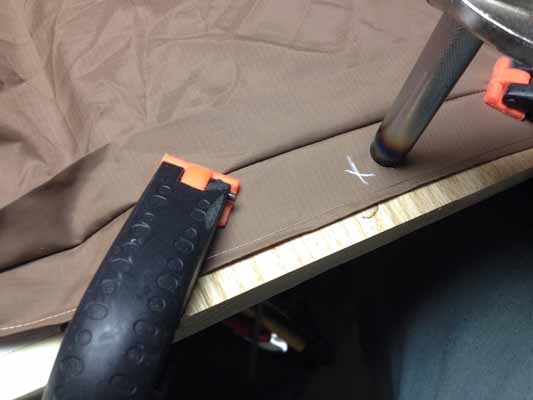
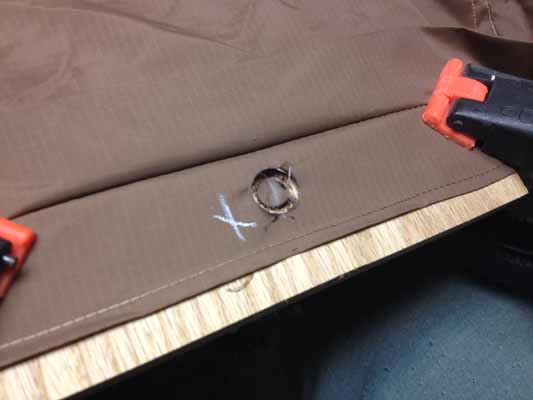
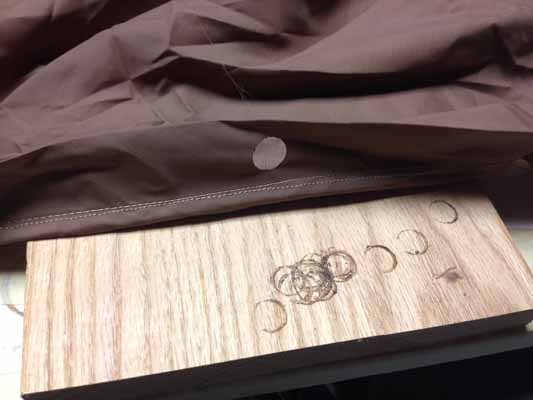
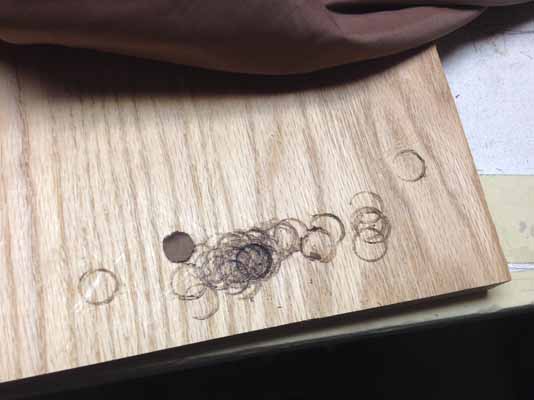
Then it was a little late to be pounding with a hammer to set grommets. So I MacGuyvered something else to get it done, and truth be told it's a better method. The cheap grommet kit as a small set of tools, a punch, anvil and a tool that rolls / locks the two halves of the grommet together. In past efforts, the fabric has proven quite durable. Too durable for the tool set, in fact. I had to use a better set of hole punches / cutters. And last time, pounding them on pine, I was actually smashing the fabric into the soft pine, before it would cut. Switched to oak as an anvil to get it done.
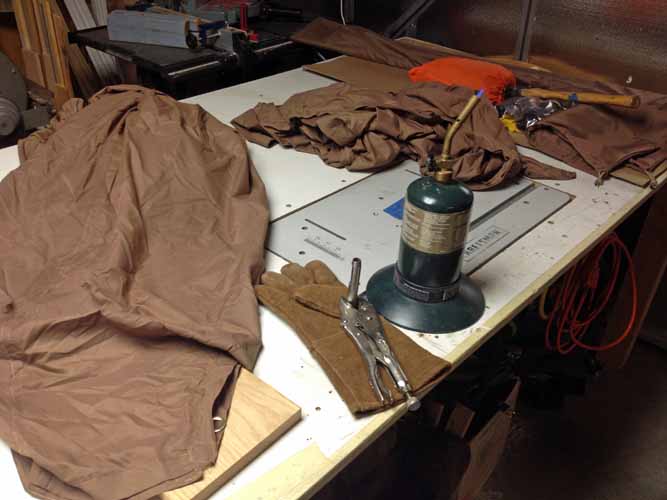
So this night, I elected to use the same cutter and oak, but chose to play with fire instead of a noisy mallet. And well my finger hurts like hell.
I set up my Coleman propane lantern base for stability and fit my propane torch to the camping canister (they're the same fitting as welding gas tanks). I rigged a few other things, did a few heating experiments and got to work. I'd previously measured and marked the places I wanted the grommets. So once things were figured out, I got into a pretty good rhythm. All told it took about an hour to melt-cut 44 holes. Quietly.

awnings82.jpg
awnings83.jpg
awnings84.jpg
awnings85.jpg
awnings86.jpg
awnings87.jpg
awnings88.jpg


So that's about it. Tomorrow I set 44 grommets and the whole thing is ready to go for photographing Friday.


10,350 views
 
Last edited:

rayra

Expedition Leader
So I drove north out of L.A. on a back road today, headed for the CA Poppy Preserve. I thought it would make a splendid backdrop for awning photographs. Along the way near Lake Elizabeth I spy a random group of people frolicking in a small patch of blooms and I think 'silly persons, the glory of the Preserve is right on the other side of the ridge.' I get up there and there's nothing. I mean nothing, none of the usually abundant floral carpet. Young ranger Bob says, 'never really happened [here] this year'. Balls, I say.

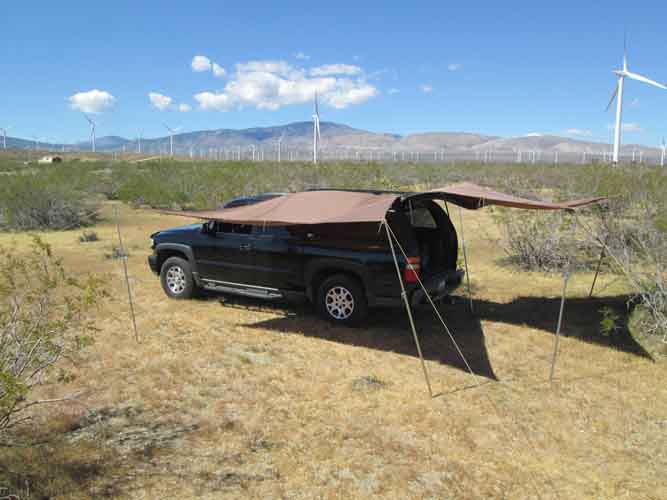
On the way out of the mountain pass / Green Valley, I'd spied a far off low butte in orange, well across this west end of the Antelope Valley. So I decide to head for that. Much meandering later I discover it's a patch of oxides, not flowers. So I head off west to an alternate site, the massive fields of solar panels and giant wind turbines. They'll serve as a backdrop.

So I get out there, there's such a large expanse of the things there's no real fencing, just close in to the towers, so I turn off the black top and down a graveled access road weaving thru the shrubbery. Wind's a little brisk and variable, so it's a bit of a hassle rigging these lightweight sails. And the hardpan around the tower is like rip-rap / crushed asphalt. Ridiculous trying to drive plastic stakes into it. I get a couple pictures done and decide to relocate a few hundred yards south, into the desert proper, so I can at least drive my crappy stakes into the ground.

I set up a few more configurations for photographing. I'm already having some technical trouble, gross flaws in my metal grommet setting. I've inadvertently crush-cut several of the grommet mountings, cut clean thru the fabric while trying to thoroughly set the grommet(s). Doubleplusungood.

I press on. At times handling all three panels attached together becomes ridiculous. Roughly 210sq', 23 square yards of sail weighing less than 3 pounds, in a 10-15mph wind. I get thru a couple larger configurations and then decide to cut things short. I go for a couple more trapezoid arrangements, a Bat-wing sort of thing. I get thru that with a bit of hassle. And then 'authority' in the form of a utility co. supervisor in his company truck drives up and tells me to GTFO of their property. So I do. Took less time to pack it up than to rig the three panel setup. Three cheers for stuff sacks.

Anyway, I'll call it a qualified success of the Mk1 design. The concept worked. It worked in (light) wind. It worked great in the desert, although I'm a bit sunburnt from spending too much time OUT of the shade I was erecting.

Now the few pictures I managed. I did go with a 'storyboard' of 18 configurations I wanted to photograph, didn't get to much of it.

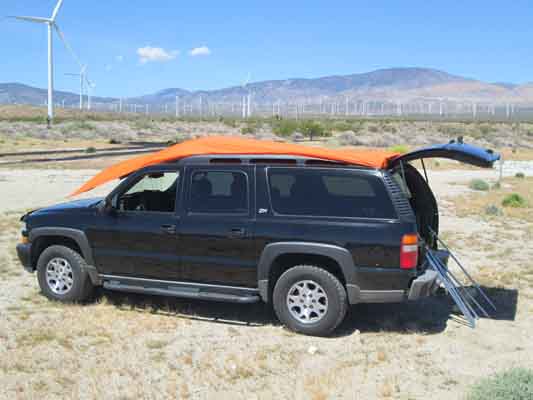
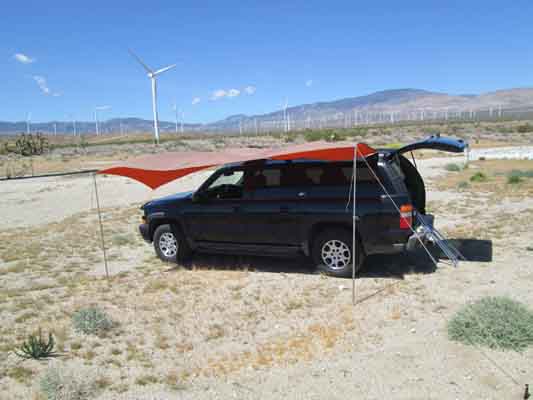
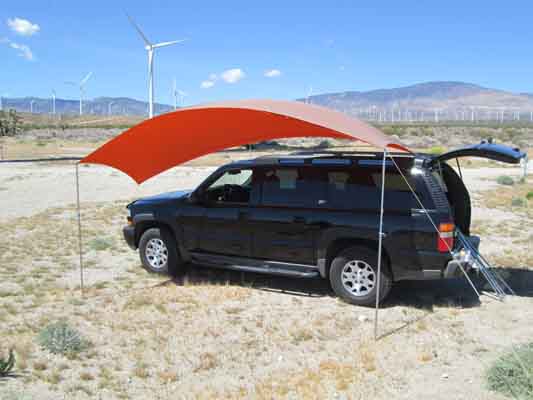
Vehicle shaded, with orange panel up
awnings102.jpg


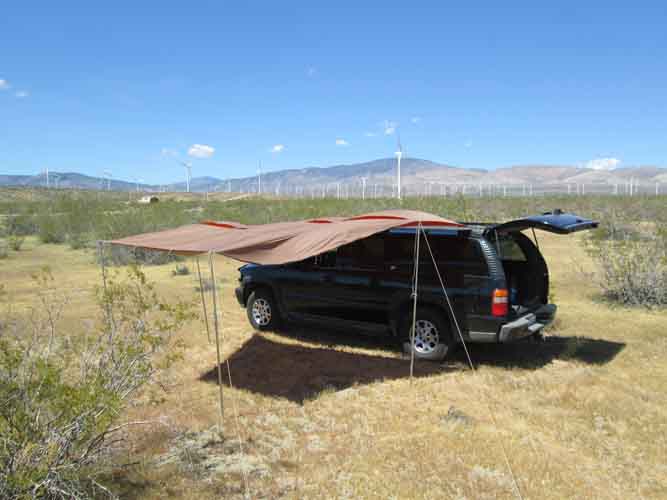
Same panel, flipped out to the side, brown side up. At rest and belling in the wind
awnings104.jpg
awnings103.jpg


After relocation, the rectangle panel out to the side, with a trapezoid outboard of that. But my vehicle orientation is now facing NW in westering sun, so the rectangle panel shade is wholly on the side of my black vehicle, pretty much unnoticeable.
awnings105.jpg


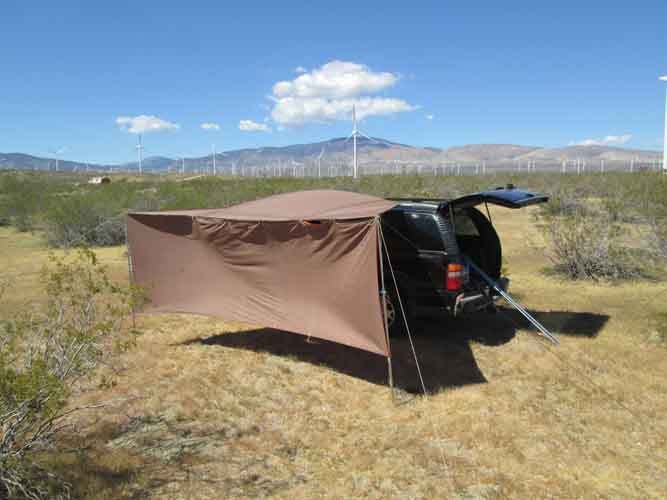
The same two-panel arrangement, spun 180deg, narrow edge of the trapezoid to the vehicle rack, and the rectangle as a wall / windbreak.
awnings106.jpg


I seemed to have forgotten completely to take a picture of the whole 3-panel 'Octagonal' config. I did try the stitching together idea, with a guyline running along an entire long join between rectangle and trapezoid wide base, poles at each end and guyline staked at both ends. It worked well enough, but 2' intervals between those grommets is too much. And the loss of few grommets' integrity by my faulty installs hampered the result as well. There were gaps. With properly set grommets and either edge reinforcement or reducing the grommet spacing to every 1', this would have worked better.

Lastly, the 'L' or 'batwing' sort of config. 2 trapezoids. Quite the gap, owing to the diagonals on the trapezoids being much less than 45deg. Those edges will never meet in my design as is. With a larger panel length / size, 45deg angles would be workable, and would allow an L config where the two panels totally meet on the diagonal edge. And share a corner pole.
In this arrangement, I could have canted the hatch-end awning to close the open corner, the hatch itself would have shaded the resulting 'gap'.

awnings108.jpg


Lessons & Observations.

1. I should have gone forward with the edge and corner reinforcement webbing I mentioned early in the topic. The grommeted corners worked fine on the poles, but the reinforced edge loops would have made more and sturdier mountings possible.
2. The metal grommets are a No Go. Not with the mallet, and not thru just the thin material. Different plastic grommets, or metal thru a woven / web strap, would be better. Particularly at the corners.
3. The individual panels are too small for a Suburban land yacht. The were max length 14'. Something like 20'-22' long would be better. And allow a greater width, as well. 7' wide side panels were also far too narrow when used alone, especially without the vehicle positioned 'just so' and at high noon. Vehicle positioning is / was important to maximize shade. Probably would have been better to use the awnings to extend the shade on the shaded side of the vehicle, but I was thinking more about photography than practical shading.
4. Get better stakes. The cheap common plastic stakes are crap. But need something like them for sandy soils. But straight up rebar would have been better for where I was today.
5. All my stitchwork held up just fine, under both guyline tensions and some light to moderate gusts.
6. Explore more attachment methods. Rudimentary 16" pieces of paracord while simple and cheap was slow and cumbersome and difficult when bucking the wind. A strap and plastic buckle arrangement would have been much better if it can be done inexpensively.
7. Bring help next time.


Now the MkII design cycle begins. Same panels. Better plastic grommets adjacent to those that cut thru. Leaving the other metal grommets in place, for durability testing. Use of 1" webbing straps as corner reinforcements and possible the longest edges entirely, for support of the 'stitching panels together' idea. Finding a better place to lay things out and fully photograph all the options.

[I'll add the configuration 'storyboards' later, so folks can see all the many ways these three awnings can be arranged.


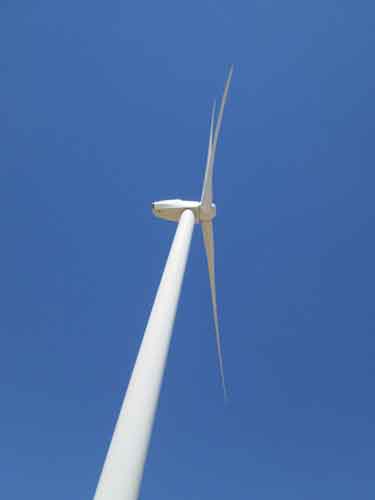
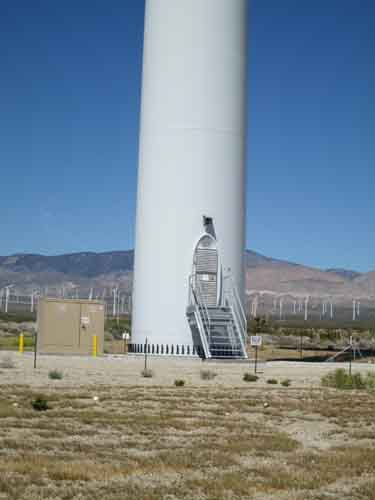
couple gratuitous windmill photos

awnings100.jpg
awnings101.jpg


10,550 - 4/7/2016

11,837 - 5/6/2016
 
Last edited:

boll_rig

Adventurer
This is a great thread Rayra! just read through and noted some great ideas and may try and make my own poles now. Mainly love the hood attachment which would obviously work great for me on my suburban. Let me know what grill guard you end up getting as I am also looking for one as well and not sure which ones fit or whether the z71 and my 1500 have similar mounting points.
 

1store

Banned
I been procrastinating on my clamshell tent made with Modular fiberglass component hard cover pieces .As soon as I post this I going to start So thanks this has motivate me .
 

dbreid

Adventurer
Rayra, when you do those grommets, it works best to use a vise to press them, as opposed to the hammer method. I use those a lot, and the hammer just doesn't work that well.
 

rayra

Expedition Leader
Yes and no. The true brass are soft enough, they flow nice and are easy to set. These cheap yellow-colored ferrous things from Harbor Freight are too stiff and tear. And hammering too much cut right thru the thin fabric in a few places.

I'm casually looking for a source for the plastic snap-together grommets used by banner printing companies. So far I can only find them in 1000-pc lots, more $ than I want to put into it. And I'm messing with other things right now before the weather gets too hot. Maybe pick this up again in the late Summer or Fall.
 

Forum statistics

Threads
188,321
Messages
2,905,393
Members
229,959
Latest member
bdpkauai
Top