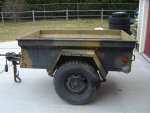
Simon's M416 Build

sgv209

Observer
I sat the tub on the frame for the first time today in order to tack the brackets that hold the tub to the frame. Here are some pics :)

002.JPG

003.JPG

004.JPG

005.JPG


Next step is taking the frame back off, finish welding, grinding all the corner welds and on to primer. Also, its time to start sanding the frame and painting it.

I got the nuts and washers for my hub assemblies in the mail today from army jeep parts. Thanks for pointing me in the right direction OverlandXJ!

006.JPG


Can anyone explain to me the order of nuts and washers? When I took apart my hubs, I only had one washer, and it was between the two nuts.
This one was not on there
007.JPG
 
Last edited:

sgv209

Observer
I found this diagram in a service manual for the M416 that I found.
Hub%20Assy.jpg

I am assuming that the larger of the two washers goes next to the bearing in spot 10 and the smaller one goes between the nuts in spot 12. The manual is not specific about which is which. They are both called key washers.
 

gasman

Adventurer
well, ive searched and searched and can not find that thread bout the flexing so maybe i just dreamed it or somthing... no i didnt cuz i remember studying it at the same time i was doing mine and that was the main reason i hinged mine on the front .. i remember the guy had to weld in some re-enforcement to stop the flex . and i think his tailgate was almost as wide as the trailer. much wider than your drawing.. i suspect with the nice lip you got and a good support around the tailgate you will be fine .. maybe some others with side opening lids could chime in here and tell me im crazy......... or not
 

Every Miles A Memory

Expedition Leader
Great looking build, here is a link to a site that has a bunch of different Recessed Latches to choose from for you tailgate when you figure out how you want to build it

Cant wait to see it when it's all finished and hooked up behind your truck
 

Tight_wad

Adventurer
I found this diagram in a service manual for the M416 that I found.
Hub%20Assy.jpg

I am assuming that the larger of the two washers goes next to the bearing in spot 10 and the smaller one goes between the nuts in spot 12. The manual is not specific about which is which. They are both called key washers.

It is the smaller one that goes against the bearing then a nut, then the larger washer, then the last nut. After you have the bearings tightened done to where you want them, take large screw driver, and bend one or two of the edges outward. Then take a punch and bend it down against the side of the outer nut. That locks it in place.

Hope that helps.
 

sgv209

Observer
It is the smaller one that goes against the bearing then a nut, then the larger washer, then the last nut. After you have the bearings tightened done to where you want them, take large screw driver, and bend one or two of the edges outward. Then take a punch and bend it down against the side of the outer nut. That locks it in place.

Hope that helps.

Thank you, that's just what I was looking for!

Great looking build, here is a link to a site that has a bunch of different Recessed Latches to choose from for you tailgate when you figure out how you want to build it

Cant wait to see it when it's all finished and hooked up behind your truck

Thanks for the link. It has cad drawings and all.
 
Last edited:

sgv209

Observer
well, ive searched and searched and can not find that thread bout the flexing so maybe i just dreamed it or somthing... no i didnt cuz i remember studying it at the same time i was doing mine and that was the main reason i hinged mine on the front .. i remember the guy had to weld in some re-enforcement to stop the flex . and i think his tailgate was almost as wide as the trailer. much wider than your drawing.. i suspect with the nice lip you got and a good support around the tailgate you will be fine .. maybe some others with side opening lids could chime in here and tell me im crazy......... or not

Ohhhhh... I get it now. I thought you were concerned about the actual edges of the trailer bowing outward instead of the ends where the tailgate is. I have decided that when I do add a tailgate, I will keep the top 1x2 tube across the back to keep up the integrity of the trailer.

I am debating which way to have the tailgate open: Downwards like a truck, or sideways like my jeep. Folding downwards will result in a nice little table to use while camping, but will make getting into the trailer a little more difficult, unless it can hinge all the way down. I saw a sideways hinging tailgate on here the other day and it looked really nice.
 

sgv209

Observer
Progress has been slow, unfortunately. The frame is now completely apart and I have primer on the wheels and tongue assembly.

003.JPG

004.JPG


I will be picking up all the grade 8 hardware for the trailer tomorrow as well as primer and paint for the tub. I have changed my mind on color and am going with a black frame with a white tub to match the jeep. I also plan to put herculiner on the inside of the tub. I am also ordering reproduction NDCC tires early next week. The ones that came with it were extremely dry-rotted.
 

sgv209

Observer
I've slowly been wire-wheeling, grinding, sanding and painting. I got the tongue and wheels painted, and the first coat of primer on the tub. Hopefully I can get some paint on it this week, and get the rest of the frame stripped.

001.JPG

003.JPG

006.JPG


And I thought this picture was fun...
007.JPG
 

sgv209

Observer
I got the frame and tub painted, and it should be rolling sometime this week :wings: I also got the tires in the mail and mounted them.

002.JPG

005.JPG


The two on the right are brand new, and the one on the left is the spare.
008.JPG

009.JPG


I was thinking of mounting the spare below the tongue like this to keep some tongue weight on the trailer at all times.
010.JPG


Does anyone have any suggestions for a good way to attach the spare? I have seen a build where they used a tire carrier from a pickup truck but I don't remember where.
 

sgv209

Observer
Thanks Detour. Looking at that location more, it seems that the spare would interfere with both the parking brake and the landing leg.

Today, I got the frame all together and the next step is wiring. I have an 81mm mortar box coming in the mail to be used for a tongue box to house the wiring connections.

Here's a before shot of the frame again just for reference
014.JPG


and here it is now
002.JPG

004.JPG
 

Hondarider

Adventurer
I just picked up my project 416 and I'm following this thread with much interest. Thanks for taking the time to document your progress.
 

Attachments

  • DSC06040 (Medium).JPG
    DSC06040 (Medium).JPG
    81 KB · Views: 37

sgv209

Observer
I just picked up my project 416 and I'm following this thread with much interest. Thanks for taking the time to document your progress.

Congrats on your new purchase! Yours looks to be in much much better shape than mine was when I brought it home.
 

sgv209

Observer
I got a little more done today. I painted the tail lights and put new water tight connectors on the back of them. My 81mm explosive round crate arrived in the mail along with 2 50 cal ammo boxes. I started working on the wiring on the inside of the 81mm box too.

002.JPG

003.JPG


The box has foam partitions which hold 50 and 30 cal ammo cans snugly, leaving room for wiring in the third compartment.
004.JPG

006.JPG

007.JPG


I noticed that the colors of the wires on my 7 wire connector did not quite match up with the standard colors and locations. I have it all sorted out, but I'm glad I checked.
 

Forum statistics

Threads
187,954
Messages
2,900,320
Members
229,233
Latest member
cwhit5
Top