You are using an out of date browser. It may not display this or other websites correctly.
You should upgrade or use an alternative browser.
You should upgrade or use an alternative browser.
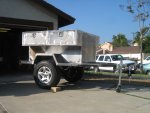
Small Garage, Big Project
- Thread starter Tom Foolery
- Start date
Tom Foolery
Adventurer
socaljeeper
Adventurer
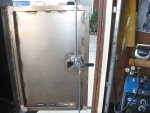
This thread makes me want to sell my trailer and build one similar. It reminds me of the Outlander Sherpa trailer. On your side boxes, why did you decide to use those type of latches? It would seem more beneficial to use two latches, one on each side. This would eliminate the bar going across the front and provide a flat counter surface. Do you have any plans for water or a fridge?
Tom Foolery
Adventurer
I wanted the bar, as well as the locking tab for added security. I didn't have any real plans for the door surface anyway. I know some people use it for stoves, cutting boards, etc.... To me its just a door. The box is what really mattered. And yes, I also really like the Outlander Sherpa trailer also.
loren85022
Explorer
Impressed
You got my vote for 2010 Build of the Year. If for no other reason, the write-up is perfect.
If you add elec/water/etc, pls post.
You got my vote for 2010 Build of the Year. If for no other reason, the write-up is perfect.
If you add elec/water/etc, pls post.
Tom Foolery
Adventurer
Thanks loren85022. Very kind of you.
Tom Foolery
Adventurer
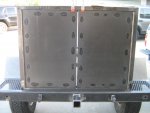
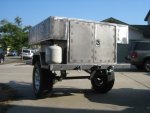
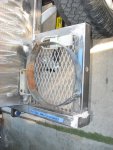
Things were starting to take shape, and I needed to start adding some accessories. First would be the propane tanks in the rear of the trailer. Originally I planned to use 10lb. tanks, being smaller and half the size of 20 lbs tanks. But I found that the 20 lb'ers were much more common, and when I needed them refilled I could just roll up to a Walmart, or Home Depot and exchange my empty tank for one of their new filled ones. 20lb tanks were also half the price of 10lb tanks also. This change in plans caused me to have to make a little 2" sub box in each of the bottoms of the slide boxes. This allowed me to slide at a angle the 20lb tank right into place.
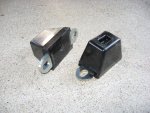
I was able to get a pair of propane tank holders from an old forklift at work. They were rusty and did not lock, so I cut a slot in the adjustable pressure handle. Then welded a shock tab to the other side allowing me to use a pad lock to keep thieves from taking my tanks
.

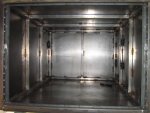
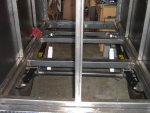
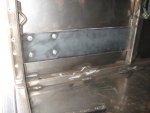
I added some backing to the inside of the main box. 1/8"x 5" strap. You may also notice the handy little tie down hooks welded on the inside of the main box. It a idea of got from "Box Rocket's" trailer. I can't imagine building at box without them.
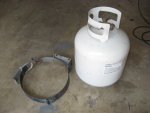
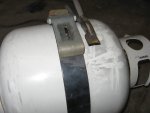
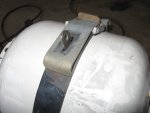
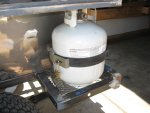
I was able to get a pair of propane tank holders from an old forklift at work. They were rusty and did not lock, so I cut a slot in the adjustable pressure handle. Then welded a shock tab to the other side allowing me to use a pad lock to keep thieves from taking my tanks
.


I added some backing to the inside of the main box. 1/8"x 5" strap. You may also notice the handy little tie down hooks welded on the inside of the main box. It a idea of got from "Box Rocket's" trailer. I can't imagine building at box without them.


Last edited:
elmo_4_vt
Explorer
I'd have to agree... Very nice build. Very close to what I wanted when I decided to do mine. Don't have the skillz you have though, so went with a utility bed. There is a lot of wasted space in mine though. I may have to go back and try it your way for a fun winter project. That's if the wife's kitchen doesn't get in the way...  )
)
Question: Did you use any sealant between the structure and the skin on the boxes? Did you said you use the JB Weld, was that int he corners where the skin met and left a small gap because of the round-ish corners of the frames? Can you post a close up of the skin corners to show that detail please?
Thanks
Don
-
Tom Foolery
Adventurer
I don't really have a close up of the corners pre-paint. Now the corners are sharp 90 dregrees. I welded the skins on to the 1-1/2" x 1-1/2" square tubes directly. Nothing in between (glue wise). The point on the outside of the box were the two skins met top/side came out pretty clean after grinding, but to insure there wouldn't be any cracks, I used JB Weld for that. After priming and painting I use silicone sealant and basically covered the entire inside of the box making it water proof you could say.
elmo_4_vt
Explorer
I don't really have a close up of the corners pre-paint. Now the corners are sharp 90 dregrees. I welded the skins on to the 1-1/2" x 1-1/2" square tubes directly. Nothing in between (glue wise). The point on the outside of the box were the two skins met top/side came out pretty clean after grinding, but to insure there wouldn't be any cracks, I used JB Weld for that. After priming and painting I use silicone sealant and basically covered the entire inside of the box making it water proof you could say.
Cool, thanks. I was just worried how the two corners of the skin would be kept from splitting ever-so-slightly under stress or heating/cooling cycles. But applying the JB Weld should work well for that. Still can't quite understand how you'd apply that when placing the skin on. But I tend to make things over-complicated at times. Can't wait to see more progress pics.
Don
-
Titanpat57
Expedition Leader
This is fun...kinda like unwrapping a Christmas present reeeeaaaaaalll slow..:ylsmoke:
Very nice, superb workmanship!
Very nice, superb workmanship!
Tom Foolery
Adventurer
RabidRover
Observer
If you don't mind me asking, how much do you think you spent on this project for materials and how much time did you spend? I am looking at buying a M101 and modifying or building from scratch ... looking at the end result of your project, building is definitely my preference. I just need to justify the tool expenses with my wife :smilies27
Tom Foolery
Adventurer
If you don't mind me asking, how much do you think you spent on this project for materials and how much time did you spend? I am looking at buying a M101 and modifying or building from scratch ... looking at the end result of your project, building is definitely my preference. I just need to justify the tool expenses with my wife :smilies27
Well, this is just my opinion, but I enjoyed building the trailer, but if your looking for something along the lines of a M101, I would consider looking at "Box Rockets" build. It serves the same purpose, but gives you options to pre-plan out all your idea before hand, where as with a trailer that is already built (M101), you are restricted to adapting to it. If registering it is a concern, believe me, its not even a issue especially in California. To build my trailer I purchased a MillerMatic 180, Air compressor, Metal Chop Saw, etc.... So the actual cost is pretty high. But if I consider it as if I had the tools, I would say it cost around $3000/$4000 give or take. If you want to build just the frame consider buying a tub from http://www.sierra4x4trailers.com/. Or even a whole trailer.
Last edited:
Similar threads
- Replies
- 10
- Views
- 3K
- Replies
- 0
- Views
- 572
- Replies
- 28
- Views
- 11K
- Replies
- 9
- Views
- 4K

