SONICMASD's 97 Montero Build Thread: The General Li

SONICMASD

Adventurer
Making Progress

Good weekend, got a lot of random things done on the Montero.

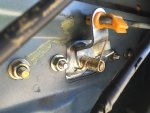
1. Rear Cargo Handle replaced. I bought a replacement handle on eBay for around $25 shipped (tip: search for "tailgate handle" instead of "rear door" or "cargo door", etc.)

IMG_2646.jpg

The steps to replace this piece are (from 4x4wire): "Remove the tool kit, the plastic around the inside latch, then the rear door panel. Pull back the plastic on the inside near the door handle. remove the actuator rod, then the 4, 10mm nuts. There may be another 1-2 Phillips screws the hold the plate holder, all from the inside. The plate holder can then be pulled loose, along the broken handle. Reverse to reassemble. Do clean all of the door catches, latches, pivot points and lube well. I'm guessing the latches get stiff, and the plastic handle can't handle the extra force."

Here's a video I found on youtube too: https://www.youtube.com/watch?v=FPqgf8AK-k0

Another tip: be VERY careful when turning the bolts that hold the license plate light hood on. The bolt studs are made of a very soft metal and my impact gun ruined the threads on both of them so I had to get a replacement bracket from the junk yard.

IMG_2649.jpg

2. Then I replaced the Rear Driver Side Exterior Door Handle (new, $12 shipped on ebay).

3. Investigated the loss of power windows and seats today. I found that the relay in the engine compartment had blown so I went to the junk yard today and got some from a Montero Sport. Plugged one in and the General Li now has power everything again! This electrical issue was totally my fault, that's what I get for replacing the power mirror switch and working on the window regulators without unplugging the battery.

4. Replaced the Power Window Regulator in the Rear Driver Side.

5. Started cleaning the interior - still much work to do but I got the rear seat area and cargo area vacuumed.

Oh, and also worth mentioning - I found 2 JAOS Challenger Offroad Lights for sale on craigslist...in Toronto. So I contacted the guy and had them shipped to me and they arrived this week, $100 shipped for what were $500 lights! They are the newer Challenger II lights so I still need to research and see if they will work with the original Challenger system which is already pre-wired in my Montero from the original owner.

https://www.burtmanindustries.com/zoomprod.php?id=jaos_challenger_h4
 

SONICMASD

Adventurer
Not much going on here, just a few small updates:

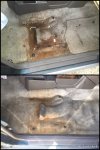
1. I got the interior cleaned - it was absolutely filthy. Probably took me a solid 5-6 hours of work. I'm not worried about getting it perfect because it's a 19 year old vehicle and strictly an overland toy.

Here's a before and after shot of the passenger side floor:

IMG_2690.jpg

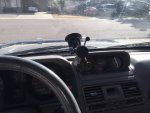
2. Sync'd my iphone to the bluetooth stereo unit in the car today so I can take calls hands free. Installed a RAM Mount just above the compass for heads up navigation.

IMG_2603.jpg
 

SONICMASD

Adventurer
Having an extra car came in handy this week. My wife's Explorer's AC wasn't working and it's getting into the 80s/90s already in PHX so she took the Montero to work while I spent the day fixing the AC. Turned out to not be an AC problem after all, the blend door had broken and was stuck on full heat only. Instead of taking the entire dash apart, i just cut the bottom of the plenum off, out dropped the door, replaced, taped box back up with HVAC tape -$11.

Looking up under the glove box area at my handy using power tools while upside down work:

36ee23620ec7094b2b0b5480dbe317f6.jpg


She hasn't warmed up to the Montero yet (mostly cuz of its unusual seating position) and i think part of her wanted to take our other car to work since it is the most comfortable thing ever...but it doesn't have AC either ;-)

69a89494fe4d8b34ac694644b8f8440c.jpg


In other news:

I replaced all interior overhead and door lights with warm white LEDs. They are a bit brighter than the stock bulbs which is a good thing IMO.

http://m.ebay.com/itm/10Pcs-31mm-35...22-Internal-/252251876509?txnId=1797699200015

I also bought this big and expensive SOB. Front brakes and lots of other needs will be addressed this weekend, stay tuned!

769a5130aa678fc65b6f752e33bf59bf.jpg


Sent from my iPhone using Tapatalk
 
Last edited:

SONICMASD

Adventurer
Another weekend of wrenching:

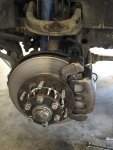
2/20/16: Front Brakes! The car had been pulsating pretty bad when braking and it felt like it was coming mostly from the drivers side. So after a ton of research and buying the Mitsu locknut socket for $55 on ebay I decided to give it a shot (never done brakes before, or wheel bearings, or hubs - what could go wrong?)


My buddy helped me out and we ran into several hurdles:

1. Getting thr caliper off the knuckle was insanely hard. 2 17mm bolts and unless you have a big breaker bar with sockets that fit it without an adapter, you're in trouble. We broke one cheap 3/8" breaker bar, so then we used a better breaker bar but it was 1/2" drive and my 17mm socket is 3/8" so we had to use an adapter and sheared that off as well. This after soaking it liberally in PB Blast. So we break out the Harbor Freight electric impact gun which is supposed have up to 250lbs of torque (doubt it even has 1/2 that) and no dice. We had to go buy a 1/2" socket set and that got it done with the big breaker bar. Ok, 1 hour wasted on 2 bolts.

2. I bought Timken wheel bearings and seals cuz everyone raves about them but the seals were a lot taller than what came out if the hubs and they wouldnt sit flush no matter how hard we pressed. Also they leave a 1/4" gap where the inner bearing can slide around in and that confused us but after googling that turned out to be normal and you're supposed to pack it with grease...not having done bearings before this one ate up some time, still not sure about the Timken seal being so tall. I'm just hoping that after torquing it down 120lbs it wedged in their real good.

3. Handy tip - bolt your new rotor to the hub before packing the hub. We forgot to do this both times because you are so used to reassembling things in the exact order you took them apart.

4. Order brake lines and calipers before doing this job (johnny b was right) - even if you dont use them you can always return them. Turned out that the driver side rotor was destroyed from a faulty caliper piston. So this weekend i get to take the tires off again and replace the calipers and lines and this week i have not been able to drive the car cuz i dont want to dig into the new rotor.

This post is the best guide that ive found, it's for the sport but it's almost identical:

http://msport97.proboards.com/thread/9180/replace-rotors-calipers-wheel-bearings

In all, it took about 9 hours with the majority being spent on the first wheel, the second one was a breeze in comparison after getting the new sockets and learning some tricks.

image.jpg
 

SONICMASD

Adventurer
2/20/16: continued - after buttoning up the front i took it around the neighborhood and the brakes work great, no pulsating. There does seem to be a new vibration, almost like driving over a bad road (bump....bump.....bump) It might just be my hyper sensitive imagination or it could have to do with the messed up caliper. I will get the calipers replaced and then see whats up.

2/21/16: Woke up sick - maybe from the copious amount of brake cleaner, anti-seize, gasket remover, rtv, and grease I inhaled the day before.

Knowing that i needed to order front calipers I decided to do the rear rotors so that i could order rear calipers if needed. The rear brakes are like a normal vehicle and can be done without losing a day of your life. The calipers were mostly fine but in need of new pin boots and bushings. The rear rotors were like brand new, i measured them with a digital caliper and they were 18mm thick and the new ones out of the box were like 18.2 and the minimum before replacement is recommended in the FSM is 16mm so i just cleaned them and will return the new ones (during the oil change, the shop made the rear rotors sound much worse "the rears aren't too bad, you can probably get a little more out of them")

Then i fixed my door lock issue. Whenever i would hit unlock the car would unlock and then instantly lock.

This post covers it pretty perfectly:

http://www.expeditionportal.com/forum/threads/151359-Door-lock-shenanigans-fix-with-pix

The only thing i would add is that opening the actuator case was a bit of a challenge. I had to hammer in a screw driver in several spots before being able to pop it open.

I cut small pieces of leftover heater hose to replace the worn away bump stops. Reinstalled and it works! Time will tell if the harbor freight imitation jb weld will hold up.

0846b889ec6ede8c6a65fa872e45cab8.jpg


Sent from my iPhone using Tapatalk
 

SONICMASD

Adventurer
2/27/16 - New Calipers and Brake hoses done!

IMG_2767.jpg

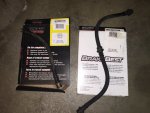
A note to all Gen2 Owners - All parts catalogs are wrong when it comes to the Brake Hoses. Autozone, Oreilly, Napa, Rock Auto, they all show 2 different hose part #s for the front and the rear. Meaning you need 8 hoses to do the job because each wheel has 2 small hose sections. This is wrong, my Montero just has 1 hose per wheel.

Here are the correct part numbers, the long one is for the front (same part# as the same year Montero Sport):

IMG_2784.jpg
 

SONICMASD

Adventurer
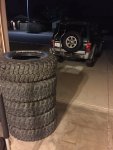
3/1/16 - Scored an awesome deal on 5 BFG KM2s on Craigslist. I'll get them mounted very soon!

IMG_2801.jpg
IMG_2805.jpg

3/2/16 - Spent a couple hours addressing some random things:

1. Got the rear cargo light working, just needed a new LED bulb (the one that I just put in last week was defective).
2. The driver's side mirror would shake/wobble really bad while driving making it really hard to use because everything was blurry and bouncing around, haha. I fixed it very easily using 2 zip ties and the method shown here: https://www.youtube.com/watch?v=A0VSmFiY348
3. Removed my windshield wiper arms. Going to hit them with some fresh black paint tomorrow.
4. Inspected some new gear that came in the mail for the rig: Viair Portable Air Compressor (http://www.homedepot.com/p/VIAIR-400P-Portable-Air-Compressor-400P/202945082) and Speedmaster Tire Repair Kit (http://www.ebay.com/itm/30pc-Tire-P...:g:oB4AAOSwLN5WltXx&item=301847300459&vxp=mtr)
5. Final coat of paint on the used JAOS Offroad Lights I bought, more on those later.
 

SONICMASD

Adventurer
3/3/16: Got the KM2s I scored on Craigslist mounted at Discount Tire:

IMG_2816.jpg
IMG_2828.jpg

3/4/16: All 3 drive belts replaced by my Mobile Mechanic. Normally this is the sort of thing I would just do myself but 3 drive belts and no auto tensioners!? screw that.

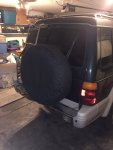
3/6/16: 4 of the tires are at 60-70% tread but the spare is at 100%. I think there is too big of a difference in tread depth between it and the other 4 so I'm not going to rotate it into service but will keep it as the spare. Not wanting the AZ sun to take its toll on a perfect tire, I covered it with a Smittybilt Tire Cover:
IMG_2837.jpg

Eventually, I would like to cut a hole in the tire cover so that that I can access the center of the spare tire carrier so I can mount my hi lift jack or a gas can back there as well.

3/8/16: There's a snorkel in that weird looking bag! Ordered it from Australia on ebay for $140 shipped. Hoping to get around to installing it soon.

IMG_2969.jpg

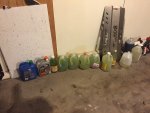
3/19/16: Coolant Flush = New Radiator Hoses, Thermostat, & Peak Long Life Coolant. This was the result after flushing the system with 8 gallons of distilled water, not very dirty but the fluid had been in there for 5 years so it was time to go:
IMG_2972.jpg

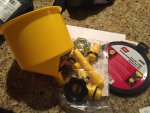
These spill proof funnels make burping the system so much easier:
IMG_2850.jpg
 

SONICMASD

Adventurer
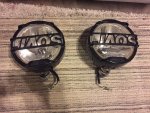
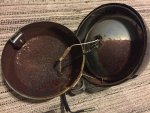
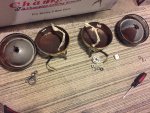
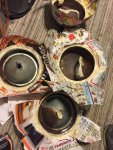
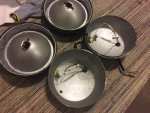
I found some JAOS Offroad Challenger lights on Craigslist, but the Toronto Craigslist. I got the seller to ship them to me and since they were from someplace other than the desert, they have some rust on the insides of the housing.

First step was to treat the rust with a vinegar water solution and scrub with steel wool. That took a lot of the rust off and then I painted with Silver Metallic High Heat paint:

IMG_2733.jpg
IMG_2734.jpg
IMG_2742.jpg
IMG_2782.jpg
IMG_2814.jpg

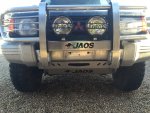
I mounted them on the bull bar but they wouldn't turn on. I had power before and after the fuse so I suspected that the relay was bad. I found a relay on Amazon and that did indeed solve the problem, here they are all mounted up:

IMG_3039.jpg
 

Attachments

  • IMG_2788.jpg
    IMG_2788.jpg
    586.1 KB · Views: 29

TripLeader

Explorer
Great thread! Keep it coming!
-----
That's a scary story about having that much faith in a Craigslist seller. Nice work with the scrapyard parts. Thanks for sharing the build and photos. I'm looking forward to seeing all the upgrades.
 

SONICMASD

Adventurer
I've been working on upgrading the factory speakers for the past few weeks off and on:

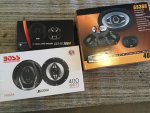
I got the SSL speakers from Fry's Electronics and the Boss ones online from MacMall - total cost was just under $60 for all 6 speakers. Shopping at Fry's is always kind of a nightmare but one of the redeeming factors is that you can listen to all of the speakers before buying. The only reason I had to order the 6" front door speakers online was because Fry's was somehow sold out of all 6" speakers.
IMG_2729.jpg
IMG_3016.jpg

I started by taking off the front door panels and removing the old, blown out factory 6" speakers. I cut the factory wire harness plug and crimped on new connectors. However, when I attach them to the new speakers and play music all I get is a very faint muffled version of the music, like the volume is very low and there is a lot of bass. From what I have been able to find by searching, this happens when the wiring or the amp is bad.

So, I decided to move on with the other speaker installs and worry about it latter.

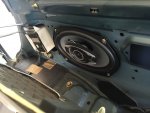
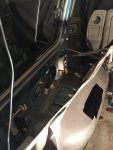
Rear panels removed, 6x9" speakers installed:
IMG_2777.jpg
IMG_2786.jpg

I took this opportunity to remove the 3rd row seat belts because I don't ever plan on putting my 3rd row back in and it just looked kind of funny having the seat belts back there all by themselves. Plus, they kind of got in the way a little.

I also decided to remove the factory 10 disc CD changer because I know that I will never use it since there is a new stereo unit in the dash. It was funny because when my buddy and I were driving back from San Diego after purchasing the Montero we had a conversation as we were pulling up to the border patrol check point on the border of AZ/CA about what the odds were of the drug sniffing dogs finding something - sure enough, I found a homemade pipe underneath the CD Changer:
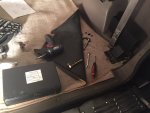
IMG_2775.jpg

I decided to leave the cd changer bracket installed because it makes a handy little storage compartment that actually fits my shovel perfectly for now until I get an exterior carrier for it.

The front 4" knee speakers were much easier, even though removing the driver side knee panel is a royal PITA.

IMG_2746.jpg

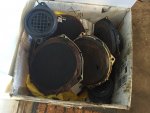
Out with the old:
IMG_3015.jpg

So that's where things stand right now. My current plan is to go to the junkyard and get a replacement amp and see if that makes the front door speakers work. If not, then I know that I need new wiring run from the existing amp but I'm hoping that's not the case because from what I can tell, the wires plug into the amp with large wire harnesses that I would have to figure out how to tap into. If anyone has any advice on this, please let me know. I'm excited to get this done because my 33" KM2s ROAR pretty loud. Though the 4 new speakers already sound better than the 6 19 year old ones.

PS - If you ever have to do this job here is a list that really helped me with figuring out the wire polarity and in case these colors don't match up for you, it turned out that all of the negative wires were located on the bottom prong of the factory plug/harness:

Amplifier Output
Wire Function Colour Notes Fuse # Size Location
12V DC Battery Blue/yellow 5 10 Amp Relay box in engine compartment
Amplifier pins 2 & 10
Left Front Mid + Yellow/blue Pin 13 to front speaker & pin 5 to door speaker
Left Front Mid - Gray/blue Pin 14 to front speaker & pin 6 to door speaker
Right Front Mid + Yellow/red Pin 3 to front speaker & pin 15 to door speaker
Right Front Mid - Gray/red Pin 4 to front speaker & pin 16 to door speaker
Left Rear Mid + Yellow/blue
Left Rear Mid - Gray/blue
Right Rear Mid + Yellow/red
Right Rear Mid - Gray/red
Top
At Speakers
Wire Function Colour Notes Fuse # Size Location
Left Front Tweeter + White/blue
Left Front Tweeter - Black/blue
Right Front Tweeter + White/red
Right Front Tweeter - Black/red
 
Last edited:

Forum statistics

Threads
188,176
Messages
2,903,366
Members
229,665
Latest member
SANelson
Top