You are using an out of date browser. It may not display this or other websites correctly.
You should upgrade or use an alternative browser.
You should upgrade or use an alternative browser.
SONICMASD's 97 Montero Build Thread: The General Li
- Thread starter SONICMASD
- Start date
SONICMASD
Adventurer
It's funny how these things all break down in the same places. My hood was peeling when I got mine, and I just replaced all of my front speakers. I'd bet your drivers side mirror wobbles too?
Haha, yep it sure did but it is a lot better now: https://www.youtube.com/watch?v=A0VSmFiY348
SONICMASD
Adventurer
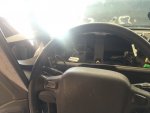
4/9/16 LED instrument cluster:
I saw jlocster's post on how to replace the interior lights with LEDs (http://www.expeditionportal.com/for...ole-and-Interior-LED-Bulb-Replacement-Gen-2-5) and decided to replace the bulbs in my instrument cluster because many were burnt out.
Oh man, what a bad decision that turned out to be. #1. I missed the part in the post where all you need to order is white because the cluster has color filters on there so I got a bunch of different colored bulbs. 2. Since LEDs only work one way I found it impossible to tell if they worked without having to plug the cluster back in, connect the battery, and turn on the car. Then take it out, flip bulbs around, and repeat. You can turn the lights on with a multimeter but the right/left side switch from positive to negative from bulb to bulb so it doesn't really help at all.
Then after screwing with it forever, I got all the bulbs working but the green wheel lights were way too bright and were distracting at night. The yellow diff indicators were too dim and I couldn't see them during the day. So I tore it all open again and replaced a lot of things with regular incandescents.
In the end, the only things that remained LEDs were the green transmission positions, CEL, A/T temp, SRS, Seat belt, Doors Open, and Battery.
If I had to do it over again I would have just replaced the burnt out bulbs with incandescents - 100 times cheaper, easier, and faster. Now if you want all your interior lights to be a certain color, then I get that, but I just wanted the bulbs to work again and figured the LEDs would last forever so why not.


SONICMASD
Adventurer
5/22/16 - I just got back from visiting a friend of mine in Flagstaff and visiting the Overland Expo on Saturday. I didn't spot any Montys, the place was overrun with Toyotas!
Build Update - I've been working on building a bed in the back of the General Li for the past few weeks because I'm not a big fan of setting up a tent when I go camping. So much easier to just move some gear to the front seats or the roof and sleep in the car. I reviewed Glenn C's post on Sleeping Set Ups and IncorporatedX's post and then got to work.
I decided to secure the rear portion of the bed to where the 3rd row seats used to mount as opposed to going with the 4 post pipe set up. The main reason that I did this was because I didn't want to lose 4-6" of storage space underneath the bed. I like to carry my trail gear in plastic totes and would have been unable to get 2 side by side this way (at least with the current totes I have, there might be narrower ones out there) and then there is those turnbuckles getting in the way as well.
Pros: More storage space underneath bed
Cons: More Expensive, longer/harder to build
I do not consider weight a con because although the wooden frame weighs more than 4 pieces of ABS and 4 turnbuckles, it is negligible. I can hold the whole frame up with one finger (literally); i estimate it weighs about 3-5 lbs.
Home Depot Shopping List:
1 x 5/8" sheet of plywood (SKU 081999104665) - $20.47 (I would recommend going with a size up like 7/8" if you plan on having more than 350lbs on the bed; I went with 5/8" to save weight and because I only weigh 140lbs soaking wet)
1 x 1x3x8 Board (SKU 914649) - $2.87
1 x 2x4 (SKU 750298153253) - $2.48
1 x Slotted Angle Iron 36" x 1 1/2" x 2" (SKU 887480013573) - $10.76
2 x 24" of 2" ABS Pipe (SKU 372813) - $7.70
2 x 3" Narrow Door Hinges (SKU 030699154012) - $6.54
2 x 2.5" Narrow Door Hinges (SKU 030699153992) - $5.54
2 x Framing Anchor/Simpson Tie (SKU 044315610707) - $1.82
2 x 2 in. Inset Knockout Test Cap (SKU 038753391014) - $0.67
7 feet of 12' tan carpet - My Home Depot had some low cut pile carpet for like 35cents a square foot I think but I lost the receipt for this item - Around $35
1 x tub of carpet adhesive or all purpose permanent spray glue - $5-$10
Lots of various screws and washers, I bought some and used a bunch that I already had.
TOTAL COST: around $110
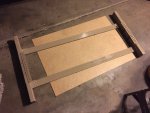
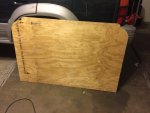
Step 1. Cut your sheet of plywood like this:
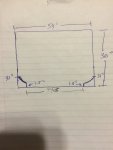
Since I'm 6' 2" I wanted every inch of space that I could get so that's why I even cut out the 1.5" extension at the rear/tailgate door.
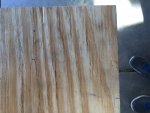
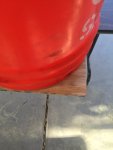
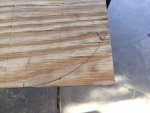
To round the corners I marked the plywood with pencil lines on both sides of the corner, then placed a standard 5 gallon Home Depot bucket so that it touched both marks, traced the line, and cut it out with a jig saw:
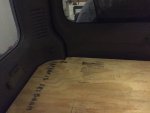
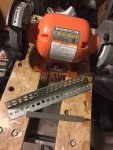
Step 2. Cut the Angle Iron into pieces about 12" long
Step 3. Round the edges off with a bench grinder or file so that they are not super sharp and you don't cut yourself accidentally.
Step 4. Cut 1 1/8" off the height of the 2x4. I did not do this originally. I just mounted the bed onto the 2x4s and it was 1 1/8" too tall above the 2nd row seats so I had to remove everything and then cut these pieces down. A different piece of lumber other than a 2x4 may work better but I'm not sure, I think the final dimensions are shorter than a 2x3 so you'd have to cut that down too.
Step 5. Cut two pieces from your 2x4. I cut one piece around 24" long and the other around 28" because I have the 10 disc changer bracket mounted in the back as a little storage compartment and I wanted to allow for easy access to it. On the driver side the piece was longer and still allowed for access to the factory flashlight.
Step 6. Bolt the two pieces of angle iron into the 3rd row seat holes. You will notice that the 3rd row seat mounts are angled so that if you place your 2x4s into the bracket, the tops will not be laying flat. So after you bolt the angle iron in, beat the back edge with a hammer or mini sledge back towards the side of the vehicle until the back piece is vertical so that when you place the 2x4 in there it will allow the plywood to lay perfectly flat on top.
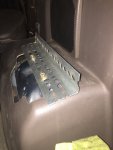
Step 7. You will notice that the 2x4 will not lay flat against the bottom of the bracket because of the bolts. So you will need to cut 2 channels so you can access the bolts and allow the wood to lay flush. Mark the locations of both bolts on both pieces of the 2x4 and then clamp them together and drill out holes with a 1" spade bit.
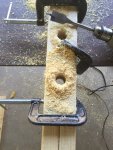
Step 8. Attach the 2x4 pieces to the angle iron. As you can see in the pic below I had not done step 4 yet and would have to take everything apart at the end to cut the 2x4s down in height. Also, I painted the pieces tan because I had a can of tan spray paint laying around and figured why not?

To be continued...
Build Update - I've been working on building a bed in the back of the General Li for the past few weeks because I'm not a big fan of setting up a tent when I go camping. So much easier to just move some gear to the front seats or the roof and sleep in the car. I reviewed Glenn C's post on Sleeping Set Ups and IncorporatedX's post and then got to work.
I decided to secure the rear portion of the bed to where the 3rd row seats used to mount as opposed to going with the 4 post pipe set up. The main reason that I did this was because I didn't want to lose 4-6" of storage space underneath the bed. I like to carry my trail gear in plastic totes and would have been unable to get 2 side by side this way (at least with the current totes I have, there might be narrower ones out there) and then there is those turnbuckles getting in the way as well.
Pros: More storage space underneath bed
Cons: More Expensive, longer/harder to build
I do not consider weight a con because although the wooden frame weighs more than 4 pieces of ABS and 4 turnbuckles, it is negligible. I can hold the whole frame up with one finger (literally); i estimate it weighs about 3-5 lbs.
Home Depot Shopping List:
1 x 5/8" sheet of plywood (SKU 081999104665) - $20.47 (I would recommend going with a size up like 7/8" if you plan on having more than 350lbs on the bed; I went with 5/8" to save weight and because I only weigh 140lbs soaking wet)
1 x 1x3x8 Board (SKU 914649) - $2.87
1 x 2x4 (SKU 750298153253) - $2.48
1 x Slotted Angle Iron 36" x 1 1/2" x 2" (SKU 887480013573) - $10.76
2 x 24" of 2" ABS Pipe (SKU 372813) - $7.70
2 x 3" Narrow Door Hinges (SKU 030699154012) - $6.54
2 x 2.5" Narrow Door Hinges (SKU 030699153992) - $5.54
2 x Framing Anchor/Simpson Tie (SKU 044315610707) - $1.82
2 x 2 in. Inset Knockout Test Cap (SKU 038753391014) - $0.67
7 feet of 12' tan carpet - My Home Depot had some low cut pile carpet for like 35cents a square foot I think but I lost the receipt for this item - Around $35
1 x tub of carpet adhesive or all purpose permanent spray glue - $5-$10
Lots of various screws and washers, I bought some and used a bunch that I already had.
TOTAL COST: around $110
Step 1. Cut your sheet of plywood like this:

Since I'm 6' 2" I wanted every inch of space that I could get so that's why I even cut out the 1.5" extension at the rear/tailgate door.
To round the corners I marked the plywood with pencil lines on both sides of the corner, then placed a standard 5 gallon Home Depot bucket so that it touched both marks, traced the line, and cut it out with a jig saw:


Step 2. Cut the Angle Iron into pieces about 12" long
Step 3. Round the edges off with a bench grinder or file so that they are not super sharp and you don't cut yourself accidentally.

Step 4. Cut 1 1/8" off the height of the 2x4. I did not do this originally. I just mounted the bed onto the 2x4s and it was 1 1/8" too tall above the 2nd row seats so I had to remove everything and then cut these pieces down. A different piece of lumber other than a 2x4 may work better but I'm not sure, I think the final dimensions are shorter than a 2x3 so you'd have to cut that down too.
Step 5. Cut two pieces from your 2x4. I cut one piece around 24" long and the other around 28" because I have the 10 disc changer bracket mounted in the back as a little storage compartment and I wanted to allow for easy access to it. On the driver side the piece was longer and still allowed for access to the factory flashlight.
Step 6. Bolt the two pieces of angle iron into the 3rd row seat holes. You will notice that the 3rd row seat mounts are angled so that if you place your 2x4s into the bracket, the tops will not be laying flat. So after you bolt the angle iron in, beat the back edge with a hammer or mini sledge back towards the side of the vehicle until the back piece is vertical so that when you place the 2x4 in there it will allow the plywood to lay perfectly flat on top.

Step 7. You will notice that the 2x4 will not lay flat against the bottom of the bracket because of the bolts. So you will need to cut 2 channels so you can access the bolts and allow the wood to lay flush. Mark the locations of both bolts on both pieces of the 2x4 and then clamp them together and drill out holes with a 1" spade bit.

Step 8. Attach the 2x4 pieces to the angle iron. As you can see in the pic below I had not done step 4 yet and would have to take everything apart at the end to cut the 2x4s down in height. Also, I painted the pieces tan because I had a can of tan spray paint laying around and figured why not?

To be continued...
Last edited:
SONICMASD
Adventurer
Step 8 continued - Test fit.

Step 9. Create horizontal braces by screwing the two Simpson ties to the 2x4s and by cutting the 1x3 into 2 pieces.
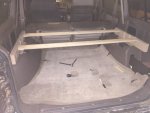
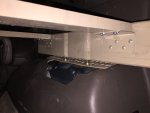
Step 10. Upholster the plywood piece. This was the hardest part for me because I know nothing about upholstery. I experimented with different cuts that would allow the carpet to wrap nicely around the various edges of the plywood but it was too complicated. I tried my best and using a lot of spray adhesive and staples I managed to make it look okay. I used two pieces of carpet, one for each side. A professional would have only used one with a nice/invisible seam on the bottom I'm sure.
Carpeting tip - make sure that the carpet is always oriented the same way when you are affixing it to a piece of wood if it has a pattern. So that when you install all of the pieces of the bed into the car the patterns/grains will all be going the same way.
Hilarious pics of my butchery:
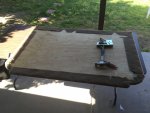
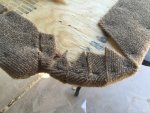
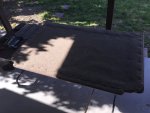
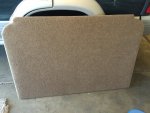
to be continued...

Step 9. Create horizontal braces by screwing the two Simpson ties to the 2x4s and by cutting the 1x3 into 2 pieces.


Step 10. Upholster the plywood piece. This was the hardest part for me because I know nothing about upholstery. I experimented with different cuts that would allow the carpet to wrap nicely around the various edges of the plywood but it was too complicated. I tried my best and using a lot of spray adhesive and staples I managed to make it look okay. I used two pieces of carpet, one for each side. A professional would have only used one with a nice/invisible seam on the bottom I'm sure.
Carpeting tip - make sure that the carpet is always oriented the same way when you are affixing it to a piece of wood if it has a pattern. So that when you install all of the pieces of the bed into the car the patterns/grains will all be going the same way.
Hilarious pics of my butchery:


to be continued...
Attachments
Last edited:
SONICMASD
Adventurer
Step 11. Using 4 large pan head screws and washers, secure the piece of plywood to the 2x4s. I did not do a good job gluing the carpet to the plywood on this piece so it was bubbling a bit at the edges so I added a small screw and washer every 4" down the rear and front sides of this main piece so that's why you will see lots of little screws in this pic:
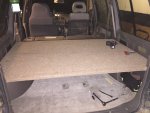
Seats folded up:
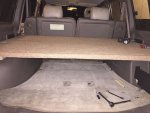
Step 12. - Moving on to the 2nd and 3rd pieces of the bed. You want them to lay flush on top of the 1st/rear piece. Cut your left over plywood into two pieces with dimensions: 46"x22" (middle) and 46"x14" (front). You'll notice that these pieces are only 46" wide whereas the rear piece is 54" wide. This is because of the curvature of the roof and the 2nd row door armrests, this is the widest you can go. The front piece will need to be rounded and cut just like the rear piece was with the 1.5" tailgate extension.
Step 13. Upholster the middle piece. This one is much easier to do since it is just a plain rectangle.
Step 14. Attach this piece to the rear piece of plywood using x3 3" hinges (left, right, center)
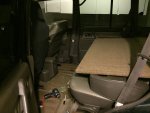
Step 15. Test fit the last/front piece into place. Now is the time to trim it if necessary or adjust any hinges. You will need to slide the front seats forward a bit to allow this front piece to clear and lay flat along with the rest of the bed. If everything looks good, go ahead and upholster it.
Step 16. Attach the front piece of plywood to the middle piece using x3 2.5" hinges (left, right, center). These should be hidden and underneath the bed when it is extended.
Step 17. Measure the height needed to allow the front piece of plywood to lay flat and cut the ABS pipe to this length. For me it was 20.5" because I have thick rubber floor mats. It would be 21" with floor mats removed.
Step 18. Drill a hole in the two ABS caps and screw them face up onto the front piece of plywood. These will hold the ABS pipe legs in place and keep them from falling down.
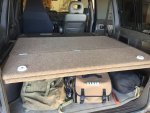
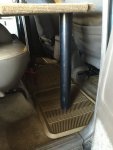
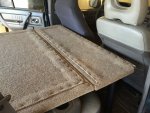
That's it you're done!
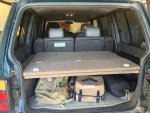

Seats folded up:

Step 12. - Moving on to the 2nd and 3rd pieces of the bed. You want them to lay flush on top of the 1st/rear piece. Cut your left over plywood into two pieces with dimensions: 46"x22" (middle) and 46"x14" (front). You'll notice that these pieces are only 46" wide whereas the rear piece is 54" wide. This is because of the curvature of the roof and the 2nd row door armrests, this is the widest you can go. The front piece will need to be rounded and cut just like the rear piece was with the 1.5" tailgate extension.
Step 13. Upholster the middle piece. This one is much easier to do since it is just a plain rectangle.
Step 14. Attach this piece to the rear piece of plywood using x3 3" hinges (left, right, center)

Step 15. Test fit the last/front piece into place. Now is the time to trim it if necessary or adjust any hinges. You will need to slide the front seats forward a bit to allow this front piece to clear and lay flat along with the rest of the bed. If everything looks good, go ahead and upholster it.
Step 16. Attach the front piece of plywood to the middle piece using x3 2.5" hinges (left, right, center). These should be hidden and underneath the bed when it is extended.
Step 17. Measure the height needed to allow the front piece of plywood to lay flat and cut the ABS pipe to this length. For me it was 20.5" because I have thick rubber floor mats. It would be 21" with floor mats removed.
Step 18. Drill a hole in the two ABS caps and screw them face up onto the front piece of plywood. These will hold the ABS pipe legs in place and keep them from falling down.


That's it you're done!

Last edited:
SONICMASD
Adventurer
Now, this project was a lot harder for me because I was figuring all of this out as I went. I wasted an entire sheet of plywood, had to dissasemble and reassemble the bed several times and tried lots of other things before settling on these steps. So I hope these steps save everyone lots of time and anguish.
Here are some more random pics to help:
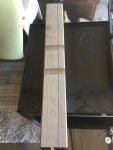
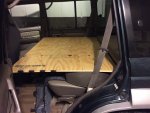
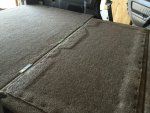
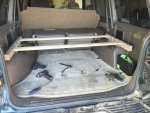
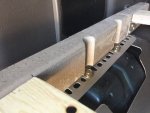
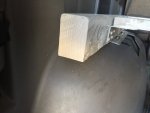
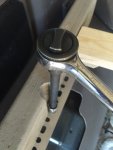
Here are some more random pics to help:


Last edited:
SONICMASD
Adventurer
FYI-Post #38 all the attachment links are showing up as invalid. Nice job on the bed. Might borrow your design for a storage idea. -thanks for the post-Josh
Fixed, thank you!
Toasty
Looking for that thing i just had in my hand...
5/22/16 - I just got back from visiting a friend of mine in Flagstaff and visiting the Overland Expo on Saturday. I didn't spot any Montys, the place was overrun with Toyotas!
There were a few at the Expo but the Majority were at Expo Camp over on the rim of Oak Creek, I'm think I saw you driving up the I17 just past Camp Verde too (Silver Gen3 behind you) I didn't do anything weird because I haven't met you in person before so...
We had 3 Gen 3's 3 Gen 2's and 2 Gen 1's, Just Sayin' :coffeedrink:
Similar threads
- Replies
- 8
- Views
- 2K
- Replies
- 2
- Views
- 456
- Replies
- 5
- Views
- 1K

