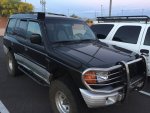
SONICMASD's 98 Montero LS Build & Adventure Thread: Black Betty

Toasty

Looking for that thing i just had in my hand...
The Montero dash is mostly metal, other than having a hole in the dash and potentially creating an area to have a crack spread from (on the pad) one could drill and nutzert a pretty HD mount almost anywhere on the dash. Personally I would snake a bracket off of something solid under the dash or gauge pod then out between panels, I've seen heavy things like laptops mounted in Monteros so a tablet shouldn't be too bad.
 

SONICMASD

Adventurer
1/28/17: My buddy was having a bday camping trip up to Parker, AZ with the main attraction being that we would spend Saturday enjoying the infamous desert bar. But due to a family emergency, he decided to make the trip shorter and closer so we all went to Sycamore Creek for 1 night instead. This is only 30 minutes from my front door so it was a very easy but very fun trip.

The area had been closed by the forest service for several days due to the large amount (for us) of raining that Phoenix had gotten the week prior. Large sections of the bank had washed away and the water was a raging river.
16387144_1214431178625182_7265186308187829367_n.jpg

The site was opened just hours before our scheduled departure time and when we got there around 10am the creek still had a good amount of water in it and the ground which is normally a beach sand like consistency was now soup.

Our camp site was on the other side of the creek so we had to cross. The lead vehicle of our group was a near stock 2000 Discovery II, it powered it's way through but just barely made it. Next up a Gen 4 Toyota 4Runner V8 towing a Jumping Jack trailer. He got stuck within seconds of hitting the soft sand. So then the Land Rover reversed to try and get close enough to pull him out and promptly got stuck as well. I was taking care of some stuff a few hundred yards away while all this was going on so I wasn't there to advise against the route or having the land rover reverse, etc. When I finished parking my 2wd Explorer (not even gonna attempt a crossing) and transferring some people and gear into Betty, I get to the situation for myself:
[video]https://youtu.be/Ef9Kz0RKzBQ[/video]
[video]https://youtu.be/LcDogyCKaOk[/video]

Not a perfect pull because yes, I know I shouldn't have twists in the recovery rope but it was actually a very mild baby pull (what would be the easiest of the day)
[video]https://youtu.be/vVbnWXzPIlY[/video]

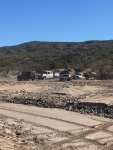
Then as soon as I get the 4Runner across we see this big Dodge Ram towing a big flatbed trailer with Razr and ATV on it bomb down and then up a different section of the creek where it was not muddy but rocky and steep instead. The truck had enough muscle and clearance but the trailer got hung up on the steep inclines of the rocky bank. Then we realize that that guy is one of our friends and also apart of our camping trip. haha

I didn't get a video because the women were off doing other things but someone did manage to snap this pic from far away of me tugging them out:
IMG_5826es.jpg

The later on I had to pull out a JK Rubicon that picked a terrible place to try and cross the river. The guy was woefully inexperienced and unprepared (no snatch strap or recovery gear). My 30ft snatch strap was not long enough for me to be on solid ground so someone gave us their cheap tow strap to lengthen the pull. I said ok despite my better judgement and instead of snatching we took the tension out of the line and I slowly pulled him out. Even still though, when disconnecting we found that the cheap town strap almost broke which could have resulted in all kinds of carnage.

These experiences were really a wake up call for me. I always have a top of the line 30ft snatch strap, 2 3/4" shackles, misc rope and tie downs, shovel, jack, jack stand, tools, and a bullet proof rear recovery point but that's not enough. I don't have a great option for front recoveries on my rig nor do I have a good way of helping people who don't have good recovery points on their vehicles either or who get stuck more than 30' away from safe ground.

So I bought another 30' recovery strap and 2 more shackles. This will allow me to make a bridle when someone needs to be pulled out but doesn't have a rated recovery point but has 2 wimpier points (like our monteros in the front). It will spread the pull between two points and both frame rails and also if one breaks it won't be able to fly far because it is still tied to the other point. I think I'll also bug Toasty to weld up some reinforcements to the existing factory tie down and tow point on the front until I can afford a custom front bumper.

Spent the day shooting, offroading and then we had a big bonfire. Drinks were consumed, propane tanks were exploded, firework fights were had, it was a bit of a ruckus and a good trip.

The legend of the Montero was expanded to a whole new network of people. And another thing was that this was the first time I wheeled without the front Detroit Locker. I much preferred the lessened torque steer and am okay with sacrificing the extra traction so I've 100% decided to sell the Detroit.

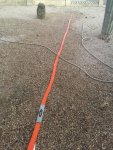
Washing off the ARB strap after a lot of use:
IMG_5809.jpg
 

jeep-N-montero

Expedition Leader
I hope that with all of the "Drinks were consumed, propane tanks were exploded, firework fights were had, it was a bit of a ruckus and a good trip." were cleaned up after by all who attended.
 

SONICMASD

Adventurer
New Incinometer

2/6/17: I found an alternative to the factory inclinometer and got it set up today.

First things first, you'll need two of these:

One will measure pitch and the other will measure roll so you'll need to install one on each axis of the vehicle.

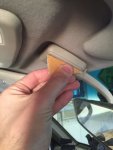
For pitch, I found the easiest place is above either front door on the plastic trim. Be sure not to follow the curvature of the plastic trim because that is not level. I chose the trim on the passenger side because it is a bit easier for me to see it than when mounted right by my head on the driver side.

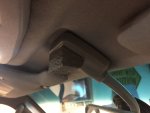
And last weekend I tested the device and found that it does not matter if you mount it near the ceiling or floor, it will read the same degrees of roll regardless. I could have just mounted it on the fake wood grain cover below the double din radio area but decided that I wanted it up higher and closer to my line of sight. So I made a small mount for it to sit under the rear view mirror.

I found the size I wanted by cutting a piece of cardboard (2.25" x 2" x 1" & 2" deep)

IMG_5831.jpg

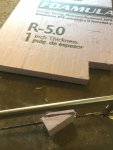
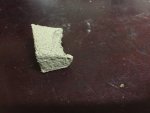
Then I cut a piece of 1" insulation foam board that I had lying around:

IMG_5832.jpg

Then I cut the back off a little:


IMG_5833.jpg

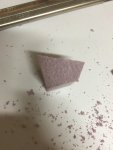
Then carved out a bit off the back to fit up nicely against the rear view mirror mount which has a rounded center hump:

IMG_5834.jpg

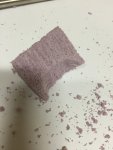
Then I hit it with some light brown spray paint I happened to have:

IMG_5890.jpg

The gauges come with a strip of 3M VHB tape already mounted on the back (such an insanely strong bond, make sure you've got it lined up before sticking cuz it is soo tough to get off) so I bought a bit more to mount the foam to the rear view mirror bracket here: on amazon.

Ta dah:
IMG_5891.jpg
IMG_5892.jpg
 
Last edited:

SONICMASD

Adventurer
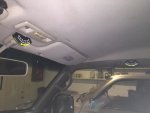
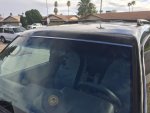
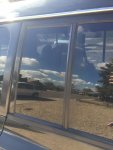
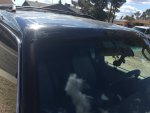
2/19/17: Nothing much to report here, just that my wife got me all of the AZ National Forest Maps for Valentine's Day which was an awesome and unexpected gift! And then today, I restored the center trim molding on the rear windows and top valance above the windshield.

(i already owned Kaibab)
16665934_10101049390315588_595196189311998415_o.jpg

Before:
IMG_6039.jpg
IMG_6041.jpg

Taped Up:
IMG_6042.jpg

After:
IMG_6044.jpg
IMG_6045.jpg

I cleaned the area with acetone and then used Trim Black and have mixed feelings about it. The final product is really nice and looks just like a factory finish but it's very liquidy so it runs easily and does not adhere very well to shiny bare metal. I would now recommend hitting the area with a coat of regular flat black spray paint or primer, and then a couple coats of trim black. Or just some satin black spray paint and call it done for cheaper. Then again, the can of Trim Black might have directions on it about using primer... but who has time for reading? haha
 
Last edited:

SONICMASD

Adventurer

Good stuff, this crossed my mind but I can't imagine that long arm not getting in the way. I have access to any RAM part # for free through my work so I'll give their chair mount a try and report back.

Just wanted to let you know that I did end up trying this option but didn't like it. The long arm comes up and is kind of in the way of the 4x4 shifter. It wasn't too bad when mounted to the passenger seat but seeing as I already have a RAM Mount Cup Holder intruding a bit into the passenger's footwell, I didn't want to inconvenience them anymore.
 

SONICMASD

Adventurer
3/12/17: I just got back from an awesome trip to SE Utah. The Montero did awesome, the only problem was a CEL came on and I had it checked out: P0400 (Exhaust Gas Recirculation Flow Malfunction). I had it cleared but then it came on again the next day. I'm thinking it was just the extreme change in altitude because I've noticed that can confuse emissions stuff sometimes but if you have any EGR tips please let me know.

If you're interested in seeing this part of the world (and I highly recommend do you), then check out my podcast because I just did an entire trip breakdown.

Also, here are our best photos and videos from the trip (including some Montero glamour shots).
 

SONICMASD

Adventurer
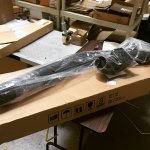
2/24/17: I ordered this snorkel on ebay from Malaysia and it arrived in just 4 days! Allegedly, the supplier says they are using the TJM mold. Quality looks to be very good on initial inspection. The main downside is that they do not include a template. So I decided not to mess with it myself and planned on taking it to a professional.
IMG_6140.jpg

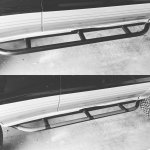
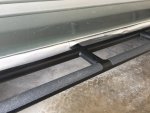
3/4/17: Prepping for my upcoming Southern Utah trip that I posted about already, I decided to order some MOB Grip tape on amazon and affix it to the top of my rock sliders. Mostly because I kept having to repaint them every time I went wheeling because the sand/rocks on the soles of my boots would scratch up the tops of the rails every time people got in and out of the vehicle. Plus, the extra grip will be nice when I get my roof rack one day.
IMG_6218.jpg
IMG_6214.jpg


4/3/17: Dropped Betty off at the Mechanic (previous owner) and a few days later the Snorkel install was done! I'm told that it was a PITA compared the standard square Gen 2 Chinese snorkel everyone gets. The mechanic sealed up all gaps with silicone and the drain holes in the bottom of the airbox too. I'm very happy with the fit and finish though I'm paranoid the head is going to fly off on the highway. It does make a little wind noise at about 60 mph and up. Time will tell how this Malaysian snorkel holds up but I'll keep you all posted.

IMG_6763.jpg
17522323_10154265576426651_2067217603_o.jpg
17778760_10154265576336651_1981543848_o.jpg

4/3/17 CONTD: I bought my wife a 2011 Kia Sorento EX V6 a couple weeks earlier because she has been wanting a newer car for the last 5 years or so and I finally relented. The thing is pretty nice and very fast with 275hp and a weight of just 3900lbs.

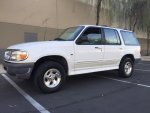
So today I sold my family's trusty steed. My 96 Explorer was purchased by my dad in 1999 who bought it from the original owner and then drove it daily until 2014. I bought it from him, drove down with it to Central Mexico and lived there for 7 months, came back to AZ, and it's been my wife's daily driver ever since. V8 2WD, 200 HP, 4,150 lbs. 227,000 miles on the original engine and tranny with zero maintenance being done other than fluid changes, plugs, and wires. I really wanted to get her to 300k and will miss her (Beverly as she was known) very much. Everything worked, she was in immaculate shape, did I mention that I'll miss her?
IMG_6651.jpg

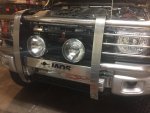
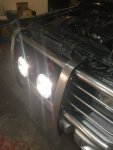
4/6/17: I purchased a set of Lightforce 170 Striker offroad lights on OfferUp a few Months ago and decided to finally install them. The reason I took so long was because I was trying to decide if I should go with this White/Amber Combo LED light bar from Lifetime LED instead.

But I decided that 1. It would be a bit more expensive 2. Probably wouldn't give me the peripheral lighting I was mostly looking for and 3. The amber color probably isn't as rich as the light force with the optional amber lens filters.

The install took a few hours last night and then I finished it up today. I used this cheapo Mictuning wiring harness off Amazon.

The harness was fine but it has these big plastic connectors that won't go through the firewall unless you make a 1" hole so I had to cut the wires, pass them through, then connect them. I haven't learned how to solder yet so I used Crimp Caps instead of Butt Connectors and I think they work a lot better.

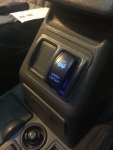
I tapped into the Horn 10A fuse to provide power for this nifty LED switch. I did this the right way with a Fuse Tap/Piggy Back/Add A Circuit. I got mine from O'Reilly cuz I needed it same day and it only works on 10A fuses and under which is why I couldn't use the Cig lighter fuse as most ppl do. I would recommend you get this 21A rated one if you plan on doing this.

I chose the hardest location for the switch install just to make life fun, just below the center arm rest. This way, when I'm driving with my left hand, my right hand can rest on the arm rest and flip the bumper lights on and off easily without taking my eyes off the road and having to lean forward to reach the dash switch areas. Plus, I already have plans for the 2 dash locations one day (Air Compressor and Front ARB locker).

I'm a big fan of wire loom and used a lot of it for this install, both the 1/2 and 3/8 sizes.

Finished product:
IMG_6791.jpg
IMG_6790.jpg
IMG_6787.jpg

I'm planning on overlanding this weekend so I'll be able to test the lights and snorkel out and report back.
 
Last edited:

Forum statistics

Threads
188,312
Messages
2,905,312
Members
229,959
Latest member
bdpkauai
Top